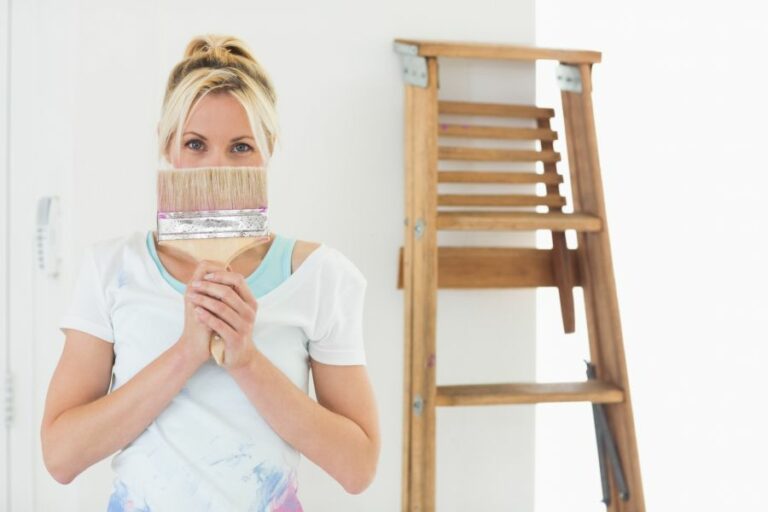
Textured Surface Painting Preparation Tips. What Pros Say
Preparing a well-textured surface for painting can make all the difference between an ordinary and extraordinary final result. That’s why we’re here to share some valuable textured surface painting preparation tips to take your creative project to the next level. With years of experience and countless successful projects, we possess the knowledge and expertise to help you achieve a stunning and long-lasting finish.
Textured surface painting preparation tips:
First, prepare textured walls for painting, identify the texture type, and inspect the surface for defects, repairing cracks or loose textures as needed. Clean the surface thoroughly to remove dust and grease, mask surrounding areas, and prime the wall with a suitable product. Choose high-quality latex paint, a flat or low-sheen finish, and appropriate tools like a thick roller cover and angle sash paintbrush. Test the paint color and technique before covering the entire surface.

Discover expert tips on preparing a textured surface for painting! We’ve got you covered with essential advice that will ensure a flawless finish. Continue reading and unlock the secret to professional results.
Contents
- 1 Tips for Prepping Textured Walls Before Painting
- 1.1 • Importance of Proper Preparation
- 1.2 • Tip 1: Identify the Type of Texture
- 1.3 • Tip 2: Inspect the Surface and Repair Defects
- 1.4 • Tip 3: Clean the Surface Thoroughly
- 1.5 • Tip 4: Mask and Protect the Surrounding Areas
- 1.6 • Tip 5: Prime the Surface
- 1.7 • Tip 6: Choose the Right Paint and Supplies
- 1.8 • Tip 7: Test the Paint Color and Application Technique
- 2 Steps to Prep a Textured Wall for a Paint Job
- 3 Techniques for Painting on Textured Surfaces
- 4 Optimal Method for Applying Textured Paint
- 5 Importance of Priming Textured Surfaces Prior to Painting
Tips for Prepping Textured Walls Before Painting
• Importance of Proper Preparation
Preparing a textured surface for painting is crucial in achieving professional-looking and long-lasting results. The textured surface should be in good condition, free of defects, and thoroughly cleaned before the application of paint.
• Tip 1: Identify the Type of Texture
Textured surfaces can be categorized into different types. Identifying the specific type of texture will help you determine the right preparation techniques, tools, and painting products. Common types of textured surfaces include:
- Knockdown Texture
- Orange Peel texture
- Popcorn Texture
- Sand Texture
• Tip 2: Inspect the Surface and Repair Defects
Before you start with the surface preparation, you need to thoroughly inspect the surface for any cracks, holes, or loose texture. It is essential to address these issues beforehand to avoid complications later on. The following tips will help you repair common defects present on textured surfaces:
- For small cracks and holes, use a lightweight joint compound and apply it using a putty knife, then allow it to dry completely before sanding and priming.
- For loose texture, remove the affected area using a scraper, and then reapply a similar texture compound or material, followed by sanding and priming.
• Tip 3: Clean the Surface Thoroughly
It is crucial to clean the textured surface thoroughly to remove dust, dirt, and grease that might interfere with paint adhesion. Following these cleaning tips will ensure a suitable surface for painting:
- Use a vacuum with a brush attachment or a microfiber cloth to remove any dust from the texture.
- For grease and other contaminants, use a mild detergent mixed with water and a soft sponge to clean the surface gently. Do not use abrasive materials that might damage the texture.
- Allow the surface to dry completely before proceeding with the painting process.
• Tip 4: Mask and Protect the Surrounding Areas
Before you begin painting, it is essential to protect the surrounding areas from paint splatters and drips. Use the following recommendations for masking and protecting your space:
- Use painter’s tape to mask off baseboards, trim, and other nearby surfaces that you don’t want to paint.
- Cover the flooring with drop cloths or plastic sheeting to protect it from paint spills.
- Remove any fixtures, outlet covers, and switch plates from the surface to prevent accidental painting and provide a cleaner finish.
• Tip 5: Prime the Surface
Priming a textured surface is essential for ensuring proper paint adhesion, improving the durability of the paint, and providing a uniform color. Select a primer that is specifically designed for textured surfaces, and follow the application instructions provided by the manufacturer.
Use a brush, roller, or spray equipment to apply the primer evenly on the surface, allowing it to dry completely before painting.
• Tip 6: Choose the Right Paint and Supplies
Selecting the appropriate paint and supplies is crucial for achieving professional-looking results on a textured surface. Consider the following tips when choosing these products:
- Use high-quality latex paint that has excellent durability and is suitable for textured surfaces.
- Flat or low-sheen finishes are preferable on textured surfaces, as they do not highlight surface imperfections.
- Select a high-quality, thick roller cover with a long nap length (3/4-inch or longer) to ensure complete coverage and proper penetration into the texture.
- For hard-to-reach areas and details, use a high-quality nylon or polyester angle sash paintbrush that provides better control and coverage.
• Tip 7: Test the Paint Color and Application Technique
Before proceeding with painting the entire surface, it is a good idea to perform a small test patch to ensure the desired color and application technique. Apply the paint according to the manufacturer’s instructions, and evaluate the color and finish once it dries.
Having a well-prepared textured surface is essential in achieving professional and long-lasting results. By following these textured surface painting preparation tips, you can ensure a smoother painting process and a beautiful, durable outcome. Happy painting!
Steps to Prep a Textured Wall for a Paint Job
• Assessing the Wall Condition
Before starting the wall preparation process, carefully evaluate the wall’s condition. Identify any cracks, holes, loose paint, or damaged stucco that may require repair. If you find any evidence of mold or mildew growth, address this issue immediately.
For details on how to handle mold and mildew, refer to the United States Environmental Protection Agency’s website here.
• Cleaning the Wall Surface
Thoroughly clean the wall surface to ensure that the paint adheres properly. To remove dirt and stains, use a mixture of water and a mild all-purpose cleaner. Apply the cleaning solution using a soft sponge or cloth, then rinse with clean water.
For textured walls, it’s particularly essential to get into the nooks and crannies where grime tends to accumulate.
• Repairing Damaged Areas
– Fixing Cracks and Holes
For minor wall imperfections, such as small holes or cracks, use a pre-made patching compound like spackling or joint compound. Apply the compound using a putty knife, smoothing it to match the existing wall texture.
Allow the compound to dry according to the manufacturer’s instructions. Once dry, sand the repaired area with fine-grit sandpaper to create a smooth surface.
– Repairing Loose Paint
If you find areas with loose or peeling paint, use a scraper to remove the affected sections. Following paint removal, sand these areas to smooth any remaining rough edges.
For larger paint sections that aren’t peeling, use fine-grit sandpaper to lightly scuff the surface. This will help the new paint coat adhere properly.
– Addressing Stucco Damage
For walls with stucco texture, repair any minor damage using a stucco repair kit, available at most home improvement stores.
Follow the product instructions to mix and apply the stucco patch. Match the original texture using a sponge, brush, or trowel, depending on the desired finish.
• Priming the Wall
After repairing and cleaning the wall, the next step is to apply a primer coat. Using a primer helps create an even base for paint, improving its overall look and durability. Choose a primer specifically designed for textured surfaces, which typically provide better adhesion and coverage.
– Selecting the Right Primer
A latex-based primer is usually recommended for most interior walls. For areas with mold or mildew, use a stain-blocking primer that includes a mold-resistant additive.
Alternatively, an oil-based or shellac-based primer is suitable for heavy stains or when painting over a previously painted surface with a glossy finish.
– Proper Application Techniques
For best results, use a thick nap roller or a paintbrush designed for textured surfaces. These tools help ensure even coverage and penetration of the unique grooves and crevices found in textured walls. Apply the primer in a consistent and uniform manner, avoiding heavy build-up or runs.
Allow the primer to fully dry based on the manufacturer’s recommended drying time. If necessary, lightly sand any uneven spots before moving on to the painting process.
• Painting the Textured Wall
As with priming, use a thick nap roller or a paintbrush designed for textured surfaces to ensure even paint coverage. Apply at least two coats of paint to achieve a consistent and professional finish.
Allow each coat to dry completely before applying subsequent coats. It’s essential to follow the manufacturer’s instructions for paint drying times in between coats.
– Opting for Quality Paint
Investing in high-quality paint is crucial for optimal results, especially when dealing with textured walls. Premium paints often provide better coverage and durability over time.
Consult paint store professionals for recommendations on the best paint types and finishes for your specific project.
• Final Thoughts
Preparing a textured wall for painting can be a challenging yet rewarding process. By carefully assessing and repairing the wall surface, thoroughly cleaning and priming, and investing in quality paint products, you can achieve the desired result.
With patience and attention to detail, your freshly-painted textured wall will transform the look and feel of any room.
Step | Description |
|---|---|
1 | Inspect the wall for any damage or imperfections that need repairing before painting. |
2 | Repair any small holes, dents, or cracks using a pre-mixed all-purpose patching compound. |
3 | Allow the patching compound to dry completely, then sand the patched area smooth. |
4 | Remove any loose paint, dirt, or debris from the textured surface using a stiff bristle brush or a scraper. |
5 | Clean the wall using a vacuum cleaner with a brush attachment or use a slightly damp cloth to remove dust and debris. |
6 | Apply painter’s tape to any areas that need to be protected from getting paint on them, such as electrical outlets, molding, and adjacent walls. |
7 | Prime the wall using a primer designed for textured surfaces to create a smoother, more consistent surface for painting. |
8 | Allow the primer to dry completely before applying the paint. |
9 | Paint the wall using a roller designed for textured surfaces, working in small sections and applying paint in a criss-cross or W-shaped pattern for even coverage. |
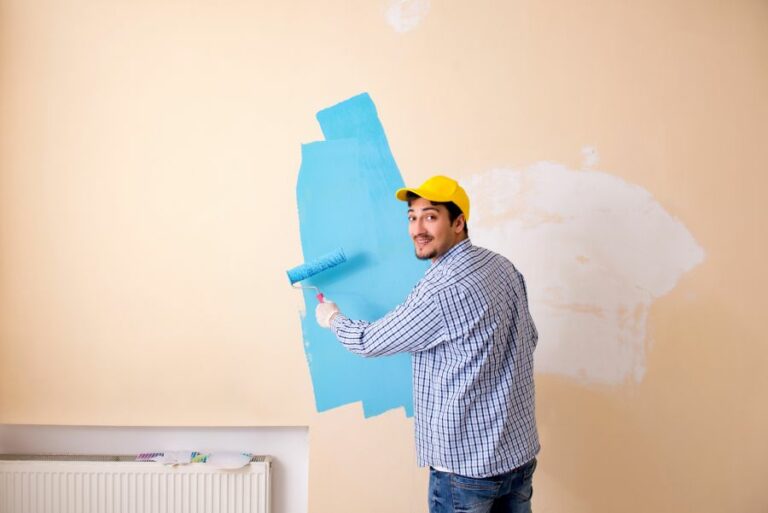
Techniques for Painting on Textured Surfaces
Textured surfaces can be a challenging yet rewarding home improvement project. When done right, it can add depth, character, and sophistication to a room.
• Understanding Different Types of Textured Surfaces
There are various methods and materials used to create textured surfaces, each requiring a specific approach to painting. Some common types of textures include:
- Knockdown
- Popcorn
- Sand
- Venetian plaster
When selecting paint and tools, it’s crucial to consider the type of texture you’re working with. It’s also essential to thoroughly understand the surface, such as whether it’s smooth or rough and the depth of the texture, as these factors can influence the painting process.
• Essential Tools and Materials for Painting Textured Surfaces
Preparing the correct tools and materials ahead of time can make your painting project smoother and more efficient. Here are some essential items to have on hand:
- Paint: Choose a high-quality, water-based acrylic or latex paint designed for textured surfaces. This paint type provides excellent adhesion and durability and allows for better coverage of the texture.
- Primer: A primer is essential, especially when painting over a dark color or new drywall. It helps ensure even coverage and reduces the number of paint coats required.
- Paint roller: Opt for a roller with a long nap (-inch to 1 inch) when painting textured surfaces, as it better accommodates surface variations and distributes paint more evenly.
- Paintbrush: Use a high-quality, angled paintbrush for cutting in and touch-ups around corners, edges, and fixtures.
- Roller tray and liners: A roller tray with disposable liners allows for easy cleanup and color changes.
- Drop cloths: Use drop cloths to protect your furniture and floors from paint splatters and spills.
- Painter’s tape: A high-quality painter’s tape is essential for creating clean lines and protecting adjoining surfaces.
- Ladder or scaffold: Choose the appropriate ladder or scaffold for your painting project to ensure safety and stability.
Once you have gathered these tools and materials, you’re ready to begin painting your textured surface.
• Preparing the Surface for Painting
Before you begin painting, proper surface preparation is crucial to achieve desired results. Follow these steps to prepare your textured surface:
- Clean the surface: Use a damp cloth or sponge to remove dust, dirt, and debris. For stubborn stains or heavy buildup, consider using a mild detergent and water solution or consult a professional cleaner. Allow the surface to dry completely before proceeding.
- Repair any defects: Inspect the surface for any damage, such as cracks or holes, and repair them using a putty knife and patching compound. Follow the manufacturer’s instructions for proper application and drying time.
- Protect the surrounding area: Apply painter’s tape around any fixtures, trim, and adjoining surfaces that you want to protect from paint. Also, lay down drop cloths to shield floors and furniture.
• Painting Textured Surfaces: Step-by-Step Instructions
Now that your surface is prepared, you can begin painting. Follow these steps for a professional-looking finish:
- Apply the primer: Mix the primer according to the manufacturer’s instructions and apply a consistent, even coat on the surface using a roller or brush. Allow the primer to dry completely before proceeding, usually at least a couple of hours or per the product recommendations.
- Cut in around the edges: Use a paintbrush to carefully paint around the corners, fixtures, and taped-off areas. This step is essential to ensure a clean, professional look.
- Apply the first coat of paint: Using a roller with a long nap, apply the paint evenly, starting from the top of the wall and working downwards. Be sure to maintain a wet edge to avoid lap marks and ensure proper coverage. Allow the first coat of paint to dry according to the manufacturer’s instructions.
- Apply additional coats: Depending on the texture and color, additional coats of paint may be necessary to achieve your desired result. Allow each coat to dry thoroughly before applying the next one.
- Remove the painter’s tape: After the final coat has dried, carefully remove the painter’s tape, taking care not to peel off any paint.
- Clean up: Dispose of any remaining paint and other material responsibly, following local regulations. Store your tools appropriately for future use.
• Expert Recommendations and Resources
Achieving a professional-quality finish when painting textured surfaces takes some practice. To improve your results, consider the following:
- Experimenting with different paint application techniques, such as back-rolling (applying paint in one direction, then rerolling over that area in the opposite direction) or stippling (using a brush or roller to dab the paint onto the surface without full coverage)
- Attending a local painting workshop or watching instructional videos online to learn techniques from professionals and other DIY enthusiasts.
- Visiting informative websites, such as This Old House or Family Handyman, which offer valuable painting tips and advice for homeowners.
By following these guidelines and leveraging available resources, you can successfully paint textured surfaces and enjoy a beautiful, professional-looking finish in your home.
Step | Description |
|---|---|
1 | Clean the surface to remove any dust, dirt, and debris. |
2 | Use a high-quality primer to prime the surface and help the paint adhere better. |
3 | Choose a paint that is specifically designed for textured surfaces or has a thicker consistency. |
4 | Use a roller with a thick nap ( inch to inch) to better get into the crevices of the texture. |
5 | Apply paint in a “W” or “M” pattern, working it into the texture without overloading the roller. |
6 | Allow the paint to dry according to the manufacturer’s instructions, and if needed, apply a second coat. |
7 | Use a brush to touch up any areas where the roller could not reach or to cut in around edges and corners. |
Optimal Method for Applying Textured Paint
Textured paint is an excellent choice for enhancing the appearance of walls and ceilings by adding depth, character, and a unique finish. It can also effectively hide imperfections and flaws, creating a visually appealing and long-lasting result.
• Choosing the Right Textured Paint
There are various types of textured paint, and selecting the right one is crucial for obtaining the desired effect. Some of the most common textured paints include:
- Sand-textured paint: Contains fine sand particles that produce a rough, granular look.
- Venetian plaster: A mixture of marble dust, lime, and other materials that create a smooth, polished appearance with subtle texture.
- Popcorn texture: A thick, stippled paint often applied to ceilings to hide flaws and reduce echo.
Based on the desired finish, you must choose the appropriate textured paint.
• Preparing the Surface
Proper surface preparation is key to ensuring a successful paint job with textured paint. Follow these steps:
- Clean the surface: Remove dirt, dust, and debris with a damp cloth and let it dry completely. For stubborn stains and residue, use a mild detergent mixed with water.
- Repair any damages: Fill any cracks, holes, or uneven areas with an appropriate filler and sand it smooth.
- Apply primer: Use a high-quality primer to ensure proper adhesion of the paint and prevent any underlying stains or colors from bleeding through.
• Choosing the Right Tools
The right tools will make the process of painting with textured paint easier and more efficient. Some essential tools and accessories for textured paint application include:
- Paint roller: A thick-nap roller is recommended for textured paint as it holds more paint and produces an even texture. Opt for a roller with a 3/4-inch to 1-inch nap.
- Paintbrush: Choose a high-quality, synthetic-bristle brush designed explicitly for textured paint. Angled brushes work well for cutting in edges and tight spaces.
- Paint tray: A sturdy paint tray is essential for proper loading of the roller and minimizing mess.
- Drop cloths: Protecting floors and furniture from paint drips and accidental spills is essential. Use plastic or canvas drop cloths to cover the surfaces.
• Applying the Textured Paint
Now that you have the right textured paint, tools, and a prepared surface, it’s time to begin painting. Follow these steps for a professional result:
- Mix the paint: Stir the textured paint thoroughly to ensure an even distribution of the texture particles. If using a custom-mixed color, ensure that it is mixed consistently.
- Cut in edges: Using the angled paintbrush, carefully paint the edges of the walls or ceiling where the roller may not reach. Maintain a wet edge to prevent lap marks.
- Load the roller: Dip the roller into the paint tray and roll it back and forth to evenly distribute the paint. Avoid overloading the roller, or it will create drips and uneven texture.
- Apply the paint: Start rolling in a “W” shape pattern on the wall, working in small sections. Maintain consistent pressure and speed to produce an even texture. Refrain from overworking the paint, as it may cause the texture to flatten.
• Finishing Touches and Clean Up
Once the textured paint has been applied, follow these tips for the final touches and cleanup:
- Inspect the surface: Allow the paint to dry according to the manufacturer’s instructions. Check for any uneven texture, missed spots, or touch-ups required. Apply additional coats if needed.
- Remove masking tapes and protective coverings: Carefully remove the masking tapes, plastic, or canvas drop cloths to avoid damaging the freshly painted surface.
- Clean tools: Clean the brushes and rollers with the appropriate solvent (water or paint thinner) immediately after use. This will prolong their lifespan and ensure they are ready for future use.
In conclusion, painting with textured paint can significantly enhance your walls and ceilings’ appearance and provide a durable and distinct finish.
By following the recommendations and tips provided in this article, you can successfully obtain a professional result and enjoy the transformative effect of textured paint.
Step | Description |
|---|---|
1 | Choose the right paint and tools: Select textured paint and suitable tools such as rollers, brushes, or trowels. |
2 | Prepare the surface: Clean, repair, and prime the surface to ensure proper adhesion and texture consistency. |
3 | Practice your technique: Experiment with different application techniques on a sample board or hidden area before painting the entire surface. |
4 | Apply the base coat: Apply the base coat evenly and let it dry completely. |
5 | Apply the textured paint: Follow the manufacturer’s instructions and apply the textured paint using your chosen technique, such as rolling, brushing, or trowel application. |
6 | Blend the sections: As you complete one section, blend it with the next by overlapping the edges to ensure a seamless finish. |
7 | Finishing touches: Once the paint is dry, add any desired finishing touches, such as paint glazes or additional texture effects. |
Importance of Priming Textured Surfaces Prior to Painting
• Understanding the Importance of Priming
Priming is a crucial step in the painting process, whether you are working on a textured surface or a smooth one. Essentially, a primer is a special type of paint that prepares the surface to receive the final coat. It is specifically formulated to adhere to surfaces and form a strong bond with the topcoat.
The main advantage of using a primer is that it allows for better adhesion of the paint on the surface. This is particularly important for textured surfaces, where the unevenness of the surface can lead to weak bonding and eventual paint failure.
Additionally, primers can help with sealing porous surfaces, improving paint coverage, and avoiding issues like peeling, flaking, and blistering. Primers can also enhance the final appearance of the paint, providing a smoother finish and better color depth.
In summary, priming before painting textured surfaces is essential, as it plays a key role in ensuring the durability and final appearance of the paint job.
• Choosing the Right Primer for Textured Surfaces
There are various types of primers available on the market, each with its specific properties and benefits. When working with textured surfaces, it’s vital to select a primer specifically designed for such application.
Acrylic primers are a popular choice for textured surfaces due to their durability, versatility, and easy cleanup. They also offer good adhesion, and their water-resistant properties make them suitable for both indoor and outdoor applications.
Another suitable primer for textured surfaces is oil-based primers. They provide excellent penetration and adhesion, and they can effectively seal porous surfaces. However, they have a slower drying time compared to acrylic primers, and they may emit strong odors during application.
Higher-build primers and specialty primers may also be necessary for specific textured surfaces, such as stucco, masonry, or cementitious backer board. These primers are designed to fill in larger gaps and irregularities, providing an even base for the topcoat.
Regardless of the primer you choose for your textured surfaces, always ensure that it is compatible with the type of paint you plan to use.
• Preparing the Surface Before Priming
Before applying the primer, it’s essential to properly prepare the surface to ensure optimal results. Here are the main steps to follow:
- Cleaning: Remove any dirt, grease, grime, or peeling paint from the surface with a suitable cleaning solution or a damp cloth. Allow the surface to dry thoroughly before moving on to the next step.
- Repairing Damage: Inspect the surface for any cracks, holes, or other damage, and repair them as needed. For textured surfaces, you may need to use a patching compound specifically designed for textured finishes.
- Sanding: Lightly sand the surface to remove any loose debris and promote better adhesion of the primer. Be sure to use appropriate sandpaper or sanding tools for the type of texture you have.
- Dust Removal: After sanding, remove any dust left behind by using a tack cloth or vacuum.
- Masking: Protect any adjacent surfaces or areas you don’t want to paint by using painter’s tape and drop cloths.
• Applying the Primer
With the surface cleaned and prepped, it’s time to apply the primer. Here’s a step-by-step guide on how to do so:
- Stir the Primer: Ensure that the primer is properly mixed before applying it to the surface. You can use a wooden paint stirrer, a paint-mixing paddle, or even a cordless drill with a mixing attachment.
- Pour the Primer: Transfer some primer into a paint tray to make it easier to load your brush or roller.
- Cut In: Use a brush to apply the primer along the edges of the surface and around any obstacles, such as electrical outlets and trim.
- Roll the Primer: Use a nap roller specifically designed for textured surfaces to apply the primer evenly onto the main surface area. Properly load the roller, and avoid pressing too hard, as this can cause roller lines or remove the texture.
- Allow to Dry: Let the primer dry according to the manufacturer’s recommendations, which can range from a few hours to 24 hours or more, depending on the type of primer and the environmental conditions.
- Inspect and Repeat: Once the primer has dried, inspect the surface to ensure it has covered the texture evenly. If necessary, apply a second coat of primer and allow it to dry before proceeding with the paint.
• Final Thoughts and Recommendations
Priming a textured surface before painting is a critical step that should not be skipped. By investing time and effort in selecting the right primer, properly preparing the surface, and applying the primer correctly, you can significantly improve the durability and final appearance of your paint job.
To ensure the best results, always follow the primer and paint manufacturer’s guidelines and consider seeking professional advice if you are unsure about any aspect of your painting project. By doing so, you’ll ensure a successful outcome and a long-lasting finish that you can be proud of.