Surface Preparation For Custom Finishes. What Pros Say
When it comes to achieving a flawless, long-lasting custom finish, proper surface preparation is absolutely vital. With years of experience under our belt, we can confidently guide you through the process, ensuring that you achieve exceptional results every time. From assessing the surface material to the final touches, we have the answers to all your surface preparation questions.
Surface preparation for custom finishes:
Surface preparation for custom finishes is crucial for ensuring adhesion, durability, and a high-quality appearance. It involves evaluating and cleaning the surface, removing existing coatings, repairing imperfections, and applying a primer or sealer as needed. Proper surface preparation helps achieve a flawless and lasting custom finish.

Discover the secrets to achieving flawlessly finished surfaces for your custom projects. From materials, tools, to expert techniques, we’ve got you covered. Dive deeper to unveil the foundation of excellent results!
Contents
- 1 Custom Finish Surface Preparation Techniques
- 2 Steps for Surface Preparation Before Finishing
- 3 Various Methods of Surface Preparation
- 4 Understanding Refinishing Surface Preparation
- 5 Preparing a Surface for Paint Coating Application
- 6 Introduction to Surface Preparation Procedures
- 7 Understanding SA 2.5 Surface Preparation
Custom Finish Surface Preparation Techniques
• Why Surface Preparation Matters
Before diving into the process of surface preparation, it’s important to emphasize the significance of this step in achieving a high-quality custom finish. Properly preparing the surface is essential for the finish’s adhesion, durability, and overall appearance.
Skipping or rushing through the surface preparation phase can result in an uneven or prematurely worn finish, ultimately compromising the outcome of the project.
• Evaluating and Cleaning the Surface
– Assessing the Condition
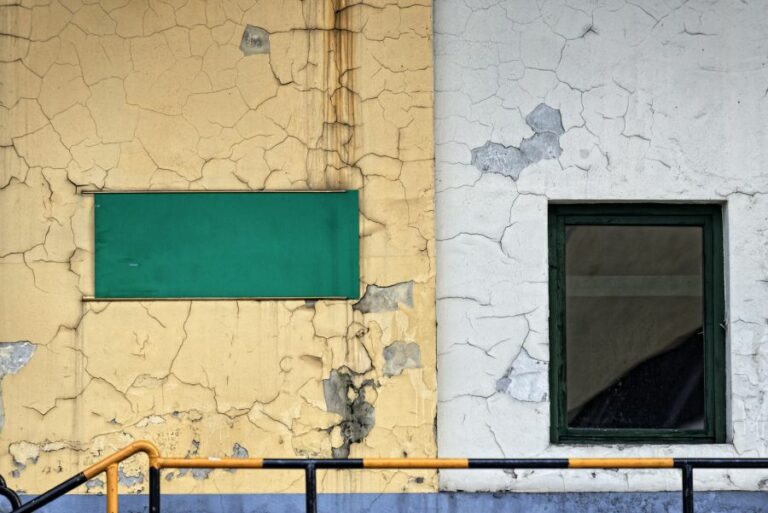
To begin, evaluate the current state of the surface, as this will dictate the level of preparation required. Identify any flaws, such as rust, peeling paint, or other contaminants, which will need to be addressed prior to applying a custom finish.
Additionally, consider the material of the surface, as some substrates may require specific treatment to optimize the adhesion and performance of the finish.
– Cleaning
Regardless of the surface’s condition, thorough cleaning is essential to remove any dust, dirt, or grease that can interfere with the finish’s adhesion. To clean the surface, use a mild detergent and water or specialized cleaners designed for the specific substrate.
For particularly stubborn contaminants, consider using degreasers or solvents, but ensure they are compatible with the material of the surface to avoid causing damage.
• Removing Existing Coatings or Finishes
If the surface is coated with an existing finish in poor condition, it is crucial to remove it before applying a new custom finish. There are several methods for stripping the surface, including:
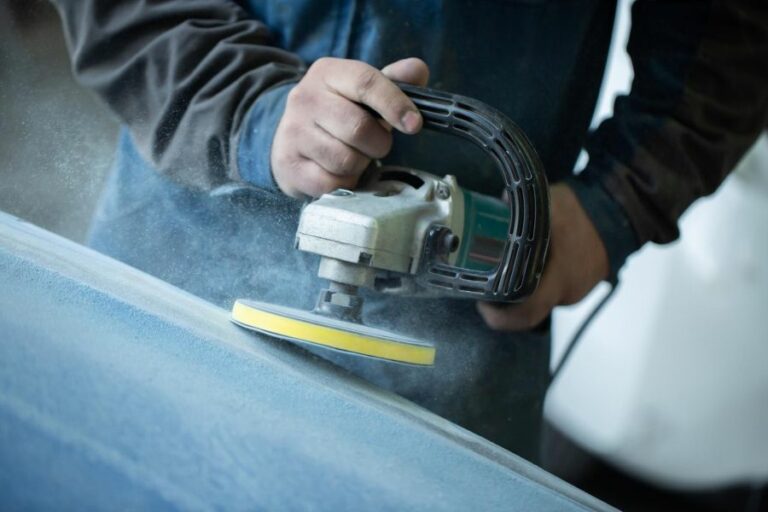
– Sanding
Sanding is an effective technique for removing paint, varnish, or other coatings. Start with a coarse grit sandpaper and progressively work your way up to a finer grit, ensuring the surface is free of any residue.
– Chemical Strippers
For more extensive removal needs, chemical strippers can be used to dissolve the existing finish.
Always follow the manufacturer’s instructions and safety precautions, and be sure to neutralize the surface with water or the recommended product to prevent any residual chemicals from compromising the new finish.
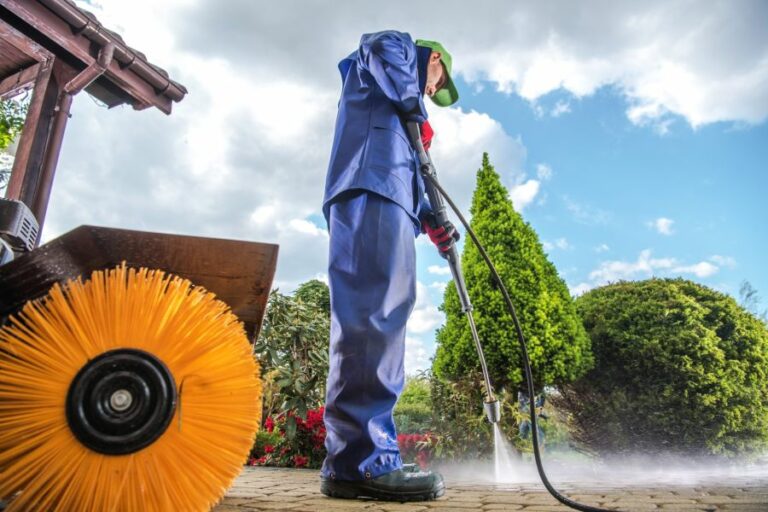
– Power Washing
Outdoor surfaces, such as decks and siding, can benefit from power washing to strip away old finishes. This method is particularly useful for removing large areas of loose paint, dirt, or mold.
• Repairing Imperfections
Once the surface is clean and free of existing coatings, it’s time to address any defects or imperfections that could affect the final appearance of the custom finish.
– Filling Holes and Dents
Using a filler or putty, fill any holes, dents, or gouges in the surface. Allow the filler to dry as indicated by the manufacturer, and then sand the area smooth to create an even surface for the finish.
– Smoothing Rough or Uneven Areas
Use a fine-grit sandpaper to smooth any rough or uneven areas on the substrate. This step is particularly important for surfaces with visible grain or texture, such as wood or concrete, to ensure the custom finish applies evenly.
• Surface Priming and Sealing
Depending on the material of the surface and the type of custom finish being applied, a primer or sealer may be necessary to optimize adhesion and ensure a durable, even finish.
Primers are particularly crucial when working with porous surfaces, while sealers are essential for use on materials that may release contaminants or moisture over time.
Choose a primer or sealer that is compatible with both the substrate and the chosen custom finish and follow the manufacturer’s instructions for application and drying times.
• Final Considerations
Before applying the custom finish, conduct a final inspection of the surface to ensure it is clean, free of imperfections, and primed or sealed as necessary.
Following these preparation steps will significantly improve the outcome of the project, resulting in a high-quality, durable, and aesthetically pleasing custom finish.
Remember, investing time and effort in proper surface preparation is crucial to the success of any custom finish project. With careful planning, attention to detail, and the right techniques, your surface will be ready for a flawless custom finish that stands the test of time.
Steps for Surface Preparation Before Finishing
Whether you are working on a painting, a woodworking project, or refinishing a piece of furniture, preparing the surface for a finish is a crucial step in achieving great results. Proper preparation not only ensures a smooth finish but also increases the durability and longevity of the project.
• Assessing the Surface
Firstly, identify the type of surface you are working with, as different surfaces require different preparation techniques. Common surfaces include:
- Wood (such as furniture, cabinets, and floorings)
- Metal (such as car parts, railings, and machinery)
- Drywall (such as walls and ceilings)
- Concrete (such as floors, driveways, and sidewalks)
Visually inspect the surface for any imperfections, such as cracks, gaps, holes, and rough spots. If present, these issues must be addressed before applying a finish.
• Cleaning the Surface
Proper cleaning is essential in removing any dirt, grease, or grime that may be present on the surface. Here are some general guidelines for cleaning different types of surfaces:
- Wood: Wipe down the surface with a damp cloth to remove dust and dirt. Use a wood cleaner or a mild dish soap solution to remove any grease or grime, and then rinse thoroughly with water. Allow the wood to dry completely before proceeding.
- Metal: Use a degreaser or a mild dish soap solution to clean the metal, and then rinse with water. Additionally, remove any rust or oxidation using a wire brush, sandpaper, or a rust remover such as those recommended by the National Park Service.
- Drywall: Wipe down the surface with a damp cloth to remove dust and dirt. For tough stains, use a mild dish soap solution, and then rinse well with water.
- Concrete: Sweep or vacuum the surface to remove dust and debris. Use a concrete cleaner or a mild dish soap solution to clean the surface, and then rinse with water.
• Repairing Imperfections
Once the surface is clean, proceed to repair any cracks, gaps, or holes as needed.
- Wood: Fill small cracks or holes with wood filler, following the manufacturer’s instructions. For larger gaps or cracks, use a two-part epoxy filler. Sand the filled area smooth once it has dried.
- Metal: Small dents and imperfections can be filled with an auto body filler or a two-part epoxy filler. For large dents or holes, welding may be necessary.
- Drywall: Small holes can be filled with a pre-made patch or joint compound. For larger holes, use a piece of drywall to patch the area and then tape and apply joint compound to cover the seams. Sand the area smooth once the compound has dried.
- Concrete: Use a concrete patch or a two-part epoxy filler to repair small cracks and holes. For larger cracks, apply a concrete resurfacer following the manufacturer’s instructions.
• Sanding the Surface
Sanding is an essential step in preparing a surface for a finish, as it helps to create a smooth, even surface. Follow the guidelines below for sanding various surfaces:
- Wood: Begin sanding with coarse-grit sandpaper (such as 80-grit) and gradually work up to finer grits (such as 220-grit) to achieve a smooth finish. Sand in the direction of the wood grain and remove any dust after sanding.
- Metal: Use sandpaper or an abrasive pad to remove any surface imperfections and to create a smooth finish. Wipe down the surface with a tack cloth or a damp cloth to remove any dust.
- Drywall: Use fine-grit sandpaper (such as 120-grit) to smooth out any imperfections on the drywall surface. Remove any dust with a damp cloth.
- Concrete: For small projects, use a concrete etching solution or a concrete grinder to create a smooth surface. For larger projects, consider hiring a professional to grind and smooth the concrete surface.
• Applying a Primer
A primer is essential in providing a uniform base for the finish and creating a better bond between the surface and the finish. Follow these general guidelines for applying a primer to different surfaces:
- Wood: Apply a wood primer using a brush, roller, or paint sprayer and allow it to dry according to the manufacturer’s instructions. Sand the surface lightly to remove any imperfections.
- Metal: Apply a metal primer using a brush, roller, or paint sprayer and allow it to dry according to the manufacturer’s instructions.
- Drywall: Apply a drywall primer using a brush, roller, or paint sprayer and allow it to dry according to the manufacturer’s instructions.
- Concrete: Apply a concrete primer using a brush, roller, or paint sprayer and allow it to dry according to the manufacturer’s instructions.
• The Final Touches
After completing the steps above, your surface should now be well-prepared for a finish. Always follow the manufacturer’s instructions when applying your chosen finish, and consider testing the finish on a small, inconspicuous area first to ensure satisfactory results.
With proper preparation and care, you will be well on your way to a beautiful, durable, and long-lasting finish for your project.
| How do you prepare a surface for a finish? | |||
|---|---|---|---|
| Step | Procedure | Tools Needed | Notes |
| 1 | Clean the surface | Cleaning solution, cloth or sponge, vacuum cleaner | Remove dirt, dust, and debris from the surface to ensure proper adhesion of the finish |
| 2 | Repair any damages | Wood filler, putty knife, sandpaper | Fill any cracks, dents, or holes in the surface to create a smooth surface |
| 3 | Sand the surface | Sandpaper, sanding block, or electric sander | Create a smooth surface; start with a coarser grit and progressively work towards a finer grit |
| 4 | Remove sanding residue | Tack cloth or vacuum cleaner | Ensure that all sanding dust is removed to prevent it from mixing with the finish and causing uneven application |
| 5 | Apply a primer or sealer, if necessary | Paintbrush, roller, or spray applicator | Seal porous surfaces or cover dark color or stains to ensure an even finish application |
| 6 | Allow the surface to dry | N/A | Wait for the recommended drying time before applying the finish |
Various Methods of Surface Preparation
Surface preparation is an essential step in the finishing process, ensuring that substrates are ready for coating, painting, or treatment. A range of surface preparation methods are available to suit different materials, conditions, and desired finishes.
• Mechanical Surface Preparation
– Abrasive Blasting
Abrasive blasting, also known as sandblasting, is a widely-used surface preparation technique. High-pressure compressed air propels a stream of abrasive material against a surface to remove rust, old coatings, and contaminants. The resulting surface profile enhances the adhesion of applied coatings.
- Dry abrasive blasting uses a dry abrasive, such as sand, glass beads, or steel grit, to thoroughly clean and profile a surface.
- Wet abrasive blasting, or wet blasting, incorporates water into the process, reducing the amount of dust generated and minimizing surface embedment.
Recommendation: For large-scale applications and removing heavy rust, dry abrasive blasting is often more effective. For delicate surfaces or dust-sensitive environments, wet abrasive blasting can be beneficial.
– Power Tool Cleaning
Power tool cleaning is a surface preparation method that utilizes power tools, such as grinders, wire brushes, or sanders, to remove contaminants, loose rust, and old coatings from a surface.
This method is suitable for small-scale applications or tight spaces where abrasive blasting equipment may not be practical. To ensure optimal adhesion of coatings, it is important to achieve the necessary surface profile.
Recommendation: Select appropriate power tools and accessories for the specific type of surface and contaminants, and prioritize safety by using proper personal protective equipment.
• Chemical Surface Preparation
– Acid Etching
Acid etching utilizes an acidic solution, such as hydrochloric or phosphoric acid, to dissolve and remove surface contaminants and create a profile suitable for coating adhesion.
Commonly used on concrete surfaces, acid etching can prepare the substrate for the application of paint, sealers, or overlays.
It is crucial to follow manufacturer recommendations for the concentration and dwell time of acid etchant to ensure the desired surface profile and to neutralize the surface after etching thoroughly.
Recommendation: Always work in well-ventilated areas and follow safety guidelines, including using proper protective equipment like gloves, eye protection, and respirators when handling acids.
– Solvent Cleaning
Solvent cleaning is a chemical method often employed to remove oil, grease, and other contaminants from a surface. It involves the use of a solvent, such as acetone or xylene, and a clean cloth or wipe to cleanse the surface.
Often used as an initial step in surface preparation, solvent cleaning may be followed by other methods like abrasive blasting or power tool cleaning for a comprehensive surface prep.
Recommendation: Select the most appropriate solvent for the type of surface and contaminants to be removed, and dispose of solvent-soaked materials following environmental and safety guidelines.
• Thermal Surface Preparation
– Flame Cleaning
Flame cleaning uses an oxyacetylene torch to burn off surface impurities, such as rust, old coatings, or contaminants. Flame cleaning relies on rapid heating of the surface, followed by controlled cooling to cause a thermal shock that results in the lifting and removal of contaminants.
This method is well suited for large-scale applications, like preparing steel structures for welding or painting. However, it should only be employed by trained operatives, with due consideration for safety and environmental factors.
Recommendation: Carefully assess the risks associated with flame cleaning, including fire hazards and toxic fumes, and follow appropriate safety protocols.
– Laser Cleaning
Laser cleaning is a non-contact method that uses laser beams to vaporize surface contaminants and remove them from the substrate. Commonly used in industrial and manufacturing applications, laser cleaning helps preserve the integrity of the substrate by avoiding abrasive or chemical treatment.
Although a relatively expensive method, laser cleaning offers excellent precision and control, making it suitable for sensitive or specialized applications.
Recommendation: Evaluate the cost and application requirements before committing to laser cleaning as a surface preparation method.
• Conclusion
Selecting the most appropriate surface preparation method depends on factors such as the material, contaminants, scale of the project, and desired finish.
Assessing these factors and considering the recommendations above can help ensure a suitable surface profile and optimal adhesion for the applied coatings.
Understanding Refinishing Surface Preparation
Surface preparation is the process of treating and preparing various surfaces, such as wood, metal, and concrete, to be refinished or recoated. This crucial step is necessary to achieve a smooth, long-lasting, and visually appealing finish on the chosen material.
• Why Surface Preparation Matters
Proper surface preparation is essential for a number of reasons:
- Adhesion: Preparing the surface ensures that the new coating will bond correctly and evenly to the material, preventing peeling or chipping.
- Durability: By removing any contaminants or imperfections, the lifespan of the refinishing project is significantly improved.
- Appearance: A well-prepared surface will result in a more professional and visually appealing finish.
An inadequate or rushed surface preparation can lead to various issues, including poor adhesion, inconsistent application, and a shorter lifespan of the refinishing project. Therefore, taking the time to prepare the surface correctly is critical for success.
• Common Surface Preparation Techniques
Several methods can be employed to prepare a surface for refinishing, and the choice of technique may depend on factors such as the material and its condition. Here are some of the most common techniques:
– Cleaning
Cleaning the surface is essential to remove any dirt, grease, or contaminants that may affect the finish’s adhesion and appearance. Depending on the surface type and level of contamination, different cleaning agents may be required.
For example, a mild detergent solution can be effective for general cleaning, while stronger solvents may be necessary to remove heavy grease. It is crucial to ensure the surface is thoroughly rinsed and dried following any cleaning process.
– Sanding
Sanding is vital for achieving a smooth and even surface necessary for a professional-looking finish. For refinishing wooden surfaces, choose the appropriate sandpaper grit according to the condition of the material.
Start with a coarser grit, typically 60 or 80-grit, and work your way up to a finer grit, such as 220-grit, for a smooth surface. Always sand in the direction of the wood grain to avoid scratches.
– Abrasive Blasting
Abrasive blasting, also known as sandblasting, is the process of forcibly propelling abrasive material against a surface using compressed air or water.
This method effectively removes imperfections, contaminants, and old coatings, leaving a clean and appropriately textured surface for the new coating to bond to.
Abrasive blasting is often utilized for preparing large surfaces or surfaces where traditional hand-sanding is impractical, such as metal or masonry.
– Chemical Stripping
For surfaces where sanding or blasting is not an option, such as ornate or detailed woodwork, chemical stripping may be used to remove pre-existing finishes or contaminants.
Various chemical stripping products such as paint remover, varnish remover, or solvent-based strippers are available to assist in the removal of paint, stains, or varnish. The chosen product should be compatible with the surface material and should be used according to the manufacturer’s instructions.
– Etching
Etching refers to the process of creating a roughened, porous surface on materials such as concrete or unglazed tiles, typically using an acid-based solution. This process allows for better adhesion of coatings or sealants.
Given the potential hazards associated with handling acidic substances, proper personal protective equipment should be worn, and the manufacturer’s instructions should be followed when using etching solutions.
• Recommendations for Successful Surface Preparation
To ensure a successful refinishing project, consider the following recommendations:
- Choose the appropriate preparation technique: Depending on the material and its condition, one method may be more effective than another. Research or consult a professional for the best approach for your specific project.
- Invest in quality materials and equipment: Using high-quality sandpaper, cleaning agents, and other tools or consumables can make a significant difference in the outcome of the project.
- Work in a well-ventilated area: Proper ventilation is essential when working with chemicals, solvents, or materials that produce dust or fine particles.
- Wear appropriate personal protective equipment (PPE): Gloves, safety glasses, and respiratory protection may be necessary depending on the materials used and the surface preparation process.
- Follow manufacturer’s instructions for products used: Carefully read and adhere to the guidelines provided by the manufacturer of any product being used on your refinishing project.
For additional information on surface preparation, consider consulting resources like the Painting and Decorating Contractors of America or the National Association of Corrosion Engineers, which can provide valuable guidance and technical assistance.
In conclusion, proper surface preparation is critical for the success of any refinishing project. +
By thoroughly cleaning the surface, selecting the appropriate preparation method, and following best practice recommendations, you can significantly extend the life of your project and achieve a professional, visually appealing finish.
Preparing a Surface for Paint Coating Application
A well-prepared surface ensures a long-lasting and high-quality paint job. Proper preparation helps avoid paint adhesion issues, cracking, peeling, and other problems.
• Assess the Surface Condition
Before you start the preparation process, you need to evaluate the condition of the surface you are going to paint. Inspect for any damage, such as cracks, holes, or peeling paint. Additionally, check for mold, mildew, or any signs of moisture.
Make a note of these issues, as they will require different treatments during the surface preparation process.
• Choose the Right Tools
Selecting the right tools for surface preparation can save time and effort. Some essential tools for preparing a surface for paint coating include:
- Sandpaper or sanding block (various grits)
- Paint scraper or putty knife
- Wire brush
- Patching compound or wood filler
- Tack cloth or microfiber cloth
- Bucket, sponge, and mild detergent
- Painter’s tape
- Drop cloths or plastic sheeting
Having these tools at your disposal ensures an efficient and effective preparation process.
• Clean the Surface
Proper cleaning removes dirt, grease, and grime that may interfere with paint adhesion. Follow these steps for effective surface cleaning:
- Fill a bucket with warm water and add a few drops of mild detergent.
- Dip a sponge or cloth in the soapy solution and wring it out to remove excess water.
- Wipe the surface gently, using circular motions to remove dirt and grime.
- Rinse the sponge or cloth with clean water, wring out excess water, and repeat the process to remove any soap residue.
- Allow the surface to dry thoroughly before moving on to the next steps.
For more information on cleaning surfaces, visit the EPA’s guidelines for paint preparation.
• Repair Damage and Fill Gaps
After the surface is clean and dry, address any identified damage or gaps. Use a putty knife or paint scraper to remove loose or peeling paint. For minor cracks, holes, or dents, apply a patching compound or wood filler. Follow the manufacturer’s instructions for the appropriate drying time before proceeding.
• Sand the Surface
Sanding is crucial to achieving a smooth surface for paint application. It helps remove rough spots and promotes better paint adhesion. Follow these steps to sand the surface effectively:
- Begin with coarse-grit sandpaper (60-80 grit) to remove rough spots and any remaining loose paint.
- Move on to medium-grit sandpaper (100-150 grit) to smooth out the surface further.
- Finish with fine-grit sandpaper (180-220 grit) for a smooth and even surface.
Remember always to sand with the grain of the surface, especially when working with wood. After sanding, use a tack cloth or microfiber cloth to remove dust and debris from the surface.
• Prime the Surface
Priming is essential for sealing the surface and providing a consistent base for the paint. It helps prevent paint absorption, ensuring a uniform finish. Follow these steps to prime your surface:
- Choose the appropriate primer based on the surface type (wood, metal, or masonry) and the paint you will be using. Consult the paint manufacturer’s recommendations.
- Apply the primer using a brush or roller, ensuring even coverage.
- Allow the primer to dry according to the manufacturer’s instructions.
Some surfaces may require multiple coats of primer or a specific type of primer, such as stain-blocking or mold-resistant. Read the product label carefully to determine the best primer for your project.
• Protect Surrounding Areas
Before beginning the paint application, protect adjacent surfaces and fixtures with painter’s tape and drop cloths or plastic sheeting. This step prevents accidental paint splatters or spills and ensures a clean and professional finish.
• Final Tips
- Always ventilate the area well during surface preparation and paint application.
- Wear protective gear such as gloves, goggles, and a dust mask when working with chemicals or sanding.
- Allow sufficient time for surfaces to dry between steps to ensure proper adhesion and avoid potential issues.
Following these preparation steps will help ensure a durable, long-lasting paint job that you can be proud of. Remember that investing time and effort in surface preparation pays off in a high-quality, professional-looking result.
Step | Task | Description |
|---|---|---|
1 | Inspect the surface | Check the surface for any cracks, dents, or other imperfections that need to be fixed before painting. |
2 | Clean the surface | Remove dirt, dust, grease, and other contaminants from the surface using soap and water or a specific cleaning solution depending on the surface material. |
3 | Repair and patch | Fill any cracks, dents, or holes with appropriate filler or patching material. Allow the filler to dry and sand it down for a smooth finish. |
4 | Sand the surface | Start with coarse sandpaper and progressively use finer sandpaper to create a smooth surface. This will allow the paint to adhere evenly and smoothly. |
5 | Prime the surface | Apply a primer appropriate for the surface material and desired finish. Primer can improve adhesion, coverage, and overall appearance of the paint. |
6 | Tape off edges and protect surrounding areas | Use painter’s tape to mask off edges, trim, and fixtures to prevent accidental painting of unwanted areas. Cover floors and nearby objects with drop cloths or plastic sheeting. |
Introduction to Surface Preparation Procedures
Surface preparation is a vital step in many processes, such as painting, coating, and bonding, to ensure long-lasting and high-quality results. It involves cleaning, smoothing, and preparing surfaces, removing contaminants and imperfections to enhance the adhesion of coating materials.
– Importance of Surface Preparation
Ensures Proper Adhesion
Preparing surfaces is crucial to achieve a strong bond between the surface and coating materials. Improperly prepared surfaces may result in peeling, cracking, or poor adhesion, compromising the quality and durability of the finished product.
Enhances Aesthetic Appeal
Proper surface preparation enhances the appearance of the applied materials and the overall look of the finished product. Eliminating imperfections and contaminants results in a smoother and more uniform surface.
Increases Longevity
By ensuring a strong bond and improving the overall appearance, thorough surface preparation extends the lifespan of coatings and treatments, reducing the need for costly repairs and maintenance.
Prevents Contamination
Surface preparation removes contaminants such as dirt, grease, and rust, which can lead to the degradation of coating materials, corrosion, and overall product failure.
– Types of Surface Preparation
Mechanical Surface Preparation
Mechanical methods involve using tools to physically remove contaminants and imperfections. These methods include:
Sandblasting
Sandblasting, also known as abrasive blasting, is a process that uses pressurized air to propel abrasive particles against surfaces to remove contaminants and create a smooth, clean surface.
Sandblasting is effective at removing rust, paint, and other materials, but it can also damage delicate surfaces.
Grinding and Sanding
Grinding and sanding employ power tools to remove surface imperfections, such as old paint, rust, and high spots, by using abrasion. These methods create a smoother surface that enhances adhesion.
Chemical Surface Preparation
Chemical methods utilize solvents and other chemical agents to dissolve or remove contaminants, such as grease, oils, and dirt.
Degreasing
Degreasing removes oil and grease from surfaces using solvents or detergents. Proper degreasing is essential to prevent contamination of the material or substrate, ensuring a strong bond.
Etching
Etching is a chemical process that modifies the surface of a material to improve adhesion. This process is commonly used on non-porous materials like metal and glass.
Surface Conditioners
Surface conditioners, such as primers and adhesion promoters, help improve the bond between the surface and the applied materials by providing an intermediate layer that promotes adhesion.
– Surface Preparation Techniques
Choose the Right Method
Select the appropriate surface preparation method based on the material, substrate condition, and desired result. Consult the material’s data sheet or seek professional advice if unsure.
Clean the Surface
Cleaning is crucial to remove dust, dirt, and other contaminants that can interfere with adhesion and lead to premature failure. Use a mild detergent or solvent, depending on the surface, and ensure that it is well-rinsed and dry before proceeding.
Remove Old Coatings
Old coatings that show signs of peeling or poor adhesion should be removed before applying new materials, as the presence of old coatings can negatively affect the new material’s bond.
Repair Surface Damage
Before starting the preparation process, it’s essential to repair any cracks, holes, or other damages present in the surface, as these imperfections can compromise the overall finish and adhesion of new materials.
– Safety Measures
Surface preparation processes, particularly those involving chemicals or abrasive tools, pose risks to health and safety. It’s essential to adhere to appropriate safety measures, such as personal protective equipment (PPE), proper ventilation, and signs or barriers to prevent accidents.
• Final Thoughts
Proper surface preparation is crucial to ensure high-quality, durable, and aesthetically pleasing finished products. By adopting the right methods, materials, and safety practices, you can enhance the bond between the surface and applied materials, resulting in a more effective and long-lasting end result.
Understanding SA 2.5 Surface Preparation
Surface preparation is a crucial step in any industrial painting or coating process. Proper surface preparation ensures optimal adhesion, performance, and durability of the applied coating.
One of the most widely recognized and accepted surface preparation standards is ISO 8501-1, which classifies the degree of surface preparation into four categories: SA 1, SA 2, SA 2.5, and SA 3.
• What is SA 2.5 Surface Preparation?
SA 2.5, also known as “Near White Metal Blast Cleaning,” is a surface preparation standard defined by the International Organization for Standardization (ISO) in their standard ISO 8501-1.
This standard specifically refers to the degree of cleanliness a surface should achieve after abrasive blast cleaning before the application of a protective coating.
To achieve the SA 2.5 surface preparation level, the surface should be free from visible oil, grease, and dirt, as well as near white metal with only a few traces of old paint or mill scale remaining.
The blast-cleaned surface should have a uniform, metallic appearance, with at least 95% of the surface area adhering to the “Near White Metal” cleanliness level.
For a better understanding of the standard, SA 2.5 surface preparation can be compared with the three other ISO 8501-1 categories, which are:
- SA 1 (Brush-Off Blast Cleaning): Loose rust, scale, and old paint are removed, but tightly adhered residues are allowed to remain.
- SA 2 (Commercial Blast Cleaning): The surface should be free from visible oil, grease, and dirt, with most of the rust, old paint, and mill scale removed.
- SA 3 (White Metal Blast Cleaning): Complete removal of rust, mill scale, and old paint, with the surface having a uniform, pure white metallic appearance.
• The Process of Achieving SA 2.5 Surface Preparation
The process of achieving SA 2.5 surface preparation typically involves the following steps:
- Initial Cleaning: Before blast cleaning, remove all dirt, grease, and oil from the surface using an appropriate solvent or degreaser.
- Abrasive Blast Cleaning: Select a suitable abrasive material and blasting equipment and use them according to the manufacturer’s guidelines. Blasting should be conducted evenly and systematically across the surface. Experience and skill are required to ensure the correct blasting parameters are deployed for optimal results.
- Visual Inspection: After blast cleaning, visually inspect the entire surface to ensure that it meets the SA 2.5 cleanliness standard. Refer to ISO 8501-1 for visual comparison or use ISO 8501-2, which provides photographic examples of the various surface preparation standards.
- Surface Profile Measurement: Using a surface profile measurement device, ensure that the surface texture (also known as anchor profile) is suitable for the type and thickness of the coating to be applied.
- Dust Removal: Blow away dust and abrasive residues from the surface using clean, dry compressed air. The surface must be free of dust for optimal coating adhesion.
• Applications and Benefits of SA 2.5 Surface Preparation
SA 2.5 surface preparation is widely used in various industries, such as marine, oil and gas, chemical, infrastructure, and power generation, where the maintenance of steel structures and surfaces is critical.
High-performance coatings require a near-white metal surface to ensure optimal adhesion, performance, and durability.
Some benefits of SA 2.5 surface preparation include the following:
- Longer Coating Life: Proper surface preparation ensures excellent adhesion between the coating and substrate, resulting in a longer-lasting protective coating.
- Corrosion Resistance: A near-white metal surface minimizes the risk of undercoat corrosion, increasing the corrosion resistance of the coated structure.
- Low Maintenance: By providing a suitable foundation for high-performance coatings, SA 2.5 surface preparation can help lower maintenance costs over time, as repaints will be less frequent.
• Expert Recommendations
Based on personal experience, the following recommendations can help ensure a successful SA 2.5 surface preparation process:
- Always follow the coating manufacturer’s guidelines and recommendations for surface preparation.
- Use appropriate abrasives, equipment, and techniques to achieve the desired surface preparation standard.
- Train your personnel in proper blasting techniques and surface inspection to ensure consistent results.
- Monitor and maintain the quality and cleanliness of the abrasive material being used.
- Always conduct a thorough visual inspection and surface profile measurement after blast cleaning.
In conclusion, SA 2.5 surface preparation is a vital step in ensuring the performance and longevity of protective coatings applied to steel structures.
Properly executed surface preparation in accordance with ISO 8501-1 standards can result in significant cost savings and extended maintenance intervals for asset owners.
For further reference and information about surface preparation standards, visit the ISO website for guidelines on laboratory accreditation and competence.