Eradicate Surface Rust And Paint Peeling. What Pros Say
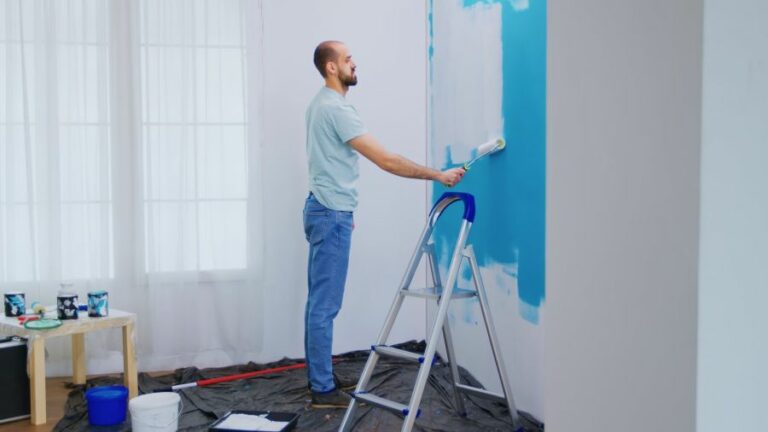
Is unsightly surface rust and paint peeling plaguing your once pristine surfaces? Fear not, because we have the effective and simple solution to restore them to their former glory. Tackling these issues may seem daunting at first, but by following our guidance and using the right techniques and tools, you’ll be able to eradicate surface rust and paint peeling like a pro.
Eradicate surface rust and paint peeling:
To eradicate surface rust and paint peeling, first identify the issue and clean the affected area. For rust, use abrasives or chemical rust removers, and apply a rust inhibitor. For paint peeling, scrape loose paint, sand the surface, repair damage, and clean the area. Finish by applying primer and repainting the surface. Follow safety precautions and use high-quality materials.

Bid farewell to unsightly surface rust and paint peeling with our in-depth guide. Discover practical tips for using the right tools, techniques, and preventative measures. Read on and restore your items to their former glory!
Contents
- 1 Eliminate Surface Rust and Flaking Paint Issues
- 2 Safely Remove Surface Rust Without Harming Paint
- 3 Preventing Rust Development Beneath Paint
- 4 Effective Surface Rust Removal Prior to Painting
- 5 Discover Solutions for Dissolving Surface Rust
Eliminate Surface Rust and Flaking Paint Issues
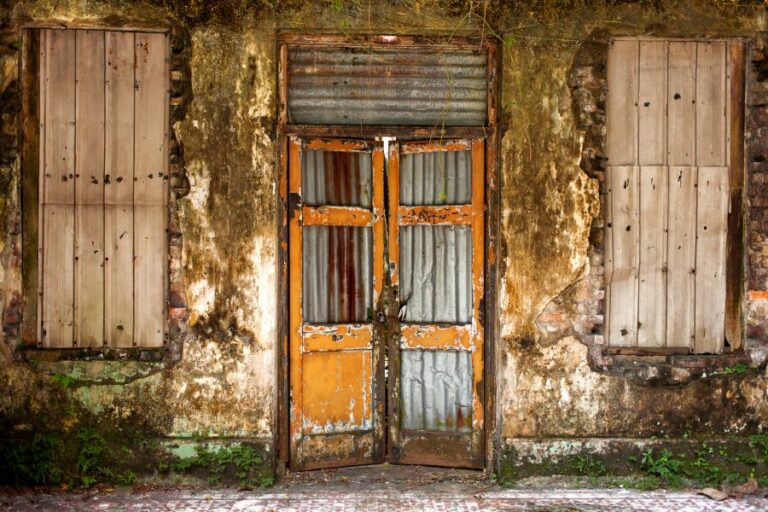
Surface rust and paint peeling are common problems that can occur on a variety of surfaces. These issues not only affect the appearance but also reduce the lifespan of the affected materials.
• Identifying Surface Rust and Paint Peeling
Before addressing the issue, it is important to identify whether the surface is affected by rust or peeling paint. Rust is an orange or red-brown flaky material found on metal surfaces, while paint peeling often manifests as curled or flaking paint.
– Surface Rust Removal
One must follow the steps mentioned below to properly remove surface rust and prevent further deterioration of the metal.
Clean the Surface
Begin with cleaning the affected area to remove any dust or debris. Use a soft cloth or sponge along with warm soapy water to clean the metal surface. Rinse thoroughly and let it dry completely.
Remove Rust with Abrasives
Use sandpaper, a wire brush, or a scouring pad to remove the rust from the surface. It is essential to start with coarse abrasives, such as 60 to 80 grit sandpaper, and gradually move to finer ones, like 120 grit sandpaper, to achieve a smoother finish.
Always remember to work in the direction of the grain or existing finish on the metal.
Chemical Rust Removers
For stubborn rust, consider using chemical rust removers. These products contain phosphoric, oxalic, or hydrochloric acid to dissolve rust.
Make sure to follow the manufacturer’s instructions and safety precautions. It is advisable to wear gloves and eye protection when using chemical rust removers.
Apply a Rust Inhibitor
Once the rust is removed, apply a rust inhibitor to avoid future rust formation. These products create a protective barrier on the metal surface, preventing the effects of moisture and oxidation.
Rust inhibitors are available in spray or brush-on forms. Make sure to follow the manufacturer’s instructions to achieve the best results.
– Paint Peeling Removal
Proper removal of peeling paint is necessary to achieve a smooth, even surface for repainting. The following steps will guide you through the process.
Scrape the Loose Paint
Use a paint scraper or putty knife to carefully remove the loose and peeling paint from the surface. Ensure you do not damage the underlying material while scraping.
Sand the Surface
After removing the loose paint, sand the edges of the remaining paint to create a smooth transition from the painted to the bare surface. Start with coarse sandpaper (60 to 80 grit) and move to finer grades (120 grit) for better results.
Repair Damaged Surfaces
Inspect the surface for any damage, such as cracks, holes, or dents. Use a suitable filler or patching compound to repair these defects. Follow the manufacturer’s instructions and allow the filler to dry before proceeding.
Clean the Surface
Ensure all dust and debris are cleared, as they can affect the adherence of the new paint or primer. Use a vacuum or a tack cloth to remove all the fine dust particles from the surface.
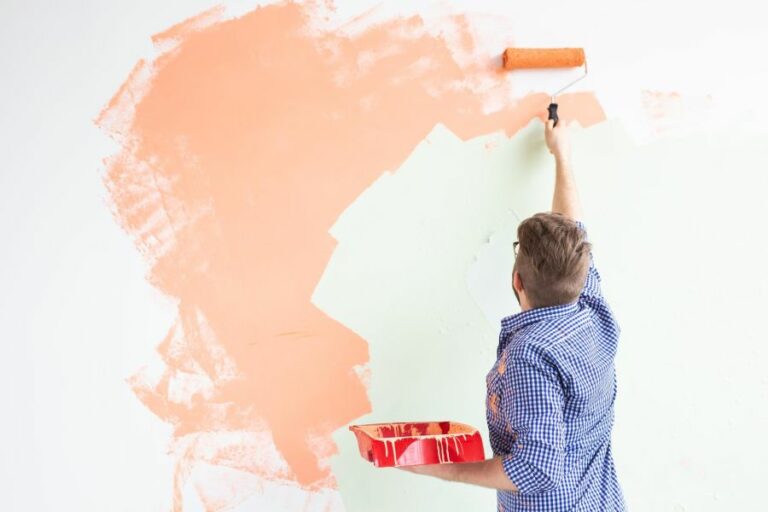
– Repainting the Surface
The final step involves repainting the treated surface to restore its appearance and provide reliable protection.
Apply Primer
A primer creates an adhesive bond between the surface and the paint. It also enhances the paint’s durability and provides an additional layer of protection against moisture, rust, and other surface issues.
Apply a suitable primer, allowing it to dry according to the manufacturer’s recommendations.
Paint the Surface
Choose a high-quality paint and follow the manufacturer’s instructions to ensure a lasting and durable finish. Apply multiple thin coats of paint with an appropriate brush, roller, or sprayer. Allow each coat to dry before applying the next one.
• Expert Recommendations and Resources
- Always begin with a thorough surface cleaning to achieve the best results.
- Wear appropriate safety gear while working with chemicals and tools.
- Use high-quality paint and primer for a long-lasting finish.
- Consult with a professional if you are unsure about the proper technique or materials for your specific project.
For further information and resources, visit the Environmental Protection Agency’s (EPA) official website, which offers guidelines on paint removal and handling of hazardous materials.
Safely Remove Surface Rust Without Harming Paint
Rust is a common problem that affects metal surfaces, especially when exposed to moisture and oxygen for an extended period. It not only ruins the look of your vehicle but can also compromise its structural integrity.
However, you can get rid of surface rust without having to worry about damaging your paint job.
• Understanding Surface Rust
Surface rust forms when the iron in the metal surface oxidizes and reacts with the oxygen present in the air to form iron oxide. You will often find rust spots on your vehicle, especially on the body and undercarriage.
Surface rust is a less severe form of rust and has not yet penetrated deep into the metal. Addressing the issue in its early stages will save your paint job as well as your vehicle’s structure.
• Gather the Necessary Materials
To remove surface rust efficiently without harming the paint, ensure you have the following materials:
- Rust remover (use a gentle, paint-safe product)
- A soft sponge or microfiber cloth
- A bucket of soapy water
- A hose or source of water
- A clean, dry towel
- A car wax or paint sealant
You can find all these materials at your local automotive supply store. Always read the label on the rust remover to make sure it is safe to use on your vehicle’s paint.
• Preparing the Surface
Before you begin the rust removal process, ensure that the affected area is clean and free from debris.
- Wash the vehicle thoroughly using a sponge or microfiber cloth with soapy water.
- Rinse off the soapy water using a hose or clean water.
- Dry off the vehicle using a clean, dry towel.
- Inspect the rusted area for dust or residue, and rewash if necessary.
• Applying the Rust Remover
Once the surface is clean, you can now proceed to apply the rust remover.
- Dampen a corner of the sponge or microfiber cloth with the rust remover.
- Gently rub the rusted area in a circular motion, applying light pressure.
- Ensure that you only work on the rusted area, avoiding the surrounding paint.
- Reapply the rust remover to the cloth when needed, and continue until the rust is gone.
Note: Some rust removers may require you to leave them on the surface for a specified period. Always follow the product’s instructions.
• Rinsing and Drying the Treated Area
After removing the rust, it is time to rinse and dry the area.
- Use the hose or bucket of clean water to rinse off the rust remover.
- Pat the treated area dry using the clean, dry towel.
• Protecting the Paint
Finally, apply a good quality car wax or paint sealant to the treated area. This will provide protection from the elements and further rust formation.
- Apply the wax or sealant according to the product’s instructions.
- Buff the treated area to a shine, ensuring even coverage.
- Allow the wax or sealant to cure for the recommended time.
By following these steps, you can efficiently remove surface rust from your vehicle without causing damage to the paintwork. Regular maintenance and protective measures will help prevent further rust issues in the future.
Step | Method |
|---|---|
1 | Wash the area with a car wash soap to remove any dirt or debris. |
2 | Dry the area thoroughly with a clean microfiber towel. |
3 | Apply a rust remover product designed for use on painted surfaces, such as a rust converter or a clay bar. |
4 | Follow the manufacturer’s instructions for using the rust remover product, which may include rubbing the product onto the rusted area and allowing it to sit for a specified period of time. |
5 | Use a soft, clean cloth to remove the rust and rust remover product from the painted surface. |
6 | Rinse the area thoroughly with water to ensure all rust and rust remover residue is gone. |
7 | Apply high-quality car wax to the treated area to protect the paint and prevent future rust formation. |
Preventing Rust Development Beneath Paint
Rust is the common term for the chemical process known as oxidation, which occurs when iron or an alloy that contains iron (like steel) is exposed to oxygen and moisture. Rust can not only be unsightly but also weaken the structure of the metal, leading to potential safety hazards.
Preventing rust from coming through paint is a significant concern for those who own metal structures, automobiles, and other metal items.
• Understanding the Rusting Process
Before diving into the solutions, it’s helpful to understand why rust forms and how it progresses. Rust is an electrochemical process where iron reacts with oxygen in the presence of moisture to form iron oxide. This iron oxide is what we commonly recognize as rust.
The rusting process tends to be self-perpetuating because, as the surface layer of rust forms, it can trap more moisture, leading to further rusting underneath. This continuous cycle eventually causes the metal to weaken and can lead to holes and structural failure.
• Choosing the Right Paint to Prevent Rust
The first line of defense against rust is selecting the right paint to protect the metal surface. When it comes to fighting rust, not all paints are created equally. Here are some essential factors to consider when selecting paint for rust prevention:
1. Primer
A rust-inhibiting primer is crucial in preventing rust from forming or continuing to deteriorate the metal underneath the paint. The primer acts as a barrier that seals off the metal from moisture, preventing the oxidation process.
It also provides a better surface for the paint to adhere to, ensuring that the paint stays intact and continues providing protection against rust. Choose a primer specifically designed for metal surfaces, preferably one with rust-inhibiting properties.
2. Rust-Inhibiting Paint
Using high-quality rust-inhibiting paint can also prevent rust from coming through. These paints often contain zinc, an element known for its ability to protect metal surfaces from rust by providing a sacrificial layer.
When zinc reacts with moisture and oxygen, it forms a layer of zinc oxide that protects the metal underneath.
Some highly recommended rust-inhibiting paints are epoxy-based paints, which provide excellent durability, adhesion, and resistance to chemicals and moisture.
Another popular choice is polyurethane-based paints, known for their flexibility, resistance to UV rays, and excellent corrosion protection.
3. Topcoat
Adding a topcoat or sealer after applying the rust-inhibiting paint is another layer of protection against rust. The topcoat seals the paint and provides a barrier against ultraviolet (UV) rays, moisture, and other elements that can cause paint to deteriorate and expose the metal to rusting.
Opt for a topcoat that is suitable for use with the rust-inhibiting paint and the environment in which the metal structure or object will be placed.
• Proper Surface Preparation
Thorough surface preparation is vital for successful rust prevention. The surface must be free of any rust, loose paint, oil, dirt, and other contaminants before applying primer and paint. Here’s how to properly prepare a metal surface for rust prevention:
1. Remove Rust
Remove any existing rust using a wire brush, sandpaper, or an electric sander for larger surfaces. Be sure to address even the smallest rust spots, as they will continue to grow if not removed.
For severe rust issues, consider using a rust converter, a chemical solution that converts the rust into a more stable and paintable surface.
2. Clean Surface
Once you have removed all visible rust, it’s essential to clean the surface thoroughly. Use a degreaser to remove any oil, grease, and dirt from the metal surface. Follow this by wiping the surface with a clean cloth soaked in a metal-prep solvent to eliminate any remaining residue and contaminants.
3. Protect Unpainted Areas
If you’re working on a structure or object with both painted and unpainted surfaces, cover the painted areas with masking tape or plastic to protect them from primer and paint.
With the surface appropriately prepared, you can now apply the primer, rust-inhibiting paint, and the topcoat as recommended by the paint manufacturer.
• Regular Maintenance
To keep rust at bay, it’s essential to regularly inspect the painted surfaces for any signs of damage or rust formation.
If you notice any peeling paint, cracks, or rust spots, it’s crucial to address them as soon as possible. Remove the rust and affected paint, and then follow the surface preparation and painting steps provided earlier.
By choosing the right paint, properly preparing the surface, and maintaining the painted surfaces, you can effectively stop rust from coming through the paint and prolong the life of your metal structures and objects.
For more information and resources about rust prevention, visit the National Association of Corrosion Engineers (NACE) International website, a non-profit organization dedicated to protecting people, infrastructure, and the environment from the effects of corrosion.
Step | Action |
|---|---|
1 | Remove loose rust using a wire brush or sandpaper. |
2 | Clean the surface using a cloth and a mild detergent solution to remove dirt, grease, and dust. |
3 | Apply a rust converter or rust-inhibiting primer to the affected area following the manufacturer’s instructions. Allow the primer to dry completely. |
4 | Apply a high-quality paint or topcoat that is suitable for metal and offers rust protection. Follow the manufacturer’s instructions for the recommended number of coats and drying time. |
5 | Regularly check and maintain the painted surface to ensure the rust does not reappear. This may involve cleaning, touching up paint, or applying an additional protective coating as needed. |
Effective Surface Rust Removal Prior to Painting
Rust, also known as iron oxide, is a common issue for metal surfaces. Removing surface rust before painting is essential to ensure your paint job is long-lasting, high-quality, and professional in appearance.
• Safety First: Protective Gear and Precautions
Before beginning any rust removal or painting project, ensure that you are wearing appropriate protective gear. This includes:
- Safety glasses or goggles
- Gloves
- Long-sleeved clothing
- Dust mask or respirator (especially if using chemical rust removers)
Furthermore, work in a well-ventilated area, as some rust removal methods can create dust or fumes that could pose respiratory hazards.
• Step 1: Assess the Rust
Before planning your rust removal strategy, evaluate the rusted area to determine the appropriate technique. Light surface rust can often be removed using simple manual or mechanical methods, while deeper rust may require the use of chemicals or specialized tools.
• Step 2: Choose Your Rust Removal Method
– Manual Methods for Light Surface Rust
For light surface rust, consider manual techniques like sandpaper (80-120 grit), steel wool, or abrasive pads, such as Scotch-Brite. Begin by rubbing the rusted area with firm pressure and periodically checking the surface to ensure that the rust is removed uniformly.
If necessary, move on to progressively finer abrasives to achieve a smooth finish.
– Mechanical Methods for Moderate Surface Rust
For moderate surface rust, mechanical methods like wire brushes, sanding discs, and angle grinders can be effective. Using these tools, follow a similar procedure with manual methods: start with coarser abrasives and move to finer ones as needed.
For instance, begin with a wire brush, followed by a sanding disc, and finish with a fine-grit sandpaper. Be cautious not to damage or gouge the underlying metal while using these tools.
The Environmental Protection Agency’s guidance on abrasive blasting provides further information on preventing environmental harm during the rust removal process.
– Chemical Methods for Deep Rust
For deep rust, chemical rust removers can help dissolve stubborn corrosion. These products are typically applied via a brush or spray, followed by a waiting period to allow the chemicals to penetrate the rust.
After the recommended waiting period, use a scraper or steel wool to remove the loosened rust.
It is essential to read and follow the manufacturer’s instructions regarding the application, safety precautions, and disposal of chemical rust removers.
• Step 3: Cleaning the Surface
After rust removal, thoroughly clean the surface with a degreasing cleaner and a clean cloth. This process ensures that any remaining dust, rust particles, or grease are removed before painting, helping the paint adhere better and resulting in a superior finish.
• Step 4: Apply a Rust Converter
If any remaining rust is unreachable by the previous methods, a rust converter can be applied after cleaning the surface. A rust converter is a chemical substance that reacts with rust to form a stable, paintable surface.
Follow the manufacturer’s instructions for applying and proper waiting times before continuing.
• Step 5: Prime and Paint
Finally, apply a high-quality, rust-inhibiting primer to seal the surface and provide a solid base for the paint. Once the primer is dry, apply the desired paint according to the manufacturer’s recommendations.
• Additional Tips for Success
- Always test your chosen rust removal method on a small, inconspicuous area of the metal surface before applying to the main area.
- Take your time when removing rust; rushing the process may result in damage to the underlying metal or an uneven finish.
- Regular maintenance, such as using a protective coating or rust-inhibiting paint, can help prevent future rust and prolong the life of your paint job.
In conclusion, removing surface rust before painting is a crucial step in achieving professional, long-lasting results. By following the techniques detailed in this article and investing in the proper tools and safety measures, you can tackle rust removal with confidence and expertise.
Discover Solutions for Dissolving Surface Rust
• Introduction to Rust Dissolution
Rust is a common issue that affects metals, especially iron and steel. It occurs as a result of the chemical reaction between the metal surface, the surrounding oxygen, and the presence of moisture.
When rust formation starts, it can spread quickly, causing permanent damage to the metal. Therefore, it is crucial to take action and dissolve the rust as soon as it is detected.
• Natural Rust Dissolvers
– White Vinegar
White vinegar is a natural and easily accessible rust dissolver that can be found in most households. It is an acetic acid solution that helps in breaking down and dissolving rust from the metal surface.
To use white vinegar, simply submerge the rusty object in the liquid and let it soak for a few hours or overnight, depending on the severity of the rust. Once the rust is dissolved, scrub the surface with a brush or an abrasive pad to remove the remaining rust particles.
Finally, rinse the object with water, and dry it thoroughly to prevent further rust formation.
– Lemon Juice and Salt
Lemon juice, which contains citric acid, when combined with salt, serves as a potent natural rust dissolver. The citric acid helps in breaking down the rust, while the salt aids in the removal process.
To use this method, first, sprinkle a layer of salt over the rusted area. Then, squeeze lemon juice over the salt, making sure the area is fully covered. Allow the mixture to sit for a few hours, periodically adding more lemon juice to keep the area moist.
After some time, scrub the surface with a brush or scouring pad, rinse with water, and dry the object thoroughly.
– Baking Soda and Water
Baking soda mixed with water can also be used to dissolve surface rust. The mildly abrasive nature of baking soda aids in removing rust without damaging the metal surface.
To use this solution, mix baking soda with water to form a thick paste. Apply the paste onto the rusted area and let it sit for a few hours. Once the paste is dry, scrub the area with a brush or a pad, rinse with water, and promptly dry the object.
• Commercial Rust Removers
– Phosphoric Acid
Phosphoric acid is a popular ingredient in many commercial rust removers due to its excellent rust-dissolving properties. It works by converting iron oxide (rust) into iron phosphate, which is a water-soluble compound that can be easily wiped away.
When using phosphoric acid-based rust removers, always follow the manufacturer’s instructions for proper application and safety measures. It is advisable to wear gloves and eye protection, as the acid can cause skin irritation and damage the eyes.
– Oxalic Acid
Oxalic acid is another effective rust-dissolving agent used in many rust removal products. It reacts with rust, breaking it down for easy removal.
Like phosphoric acid, oxalic acid should be used with caution, following the manufacturer’s guidelines, and wearing appropriate personal protective equipment.
Naval Jelly is a gel-based rust remover containing phosphoric acid, designed to be applied directly onto the rusted surface. It is thick and adheres well to vertical surfaces, making it a popular choice for treating rust on items that cannot be submerged in liquid solutions.
To use Naval Jelly, apply it evenly to the rusted surface and let it sit for the recommended time, usually 5-10 minutes. Afterward, scrub the area with a brush, rinse with water, and dry the object thoroughly.
• Protective Measures and Maintenance
Once the rust has been dissolved and removed, it is essential to take steps to prevent it from reoccurring. Some recommendations include the following:
- Applying a coat of rust-inhibiting primer or paint to protect the metal surface.
- Using a moisture-absorbing product to control the humidity in the storage area.
- Regularly inspecting and cleaning the metal objects to ensure they remain rust-free.
• Conclusion
Dissolving surface rust can be done using both natural and commercial rust dissolvers. Choosing the right solution depends on the severity of the rust, the type of metal, and personal preference.
When dealing with rust, prompt action is crucial to prevent further damage to the metal, and taking preventative measures will ensure the problem doesn’t resurface.