Strip Away Paint Flakes And Surface Rust. What Pros Say
Are you tired of staring at those unsightly paint flakes and surface rust on your beloved items? Worry no more, as we have the perfect solution for you! With our expert guidance, you’ll strip away those pesky flakes and rust in no time, revealing a renewed and aesthetically pleasing surface beneath.
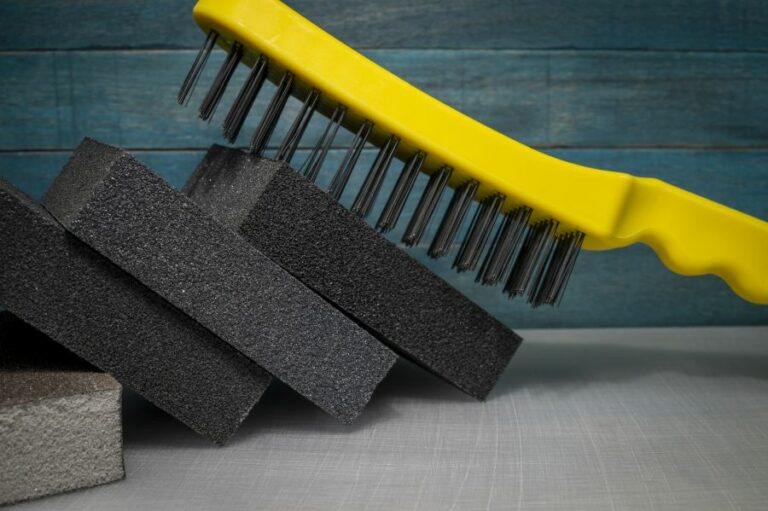
Strip away paint flakes and surface rust:>
Stripping paint flakes and surface rust from metals is crucial for preventing corrosion, peeling and maintaining aesthetics. To remove paint and rust, gather essential tools, such as safety goggles, gloves, a wire brush, sandpaper, rust remover solution, and paint scraper. Work in a well-ventilated area, using a scraper or wire brush to remove paint flakes and sandpaper or rust remover solution for rust. Afterward, prepare the surface for repainting, apply a rust inhibitor, and repaint as desired.

Discover how to effectively remove paint flakes and surface rust for a smooth and durable finish! In this comprehensive guide, we’ll share expert tips, product recommendations, and step-by-step instructions to get the job done right.
Read on for proven methods, techniques, and top tools for tackling paint and rust issues like a pro!
Contents
- 1 Eliminate Paint Flakes and Surface Rust Effectively
- 2 Techniques for Removing Rust Flakes from Paint
- 3 Effective Removal of Surface Rust on Painted Areas
- 4 Solutions to Dissolve and Clear Surface Rust
- 5 Surface Rust Removal and Prepping for Repainting
- 5.1 • Identifying Surface Rust
- 5.2 • Gathering Supplies
- 5.3 • Step 1: Remove Loose Rust with a Wire Brush
- 5.4 • Step 2: Sand the Surface
- 5.5 • Step 3: Apply Rust Converter or Rust Remover Solution
- 5.6 • Step 4: Clean the Surface
- 5.7 • Step 5: Apply Primer
- 5.8 • Step 6: Paint the Surface
- 5.9 • Step 7: Apply Clear Coat (Optional)
- 5.10 • Final Thoughts
Eliminate Paint Flakes and Surface Rust Effectively
• Importance of Removing Paint Flakes and Rust
Stripping away paint flakes and surface rust from various materials, particularly metals, is an essential maintenance task. Neglecting this process can lead to severe damage to the material due to the following:
- Corrosion: The presence of rust indicates that the metal is corroding. If left untreated, the corrosion may spread, weakening the structure and jeopardizing its integrity.
- Peeling: When paint flakes off the surface, the protective layer is lost and exposes the material to environmental factors leading to further flaking and eventual peeling off the paint.
- Aesthetics: Rust and flaking paint diminish the visual appeal of the structure or object, which could negatively impact its value.
• Preparing for the Process
Before we begin the process of stripping away paint flakes and surface rust, it is crucial to gather the necessary tools and equipment. Standard items include:
- Safety goggles
- Protective gloves
- Wire brush
- Sandpaper (varying grits)
- Rust remover solution
- Paint scraper
- Plastic sheeting (for the work area)
- Paint stripper (if necessary)
- Respirator (if using chemical paint stripper)
Always work in a well-ventilated area and follow the directions and safety precautions provided by the manufacturers of the rust remover solution and paint stripper.
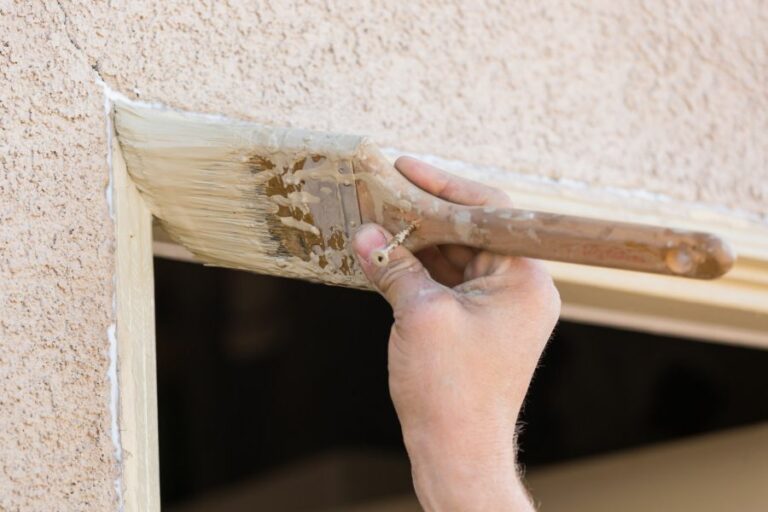
• Removing Paint Flakes
– Using a Paint Scraper
- Begin by putting on your safety goggles and gloves.
- Place the paint scraper’s edge against the surface at a 30-degree angle.
- Apply pressure on the scraper and carefully slide it along the surface, peeling the paint flakes as you go.
- Repeat the process, changing the direction of the scraping motion until the loose paint flakes have been removed.
– Using a Wire Brush
- Hold the wire brush firmly in one hand, maintaining a good grip without applying excessive pressure.
- Gently rub the wire brush over the surface, moving it in a circular motion and concentrating on the areas with paint flakes.
- After removing the majority of the flakes, switch to a finer-bristled brush or sandpaper to smooth the surface.
– Using a Paint Stripper
If the paint flakes are persistent or the paint is very old, consider using a paint stripper. Follow the manufacturer’s instructions for application and removal, ensuring proper ventilation and wearing a respirator if necessary.
• Removing Surface Rust
– Use a Wire Brush or Sandpaper
- Use a wire brush or coarse-grit sandpaper (80-120 grit) to remove larger patches of rust.
- Apply moderate pressure to the brush or sandpaper, working in a circular motion. Be careful not to scratch the underlying material.
- Switch to a finer-grit sandpaper (180-220 grit) to smooth the surface after the rust has been removed.
– Use a Rust Remover Solution
- Apply the rust remover solution to the affected area, following the manufacturer’s instructions. Depending on the solution, you may need to use a cloth, sponge, or brush to apply it to the surface.
- Allow the solution to work on the rust for the recommended amount of time.
- Remove the solution by rinsing or wiping the surface as directed. If the rust remains, repeat the process.
• Final Steps
After removing the paint flakes and surface rust, it’s essential to prepare the surface for repainting by sanding it to remove any remaining debris and smooth the surface. Start with medium-grit sandpaper (150-180) and work your way to a fine-grit (220-320) for a smoother finish.
Clean the surface thoroughly with a damp cloth, ensuring all dust and debris are removed. Allow the surface to dry completely before applying a rust inhibitor or primer, which will protect the surface from future corrosion and create a better surface for paint adhesion.
Repaint the surface as desired, following the recommendations for your chosen paint. If done correctly, your surface should now be refreshed and protected from further damage.
For more information and guidance on rust removal, visit the USDA Forest Service website. They provide a comprehensive guide on various rust removal techniques for different applications, ensuring you have the proper knowledge to tackle your specific project.
Techniques for Removing Rust Flakes from Paint
Removing rust flakes from paint is essential in maintaining the aesthetic appeal and overall health of your vehicle. If left untreated, rust can continue to grow, eventually causing significant and costly damage to your car’s paintwork.
• Identify the Affected Areas
Before you can remove rust flakes from your car’s paint, you must first identify the areas where rust has started to form. Look for small, discolored patches on your vehicle’s surface, as these may indicate the presence of rust.
Additionally, run your hand along the car’s body to feel for any rough or uneven areas, which could also signify rust formation.
• Gather Necessary Materials
In order to effectively remove rust flakes from paint, you will need to gather the following materials:
- A high-quality automotive soap
- A sponge or microfiber cloth
- A bucket of water
- A hose or source of running water
- A clay bar or clay bar alternative
- A rust converter
- Automotive touch-up paint (in the same color as your vehicle)
- Clear coat
- A lint-free cloth
• Clean the Affected Area
First, you will need to thoroughly clean the affected area using high-quality automotive soap. Mix the soap with water in a bucket and use a sponge or microfiber cloth to gently rub the rusting areas in a circular motion.
Rinse the area thoroughly with a hose or running water, ensuring no soap residue remains on the surface. Allow the area to dry completely before proceeding to the next step.
• Utilize a Clay Bar or Alternative
A clay bar or a clay bar alternative can be an effective tool in removing rust flakes from your vehicle’s paint. Ensure that your clay bar is properly lubricated with clay lubricant or a mixture of water and automotive soap.
Gently rub the clay bar over the rusted area using a back-and-forth motion. As the rust flakes come off, fold the clay bar to reveal a clean surface and continue the process until the rust has been removed. If you are using a clay bar alternative, follow the product instructions carefully.
For more information on how to use a clay bar, visit this helpful guide by Autogeek.
• Apply a Rust Converter
Once the rust flakes have been removed, it’s important to apply a rust converter to the affected area. A rust converter is a chemical solution that penetrates the rust and transforms it into a stable, paintable surface.
Apply the rust converter to the area according to the manufacturer’s instructions and allow it to dry completely.
• Touch-Up Paint and Clear Coat
After the rust converter has dried, it’s time to apply touch-up paint to further protect the affected area. Ensure that the touch-up paint matches your vehicle’s existing paint color. Apply the paint carefully, following the manufacturer’s instructions.
Allow the paint to dry for the recommended time before applying a clear coat. The clear coat will help to seal and protect the painted area, preventing future rust formation.
• Prevention Tips
To keep your vehicle looking its best and minimize the risk of rust formation, consider the following tips:
- Regularly wash your vehicle: Accumulated dirt, grime, and road salt can contribute to rust formation. Washing your vehicle regularly with an automotive soap will help to remove these contaminants and protect your paint.
- Inspect for and address paint chips: Paint chips expose the underlying metal to the elements, making it more susceptible to rust. Regularly inspect your vehicle for paint chips and promptly address them using touch-up paint.
- Park your vehicle indoors: Whenever possible, park your vehicle in a garage or other enclosed space to protect it from the elements and reduce exposure to moisture and temperature fluctuations.
In conclusion, removing rust flakes from paint requires diligence and attention to detail. By properly cleaning the affected area, using a clay bar, applying a rust converter, and touching up the paint, you can successfully remove rust flakes and preserve your vehicle’s appearance.
Don’t forget to take preventative measures to avoid future rust formation and keep your vehicle in top shape.
Step | Action |
|---|---|
1 | Wash the affected area with soap and water |
2 | Use a rust remover or rust converter product |
3 | Apply the product according to the manufacturer’s instructions |
4 | Scrub the rust with a nylon brush or fine steel wool |
5 | Wipe away the rust and residue with a clean cloth |
6 | Rinse with clean water and dry the surface |
7 | Apply touch-up paint if necessary |
Effective Removal of Surface Rust on Painted Areas
Surface rust on a painted surface can be a frustrating and unsightly issue. Whether it’s on your vehicle, outdoor furniture, or even a beloved garden ornament, it’s important to take swift action to remove it and prevent further damage.
• Identifying Surface Rust
The first step in tackling surface rust is to properly identify it. Surface rust is characterized by small reddish-orange spots that appear on top of the paint or an oxidized metal surface.
It’s crucial to address this issue promptly, as untreated rust can eventually corrode or undermine the integrity of the painted surface.
• Gathering the Necessary Supplies
To successfully remove surface rust from a painted surface, you will need the following items:
- Rubber gloves
- White vinegar
- Baking soda
- Soft cloth
- Toothbrush or small scrub brush
- Bowl or container
- Water
- Automotive touch-up paint (if necessary)
• Removing Surface Rust with Vinegar and Baking Soda
A popular and highly effective method of removing surface rust is by using a combination of white vinegar and baking soda. This natural, non-abrasive solution works by dissolving the rust and preventing future oxidation.
– Preparing the Vinegar and Baking Soda Solution
- Begin by mixing equal parts white vinegar and baking soda in a small container. Stir the mixture until it forms a thick paste.
- Dampen the soft cloth with water and gently wipe the rusted area to remove any loose particles.
– Applying the Solution
- Dip a clean toothbrush or small scrub brush in the vinegar-baking soda paste.
- Gently scrub the rusted area using circular motions, taking care to avoid damaging the paint.
- Allow the paste to sit on the rust for 15-20 minutes.
– Cleaning and Assessing
- Rinse the rusted area thoroughly with water, ensuring that all paste residue is removed.
- Dry the area completely with a clean, soft cloth.
- Assess the area for any remaining rust. If rust is still present, repeat steps 3-7 as needed.
– Optional: Touch-up Paint Application
- Depending on the paint’s condition, you may need to apply touch-up paint to the area after the rust-removal process is complete. This will help to protect the painted surface from future rusting.
• Preventing Surface Rust on Painted Surfaces
Once you’ve successfully removed the surface rust, it’s critical to take preventative measures that can help protect your painted surfaces from future rust issues.
- Regularly inspect your painted surfaces for any signs of rust, chipped paint, or weather-related wear.
- Keep your painted surfaces clean and free of debris, as dirt and moisture can accumulate, leading to rust formation.
- Apply a high-quality paint sealant or wax to create a protective barrier against moisture and contaminants.
- Store your painted items, such as outdoor furniture or vehicles, in a dry, climate-controlled environment whenever possible.
According to the U.S. Department of Energy, taking proper care of your painted surfaces can not only prevent rust but also preserve the original appearance and functionality of the item.
• Conclusion
Surface rust on painted surfaces can be an unsightly and potentially damaging issue if left untreated. By using vinegar and baking soda solution and following the steps provided, you can effectively remove surface rust without damaging the underlying paint.
Furthermore, by taking preventative measures like regular inspections, maintaining cleanliness, and applying protective sealants, you can help ensure that rust issues don’t resurface on your cherished painted possessions.
| How to Remove Surface Rust from a Painted Surface | |
|---|---|
| Step 1 | Wash the painted surface with water and a mild detergent to remove dirt and debris. |
| Step 2 | Use a rust converter or rust remover product, following the manufacturer’s directions, to treat the rusted area. |
| Step 3 | Gently scrub the rusted area with a soft bristle brush or a non-abrasive sponge to remove the rust. |
| Step 4 | Rinse the treated area with water, then let it dry completely. |
| Step 5 | Apply a coat of primer to the surface, following the manufacturer’s instructions, to prevent rust from reoccurring. |
| Step 6 | Repaint the surface with a matching color paint to restore the original appearance. |
Solutions to Dissolve and Clear Surface Rust
Rust removal is an essential process for maintaining metal objects and surfaces exposed to elements that promote oxidation. Let’s discuss effective methods and substances that can dissolve surface rust and help you restore your rusty items to their original shine.
– Understanding Rust Formation
Before we get into the rust-dissolving substances, it’s essential to comprehend rust formation briefly. Rust forms when iron or steel comes into contact with both water and oxygen, triggering an electrochemical reaction known as oxidation.
The result of this reaction is commonly called “rust” and is scientifically known as “hydrated iron(III) oxide.”
– White Vinegar: A Natural Rust Remover
One of the most common rust-dissolving agents is distilled white vinegar. The acetic acid in vinegar acts as a mild corrosive against rust, dissolving it over time.
How to use white vinegar for rust removal:
- Pour white vinegar into a container that can completely submerge the rusted item. If the rusted object is too large, you can use a spray bottle to apply the vinegar to the surface.
- Allow the item to soak in the vinegar for several hours or even overnight. You may observe the rust discoloring the vinegar solution and releasing from the object’s surface.
- Remove the object from the vinegar solution and use a scrubbing pad, steel wool, or a wire brush to eliminate any remaining rust gently.
- Rinse the object with water and immediately dry it thoroughly to avoid new rust formation.
Although white vinegar is a natural, eco-friendly option to dissolve surface rust, it’s not suitable for some delicate metals or items with painted surfaces as it might damage them.
– Baking Soda: A Mild but Effective Rust Remover
Another household product that can effectively dissolve surface rust is baking soda (sodium bicarbonate).
How to use baking soda for rust removal:
- Mix baking soda with water to form a thick paste.
- Apply the paste on the rusty surface using a spatula or cloth and let it sit for a few hours.
- Use a scrub brush or an old toothbrush to scrub the paste into the rusty areas gently.
- Rinse the object with water and dry it immediately.
Baking soda is a gentle and mild rust remover suitable for delicate materials, but it might not be useful in tackling severe rust cases.
– Commercial Rust Removers: Powerful Solutions for Stubborn Rust
In some instances, you may require a powerful solution to dissolve surface rust. There are many commercial rust removers available in the market that contain chemicals like oxalic acid, phosphoric acid, or hydrochloric acid that effectively dissolve rust.
Some popular commercial rust removers include:
- Evapo-Rust
- WD-40 Rust Remover Soak
- CLR Calcium, Lime & Rust Remover
How to use commercial rust removers:
- Read and follow the manufacturer’s instructions for the specific rust remover you have chosen.
- Wear protective gloves and eyewear to shield yourself from the chemicals.
- Apply the rust remover to the rusty surface or soak the rusted object in the solution, depending on the product.
- Allow the rust remover to work for the recommended time.
- Rinse the item with water and dry it thoroughly.
While commercial rust removers are effective at dissolving surface rust, some may also cause damage to specific metals or painted surfaces. It’s crucial to follow the manufacturer’s guidelines and test it on a small hidden area before applying it to the entire object.
– Citric Acid: Another Alternative for Rust Dissolving
Citric acid, commonly found in fruits like oranges and lemons, can also help dissolve surface rust.
How to use citric acid for rust removal:
- Fill a container with warm water.
- Add citric acid powder (available in many supermarkets) to the water and stir until it dissolves. The amount of citric acid needed depends on the severity of the rust; you may start with 1-2 tablespoons per quart of water.
- Submerge the rusty object in the citric acid solution for a few hours or overnight.
- Remove the object from the solution and use a scrubbing pad or brush to remove any remaining rust.
- Rinse the object with water and dry it immediately.
Citric acid is a natural, eco-friendly rust-dissolving substance. However, similar to white vinegar, it might not be suitable for all metals or painted surfaces.
• Conclusion
There are many ways to dissolve surface rust, ranging from natural substances like white vinegar and citric acid to commercial rust removers. While these methods are effective, prevention is still the best approach to dealing with rust.
To prevent rust formation, avoid exposing metals to moisture and humidity, apply protective coatings like paint or wax to metal objects, and store them in dry, cool areas.
For additional information on rust removal techniques and prevention, you may consult the United States Department of Agriculture’s guide on rust prevention and removal.
Surface Rust Removal and Prepping for Repainting
• Identifying Surface Rust
Before you begin the rust removal process, it is essential to identify the extent of rust on the metal surface. Surface rust is typically seen as a thin, flaky layer of oxidized metal that can be removed relatively easily.
This type of rust should not have penetrated deep into the metal and will not affect the overall structure or strength of the surface.
If you notice that the rust has developed into deep pits or has caused structural damage, you may need to consult with a professional or consider replacing the damaged parts.
• Gathering Supplies
To remove surface rust and prepare for painting, you will need a few essential tools and materials:
- Wire brush or steel wool
- Sandpaper (80-grit and 120-grit)
- Rust converter or rust remover solution
- Clean cloth or rags
- Primer
- Paint (designed for use on metal surfaces)
- Clear coat (optional)
- Safety gear: gloves, safety glasses, and a dust mask
With your supplies ready, you can now start the rust removal process.
• Step 1: Remove Loose Rust with a Wire Brush
Wearing safety glasses and gloves, use a wire brush or steel wool to scrub the rusted area vigorously. The goal here is to remove any loose or flaky rust without causing damage to the surface.
If the rusted area is large or there is a significant amount of rust, you can use a wire wheel attached to a drill or angle grinder for a quicker and more efficient removal process.
Remember to work in a well-ventilated area while wearing a dust mask to avoid inhaling rust particles.
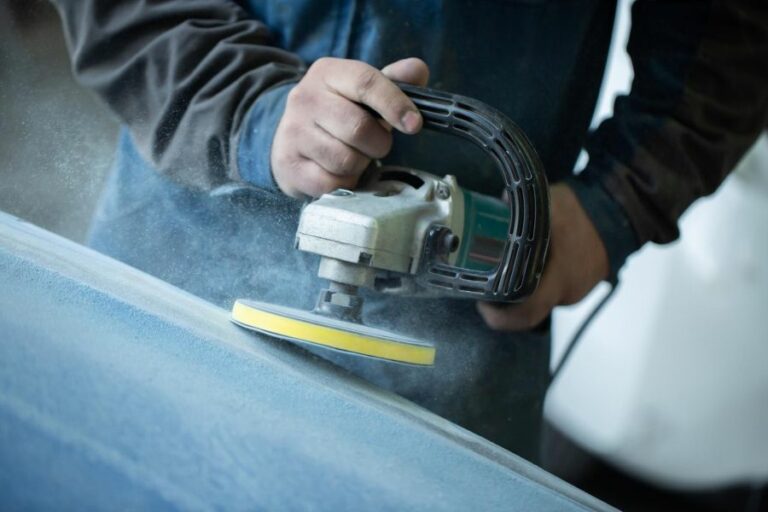
• Step 2: Sand the Surface
After removing the loose rust, use 80-grit sandpaper to sand the rusted area thoroughly. The objective here is to remove any remaining rust and create a smooth surface for the paint to adhere to.
Once the rust has been removed, switch to 120-grit sandpaper to further smooth the surface and remove scratches left by the coarser sandpaper.
• Step 3: Apply Rust Converter or Rust Remover Solution
Now that the surface is free of rust, you can apply a rust converter or rust remover solution to the affected area. These products chemically react with the remaining rust, neutralizing it and creating a stable surface for painting.
Follow the manufacturer’s instructions for applying the rust converter or rust remover solution, as the process may vary between products.
• Step 4: Clean the Surface
Using a clean cloth or rag, wipe down the entire surface to remove any dust, debris, or residue from the rust removal process. An automotive cleaner can be used to ensure a more thorough clean, but make sure the surface is completely dry before moving on to the next step.
A link that could be useful to readers is the U.S. Environmental Protection Agency (EPA) website, where you can find information on preventing corrosion in water pipes – a common cause of surface rust in certain environments.
• Step 5: Apply Primer
With the surface clean and dry, it’s time to apply a primer designed for use on metal surfaces. The primer will help the paint adhere correctly to the surface and provide a protective barrier against future rusting.
Follow the manufacturer’s instructions for application and drying time before moving on to the next step.
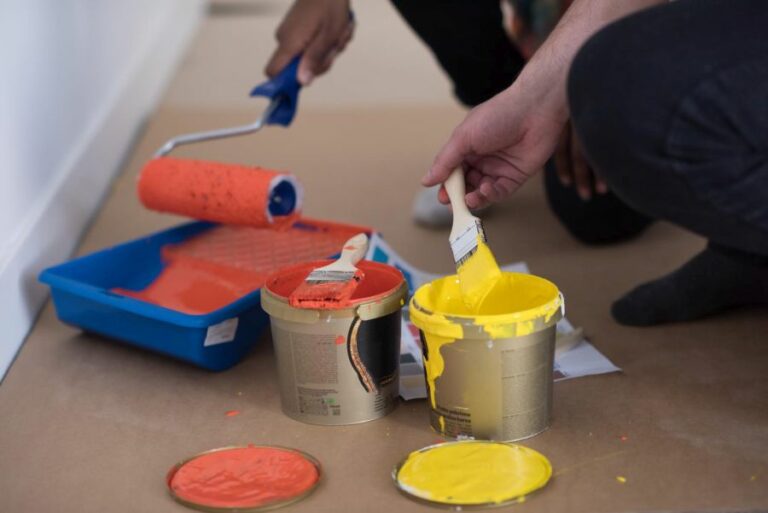
• Step 6: Paint the Surface
Once the primer has dried, you can finally apply the paint to the metal surface. Choose a paint specifically designed for use on metal surfaces, as this will ensure long-lasting protection and durability.
Apply the paint in thin, even coats, allowing each coat to dry fully before applying the next. The number of coats required may vary depending on the paint, so follow the manufacturer’s guidelines.
• Step 7: Apply Clear Coat (Optional)
If desired, you can apply a clear coat to the painted surface for added protection and a glossy finish. This step is optional, as the paint alone should provide adequate protection against rust.
Like with the primer and paint, follow the manufacturer’s instructions for applying the clear coat and allowing it to dry.
• Final Thoughts
By following these steps, you can effectively remove surface rust and prep the metal for paint, ensuring a long-lasting and rust-free finish. Regular maintenance and inspection can help prevent future rust development, prolonging the life of your metal surfaces.
Step | Description |
|---|---|
1 | Assess the extent of surface rust and determine the appropriate removal method. For minimal rust, a simple hand sanding might suffice. More extensive rust may require power tools or chemical treatments. |
2 | Remove the surface rust using the chosen method. This could include sandpaper, wire brushes, sandblasting, or an angle grinder. If using chemical treatments, follow the manufacturer’s instructions carefully. |
3 | Thoroughly clean the surface after rust removal, wiping away all dust and debris. Use a degreaser or denatured alcohol to ensure the surface is free from contaminants that could impair paint adhesion. |
4 | Apply a primer to the metal surface to provide a good base for the paint. Choose a primer designed specifically for metal applications and, if necessary, a rust-inhibiting primer. Follow the manufacturer’s instructions for application and drying times. |
5 | After the primer has dried, lightly sand the surface to ensure a smooth finish for the paint. Wipe the surface clean of dust and debris. |
6 | Apply your chosen paint, following the manufacturer’s instructions for the appropriate number of coats and drying times. Consider using a paint designed specifically for metal surfaces and one that includes rust protection. |
7 | Once the paint is dry, apply a clear coat or top coat, if desired, to further protect the surface against future rust and wear. Allow this coat to dry according to the manufacturer’s instructions. |