How To Prep Textured Surfaces For Paint, What Pros Say
Tackling a painting project with textured surfaces can seem daunting, but with the right approach and proper preparation, you can confidently achieve a flawless finish. We’re here to guide you through the essential steps to prep textured surfaces for paint, ensuring a smooth and professional outcome.
How to prep textured surfaces for paint:
To prep textured surfaces for painting, inspect for damages and repair cracks and holes using filler or caulk. Clean the surface by dusting and washing with a mild detergent solution. Optionally, sand and smooth the surface with a joint compound. Apply primer for uniform color and optimal paint adhesion. Choose appropriate paint and equipment, and apply the paint evenly.

Ready to refresh those textured surfaces? Our step-by-step guide will walk you through the process of prepping and priming for a beautiful and lasting finish. Read on for expert tips and tricks to ensure your paint job stands the test of time.
Contents
- 1 Preparing Textured Surfaces for Painting: A Guide
- 2 Painting on Textured Surfaces: Tips and Techniques
- 3 Applying Paint Over Textured Surfaces: Dos and Don’ts
- 4 Textured Wall Painting Preparation: Step-by-Step
- 5 Cleaning Textured Walls Prior to Painting: Best Practices
- 5.1 • Gather Your Cleaning Supplies
- 5.2 • Clear the Area and Remove Dust and Cobwebs
- 5.3 • Mix a Cleaning Solution
- 5.4 • Clean the Textured Surface
- 5.5 • Rinse and Dry the Wall
- 5.6 • Inspect the Wall and Address Any Remaining Issues
- 5.7 • Apply a Quality Primer
- 5.8 • Follow Best Practices for Painting Textured Walls
Preparing Textured Surfaces for Painting: A Guide
When painting textured surfaces, proper preparation is crucial to ensure a smooth, even finish.
• Assess the Surface Condition
Begin by inspecting the textured surface for any damage or inconsistencies, such as cracks, loose texture, or uneven areas. Address any issues as follows:
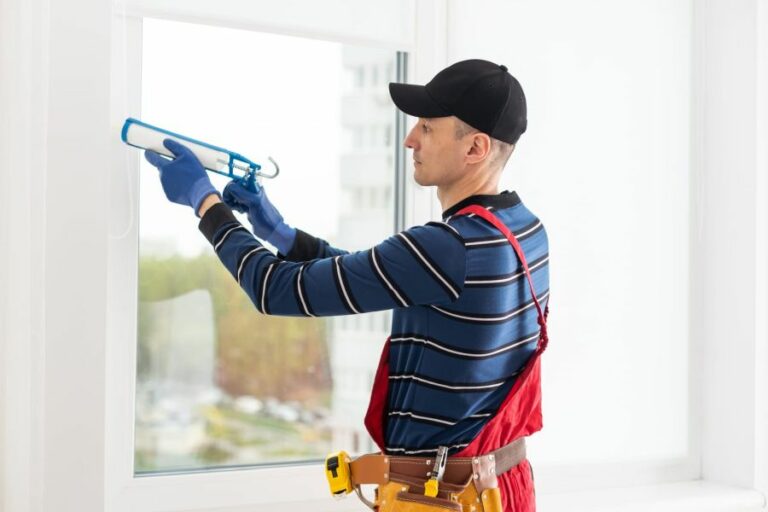
– Repair Cracks and Holes
- Widen the crack slightly using a utility knife or scraper. This will help the filler adhere more securely.
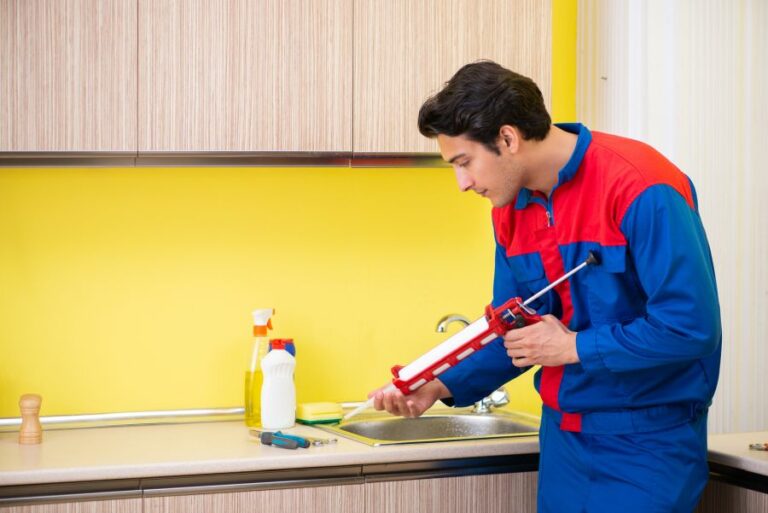
- Apply a flexible, paintable filler or caulk to the crack, smoothing it out with a putty knife.
- Allow the filler to dry completely according to the manufacturer’s recommendations.
- Lightly sand the filled area using fine-grit sandpaper to ensure a smooth surface.
– Fix Loose or Damaged Texture
- Remove any loose or damaged texture material using a scraper or utility knife.
- Apply a premixed texture compound to the affected area, following the manufacturer’s instructions.
- If the surface has a specific pattern, such as a knockdown or orange-peel texture, use a texture brush or roller to replicate the pattern.
- Allow the texture to dry completely before proceeding.
For more information on repairing textured surfaces, refer to the Family Handyman guide.
• Clean the Surface Thoroughly
Dirt, grease, and dust can interfere with the adhesion of paint to a textured surface. To ensure proper paint application, clean the surface using the following steps:
- Dust the surface using a vacuum cleaner with a brush attachment or a microfiber cloth.
- Mix a gentle cleaning solution in a bucket consisting of one gallon of warm water and one cup of mild dish detergent.
- Using a sponge or soft cloth, wash the surface with the cleaning solution.
- Rinse the surface with clean water, then allow it to dry completely before proceeding.
• Smooth the Surface (Optional)
If the existing texture is too pronounced or rough, you may choose to smooth it out before painting. Here’s how:
- Lightly sand the surface using fine-grit sandpaper or a sanding sponge.
- If needed, apply a thin coat of joint compound to the surface using a wide putty knife.
- Allow the joint compound to dry, then sand it smoothly using fine-grit sandpaper.
- Wipe away any dust using a tack cloth or microfiber cloth.
• Apply Primer
Applying a primer is crucial for achieving a uniform color and optimal paint adhesion. Choose the right primer for the surface material (e.g., drywall, plaster, or masonry) and follow these steps:
- Stir the primer thoroughly before use.
- Pour the primer into a paint tray or bucket equipped with a paint grid.
- Apply the primer to the textured surface using a roller with a nap thickness appropriate for the texture (usually 1/2″ to 3/4″ nap).
- Use a brush to reach corners and edges or areas that the roller cannot access.
- Allow the primer to dry according to the manufacturer’s recommendations.
• Choose the Right Paint and Equipment
Selecting the proper paint and tools is vital for a professional-quality finish. I recommend using high-quality acrylic-latex paint that is formulated for textured surfaces.
In addition, choose a roller with a nap thickness appropriate for the texture (usually 1/2″ to 3/4″ nap) and a high-quality paintbrush for cutting in and detail work.
• Apply the Paint
With the surface primed and the necessary tools at hand, you are now ready to apply the paint.
- Stir the paint thoroughly before use.
- Pour the paint into a clean paint tray or bucket equipped with a paint grid.
- Begin by cutting in along edges, corners, and trim using the paintbrush.
- Use the roller to apply paint to the textured surface, taking care to maintain a consistent application pressure.
- Allow the paint to dry according to the manufacturer’s recommendations.
If necessary, apply a second coat of paint to achieve the desired coverage and finish. Following these steps will ensure a smooth and even outcome, transforming your textured surface into a beautifully painted feature in your space.
Step | Instructions |
|---|---|
1 | Clean the surface: Remove any dirt, dust, or debris from the textured surface with a soft brush or vacuum cleaner. Wipe the surface with a damp cloth if needed. |
2 | Repair damages: Inspect the surface for any cracks, holes, or other damages. Use a textured patching compound or caulk to fill and repair these areas. Allow the repairs to dry completely before proceeding. |
3 | Use a primer: Apply a primer specifically designed for textured surfaces to ensure better paint adhesion and even coverage. Let the primer dry according to the manufacturer’s instructions. |
4 | Choose the right paint: Select the appropriate paint for the surface material and texture. Consider using paint with added primer for extra adhesion and coverage. |
5 | Use the right tools: A roller with a thick nap is recommended for textured surfaces to ensure even coverage. A brush or paint sprayer may also be used, depending on the texture and personal preference. |
6 | Begin painting: Apply the paint in a consistent and even manner, taking care to avoid drips or streaks. Multiple coats may be necessary to achieve the desired coverage and finish. Allow the paint to dry according to the manufacturer’s instructions. |
Painting on Textured Surfaces: Tips and Techniques
Painting over a textured surface can be a challenging task, but with the right guidance and tools, it can be successfully accomplished.
• Preparing the Surface
Before you begin painting over a textured surface, it is crucial to first prepare the surface. Skipping this step can result in an uneven and poor-quality finish.
– Cleaning the Surface
The first step is to clean the surface thoroughly. This can be done using a vacuum cleaner with a brush attachment or by wiping the surface with a damp cloth to remove any dirt, dust, or debris.
You can also use a mild detergent for stubborn stains or grease. Once clean, let the surface dry completely before proceeding.
– Repairing Damage
Check the textured surface for any damage, such as cracks or dents. If you find any damaged areas, repair them using the appropriate materials.
For example, use a ready-to-use filler to fill cracks and apply a primer over the repaired area to seal it. Allow the repairs to dry before moving on to the painting process.
– Priming the Surface
Applying a high-quality primer is essential when painting over a textured surface. A primer will help the paint adhere better to the surface and provide a smoother finish.
Use a roller or brush to apply the primer, ensuring full coverage of the surface. Allow the primer to dry completely before proceeding to paint.
• Choosing the Right Paint
Selecting the right paint for your textured surface is crucial. For best results, choose a paint with excellent coverage and durability. High-quality acrylic latex paint is a popular choice for textured surfaces because it provides excellent adhesion, dries quickly, and is easy to clean up.
• Painting Techniques for Textured Surfaces
There are several techniques that can be used to paint over a textured surface. The choice of technique will largely depend on the type of texture and the desired finish.
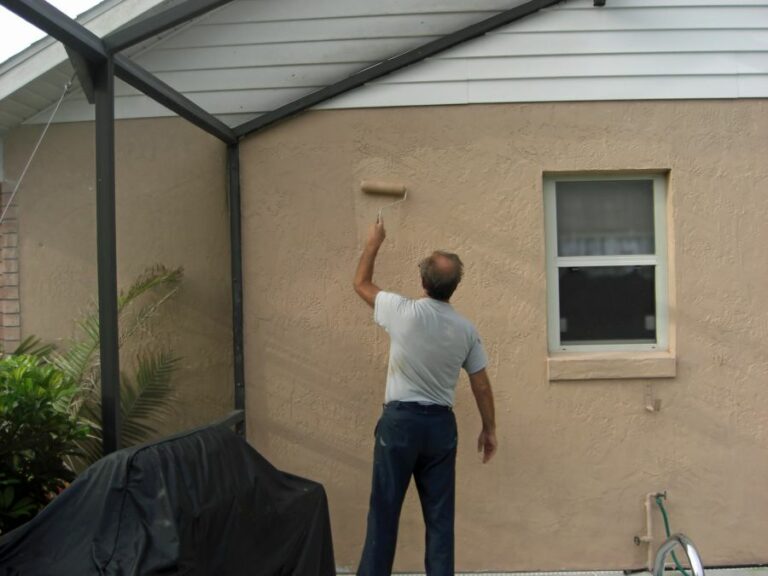
– Using a Roller
Using a roller is the most common method for painting textured surfaces. A roller designed specifically for textured surfaces, such as one with a long nap, will provide the best results. Begin by loading the roller with paint and applying it to the surface with even pressure.
Move the roller in a “W” pattern to achieve consistent coverage, and then use a horizontal or vertical motion to blend the paint.
– Using a Brush
In some cases, a brush may be more appropriate than a roller, particularly for smaller or more intricate textured surfaces. Use a high-quality, soft-bristle brush and load it with a moderate amount of paint. Apply the paint using a dabbing motion, ensuring the texture is fully covered. Be careful not to apply too much paint at once, as this can cause the texture to become filled in or obscured.
– Using an Airless Sprayer
For large textured surfaces, an airless sprayer can be an efficient painting method. This technique requires a well-ventilated area and proper safety gear, such as a respirator mask and goggles.
When using an airless sprayer, maintain a consistent distance from the surface and move the sprayer in smooth, even strokes. Make sure to overlap each stroke slightly to ensure proper coverage.
• Tips for Achieving a Seamless Finish
To achieve a seamless finish when painting over a textured surface, keep these tips in mind:
- Use high-quality materials and tools, such as premium paint, primer, and brushes/rollers.
- Take your time when applying paint, ensuring even coverage and blending.
- Allow ample drying time between coats of paint.
- Don’t be afraid to apply multiple coats of paint for better coverage and a smoother finish.
In conclusion, painting over a textured surface can be a challenging task, but by properly preparing the surface, selecting the appropriate materials and tools, and utilizing the correct techniques, you can achieve a professional and seamless finish.
Just remember to be patient and take your time throughout the process for the best possible results.
Step | Description |
|---|---|
1 | Clean the surface: Remove any dirt, dust, and debris from the textured surface by using a brush or vacuum cleaner. |
2 | Repair any damages: Fix any cracks, holes, or other damages on the surface using a patching compound or joint compound, and then sand the area smoothly. |
3 | Prime the surface: Apply a high-quality primer to the textured surface to ensure proper adhesion of the paint. Allow the primer to dry completely. |
4 | Choose the right paint: Select a high-quality paint suitable for textured surfaces. Flat or matte finishes are ideal for hiding imperfections. |
5 | Apply the paint: Use a paint roller with a thick-nap cover that can handle the texture of the surface. Apply the paint in a crisscross pattern to ensure full coverage. |
6 | Allow the paint to dry: Allow the first coat of paint to dry completely before applying a second coat, if needed, to ensure proper coverage and color consistency. |
7 | Cleanup and touch-ups: Once the paint has completely dried, clean up any paint spills and touch up any areas that may require additional coverage. |
Applying Paint Over Textured Surfaces: Dos and Don’ts
Painting over textured surfaces can seem daunting, but with the right techniques and guidance, it can be done successfully.
• Advantages Of Painting Over Texture
Painting over textured surfaces can be an excellent solution for those looking to update the appearance of their home without having to invest in a complete renovation or remodel. Here are some of the benefits:
– Time And Cost Saving
By opting to paint directly over texture, homeowners can achieve a refreshed and harmonious finish without needing to invest in costly removal or re-texturing processes.
This can be particularly advantageous in larger areas or rooms, as the necessary materials and labor can add up quickly.
– Flexibility
Painting directly over textured surfaces provides the creative freedom to choose from various colors, finishes, and techniques to personalize your space. Whether you’re looking to create a bold statement or something more subtle, the options are endless.
– Enhanced Aesthetic Appeal
Texture combined with a fresh coat of paint can add depth, dimension, and visual interest to an otherwise plain surface. As such, this approach can significantly enhance the aesthetic appeal of your home.
• Challenges Of Painting Over Texture
Despite its many advantages, painting over texture does present a few challenges. Here’s what to be mindful of:
– Uneven Paint Coverage
Painting over texture can sometimes result in uneven paint distribution, which can lead to a less-than-ideal finished appearance. This issue can be compounded if the texture is deep, irregular, or intricate.
– Chipping Or Peeling Paint
Depending on the type of texture applied, there may be a risk of chipping or peeling paint down the road. This is particularly relevant for homeowners looking to refurbish older textures or those with an unknown history.
To avoid this occurrence, proper surface preparation and the correct choice of paint and materials are crucial.
• Expert Tips And Techniques
To attain a professional finish when painting directly over texture, here are some recommendations from personal experience:
1. Cleaning And Preparation
Thoroughly clean all surfaces before you begin painting to ensure any dirt, dust, and debris are removed. This will provide an impeccable foundation for the paint, which in turn will result in a smooth and even finish.
Additionally, patch any cracks, dents, or damage with an appropriate filler, and follow with fine-grained sandpaper to create a smooth surface.
2. Priming
Applying a high-quality primer is an essential step for creating a uniform and consistent surface for your paint, particularly when painting over textured surfaces.
A primer with high adhesion properties will provide a superior base, allowing your chosen paint to adhere effectively and reduce the risk of chipping or peeling. Primer also helps to cover any existing colors or stains on the surface.
3. Choose The Right Paint And Tools
For textured surfaces, it’s essential to choose a paint with a higher viscosity, as these types of paints usually have superior self-leveling qualities that can help to evenly coat and cover the texture.
Additionally, select the appropriate tools for application, such as rollers or brushes specifically designed for textured surfaces. These tools can better navigate the textured surface and provide even coverage.
4. Painting Technique
Painting in one direction can help prevent visible streaks and irregularities when painting over textured surfaces.
It’s also crucial to use the appropriate amount of paint in order to achieve uniform coverage. Applying too little paint may lead to an uneven finish while applying too much can cause drips or pooling.
5. Multiple Coats
Applying multiple coats of paint may be necessary to achieve the desired finish, particularly for deep or irregular textures. Allow each coat to dry fully before proceeding with the next.
• Conclusion
While painting directly over textured surfaces can be challenging, it is undoubtedly a viable option for homeowners looking to refresh their spaces in a time- and cost-efficient manner.
By following the best practices outlined in this article, you can achieve a professional finish and enhance the overall aesthetic appeal of your home.
| Can You Paint Over Textured Surfaces |
|---|
| Yes, you can paint directly over texture. However, it is important to properly prepare the textured surface beforehand by cleaning and priming it, as well as using the correct type of paint and painting technique to achieve the best results. |
Textured Wall Painting Preparation: Step-by-Step
A textured wall can add a unique look to a room, but painting over it can be a daunting task. Here is a simple, step-by-step guide to preparing your textured wall for a fresh coat of paint.
• Gather the Necessary Supplies
Before you begin, gather the appropriate tools and materials:
- Protective gear: wear gloves, a dust mask, and safety goggles
- Sandpaper: 120-grit for lightly textured walls, 80-grit for heavily textured walls
- Sanding block or pole sander
- Tack cloth or damp rag
- Painter’s tape
- Drop cloths
- Acrylic primer
- Paint roller and brush
- High-quality paint
• Assess the Condition of the Wall
Examine the wall closely to determine the texture’s condition. If there are cracks, chips, or peeling paint, these issues must be addressed before painting. Repair any damaged areas with spackling compound, and sand the surface smooth.
Refer to this guide from the DIY Network for detailed instructions on repairing textured drywall.
• Sand the Textured Surface
To ensure proper adhesion of the primer and paint, begin by sanding the textured surface. Use a sanding block or pole sander with the appropriate grit sandpaper. Apply even pressure and move the sander in circular motions, ensuring you reach all areas of the wall.
Note: If the existing paint on the wall is glossy or semi-gloss, sanding is particularly crucial, as these finishes can hinder new paint from adhering correctly.
• Clean the Surface
After sanding, use a tack cloth or damp rag to remove any remaining dust and debris from the wall. This step is vital to ensure a smooth, consistent paint finish.
• Protect Surrounding Areas
Use painter’s tape to cover any trim, baseboards, or outlets on the wall. Additionally, adhere drop cloths to the floor to protect it from paint splatters and spills.
• Apply Primer
An acrylic primer is recommended for use on textured walls, as it will better adhere to the uneven surface than a traditional primer. Using a paint roller for large areas and a brush for tighter spaces, apply a thin coat of primer to the wall.
Allow the primer to dry completely, according to the manufacturer’s instructions. In some cases, a second coat of primer may be necessary, especially if the wall’s texture is exceptionally rough or heavy.
• Choose the Right Paint
Select high-quality paint for your textured wall project. Paints with a satin or semi-gloss finish are ideal, as they offer more durability and are easier to clean. Flat or matte finishes are not recommended for textured surfaces, as they can accentuate imperfections and are more susceptible to damage.
• Apply the Paint
Once the primer is dry, apply the paint using a paint roller for large areas and a brush for tight spaces. Work in small sections and use a “W” or “M” pattern to ensure even paint distribution.
Allow the first coat of paint to dry before applying a second, if necessary. Some textured walls, particularly heavily textured ones, may require up to three coats for complete and even coverage.
• Clean Up
Once the paint is dry, carefully remove the painter’s tape and drop cloths. Dispose of any paint and primer containers according to local regulations.
• Final Thoughts
Painting a textured wall can be a challenging but rewarding DIY project. By following these steps and using the recommended materials and techniques, you can achieve a professional-looking result. In the end, you’ll have a beautifully updated space to enjoy for years to come.
Step | Description |
|---|---|
1 | Clear the area surrounding the wall by removing furniture and objects, and cover the floor with drop cloths or plastic sheeting. |
2 | Inspect the wall for any dirt, dust, grease, or other debris, and clean it using a mild detergent solution and a sponge or cloth. Rinse the wall with clean water and allow it to dry completely. |
3 | Look for any cracks, holes, or imperfections in the wall surface, and patch them up using a premixed joint compound or spackle. Allow the compound to dry, and then sand the area smoothly with medium-grit sandpaper. |
4 | Use fine-grit sandpaper to lightly sand the entire wall, removing any loose paint or rough edges. This will help create a smoother surface for the new paint to adhere to. |
5 | Wipe down the wall with a damp cloth or sponge to remove any dust or debris from the sanding. Allow it to dry completely before proceeding. |
6 | Apply a coat of primer to the wall using a brush or roller, making sure to cover the entire surface evenly. Wait for the primer to dry completely before proceeding (usually around 24 hours). |
7 | Once the primer is dry, apply the paint to the wall using a brush or roller, working in a consistent “W” pattern to ensure even coverage. Allow the first coat of paint to dry completely, and then apply additional coats if necessary to achieve the desired level of coverage. |
Cleaning Textured Walls Prior to Painting: Best Practices
Textured walls add depth and visual interest to a room. However, when it comes to painting, these surfaces can present some challenges, as dirt, dust, and grime can accumulate in the tiny crevices and make it difficult for paint to adhere properly.
• Gather Your Cleaning Supplies
Before starting the cleaning process, gather the necessary supplies. Here’s a list of materials you’ll need:
- A vacuum cleaner with a brush attachment
- Microfiber duster or cloth
- Bucket, water, and mild detergent (such as dish soap)
- Sponge or soft-bristle brush
- Ladder or step stool
- Clean, dry towels
- Protective gloves
• Clear the Area and Remove Dust and Cobwebs
Remove any furniture, curtains, or wall decorations from the area around the walls you’ll be cleaning. Then, use your vacuum cleaner’s brush attachment or a microfiber duster to remove loose dust and cobwebs from the wall’s surface.
This step is essential because it helps prevent dirt and grime from becoming embedded in the textured surface during cleaning.
• Mix a Cleaning Solution
Fill a bucket with warm water and add a few drops of mild detergent. Avoid using harsh chemicals or strong cleaners, as they can damage the walls or leave a residue that may interfere with paint adhesion.
• Clean the Textured Surface
Put on protective gloves and dip a soft sponge or brush into the cleaning solution, then wring out the excess water to prevent drips. Gently scrub the textured wall using circular motions, starting at the top of the wall and working your way down.
Take your time and pay close attention to any areas with visible dirt, stains, or grime. You can use a step stool or ladder to reach higher areas if necessary.
For particularly stubborn spots, you may need to apply some elbow grease or use a slightly more aggressive cleaning.
The University of Illinois Extension recommends using a non-sudsing ammonia-based cleaner for more challenging areas. However, always test a small, inconspicuous area first before using stronger cleaners to avoid damaging the wall’s finish.
• Rinse and Dry the Wall
Once you’ve finished cleaning the entire wall, it’s crucial to remove any detergent residue. To do this, gather a clean sponge or cloth, dampen it with clean water, and wipe down the entire wall. Be sure to wring out the excess water to avoid soaking the surface, as this can cause damage.
After rinsing, use clean, dry towels to pat the wall dry gently. Do not rub or scrub the wall with the towel, as this can cause damage to the texture. Allow the wall to air dry completely before moving on to the painting process.
• Inspect the Wall and Address Any Remaining Issues
Before painting, take the time to inspect the cleaned wall and address any remaining issues. Look for loose or damaged areas in the texture that may need repair, and patch them using a pre-mixed textured compound. Sand any rough edges or high spots to ensure a smooth and even painting surface.
• Apply a Quality Primer
A critical step in painting textured walls is applying a suitable primer. This product helps seal the surface, improving paint adhesion and ensuring a uniform finish. Use a primer specifically designed for textured surfaces or one that mentions good adhesion on its label.
Apply the primer using a roller with a thick nap (typically 3/4 inch to 1 inch) to ensure it reaches into the crevices of the texture. Allow the primer to dry completely before moving on to painting.
• Follow Best Practices for Painting Textured Walls
After cleaning, repairing, and priming your textured walls, it’s time to apply the paint. Use high-quality, durable paint and follow the same techniques you used when applying the primer.
Remember to use a thick nap roller and work slowly to ensure proper coverage. For a consistent finish, apply at least two coats of paint, allowing each layer to dry completely.
By following these steps and utilizing the best practices outlined in this article, you’ll achieve a professional, long-lasting finish on your textured walls.
Step | Description |
|---|---|
1 | Clear the area and lay down drop cloths to protect your floor and furniture. |
2 | Dust the walls with a soft-bristled broom or brush to remove any loose dirt and debris. |
3 | Fill a bucket with warm water and a small amount of mild dish soap. |
4 | Use a soft sponge or cloth to gently scrub the walls, focusing on any stained or dirty areas. |
5 | Rinse the walls with clean water, using a sponge or cloth to remove any soap residue. |
6 | Allow the walls to air dry completely before beginning to paint. |
7 | Repair any cracks or damaged areas with spackle, sanding the surface smooth after drying and dusting with a dry cloth. |
8 | Apply a coat of primer to seal the wall surface and create a smooth, even base for your paint. |
9 | Once the primer is dry, paint your walls following the manufacturer’s instructions. |