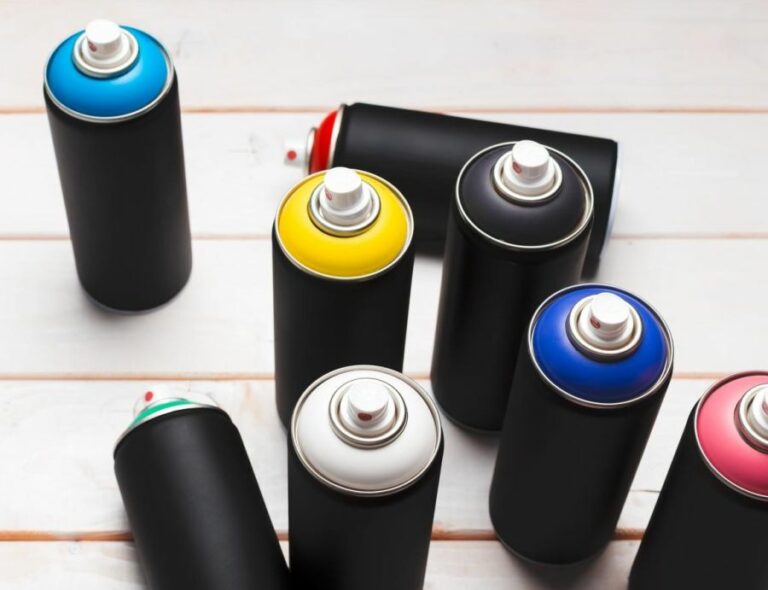
Achieving The Perfect Finish On Plastic Surfaces. What Pros Say
Achieving the perfect finish on plastic surfaces can be challenging, but it’s possible with the right approach and techniques. With years of experience, we can proudly provide expert guidance to ensure you get the best results every time. Whether you are a professional or a DIY enthusiast, we have the essential tips and tricks to transform your plastic surface and achieve an impeccable, long-lasting finish.
Achieving the perfect finish on plastic surfaces:
First, identify the type of plastic being used to achieve a perfect finish on plastic surfaces. Clean and sand the surface for better adhesion, then apply a compatible primer. Use paint specifically formulated for plastics and apply with a suitable method, such as brush painting, aerosol spray, or airbrushing. Finish with a clear coat and polishing for a flawless appearance. Always follow safety precautions and manufacturer’s guidelines for best results.

Discover the secrets to obtaining a flawless finish on plastic surfaces, from thorough prep work to expert application techniques. Keep reading to uncover our top tips and transform your plastics into perfectly polished masterpieces.
Contents
- 1 Attaining Flawless Finishes on Plastic Materials
- 2 Mastering the Art of Finishing Plastics
- 3 Exploring Plastic Surface Finishing Techniques
- 4 Comparing Quality in Surface Finish Methods
- 5 Strategies for Superior Surface Finishing
Attaining Flawless Finishes on Plastic Materials
– Introduction
Achieving the perfect finish on plastic surfaces can be a challenging task. Plastic, being a versatile material, comes in various forms, textures, and colors.
To obtain a flawless finish, one must have a good understanding of the properties of the specific type of plastic being used and the guidelines for working with it.
– Types of Plastic Surfaces
There are numerous types of plastics available in the market, including thermoplastics, thermosetting polymers, and elastomers. Knowing the type of plastic will help you identify the best approach to achieve the desired finish on the surface. Below are some common types of plastic surfaces:
- Polyethylene (PE) – This is the most common plastic used in daily life products like shopping bags and bottles.
- Polyvinyl Chloride (PVC) – Used in pipes, window frames, and cables.
- Polypropylene (PP) – Used in automotive parts, packaging, and textiles.
- Polystyrene (PS)– Utilized for packaging, insulation, and disposable tableware.
- Polycarbonate (PC) – A durable and transparent plastic used in safety glasses, electronics, and more.
– Surface Preparation
Proper preparation is crucial for achieving a perfect finish on plastic surfaces. Clean the surface thoroughly to remove any dirt, grease, or contaminants that may hinder the adhesion of the finishing medium.
Use mild soap and water, followed by a rinse with clean water, and let it dry completely.
Sanding is an essential technique for surface preparation. It allows for better adhesion, evens out uneven surfaces, and removes any scratches or other imperfections.
Start with coarse-grit sandpaper (180-220 grit) to level the surface and then move to finer grit (400-600 grit) to smooth it out further.
– Priming the Surface
A quality primer is essential for achieving a perfect finish on plastic surfaces, as it ensures proper bonding of the paint or other finishing medium. It’s crucial to choose a primer that is compatible with the type of plastic being used.
There are specific primers available for different plastic materials, such as:
- Plastic Adhesion Promoters (PAPs) are suitable for polyolefins (PE, PP) and do not require sanding.
- Universal primers can offer better adhesion on non-polyolefin plastics (PVC, PC, PS) and require sanding.
Apply the primer in thin, even coats, allowing it to dry as recommended by the manufacturer.
– Selecting the Appropriate Paint
A professional finish on plastic surfaces requires using paint specifically formulated for use on plastics. Such paints generally contain additives that improve the adhesion, flexibility, and durability of the finish. Some popular varieties of plastic paints include:
- Acrylic paint – A widely available and versatile option for plastic surfaces, providing fast drying times and easy cleanup. It’s available in various finishes, such as matte, satin, gloss, and metallic.
- Enamel paint – This oil-based paint is suitable for achieving a high-gloss, durable finish, often used on automotive parts and models.
- Polyurethane paint – Known for its chemical resistance, excellent durability, and superior adhesion, this paint works well for large-scale applications such as industrial equipment.
– Application Techniques
Several techniques can be employed to apply paint to plastic surfaces:
- Brush painting – An affordable and straightforward method, brush painting requires a good-quality brush, a steady hand, and paint consistency for optimal results.
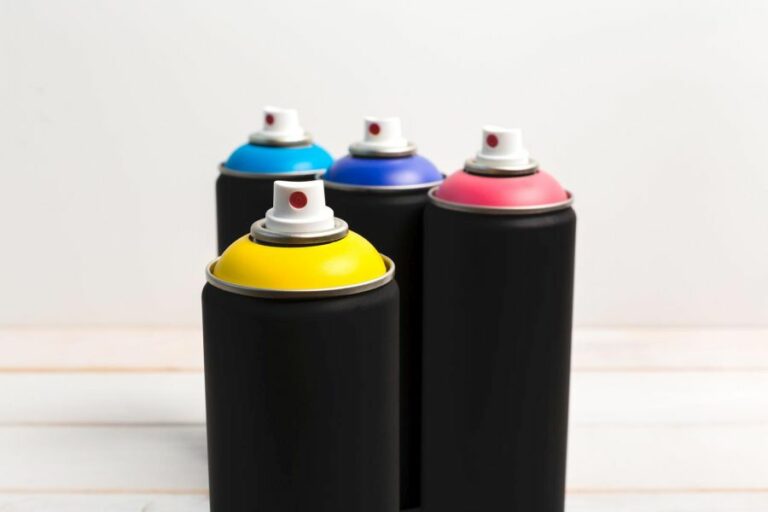
- Aerosol spray paint – A quick and convenient option for small-scale projects, ensuring even coverage of the surface when applied with appropriate technique.
- Airbrushing – A versatile method that provides the ultimate control and highly professional finish, requiring specialized equipment and skill.
– Final Touches, Clear Coat, and Buffing
Once the paint has been applied and allowed to dry as per the manufacturer’s recommendations, finishing touches can be added to achieve the desired appearance. Applying a clear coat will provide a protective layer to the paintwork and enhance the overall look of the surface.
After the clear coat has dried, buffing the surface using a polishing compound and a buffing pad can be done to remove any imperfections or dust particles that settle during the final curing process. Always follow the recommended guidelines in terms of buffing speed and pressure.
– Safety Precautions
It’s essential to prioritize safety when working with plastics and their finishing materials. Work in a well-ventilated area, ensuring proper respiratory and eye protection when handling substances like primers, paints, and solvents.
Always follow the manufacturer’s instructions for using and disposing of such materials.
– Conclusion
Achieving a perfect finish on plastic surfaces requires understanding the nature of the plastic material, proper preparation, and using suitable techniques for priming, painting, and protecting the surface.
Following the guidelines mentioned in this article, along with sufficient practice and patience, will aid in obtaining a professional-looking finish on various plastic surfaces.
For further reading and resources, you might find helpful information from websites like The American Society for Materials at asminternational.org. Stay safe, and enjoy creating impressive finishes on your plastic projects.
Mastering the Art of Finishing Plastics
Finishing plastics is a crucial step in the manufacturing process, as it gives the final product its desired appearance, texture, and performance properties.
• Surface Preparation: The Foundation of Plastic Finishing
Before applying any finishing technique, it is essential to prepare the plastic surface properly. Proper surface preparation ensures that the final finish will adhere to the material and create a smooth, consistent appearance. Some common methods of surface preparation include:
- Cleaning: Use a mild detergent and a clean, soft cloth to remove surface contaminants like dirt, oil, and grease.
- Sanding: If the plastic has a rough surface, sand it using fine-grit sandpaper to create a smooth, even texture. Always sand in the same direction to minimize scratches.
- Degreasing: Use a degreaser to remove any residual oils or grease from the material. This can be especially important for plastics that will be painted or coated with another substance.
• Techniques for Finishing Plastics
– Painting
Spray painting is a popular finishing technique used to apply color, protect the material, and improve aesthetics. The key to a successful spray-painting job is selecting the right paint for the plastic material.
Some plastics are highly resistant to paint adhesion, so using an appropriate primer may be necessary. Here is a step-by-step guide to spray painting plastics:
- Clean and prepare the surface as described above.
- Apply a plastic-compatible primer if required. Allow it to dry according to the manufacturer’s instructions.
- Shake the spray paint can for at least one minute, then hold it 10-12 inches away from the surface.
- Apply the paint using smooth, even strokes. Allow each coat to dry, usually about 10-15 minutes, before applying additional coats.
- For long-lasting results, apply a clear topcoat to protect the paint from scratches and fading.
– Polishing and Buffing
Polishing and buffing are used to create a high-gloss, shiny finish on plastics. Polishing is the process of removing material from the surface using abrasive compounds, while buffing is the process of smoothing out the surface with a cloth wheel or pad.
Here’s how to polish and buff plastics:
- Clean and prepare the surface as described above.
- Use a polishing compound, either liquid or paste and apply it to a soft polishing wheel or sponge pad. Some compounds are specifically designed for plastics, so consult the manufacturer’s instructions for the best results.
- Move the polishing wheel or pad in a circular motion over the surface until the desired gloss is achieved.
- To achieve a high-gloss finish, use a buffing wheel with a soft cloth or foam pad and buff the surface in circular motions.
- After buffing, wipe the surface with a clean, soft cloth to remove any residue.
It is essential to note that polishing and buffing remove small amounts of material from the surface, so use caution not to remove too much material, causing damage or distortion.
– Chroming and Metalizing
Chroming and metalizing are finishing techniques used to achieve a metallic or chrome-like appearance on plastics. Vacuum metalizing is the most common method, using a vacuum chamber to deposit metal particles onto the plastic surface.
This process provides a metallic, reflective finish in a variety of colors. Electroplating is another option, but it requires additional preparation, including applying a conductive coating to the plastic surface.
For more information on vacuum metalizing and electroplating processes, visit the ASM International website.
• Final Thoughts on Finishing Plastics
Achieving a professional plastic finish requires experience, patience, and attention to detail. By following the steps and advice provided in this article, you can improve your plastic finishing results and create attractive, durable, and high-quality products.
Remember, always consult the manufacturer’s instructions for the specific plastic material, paint, primer, or finishing product to ensure compatibility and the best results.
And don’t forget about proper ventilation and personal protective equipment when working with chemicals, paints, and solvents.
Step | Description |
|---|---|
1 | Clean the plastic surface to remove dirt, grease, and dust. |
2 | Remove any scratches or imperfections by sanding the surface with sandpaper. |
3 | Apply a plastic primer to the surface. This will help the paint adhere to the plastic and prevent it from peeling. |
4 | Once the primer has dried, apply a coat of paint specified for use on plastics. |
5 | After the paint has dried, apply a clear coat to protect the paint and add a glossy finish. |
6 | Buff the surface to restore any lost shine and remove any imperfections. |
Exploring Plastic Surface Finishing Techniques
Plastic surface finish processes are essential treatments and techniques applied to enhance the aesthetics, functionality, and longevity of various plastic products.
• Injection Molding and Plastic Surface Finish
Injection molding is a widely used manufacturing technique for producing plastic parts. The process involves injecting molten plastic material into a mold cavity, cooling it, and ejecting the final solid part.
The surface finish of an injection molded part depends on the mold’s design and material choice. For more information about injection molding and its best practices, you can visit the Society of Plastics Engineers’ official page.
– Texture Production in Injection Molding
When designing a mold for an injection molding project, consider the type of surface finish you desire for the final product.
Texturing is a popular process that gives parts various appearances, such as matte, high-gloss, or patterns that mimic natural surfaces. Some commonly used texturing techniques include:
- Chemical etching
- Heat treatment
- Laser engraving
- Sandblasting
Selecting a texture based on your part’s functionality is important. For instance, textured surfaces can reduce glare, improve grip, or assist in masking wear and tear.
Matte finishes are recommended for parts that must remain visually appealing even after exposure to harsh conditions, while shiny surfaces are ideal for decorative pieces.
• Post-Molding Processes
After injection molding, several post-molding processes may be applied to improve appearance, durability, or functionality. Some of the most common plastic surface finish processes include:
– Painting
Paint is applied to plastic parts primarily to enhance their aesthetic appeal or to provide an additional protective layer.
Considerations for painting plastic parts include proper surface preparation, paint compatibility with the plastic substrate, and optimal drying conditions to ensure an even and long-lasting finish.
– Plating
Plating involves depositing a thin, uniform layer of a metallic material onto a plastic part’s surface, primarily to improve appearance, increase durability or provide electrical conductivity. Common plating techniques for plastic components include:
- Electroplating: A metal, such as chrome or nickel, is deposited onto the plastic by means of an electric current.
- Electroless plating: A chemical reduction process that deposits metal ions, such as copper or silver, onto the plastic surface without the use of electricity.
– Vacuum Metallization
Vacuum metallization is a surface finish process in which a thin layer of metal is deposited onto a plastic part’s surface through the vaporization of a metal source in a vacuum chamber.
This finish provides an attractive, shiny appearance and is commonly used to create reflective surfaces or mimic the appearance of metal components.
– Hot Stamping
Hot stamping is the process of transferring pre-dried paint or foil onto a plastic part’s surface using a heated die, which is pressed onto the paint or foil before being applied to the plastic part. This process provides a high-quality, consistent finish with excellent durability and abrasion resistance.
• Choosing the Right Process
When selecting the appropriate surface finish process for your plastic parts, it’s essential to consider the following factors:
- Material compatibility: Ensure that the chosen process is compatible with the plastic material used in your part.
- Application requirements: Consider the part’s end-use and any specific requirements, such as UV resistance, wear resistance, or conductivity.
- Cost and time: Evaluate the costs and turnaround time associated with each process to make an informed decision that fits within your project’s budget and timeline constraints.
• Conclusion
In summary, understanding the various plastic surface finish processes, their benefits, and recommendations based on experience is crucial in ensuring the optimal appearance, functionality, and longevity of injection-molded parts.
By considering the factors mentioned above and exploring the different surface finish techniques, you can make informed decisions regarding the best approach for your specific plastic product requirements.
Comparing Quality in Surface Finish Methods
Surface finish is a vital aspect in the world of machining and manufacturing. High-quality surface finishes not only affect the cosmetic appearance of a workpiece but also its functional performance, such as friction, wear, and corrosion resistance.
• Machining Parameters and Surface Finish
Various parameters during the machining process can directly or indirectly affect the surface finish. A few of these factors include:
– Cutting Tool Selection
The choice of cutting tool plays a significant role in determining the final surface finish of a workpiece. Tools such as high-speed steel and carbide tools are popular for their durability, rigidity, and wear resistance, leading to a better surface finish over time.
Furthermore, tools with sharp cutting edges and precision-ground insert geometries are known for providing excellent surface finishes.
– Feed Rates and Cutting Speeds
Feed rates and cutting speeds can also impact the surface finish. Higher cutting speeds can lead to less force on the workpiece, which results in less deformation and, ultimately, a smoother surface.
Lower feed rates enable finer chips and smaller cuts to be taken, reducing the possibility of chipping and improving the final finish.
– Coolant and Lubrication
Proper cooling and lubrication during the machining process can greatly influence the final finish.
Coolants and lubricants help dissipate heat and minimize the friction between the cutting tool and workpiece, reducing the amount of deformation and wear on both the workpiece and the tool. This leads to a better surface finish and extended tool life.
It’s crucial to select the appropriate coolant or lubricant for the material being machined. For example, for aluminum and its alloys, it’s essential to use a cutting fluid with high lubricity to prevent the chips from adhering to the tool, leading to a smoother surface.
• Machine Tool Rigidity and Vibration Control
The stability of the machine tool is another critical factor that determines the quality of the surface finish. Machines with a high level of rigidity can effectively maintain accuracy during machining and resist vibration, allowing for a better overall finish.
– Vibration Control Techniques
There are various techniques to control vibrations during machining. Some of these methods include:
- Utilizing cutting tools with a shorter length, which can reduce vibrations and increase rigidity;
- Adding mass to the machine tool or workpiece to absorb and dampen vibrations;
- Implementing vibration dampening technology such as viscoelastic dampers or magnetic dampers on the machine tool.
• Workpiece Material and Surface Preparation
The type of material being machined is another factor that can influence the final surface finish.
When working with materials susceptible to deformation (such as soft metals or plastics), it’s essential to minimize the amount of contact between the tool and the workpiece by using sharp tools and lower cutting forces.
Additionally, the surface preparation prior to the machining process can have a significant impact on the surface finish. Properly cleaned, deburred, and stress-relieved workpieces will yield a better finish and reduce potential tool breakage.
• Best Practices for Achieving a Better Surface Finish
From the factors discussed above, we can infer some best practices for achieving a better surface finish:
- Select the proper cutting tool material and geometry for the given application;
- Optimize feed rates, cutting speeds, and depths of cut based on the workpiece material and desired finish;
- Use appropriate coolants or lubricants for effective heat dissipation and friction reduction;
- Ensure the rigidity and stability of the machine tool;
- Implement vibration control techniques to minimize the impact of vibration-induced surface roughness;
- Properly prepare the workpiece by cleaning, deburring, and stress-relieving ahead of machining.
• Conclusion
In conclusion, the pursuit of enhanced surface finishes involves addressing various factors, including machining parameters, machine tool rigidity, vibration control, and workpiece material and preparation.
By understanding these factors and following the recommended best practices, professionals in the machining and manufacturing industries can consistently achieve better surface finishes, significantly improving both the functional and cosmetic aspects of their workpieces.
Strategies for Superior Surface Finishing
Surface finish plays a crucial role in determining the performance, appearance, and overall quality of a manufactured part.
Let’s discuss various methods for achieving a high-quality surface finish, the factors that affect the quality of the finish, and the importance of proper techniques to ensure consistency and reliability.
• Factors Affecting Surface Finish
There are several factors that can influence the surface finish of a part. These include:
- Material: The type of material being machined plays a significant role in determining the achievable surface finish. Harder materials tend to produce smoother finishes, while softer materials leave rougher surfaces. Additionally, material homogeneity and the presence of inclusions or voids can impact the surface finish.
- Tool Quality: The quality and sharpness of the cutting tool are crucial factors in achieving a smooth surface finish. Worn or poor-quality tools can result in excessive tool deflection, vibration, and surface irregularities.
- Machining Parameters: Spindle speed, feed rate, and depth of cut all contribute to the surface finish. Generally speaking, higher spindle speeds and lower feed rates result in finer finishes.
- Coolant and Lubrication: Proper coolant and lubrication are essential for maintaining consistent cutting-tool temperatures and reducing friction between the workpiece and the cutting tool. These factors help minimize heat buildup, which can affect the surface finish.
- Machine Rigidity: A rigid machine setup is critical in avoiding vibrations and chatter, which can negatively impact the surface finish. This includes ensuring proper workpiece clamping and minimizing tool overhang.
• Methods for Achieving a High-Quality Surface Finish
There are various methods utilized in achieving a superior surface finish. Below are some of the most common techniques.
– Machining Techniques
- High-Speed Machining (HSM): HSM involves increasing the spindle speed to significantly higher levels than conventional machining. This technique can produce a smoother surface finish due to lower cutting forces, reduced tool deflection, and minimized heat buildup.
- Climb Milling: Climb milling is a technique in which the cutting tool moves in the same direction as the workpiece feed. By engaging the workpiece with a minimal chip thickness and progressively increasing it, climb milling generates less heat and typically results in a finer surface finish.
- Use of High-Quality Cutting Tools: Using sharp cutting tools with appropriate tool geometry and edge preparation contributes to achieving a smooth surface finish. Carbide tools and other advanced cutting materials can yield superior results compared to high-speed steel (HSS) tools.
- Optimal Machining Parameters: Selecting appropriate spindle speeds, feed rates, and depths of cut is crucial in achieving the desired surface finish. Experimenting with different combinations of these parameters and finding the optimal values for each material/tool combination can significantly improve surface finish quality.
– Finishing Processes
Besides refining the machining techniques, you can also employ additional processes to improve the surface finish further. Some of these processes include:
- Grinding: Grinding can remove surface irregularities left by the machining process and achieve a smoother surface finish. Cylindrical grinding, surface grinding, and centerless grinding are all common techniques for improving the surface finish on cylindrical or flat surfaces.
- Polishing: Polishing involves using an abrasive media, such as a polishing compound or pad, to remove a thin layer of material from the surface of a part. This process can further refine the surface finish obtained through machining or grinding.
- Honing: Honing is a low-speed grinding process that uses a bonded abrasive stone to accurately size, straighten, and smooth cylindrical bores or flat surfaces.
- Lapping: Lapping is a low-speed finishing process in which an abrasive slurry is applied between two mating surfaces, which are then rubbed together to refine the surface finish.
- Buffing: Buffing is a high-speed process that uses a loose abrasive, such as a buffing compound and a buffing wheel, to remove a thin layer of material and improve the surface finish substantially.
• Achieving Surface Finish Consistency
Achieving consistent surface finish quality requires a systematic approach and attention to detail. Here are some key points to consider:
- Quality Control Measures: Implement stringent quality control measures to ensure that feed rates, spindle speeds, and cutting tools are consistently adhering to the established specifications.
- Tool Maintenance: Regularly inspect and maintain cutting tools to minimize the chances of tool failure and maintain consistent surface finishes.
- Operator Training: Train machine operators to better understand factors that influence surface finish and the importance of maintaining a clean and organized work environment.
- Continuous Improvement: Continuously monitor and improve processes to maintain a high level of surface finish quality over time.
• Conclusion
Achieving a high-quality surface finish is crucial for the functionality and overall quality of a manufactured part.
By understanding and addressing the factors that influence surface finish, utilizing appropriate machining techniques and finishing processes, and taking steps to ensure consistency and reliability in your process, you can significantly improve the surface finish quality of your products.
For additional information and resources on achieving optimal surface finish, the American Society of Mechanical Engineers (ASME) provides valuable insights into advancements and best practices in the industry.
Method | Description |
|---|---|
Grinding | Using an abrasive wheel to remove material, creating a smooth and even surface finish. |
Polishing | Smoothing out a material’s surface using an abrasive, often in the form of a paste or compound. It can be done manually or with a machine. |
Sanding | Removing surface material using sandpaper or another abrasive material. It can be done manually or with a machine. |
Honing | Using an abrasive stone to create a smoother surface finish, often used for precision parts with tight tolerances. |
Lapping | Very fine abrasive particles are mixed with oil and applied to the surface to achieve an ultra-smooth finish. |
Blasting | Using high-pressure air or water to propel abrasive particles against the surface, creating a uniform finish. |
Chemical polishing | Using chemicals to dissolve or etch away surface imperfections to achieve a smoother finish. |
Electro-polishing | Using an electrical current to remove material from the surface of a metal, creating a smoother finish. |