Spray Paint Faux Finishes: A Step-By-Step Guide. What Pros Say
Are you ready to give your home a trendy and creative upgrade? If so, you’ve come to the right place! Our step-by-step guide on creating faux finishes with spray paint will help you easily transform your walls and furniture. With our expert tips and clear instructions, you can achieve professional-looking results quickly.
Spray paint faux finishes: a step-by-step guide:
Spray paint faux finishes involve applying a base coat, creating the desired effect (e.g., stone, patina, or wood grain), and sealing with a topcoat. Preparation steps include gathering necessary materials, choosing the right spray paint, preparing the surface, and applying a primer if needed. Correct techniques, materials, and patience can achieve professional-looking results.

Unleash your inner artist and learn how to create stunning faux finishes using spray paint! From stone to wood, our step-by-step guide will show you how to master various techniques, tips, and tricks to transform any surface into a unique work of art.
There’s even more amazing inspiration ahead. Keep reading!
Contents
Faux Finish Spray Painting: Comprehensive Guide
Spray paint faux finishes are an excellent way to create a unique and artistic look on various surfaces, from furniture to walls. This type of decorative finish can replicate the appearance of natural stone, metal patinas, or even expensive wood finishes.
With the correct techniques, materials, and a bit of patience, you can achieve stunning results while saving money and time.
– Gather the Necessary Materials and Tools
Before starting, make sure to have all the necessary materials and tools. Here’s a list of what you will need:
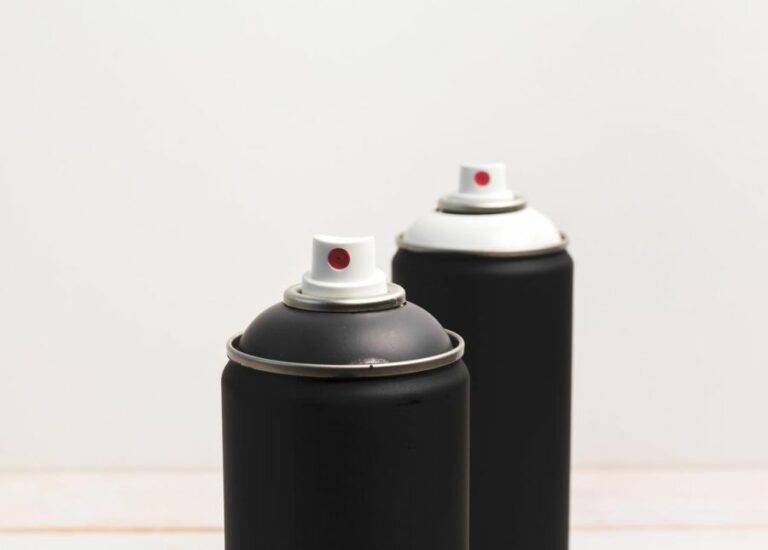
- Spray paint
- Base coat paint (latex or acrylic)
- Clear topcoat (latex, polyurethane, or varnish)
- Primer (optional)
- Brushes or rollers
- Drop cloths or plastic sheeting
- Sandpaper
- Painter’s tape
- Clean, lint-free rags
- Spray bottle with water
- Gloves
– Choose the Right Spray Paint
Choosing the right spray paint is essential for achieving the desired faux finish. High-quality paints tend to provide better coverage, more consistent spray patterns, and longer-lasting results. Look for spray paint brands specifically designed for faux finishing or use a multi-surface paint that adheres well to different materials.
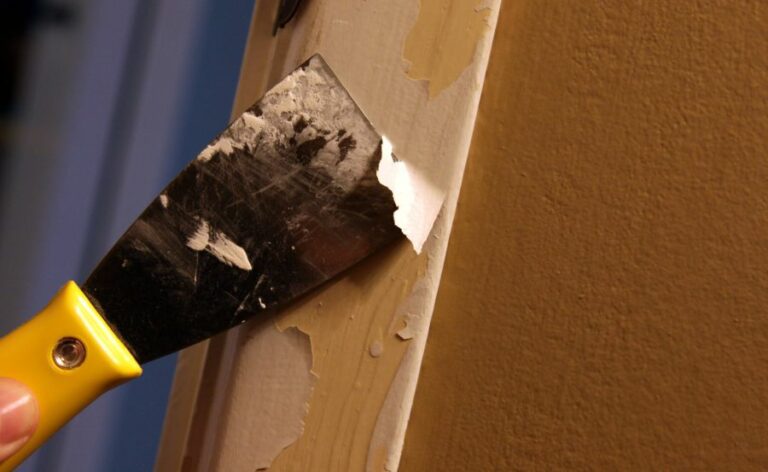
– Prepare the Surface
Before applying any paint or finish, the surface must be clean, smooth, and free of any debris or imperfections. Follow these steps to properly prepare the surface:
- Remove any previous paint, varnish, or finish using a chemical paint stripper or sandpaper.
- Fill in any holes, cracks, or imperfections with wood filler or spackle (for walls), and allow it to dry.
- Sand the surface with fine-grit sandpaper for a smooth and even finish.
- Wipe the surface clean using a damp, lint-free cloth to remove dust and debris.
- Apply a coat of primer if necessary, especially if the surface is porous, stained, or uneven in color; let it dry completely.
– Apply the Base Coat
The base coat will serve as the foundation for the faux finish, and it should be a lighter color than the spray paint. Apply the base coat using a brush, roller, or paint sprayer to achieve an even and consistent coverage. Allow the base coat to dry completely before proceeding to the next step.
– Create a Faux Finish Effect
There are numerous techniques to create faux finish effects using spray paint, and the chosen method will depend on the desired outcome. Below are some popular techniques to achieve various faux finishes:
Stone Finish
- Choose two or three spray paint colors that resemble the natural stone you want to replicate.
- Apply the lightest color first as a light, even coat; let it dry.
- Use a crumpled-up piece of paper, a natural sea sponge, or a textured roller to dab the second color onto the surface, leaving random exposed areas of the base color; let it dry.
- Repeat the process with a third color if desired, applying it more sparingly to allow the other two colors to show through; let it dry.
Patina Finish
- Apply a coat of metallic spray paint as the base color; let it dry completely.
- Mix a second color (usually green or blue) with water in a spray bottle to create a thin mist.
- Spray the mixture onto the metallic base coat, allowing the paint to run and pool in random areas to create the appearance of a natural patina; let it dry.
Wood Grain Finish
- Choose a light-colored base coat that resembles the lightest color of the desired wood.
- Apply the base coat using a brush, roller, or paint sprayer; let it dry completely.
- Mix a darker color of paint with a glazing medium to create a transparent glaze.
- Using a specialized wood graining tool or a stiff bristle brush, draw the glaze along the length of the surface, rocking the tool back and forth to create the appearance of wood grain; let it dry.
– Apply the Topcoat
After achieving the desired faux finish effect, protect the surface with a clear topcoat. Choose a topcoat based on the level of durability and sheen required, and apply it following the manufacturer’s instructions.
A satin or semi-gloss topcoat is often preferred to maintain some shine without being too reflective.
• Final Thoughts
Creating professional-looking spray paint faux finishes requires patience, practice, and the correct tools and materials. Following this step-by-step guide will help ensure a successful result while allowing for endless customization and creativity. Happy painting!
Mastering Faux Paint Finishes: Techniques & Tips
Faux painting, also referred to as faux finishing, has become increasingly popular as a creative and cost-effective means of achieving stunning wall finishes in recent years. This technique involves using painting methods to replicate the appearance of materials such as marble, wood, or stone.
If you’re interested in adding a unique touch to your space, here are some tips and techniques to help you create the perfect faux paint finish.
• 1. Choose the Right Paint and Tools
Before you begin creating your faux finish, you’ll need to gather the necessary paint and tools. Generally, I recommend starting with a base coat of high-quality latex paint in the desired color.
Additionally, you may need to use a glaze, which is a paint-like substance that creates a translucent layer over the base coat, allowing you to manipulate color and texture. Here is a list of tools that you may need:
- Paint trays
- Paint rollers
- Brushes (artist brushes, chip brushes, or other specialty brushes)
- Texturing tools (sponges, rags, or plastic bags)
- Stencils (optional)
• 2. Prepare Your Workspace
Before you begin, it is essential to prepare your workspace. This includes cleaning and repairing any imperfections in the walls, as well as protecting the floor and furniture with drop cloths or plastic sheeting.
Once you have done so, you can apply a primer and base coat to your walls, ensuring a smooth and even surface for your faux finish.
• 3. Choose Your Faux Finish Technique
There are numerous faux painting techniques to choose from, such as sponging, ragging, or combing. It is essential to research and select a technique based on your desired look and personal preference. Here are a few popular faux-finishing techniques:
– Sponging
Sponging is perhaps the simplest and most versatile faux painting technique. It involves using a sponge, dampened in either paint or glaze, to create a textured, mottled appearance on the wall.
When applied over a base coat, sponging can create both subtle and dramatic effects, depending on the colors used and the amount of pressure applied.
– Ragging
Similar to sponging, ragging uses a cloth or rag instead of a sponge to apply paint or glaze to the wall. This technique creates a soft, elegant texture reminiscent of fabric, and it is ideal for adding depth and visual interest to any room.
– Combing
The combing technique involves using a specialized brush or comb-like tool to create linear or patterned textures on the wall. By dragging the comb through wet paint or glaze, you can achieve various effects that resemble wood grain, textiles, or elaborate geometric designs.
• 4. Experiment and Practice
To ensure the best possible outcome, it is essential to experiment and practice your chosen technique on a sample board or an inconspicuous area before applying it to the final surface.
This will help you become more comfortable with the process and allow you to make any necessary adjustments to achieve the desired effect.
• 5. Apply the Faux Finish
Once you are confident in your technique, you can begin applying the faux finish to your walls. For most techniques, you will work in small sections to ensure that the paint or glaze remains wet and workable.
If using a glaze, mix it with your selected paint color, typically in a ratio of 4:1 (four parts glaze to one part paint). The following steps are common to most faux painting methods:
- Apply your paint or glaze mixture to a small section of the wall with a brush or roller.
- Use your chosen tool (sponge, rag, comb) to create the desired texture or pattern, working quickly to avoid the paint or glaze from drying.
- Continue this process, working in small sections and blending the edges as you go to ensure a seamless finish.
- Stand back periodically to assess the overall appearance and make any necessary adjustments.
• 6. Finishing Touches
Once your faux finish is complete and has had sufficient drying time, I recommend applying a protective clear coat. This will ensure that your beautiful new faux paint finish is resistant to damage and easier to clean.
A faux paint finish adds a stunning and unique aesthetic to your space that cannot be replicated with store-bought wallpaper or other methods.
By choosing the right tools, practicing your technique, and applying a protective clear coat, you can create an impressive faux paint finish that is both beautiful and durable.
Technique | Instructions | Recommended tools |
|---|---|---|
Sponging | 1. Apply base coat and let it dry. 2. Mix glaze with the second color of paint. 3. Dip sponge in the paint mixture and dab it on the wall. 4. Blend the sponged color using a clean sponge. |
Sponge, paint, glaze, paintbrushes
|
Rag rolling | 1. Apply base coat and let it dry. 2. Mix glaze with the second color of paint. 3. Dip a cloth into the paint mixture and roll it on the wall. 4. Overlap the rolled color to create a textured finish. |
Clean cloth, paint, glaze, paintbrushes
|
Dragging or Strie | 1. Apply base coat and let it dry. 2. Mix glaze with the second color of paint. 3. Apply the paint mixture to the wall using large brush strokes. 4. Use a stiff-bristled brush or wallpaper smoothing brush to drag the wet paint in straight lines. |
Large paintbrush, stiff-bristled brush, wallpaper smoothing brush, paint, glaze
|
Color washing | 1. Apply base coat and let it dry. 2. Mix glaze with the second color of paint. 3. Apply the paint mixture to the wall using random brush strokes. 4. Blend the paint using a clean brush or rag, working in a circular motion. |
Paintbrushes, clean cloth or brush, paint, glaze
|
Marbling | 1. Apply base coat and let it dry. 2. Mix glaze with the second color of paint. 3. Create veins of the faux marble using a small brush or feather. 4. Blend the veins using a softening brush or sponge to make it more natural. |
Paintbrushes, feather, softening brush, sponge, paint, glaze
|
Ideal Paint-to-Glaze Ratio for Faux Painting Techniques
Faux painting is a popular technique used to create the illusion of texture, depth, and dimension on various surfaces. One key element that dramatically influences the result of a faux painting project is the ratio of paint to glaze.
Knowing the right mixture or balance between paint and glaze and the purpose each ratio serves can significantly impact the final appearance of your faux painting project.
• Understanding Paint and Glaze
Before discussing the ratio between paint and glaze, let’s first understand the role of each component in a faux painting project.
– Latex or Acrylic Paint
Identify the latex or acrylic paint you plan to use for your project. This type of paint will act as the base color and provide the otherwise flat surface with a more complex, layered appearance.
– Glaze
Glaze is a translucent medium that, when mixed with paint, allows you to manipulate the paint in various ways, thus creating different faux painting effects. It can be clear or pre-tinted and comes in water-based, oil-based, or acrylic forms.
Glazer offers more extended open times, allowing you to work with the paint and create your desired texture and patterns.
• Mixing Ratios and Their Effects
The ratio of paint to glaze dramatically impacts the transparency and workability of the mixture. So, let’s explore some common mixing ratios and their outcomes.
– 1:1 Ratio (Equal Parts)
A 1:1 ratio of paint to glaze provides a balanced combination that offers moderate transparency and workability.
Generally used for popular faux painting techniques such as sponging, rag rolling, or color washing, this mixture allows the base coat color to show through subtly while still providing adequate coverage.
– 1:2 Ratio (One Part Paint to Two Parts Glaze)
A 1:2 ratio of paint to glaze yields a more translucent mixture, making it ideal for more delicate faux painting effects. This ratio is commonly used for techniques such as marbleizing or wood graining, where a more transparent and subtle look is desired.
The increased amount of glaze also allows for greater workability, giving you more time to manipulate the paint to achieve the desired pattern.
– 2:1 Ratio (Two Parts Paint to One Part Glaze)
A 2:1 ratio of paint to glaze produces a more opaque mixture, which is great for faux painting techniques requiring bold colors or more dramatic effects. Using this ratio in techniques such as dragging or stria might give you a more distinct and striking final appearance.
However, keep in mind that the decreased glaze content might result in less workability, which means you need to work more quickly and efficiently.
• Custom Ratios
While the ratios mentioned above are commonly used for various faux painting techniques, there is no definitive rule that restricts you from using custom ratios that suit your preference and desired outcome.
You can always experiment by adding more paint or glaze to your mixture to achieve the desired opacity and workability.
Remember, practice makes perfect! Test your custom ratios and techniques on a sample board or an inconspicuous area before committing them to the main project.
• Additional Tips
- Always mix your paint and glaze thoroughly to ensure a consistent mixture. You can use a stir stick or even an electric drill with a paint mixing attachment for larger quantities.
- Label your mixing container with the ratio used. This will help in case you need to replicate the mixture for future touch-ups or projects.
- Consider the drying time of the glaze you are using. Oil-based glazes dry slower than water-based or acrylic glazes, giving you more time to work with the paint.
In conclusion, the ratio of paint to glaze in faux painting is crucial for achieving the desired result. Experiment with various ratios and techniques, and don’t be afraid to customize your mixture based on your preference and goal.
With practice and persistence, you will be able to master the art of faux painting and create stunning surfaces that perfectly fit your vision.
Expert Techniques for Applying Faux Glaze Paint
Faux glaze painting is an excellent way to add visual interest, texture, and depth to any room in your home. This technique involves applying a glaze over a base coat of paint, then manipulating it to create a variety of decorative finishes, such as marble, wood grain, or linen.
• Preparing the Surface
Before you begin, it’s essential to prepare your walls for painting. Start by cleaning the surface with warm water and mild detergent, and remove any dust, dirt, or grime that may prevent the paint and glaze from adhering properly.
Next, use quality painter’s tape to protect any areas that you don’t want to be painted, such as trim, molding, or outlets. Finally, apply a coat of primer if you are painting over a bare or dark-colored surface. This will ensure that your base coat adheres effectively and provides a clean canvas for your faux finish.
• Choosing Paint and Glaze Products
Select a latex paint for your base coat, ensuring it has a flat or matte finish to allow the glaze to adhere correctly. You’ll also need to choose a color that complements your desired faux effect, such as beige for a linen finish or a deep red for a faux marble look.
When choosing your glaze, opt for a water-based product that is specifically designed for faux finishing. This will ensure the best results and allow for easy clean-up.
• Mixing the Glaze
Before applying the glaze, you’ll need to mix it to achieve the desired consistency and transparency. You can do this by combining the glaze with your chosen paint color in a mixing container. Generally, a ratio of four parts glaze to one part paint is recommended.
However, you can adjust this ratio to create a more transparent or opaque finish, depending on your personal preference.
• Applying the Base Coat
Once your surface is prepared, use a paint roller or brush to apply the base coat evenly. Apply the paint in a “W” pattern, overlapping and spreading the paint to achieve a smooth finish.
Be sure to cover the entire surface, as any areas left unpainted will not achieve the desired faux effect. Allow the base coat to dry completely before proceeding to the glazing process.
• Applying the Faux Glaze
There are various techniques for applying faux glaze, depending on the type of finish you desire. Below, we have outlined some common methods for achieving popular faux effects:
– Rag Rolling
- Dip a clean, lint-free rag into the glaze mixture.
- Roll the rag on the surface, pressing firmly to remove excess glaze.
- Continue the process, overlapping and changing the direction of the rag to create a textured effect.
- After the glaze dries, if desired, apply additional layers using the same technique for added depth.
– Sponge Technique
- Dip a sea sponge or a damp, lint-free rag into the glaze mixture.
- Dab the sponge or rag onto the surface, pressing firmly to remove excess glaze.
- Continue this process, overlapping the sponge or rag impressions to create a textured effect.
- After the glaze dries, if desired, apply additional layers using the same technique for added depth.
– Color Washing
- Apply the glaze mixture to the surface with a brush, using overlapping “X” strokes.
- Soften the brush strokes with a clean, dry brush or a damp, lint-free rag.
- Continue the process until the entire surface is covered.
- After the glaze dries, if desired, apply additional layers using the same technique for added depth.
• Finishing Touches
Once your faux glaze has dried, remove the painter’s tape and make any necessary touch-ups. It’s also essential to protect your beautiful new finish with a clear, non-yellowing topcoat, particularly in high-traffic areas or moisture-prone rooms like bathrooms or kitchens.
This will add a layer of durability and ensure your faux glaze lasts for years to come.
• Conclusion
Faux glaze painting can transform any space, adding depth, texture, and visual interest. With the right tools, paint products, and technique, achieving a professional-looking result is well within reach.
Experiment with the different application methods outlined above and have fun creating a truly unique and beautiful finish for your home.
Step | Description |
|---|---|
1 | Choose the appropriate glaze and paint colors. The glaze should be translucent and compatible with the paint color. |
2 | Prepare the surface by cleaning and priming it. Remove any dirt, dust, or grime and let the primer dry completely. |
3 | Paint the base coat color onto the surface. Let it dry for at least 24 hours before applying the glaze. |
4 | Mix the glaze with the paint color according to the manufacturer’s instructions. Use a separate container to avoid contaminating the main paint supply. |
5 | Choose a faux finish technique to achieve the desired effect. Some popular techniques include sponging, color washing, dragging, stippling, and rag rolling. |
6 | Apply the glaze mixture onto the surface using the chosen technique. Work in small sections to ensure even coverage. |
7 | Blend the edges of each section to create a seamless finish. Pay special attention to corners and tight spaces where brush or roller marks may be visible. |
8 | Let the glaze dry according to the manufacturer’s instructions. This may take anywhere from a few hours to overnight. |
9 | If desired, apply a second coat of glaze with a different technique or color to add depth and complexity to the finish. |
10 | Protect the finished faux glaze with a clear sealer or topcoat, if necessary. |
Creating a Faux Wood Finish: Easy Steps and Tips
A faux wood finish can transform a room, giving it a warm, rustic feel. This technique creates the appearance of natural wood grain on various surfaces, such as walls, furniture, and doors.
• Materials and Tools Needed
Before beginning your faux wood finish project, gather the following tools and materials:
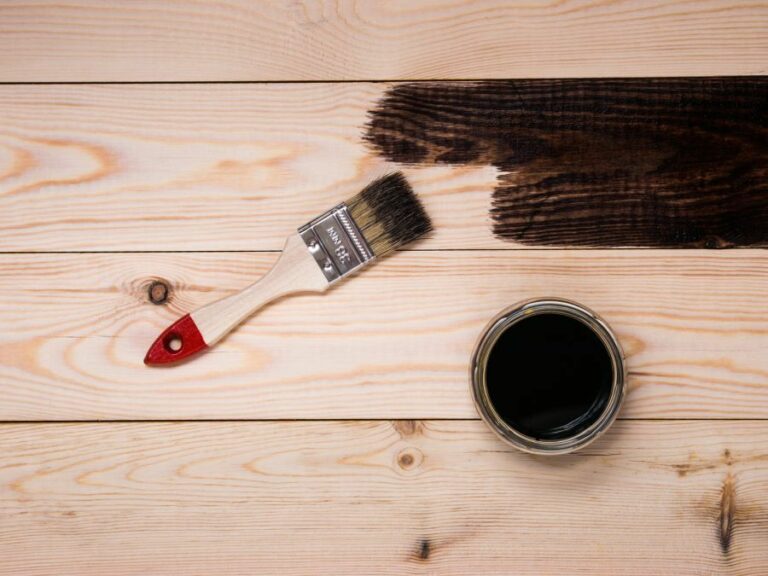
- Base paint (latex or acrylic)
- Wood stain or glaze
- Brushes (both wide and narrow)
- A wood-graining rocker and comb
- Painter’s tape
- Rags
- Sandpaper
- Clear protective finish (optional)
• Step 1: Prepare the Surface
Begin by cleaning the surface to remove any dirt, grease, or debris. If painting a piece of furniture, remove hardware and apply painter’s tape to protect areas you do not want to be painted.
Next, sand the surface to create a smooth, even area for the base paint to adhere well. Wipe off any dust with a damp cloth and let dry completely.
• Step 2: Apply the Base Paint
Select a base paint color that matches the tone of the wood you desire to recreate. For example, choose a light beige for a pine finish or a rich brown for a cherry wood appearance.
Apply the base paint using a wide brush, moving in the direction of the wood grain (horizontal or vertical strokes). Allow the paint to dry completely before proceeding to the next step.
• Step 3: Create the Wood Grain Effect
Begin by applying a thin layer of wood stain or glaze in the same direction as the base paint. You can use a rag for this step or a brush if you prefer more control.
Use a wood-graining rocker in a rocking motion, moving in the direction of the grain. This tool creates a natural-looking pattern when dragged through the wet stain or glaze.
To create knots in the faux wood grain, use the tip of the rocker and press gently into the wet stain or glaze.
Employ a wood-graining comb to refine the lines in the faux wood grain, dragging the teeth through the wet stain or glaze in a continuous, straight motion.
Wipe away any excess stain or glaze with a clean, dry cloth.
• Step 4: Apply Additional Layers (Optional)
For a more intricate, realistic look, repeat Step 3 with additional layers of stain or glaze. Allow each layer to dry before applying the next, and use varying shades of stain or glaze to create depth in the faux wood grain.
• Step 5: Seal the Finish
Once you are satisfied with the faux wood grain appearance and the paint has dried completely, apply a clear protective finish like water-based polyurethane. This step is optional but recommended to ensure the longevity of your faux wood finish.
• Step 6: Reassemble and Enjoy
If working on a piece of furniture or door, remove the painter’s tape and reattach any hardware. Admire your beautiful faux wood finish!
• Tips and Tricks for Success
- Practice your technique on a scrap piece of wood or cardboard before working on the final surface.
- Work quickly when applying the stain or glaze to avoid drying lines.
Remember, creating a faux wood finish takes patience and practice. However, with the right tools and techniques, you will enjoy the warmth and beauty this finish brings to any space in your home.
Step | Description |
|---|---|
1 | Prepare the surface by cleaning it and removing any dirt, grease, and old finish. |
2 | Apply a base coat of paint to the surface, choosing a color that will be the base for the wood grain. |
3 | While the base coat is still wet, drag a wood grain rocker tool through the paint to create the appearance of the wood grain. |
4 | Allow the paint to dry for the recommended period of time on the paint label. |
5 | Apply a glaze over the base coat, using a color that complements the base coat and adds depth to the wood grain effect. |
6 | While the glaze is still wet, use a wood grain comb or another tool to further enhance and refine the wood grain pattern. |
7 | Allow the glaze coat to dry. |
8 | Apply a protective clear coat to seal and protect the faux wood finish. |