DIY Projects With UV-Sensitive Spray Paint. What Pros Say
Are you seeking a unique and exciting twist for your next DIY project? Look no further because UV-sensitive spray paint will improve your creativity game. As experts in this medium, we’re here to provide helpful tips and techniques to kickstart your journey. From transforming furniture to creating stunning artwork with that glow-in-the-dark effect, trust that we’ll guide you every step.
Diy projects with UV-sensitive spray paint:
UV-sensitive spray paint, or photochromic paint, changes color when exposed to ultraviolet (UV) light. Ideal for DIY projects, this paint appears colorless or lightly tinted in normal conditions but transforms into vibrant colors upon interacting with UV radiation. To create unique and visually impressive art, follow a step-by-step guide and experiment with various patterns or designs while considering applications like party decorations, fashion, outdoor art, and home decor.

Ready to add a touch of magic to your DIY projects? Discover how to elevate your creations with the power of UV-sensitive spray paint. Read on to unearth unique ideas and expert tips, and let your imagination run wild as we explore fascinating techniques with sunlight-reactive colors!
Contents
- 1 UV-Sensitive Spray Paint: A Guide to Creative DIY Projects
- 2 Discover Creative Projects Using Spray Paint
- 3 Unlock the Magic of Glow-in-the-Dark Spray Paint
- 3.1 • Illuminating Artwork with Glow in the Dark Spray Paint
- 3.2 • Decorating your Home and Garden with Glowing Paint
- 3.3 • Creating Captivating Signs and Navigation
- 3.4 • Glowing Fabric and Clothing Enhancements
- 3.5 • Safety Applications for Glow in the Dark Spray Paint
- 3.6 • Tips for Using Glow in the Dark Spray Paint
- 4 Master the Art of Spray Paint Techniques and Effects
- 5 Revealing the Best Blacklight-Responsive Paints
UV-Sensitive Spray Paint: A Guide to Creative DIY Projects
UV-sensitive spray paint, also known as photochromic paint or solar-activated paint, is a unique type of paint that changes color upon exposure to ultraviolet (UV) light.
When not exposed to UV light sources, such as sunlight, the paint appears colorless or has a very light tint. Once it interacts with UV radiation, it transforms into vibrant colors, resulting in impressive visual art and DIY creations.
• Understanding the Science Behind UV-Sensitive Spray Paint
To effectively use UV-sensitive spray paint, it’s important to understand the chemistry involved. These paints contain a special type of dye called photochromic dye. The molecules within this dye have the ability to change their structure when exposed to UV light.
Essentially, this change in structure allows the dye molecules to absorb light at different wavelengths, leading to a visible color change.
Photochromic dyes, in turn, consist of two main components: a chromophore and a photoacid. The chromophore is responsible for the light-absorbing properties, while the photoacid provides the necessary energy for molecular transformations.
Thanks to these components, the color change process is reversible. When removed from UV light, the molecules in photochromic paint return to their original structure and regain their transparency.
• Essential Supplies for DIY Projects with UV Sensitive Spray Paint
Before embarking on your DIY endeavors with UV-sensitive spray paint, ensure you have the following supplies:
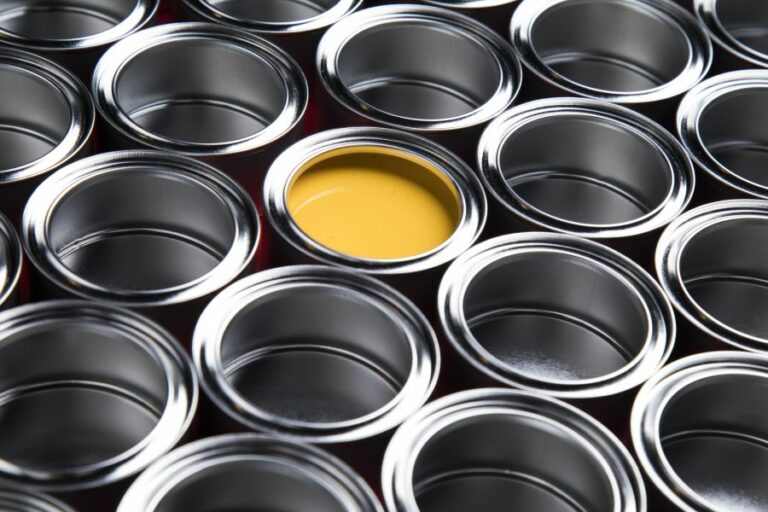
- UV-sensitive spray paint: Choose a high-quality, solar-activated paint suitable for your creative projects.
- Surface materials: Select materials compatible with your chosen spray paint. Examples include canvas, wood, glass, or even fabric. Ensure that the surface is clean and free of dust or dirt prior to painting.
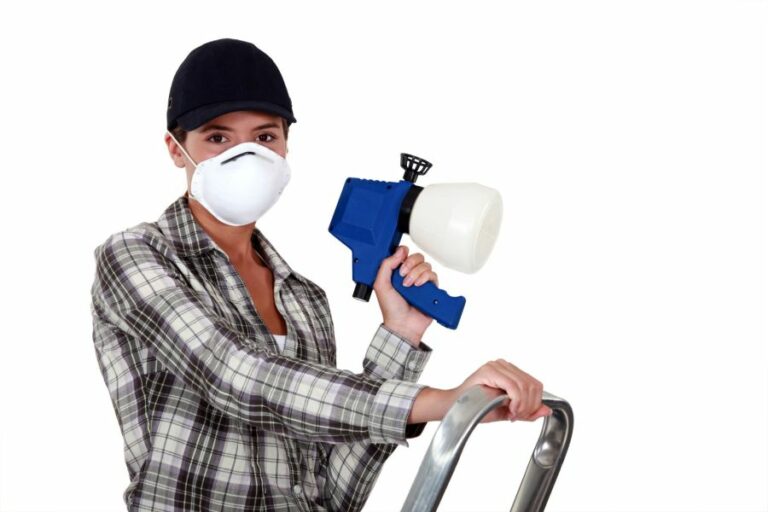
- Protective gear: Consider wearing gloves, a mask, and safety goggles to protect your skin, respiratory system, and eyes from paint particles.
- Sunlight or a UV light source: For the UV-sensitive spray paint to change color, you’ll need access to direct sunlight or a UV light source, such as a blacklight.
• Step-by-Step Guide to Successful UV-Sensitive Spray Paint Projects
Follow these key steps to achieve the best results in your DIY projects with UV-sensitive spray paint:
– Step 1: Prepare Your Workspace
Set up your workspace in a well-ventilated area and cover the surrounding surfaces to protect them from spray paint residue. Ensure the working surface is level for even paint application.
– Step 2: Prime Your Surface
Depending on the surface material you’ve chosen, it may be necessary to apply a primer before using UV-sensitive spray paint. Priming the surface will help the paint adhere better, leading to a longer-lasting creation.
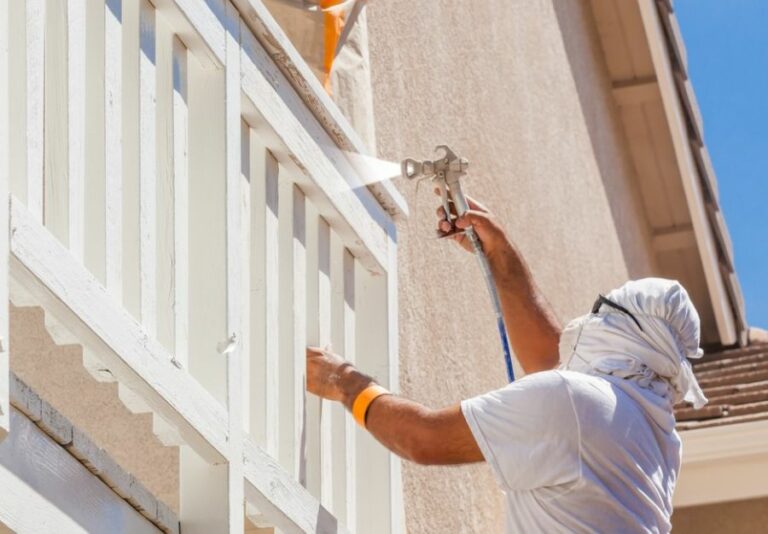
– Step 3: Apply the UV-Sensitive Spray Paint
Shake the spray paint can vigorously for 30 seconds to ensure the paint is mixed well. Hold the can approximately 12 inches away from the surface, and apply a thin coat of paint using a sweeping motion.
It’s better to apply several light coats rather than one heavy coat to avoid drips, smudging, or uneven coverage.
– Step 4: Test Your Creativity
As you paint, experiment with different patterns or designs while keeping in mind that the true effect will only be visible under UV light exposure. Consider using stencils, painter’s tape, or do some freehand work to create your masterpiece.
– Step 5: Cure the Paint
Allow the UV-sensitive spray paint to dry and cure as per the manufacturer’s instructions. Drying time will vary depending on the surface material and paint brand.
– Step 6: Enjoy Your Finished Project
Once the paint is completely dry, enjoy your creation by exposing it to UV light. Observe the color changes and proudly display your work.
• Tips and Ideas for UV Sensitive Spray Paint Projects
- Party decorations: Liven up your party environment by creating UV-sensitive decorations like signs, banners, or painted glassware.
- Fashion statements: Customize clothing, shoes, or bags with UV-sensitive spray paint to create a unique and personal style that will stand out in the sun or under blacklights.
- Outdoor art: Design outdoor sculptures, murals, or garden features that will transform in sunlight, creating an interactive visual experience for yourself and visitors.
- Home dcor: Add a magical touch to your living space by applying UV-sensitive paint to picture frames, mirrors, or even light switches. This will give your home a unique, personalized touch and spark conversations.
In conclusion, with a working knowledge of the science behind UV-sensitive spray paint, a trusty step-by-step guide, and a wide array of project ideas, you are now well-equipped to embark on a journey of creative exploration.
Get out there, experiment, and have fun with this unique paint, transforming ordinary objects into extraordinary, dynamic works of art.
Discover Creative Projects Using Spray Paint
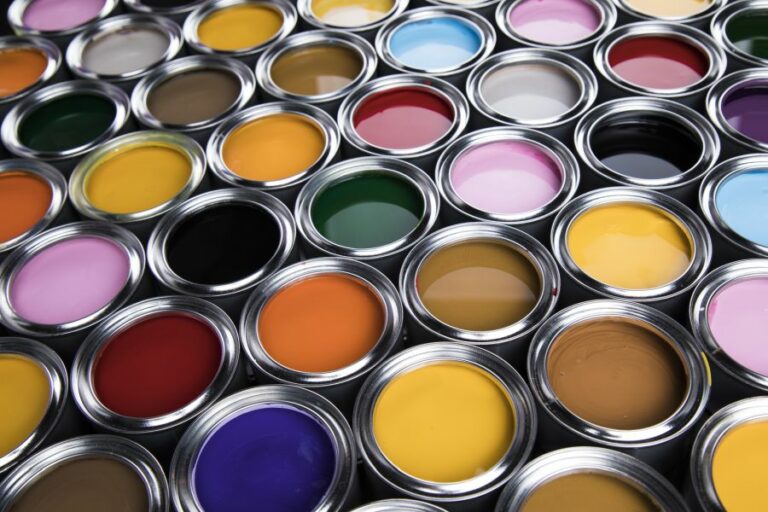
Spray paint is a versatile and budget-friendly medium that allows artists and DIY enthusiasts to create impressive works. With a wide range of colors and finishes available, the possibilities are virtually endless.
• Personalize Your Furniture
Spray paint is excellent for giving your old furniture a new lease on life. You can transform the look of a chair, table, or dresser with just a few coats. While there are many tutorials available online, this guide from Duke University offers a detailed and easy-to-follow approach to furniture restoration.
I recommend: When refurbishing your furniture, ensure you are working in a well-ventilated area and use a drop cloth to protect the surrounding area from paint. Additionally, consider using a layer of primer before applying the paint to ensure better adhesion and an even finish.
• Create Your Own Abstract Art
Spray paint is an excellent medium for artists to quickly create stunning abstract art. This form of expression is not limited by any specific rules, making it an ideal medium for beginners and experienced artists alike. Additionally, spray paint can be applied on various surfaces, such as canvas, wood, or metal.
I recommend: Experimenting with various techniques, such as layering, stenciling, or creating texture by using a crumpled piece of paper or sponge to dab paint. Allow layers to dry before adding more paint to achieve your desired effect.
• Upgrade Your Bike or Car
Spray paint comes in a variety of durable, automotive-grade options that can be used to customize the look of your bike or car. Bright colors, metallic finishes, and even glow-in-the-dark paints are available, offering endless design possibilities.
I recommend: To ensure the best results, carefully prepare the surface by removing dirt, grease, and previous paint layers. Also, use a primer and a clear topcoat to protect the paint and ensure it lasts for many years.
• Design Eye-catching Planters
Spray paint can breathe new life into old or dull planters. Transform plain terra cotta pots or refresh plastic containers with pops of color, metallic accents, or geometric designs.
I recommend: Protecting the inside of the planter with painter’s tape to avoid accidental paint transfers. Additionally, use a clear sealant or varnish to protect the paint from the elements if the plants will be placed outdoors.
• Customize Clothing and Accessories
Use fabric or acrylic spray paint to create unique designs on clothing and accessories, such as shoes, bags, or clothing. Stencils can be used for precise patterns or unleash your creativity by freehand painting.
I recommend: Testing the paint on a small, inconspicuous area of the item to ensure compatibility and desired appearance. Allow for adequate drying time before handling or wearing the item to prevent smudging or transfer.
• Create Your Own Wall Art
Spray paint creates a perfect opportunity to design custom wall art that complements your home decor. From cityscape silhouette art to geometric patterns, there are countless artistic possibilities.
I recommend: Using painter’s tape or stencils for sharp, clean lines, and always consider protecting surrounding surfaces from overspray. Allow the paint to dry for at least 24 hours before hanging the artwork on the wall.
• Transform Glass Surfaces and Objects
Spray paint designed for glass can be used to create unique pieces of art, privacy screens, or simply upgrade old glass items. Utilize stencils or painter’s tape for intricate designs or frosted glass paint for a unique touch.
I recommend: Thoroughly cleaning the glass surface before painting and allowing the paint to dry for at least 72 hours for the best results. For a professional finish, you can also use Goo Gone to remove any adhesive residue from painter’s tape or stickers.
In conclusion, spray paint is a remarkable medium that can be employed for an array of creative projects. By utilizing various techniques and appropriate preparation, you can create stunning and personalized furniture, artwork, clothing, and much more. T
he only limit to what you can make with spray paint is your imagination.
# | Creative Projects Using Spray Paint |
|---|---|
1 | Wall murals |
2 | Canvas art |
3 | Custom furniture |
4 | DIY home decor |
5 | Upcycling old items |
6 | Outdoor art installations |
7 | Stencil artwork |
8 | Refurbishing bicycles or cars |
9 | Fashion customization |
10 | Street art and graffiti |
Unlock the Magic of Glow-in-the-Dark Spray Paint
Glow-in-the-dark spray paint provides an excellent way to add creativity and uniqueness to various surfaces, both indoors and outdoors. This unique type of paint absorbs light during the day and releases a phosphorescent glow when in darkness.
• Illuminating Artwork with Glow in the Dark Spray Paint
Glow-in-the-dark spray paint can take your artistic creations to a whole new level. Artists can use this type of paint on canvas, wood, or metal surfaces to create paintings with a captivating, glowing effect during nighttime.
This feature can provide additional depth to your artwork since it can change the visual experience depending on the light surrounding it.
• Decorating your Home and Garden with Glowing Paint
Adding a touch of luminescence to your home or garden can be easily achieved using glow-in-the-dark spray paint. Some interesting ideas for home application include:
- Light switch plates: Make it easier to locate light switches in the dark by applying glow-in-the-dark paint to the switch plates. This addition is both practical and aesthetically pleasing.
- Stair edges: Applying spray paint to the edges of your stairs can help prevent accidents during nighttime by illuminating each step.
For your garden, there are a myriad of possibilities, such as:
- Garden statues and ornaments: Enhance the visual appeal of your garden decorations by adding a luminescent touch, creating an interesting contrast between light and shadow.
- Outdoor furniture: A subtle glow on the edges of your garden furniture can make it easier to locate them at night, while also adding a whimsical vibe to your outdoor space.
Glow-in-the-dark spray paint presents a functional solution for creating signs and navigation aids. This can be particularly useful in environments where electricity is not readily available or when you want to reduce energy consumption. Examples include:
- Camping trips: Illuminate tent pegs, ropes, or even pathways to make moving around the campsite easier during nighttime.
- Emergency exit signs: Applying the paint to emergency exit signs can ensure that they remain visible during unforeseen circumstances such as blackouts.
• Glowing Fabric and Clothing Enhancements
Utilizing glow-in-the-dark spray paint on fabric can transform ordinary clothing and accessories into dazzling, luminescent masterpieces. Options include:
- Costumes: Create impressive Halloween or party costumes that will leave a lasting impression on others.
- Bags and shoes: Customize your accessories by applying glow-in-the-dark paint for a fun and unique twist. Ensure that the paint you use is suitable for fabric surfaces to achieve the best results.
• Safety Applications for Glow in the Dark Spray Paint
In addition to its artistic and decorative uses, glow-in-the-dark spray paint can also be used for various safety purposes. Some examples are:
- Bike and helmet visibility: Applying the paint to your bicycle frame, pedals, or helmet can increase your visibility during nighttime rides, contributing to a safer cycling experience.
- Child safety: Paint your child’s backpack, jacket, or shoes with glow-in-the-dark spray paint to improve their visibility during low-light conditions, particularly when walking to and from school during winter months.
• Tips for Using Glow in the Dark Spray Paint
From my experience, I have gathered some useful tips to maximize the results when working with this unique paint:
- Always ensure that the surface you intend to paint is clean, dry, and free of grease before applying the glow-in-the-dark spray paint.
- Apply the paint in a well-ventilated area.
- For optimal glowing effects, consider applying multiple light layers of paint, allowing each layer to dry before adding the next one.
- Note that the glowing effect is achieved through light absorption during the day. Therefore, the paint will not glow immediately after application but will require exposure to natural or artificial light sources.
In conclusion, glow in the dark spray paint offers an extensive range of possibilities for creative minds wanting to transform regular spaces, objects, and clothing into enchanting and functional works of art. The potential for its use is vast, limited only by your imagination.
May your inner artist shine as bright as the glow-in-the-dark paint you use.
| Ideas with Glow-in-the-Dark Spray Paint |
|---|
| Decorate clothing or accessories for a glow-in-the-dark party |
| Create wall art or murals that come alive at night |
| Make outdoor decorations and signs for Halloween or other events |
| Paint stepping stones or rocks for a glow-in-the-dark garden |
| Spray paint bike helmets, skateboards, or scooters for nighttime visibility |
| Illuminate jar or bottle displays with a glowing touch |
| Paint switch plates or other household items for easy visibility in the dark |
| Create glowing costumes and props for theater or dance performances |
| Design glow-in-the-dark toys and games for children |
Master the Art of Spray Paint Techniques and Effects
As a spray paint enthusiast and expert, I have discovered numerous techniques over the years that can help you achieve mesmerizing effects using spray paint. Knowing how to manipulate the medium is crucial for beginners and seasoned artists alike.
• Prepare Your Workspace and Materials
Before we explore different techniques, it’s essential to prepare your workspace and gather the necessary materials. The workspace should be well-ventilated, clean, and free of dust.
Acquire various colored spray paints, a suitable painting surface, such as canvas or wood, and other tools like stencils and masking tape. For safety, always wear a mask and gloves when working with spray paint.
• Create Crackle Effects with Spray Paint
To achieve that signature crackle look, you’ll need two contrasting spray paint colors, a textured spray paint, and a clear sealer.
- Start by applying a base coat of your chosen color. Make sure your painting surface is clean and primed for better adhesion.
- Allow the base coat to dry fully. This might take a few hours or more, depending on factors like temperature and humidity.
- Apply textured spray paint, like “stone” or “granite,” over the base coat. Allow it to dry completely.
- Carefully spray your second color over the textured layer. As the paint dries, it will naturally crack and reveal the textured base underneath, creating a stunning crackle effect.
- Seal the finish with a clear spray paint sealer to protect your work from scratches or fading.
• Make Beautiful Stencil Patterns
Using stencils is a simple way to add clean, crisp images or patterns to your spray paint art. You can purchase pre-made stencils or make your own using materials like cardstock or plastic sheets.
- Apply a base coat of spray paint on your painting surface and allow it to dry thoroughly.
- Position your stencil on the canvas or wood and secure it with masking tape, ensuring it is flat against the surface.
- Apply a thin, even coat of spray paint over the stencil, making sure not to oversaturate the area.
- Carefully remove the stencil while the paint is still wet. Allow the paint to dry before touching up any imperfections or adding more layers to create depth.
• Develop Texture with Plastic Bags
Using plastic bags is an effortless method to create organic and abstract textures on your painting surface.
- Begin by applying a base coat of spray paint to your surface, then carefully place a plastic bag over the wet paint.
- Press the bag firmly against the paint, shaping it and moving it around to create your desired texture.
- Gently lift the plastic bag off the canvas or wood, revealing the unique pattern underneath.
- Repeat the process with different colors to create depth and dimension.
• Incorporate Drips and Splatter Effects
Drips and splatters can add an edgy, abstract quality to your spray paint art. This technique is perfect for those who want a more spontaneous and dynamic piece of work.
- Choose your spray paint colors and apply them to your painting surface as desired, either in a random order or using a specific pattern.
- To create drips, spray the paint with an upward flicking motion, allowing the paint to run down the surface. Varying the distance and angle can produce different drip effects.
- For a splatter effect, flick the spray paint nozzle quickly, releasing small droplets of paint onto the canvas or wood. Experiment with different angles and pressures for various splatter sizes.
• Final Thoughts
These are just a few of the countless techniques and effects you can achieve with spray paint. Remember to work in a well-ventilated area, use proper safety equipment, and practice frequently to hone your skills.
The more you experiment and explore, the more unique effects you’ll create with spray paint. The only limit is your creativity!
Effect | Technique |
|---|---|
Stenciling | Create a stencil from paper, plastic, or vinyl; hold it flat against the surface and spray paint over it. Remove the stencil to reveal the design. |
Fading | Start spraying from a distance and slowly move closer to the surface while spraying. The paint will appear denser in the area where the spray started. |
Texturing | For a textured effect, you can crumple up material like paper or plastic, lay it on the surface, and spray paint over it. Remove the material to reveal an uneven texture. |
Marbling | Spray multiple colors close together, then use a wide brush, sponge, or cloth to blend the colors together in a marbled pattern. |
Splatter | Either spray directly onto the surface with the can at an angle or spray the paint onto a brush or toothbrush and flick the bristles to create a splatter effect. |
Dripping | Spray the paint heavily onto the surface from a close distance, allowing the paint to drip and create an intentional dripping effect. |
Revealing the Best Blacklight-Responsive Paints
In the world of science and art, blacklight, also known as ultraviolet (UV) light, has an amazing effect on certain materials, including paint. Exposing these paints to blacklight can create vivid and mesmerizing effects, grabbing the viewers’ attention.
• Fluorescent Paint
Undoubtedly, fluorescent paint is the most well-known and widely used paint that reacts to blacklight. These paints contain pigments that absorb and emit light, causing the paint to glow when exposed to UV rays.
Fluorescent paints are available in various colors and finishes, such as water-based, acrylic, and spray paints.
I recommend using fluorescent acrylic paints, as they are versatile and can be applied to various surfaces, including canvas, wood, and fabrics.
For more information on fluorescent paints, visit the American Chemical Society’s page on fluorescence.
• Phosphorescent Paint
Often referred to as glow-in-the-dark paint, phosphorescent paint absorbs light from various sources, including the sun or artificial lights. When exposed to a dark environment, the paint releases this stored energy, creating a soft glow without the need for a UV light source.
However, this paint also responds to blacklight, which enhances its glow effect. Phosphorescent paint is available in an array of colors and finishes, such as powder, acrylic, and spray paints.
I recommend using phosphorescent powder paint if you’re working on a large-scale art installation, as it can easily be mixed with other materials and offers a longer-lasting glow.
• Invisible UV Paint
As the name suggests, invisible UV paint appears transparent under normal lighting conditions. However, when exposed to blacklight, this paint fluoresces brightly, creating a hidden design or message that only becomes visible under UV light.
Invisible UV paint is commonly used for security purposes, such as marking valuables or creating hidden messages, but it can also be used for artistic and creative applications.
I recommend using invisible UV paint for projects where you want to surprise or reveal hidden elements in your artwork, such as in interactive installations or escape rooms.
For more information about invisible UV paint, visit the Environmental Protection Agency’s page on UV inks and varnishes.
• Reactive Dyes
Reactive dyes are a class of highly colored organic substances that are commonly used in the textile industry. These dyes contain chromophores, which are chemical groups that absorb UV light and emit it as visible light.
Reactive dyes can be applied to various materials, including fabrics, paper, and wood, to create a vivid and lasting color effect.
I recommend using reactive dyes for projects that involve dyeing fabrics, such as costumes or decor, as they are easy to apply, and the final results are often stunning.
• Safety Precautions
While working with blacklight-reactive paints and materials, it is essential to follow safety precautions. Always wear appropriate protective gear, such as gloves and safety goggles. Avoid direct skin contact and inhalation, and use these materials in well-ventilated areas.
Remember that UV light can be harmful to the eyes and skin, so take suitable measures to limit exposure.
In conclusion, there is a variety of paint types that show up under blacklight. By selecting the appropriate paint for your specific project and application, you can create mesmerizing and visually stunning effects for your audience.
Always follow safety precautions and make sure to have fun while exploring the world of blacklight-reactive art.