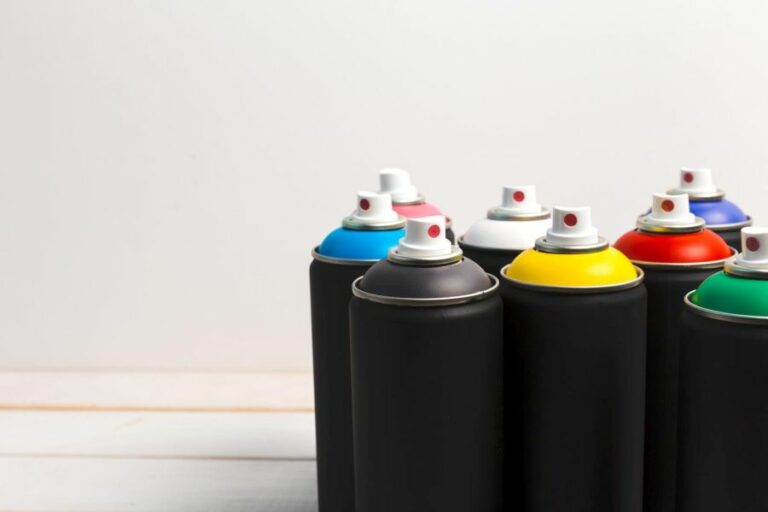
Creating Art With Ultraviolet Spray Paint, What Pros Say
Ever wondered how to make your artwork stand out and be the center of attention? Well, look no further because we have the perfect solution for you! Creating art with ultraviolet (UV) spray paint is the answer. This innovative and unique method of painting can give your work a mesmerizing glow that will capture anyone’s attention.
Creating art with ultraviolet spray paint:
Ultraviolet (UV) spray paint is a colorless paint that becomes visible under UV light, commonly used for invisible artwork, special effects, and unique decorations. To create UV art, prepare a well-ventilated workspace, use a quality blacklight, layer and blend paint, use stencils and negative space, and protect the artwork with a UV-resistant sealer.

Discover the world of ultraviolet spray paint and how it can transform your art into mesmerizing, glow-in-the-dark masterpieces. Explore its unique properties, techniques, and endless potential. Read on and prepare to be amazed by the captivating possibilities that await you.
Contents
- 1 Crafting Masterpieces with UV Reactive Spray Paint
- 2 Transforming Spray Paint into Visual Artistry
- 3 Crafting Luminous Blacklight Artwork
- 4 Maximizing Glow-in-the-Dark Spray Paint Effectiveness
- 5 Achieving Stunning Canvas Effects with Spray Paint
Crafting Masterpieces with UV Reactive Spray Paint
• Overview of Ultraviolet Spray Paint
Ultraviolet (UV) spray paint is a colorless paint that is only visible under ultraviolet light or blacklights. It has a translucent, glossy finish and is often used for invisible artwork, special effects, and unique decorations that come to life in the dark.
UV spray paint is available in various types, including those with weatherproof and quick-drying properties.
When creating art with ultraviolet spray paint, remember that the final result can be seen only under UV light. Therefore, it is essential to work in an appropriate environment and take safety precautions to ensure a successful project.
• Preparing Your Workspace
Before you start working with ultraviolet spray paint, make sure to set up a safe and suitable workspace. Here are some tips for preparing your area:
- Choose a well-ventilated area: The fumes emitted by most spray paints can be harmful when inhaled. It is essential to work in a well-ventilated space or outdoors to minimize the risk.
- Invest in a blacklight: A quality UV light is crucial for this type of artwork. Ensure that it emits a strong UV wavelength, preferably near 365 nm, for maximum visibility of the paint.
- Cover surfaces: To protect the area from accidental overspray, cover nearby furniture and flooring with drop cloths or plastic sheeting.
- Wear safety gear: Use safety goggles, gloves, and a mask to protect yourself from paint fumes and potential skin irritations.
• Tips for Creating UV Art
Here are some suggestions for optimizing your ultraviolet artwork:
– Creating Layers and Patterns
UV paint can be used to create impressive multi-layered effects and patterns by applying multiple layers over one another. Start with a base color, such as white or a light shade, and let it dry completely.
Then, spray additional colors in layers to achieve your desired effect, allowing each layer to dry before applying the next.
– Blending and Shading
UV spray paint can be blended similarly to regular spray paint. To create gradients and shading effects, hold the spray can at an angle and lightly mist the paint over the desired areas. Practice on a piece of cardboard or scrap material to master the technique.
– Stencils and Templates
Stencils and templates are excellent tools for creating intricate designs with UV spray paint. Cut out your design from a sturdy material, such as cardstock or plastic, and secure it to your surface with painter’s tape.
Then, spray your UV paint over the stencil or template, removing it gently once the paint has dried.
– Using Negative Space
Don’t be afraid to use negative space in your designs. By allowing the surface beneath the paint to show through, you can create striking contrasts and subtle effects.
• Caring for Your UV Art
Once your artwork is complete, it is necessary to protect it from damage and fading. Here are some helpful tips:
- Seal your work: Apply a clear UV-resistant sealer or varnish to your artwork to protect it from wear and tear, water, and other elements. Follow the manufacturer’s instructions for the best results.
- Limit exposure to direct sunlight: UV paint can fade with prolonged exposure to direct sunlight. Keep your artwork in a shaded area or apply a UV-resistant film over windows if displaying the piece indoors.
- Clean gently: Avoid using harsh or abrasive cleaning products on your UV artwork. Instead, opt for a gentle soap and water mixture or damp cloth to wipe away dust and dirt.
- Store properly: If your artwork must be stored, wrap it in a UV-resistant material and store it in a dark, cool, and dry location.
• Final Thoughts
Creating art with ultraviolet spray paint is an exciting way to explore the world of invisible art and special effects. With proper workspace setup, solid painting techniques, and careful care for your finished work, you can create stunning, one-of-a-kind pieces that shine bright under a blacklight.
Transforming Spray Paint into Visual Artistry
Spray paint art is a captivating and versatile medium that allows artists to create unique and stunning works of art. When executed with proper technique and skill, spray paint has the potential to transform into a masterpiece.
• Choosing the Right Supplies
Before diving into spray paint techniques, it’s crucial to select the appropriate materials to ensure the best results.
– Spray Paint
Choose high-quality paints that are specifically designed for artwork. I recommend using artist-grade brands for consistent coverage, vibrant colors, and longevity. Some reputable brands include Montana, Liquitex, and Ironlak.
– Surface Material
Spray paint adheres best to surfaces like canvas, wood, or metal. Select the right size and material depending on your desired artwork dimensions and aesthetics.
– Protective Gear
Safety is essential while using spray paint. Ensure adequate ventilation in the area where you’re working, and wear a mask, gloves, and goggles to protect yourself from paint fumes and contact.
• Prepping the Surface
A well-prepared surface is key to a successful spray paint art piece. Start by thoroughly cleaning the surface to remove any dirt, dust, or debris. Next, apply a coat of primer this will ensure better paint adhesion and longevity for your artwork.
If you’re painting on a large canvas or other porous surfaces, consider applying gesso for added protection and smoother paint application.
• Mastering Spray Paint Techniques
To create intricate, awe-inspiring art with spray paint, it’s essential to develop proper techniques and creative approaches. Here are several tips and methods to consider:
– Spray Paint Control
- Distance: Adjust the distance of the spray can from the surface for varied effects. Holding the can further away creates a softer, lighter appearance, while a closer approach provides a more intense, concentrated appearance.
- Speed: Altering the speed of your hand movement can influence the paint’s coverage and texture. Swift movements allow for lighter, more blended shades, while slower movements produce heavier, bolder colors.
- Angle: Using different angles when spraying helps achieve a wide range of effects, from precision lines to gradient blends. Experiment with various angles and movements to discover combinations that work best for your artistic style.
– Manipulating the Paint
- Stencil: Stencils can be used to create intricate designs or defined shapes. This technique works well for achieving crisp, clean lines and intricate detail. Consider using stencil paper or mylar sheets for a reusable and durable stencil option.
- Layering: Layering paint colors and textures can add depth and interest to your artwork. Experiment with various opaque and transparent spray paint colors to create unique and eye-catching effects.
- Masking: Use masking tape or painter’s tape to mask off sections of your surface that you’d like to keep free of paint. This method allows for sharp, clean lines and the creation of geometric designs.
- Texture: Add texture to your artwork by using objects like newspaper, cardboard, or plastic bags to manipulate the paint. Press or rub these objects against the wet paint to create interesting textures and patterns.
– Blending Colors and Shading
- Wet-on-Wet: Apply multiple color layers while the paint is still wet to create smooth transitions and blends. Practice blending one color into another to master this technique and achieve seamless color gradients.
- Wet-on-Dry: For more control over color blending, wait for one layer to dry before applying subsequent layers. This method allows for more precise blending and shading, as the colors won’t mix as quickly.
- Transparent Colors: Utilize transparent spray paint hues to create glazes and subtle shading. These colors can be layered over opaque paints to alter tones and add depth.
• Finishing Touches
Once your artwork is complete, allow the paint to dry thoroughly. This may take anywhere from a few hours to a few days, depending on the humidity and temperature of your work environment.
Consider applying a protective clear coat or varnish to protect your artwork, enhance color vibrancy, and increase durability. Make sure to select a sealer that is compatible with your chosen spray paint brand and surface material.
Lastly, proudly display your new masterpiece and enjoy the satisfaction of transforming spray paint into a work of art. Remember that practice makes perfect, so continue experimenting and exploring your creativity through this exciting medium.
Step | Instruction |
|---|---|
1 | Choose your canvas: Select a suitable surface to paint on, such as a wall, canvas, or wooden board. |
2 | Plan your design: Sketch your idea on paper or create a digital version using design software. |
3 | Pick the right spray paint: Use high-quality spray paint in various colors to achieve the desired effect. |
4 | Practice your technique: Experiment with different spray paint techniques, such as layering, blending, and using stencils, on a separate surface before applying them to your main artwork. |
5 | Prepare the surface: Clean and prime the surface to ensure proper paint adhesion and longevity. |
6 | Create your artwork: Carefully create your design on the surface using your chosen spray paint techniques, being mindful of any potential hazards or safety concerns. |
7 | Protect your artwork: Apply a clear coat or sealant to protect and preserve your artwork. |
Crafting Luminous Blacklight Artwork
Blacklight art, also known as UV-reactive art or fluorescent art, is a captivating form of visual artistry that comes to life under ultraviolet (UV) light. This unique style of artistry boasts glowing and vivid colors that make it a popular choice for various settings, such as festivals, clubs, and galleries.
• Essential Materials for Blacklight Art
– Blacklight Sources
To make blacklight art, you’ll need a UV light source. A blacklight bulb, LED strip, or UV flashlight is necessary to charge up the reactive colors used in your artwork. Try using a black light LED strip for a powerful and energy-efficient UV light source.
– Fluorescent UV Acrylic Paints
These paints are specifically designed to react with UV light and produce the bright, illuminating effect that defines blacklight art. Brands such as Wildfire Lighting and Invisible UV paint supply a range of UV-reactive colors that cater to different budgets and preferences.
– Canvas or other Art Surfaces
You can create blacklight art on a variety of surfaces, such as traditional canvases, fabric, glass, or even walls. Your choice of surface will depend on your preferences and how you imagine your final piece.
• Techniques for Creating Blacklight Art
– Layering
When creating blacklight art, layering is essential to achieve depth and a structured appearance. Start by applying a base layer of paint and allow it to dry before applying additional layers. This gradually builds up the vibrancy and helps prevent the colors from mixing and losing their intensity.
– Contrast and Blending
Achieving the right balance of contrast ensures your artwork remains coherent rather than becoming an overwhelming collection of colors. Consider using darker, non-UV-reactive colors to create shadows and depth.
Additionally, gently blending nearby colors can create a smooth transition between shades, adding to the overall appeal of your artwork.
– Detail and Precision
With blacklight art, details can make a significant difference. Using fine brushes to apply intricate designs or patterns can elevate your artwork, creating a more polished final piece. Keeping a steady hand and working in small areas at a time will ensure better precision.
– Experimentation
Don’t be afraid to get creative with your approaches to blacklight art. Experimenting with different strokes, textures, and styles can help you develop your skills and artistic expression. Play with various materials, such as sponges or palette knives, to explore different outcomes.
• Tips and Recommendations
– Test Your Materials
Before diving into a full artwork, it’s essential to test your materials, such as paints and the UV light source, to ensure they provide the desired effect. This can save you time and resources in the long run.
– Work in a Well-lit Space
As you work on your blacklight art, it’s vital to ensure your workspace is well-lit by natural or artificial light. This enables you to see the colors more accurately and helps avoid mistakes during the painting.
– Utilize Negative Space
To make your blacklight art stand out, be strategic in using negative space. This creates contrast and allows the fluorescent colors to shine even brighter under the blacklight.
– Sealing Your Artwork
Once your artwork is complete and dry, it’s essential to seal it with a clear fixative or varnish to protect it from damage or fading. This ensures your piece stays vibrant and visually stunning for a longer time.
– Observe Other Artists
Studying and experimenting is the key to success. Learn from other artists who specialize in blacklight art by visiting galleries or looking online for inspiration. Websites such as Fluorescent Palace offer unique insight into the work of other blacklight artists.
In conclusion, creating captivating blacklight art involves the right materials, techniques, and a willingness to experiment. With dedication and practice, you can develop your unique style and produce stunning UV-reactive art that appeals to a wide range of viewers.
Step | Instructions |
|---|---|
1 | Choose a suitable working space that can accommodate a blacklight and your art materials. |
2 | Set up a blacklight in your work area. Make sure the blacklight covers the entire area you’ll be painting on. |
3 | Gather your art materials, such as canvas, brushes, and most importantly, UV-reactive or fluorescent paints. |
4 | Sketch your design onto the canvas with a pencil or paintbrush using light-colored, non-UV-reactive paint, as this will not be visible under the blacklight. |
5 | Begin painting your design using UV-reactive or fluorescent paints. As you paint, periodically check your progress under the blacklight to ensure the colors are reacting as expected. |
6 | Once you have completed your painting, allow it to dry before displaying it under blacklight. |
Maximizing Glow-in-the-Dark Spray Paint Effectiveness
Glow-in-the-dark spray paint can transform a boring room or object into something magical and unique. However, many people find it tricky to make the paint perform at its best.
• Choosing the Right Spray Paint
The first crucial step is selecting the right type of glow-in-the-dark spray paint. There are different brands and types available, but keep in mind that you’ll get what you pay for.
A cheap product might not provide the desired effect or may not last as long. I recommend going for a reputable brand known for quality products, such as Rust-Oleum, Montana, or Krylon.
Additionally, consider the type of glow. Some paints emit green or blue light, while others provide a more diverse color range. Choose the color that best suits your project.
• Preparing the Surface
A clean, smooth surface is necessary for achieving the best results with glow-in-the-dark spray paint. Begin by wiping away any dirt, dust, or grime from the area you want to paint. If the surface has a glossy finish, consider lightly sanding it to provide better adhesion for the paint.
Once your surface is clean and prepped, apply a primer. This step is essential, as primer ensures that the spray paint will adhere properly and last longer. White primer is preferable, as it allows the glow-in-the-dark paint to perform better.
• Applying the Glow in the Dark Spray Paint
Before spraying, remember to shake the can well for at least one to two minutes to mix the glowing particles evenly. It’s crucial to apply the paint in thin, even layers for the best glow effect.
Hold the spray can approximately 8 to 12 inches away from the surface, and use a side-to-side motion to apply each coat. Allow each layer to dry for at least 15 minutes before applying the next.
The number of coats required will depend on the specific paint and the desired glow strength. Typically, 2-3 coats should provide a noticeable effect. However, more layers may be necessary for a more intense glow. It’s essential to keep the layers thin so you don’t compromise the final finish.
• Sealing Your Project
Once the glow in the dark spray paint has dried, it’s a good idea to apply a clear sealer. This step adds protection against wear and tear, ensures better performance, and prolongs the life of the glow effect. Choose a sealer that’s compatible with both the spray paint and the surface you’ve painted.
Apply the sealer according to the instructions on the can, and allow it to dry completely before handling or displaying the painted object.
• Charging the Glow
To achieve the best glow effect, your painted project needs to be “charged.” This process involves exposing the paint to a bright light source for a predetermined length of time. The charging time and strength of the glow may vary based on the paint you’ve used.
However, in general, exposing the painted surface to bright sunlight or a strong artificial light source for at least 30 minutes to an hour should yield good results.
Remember that the more light exposure the paint receives, the brighter and longer-lasting the glow will be. Regularly charging the paint will keep the glow effect at its peak.
• Considerations and Tips
- Glow-in-the-dark spray paint requires regular exposure to light to maintain its glow and will naturally fade over time. Familiarize yourself with the paint’s recharging needs and consider its location when using it in your project.
- For an interesting and varied effect, consider using different colors of glow-in-the-dark paint.
- Keep safety in mind while using spray paint. Work in a well-ventilated area, wear a mask and safety goggles and keep the paint away from children and pets.
- Test your glow-in-the-dark spray paint on a small, inconspicuous area before applying it to your main project to ensure you are happy with the results.
By following these steps and advice, you can achieve fantastic results with glow-in-the-dark spray paint. Whether you’re decorating a room, creating artwork, or adding a unique touch to an everyday item, this paint can help your project stand out and shine.
Step | Instructions |
|---|---|
1 | Choose the right glow-in-the-dark spray paint by considering factors like the type of surface, paint durability, and color intensity. |
2 | Prepare the surface by cleaning it, removing dust or dirt, and applying a primer if necessary. |
3 | Shake the spray paint can for at least a minute to mix the paint and glow particles evenly. |
4 | Apply the glow-in-the-dark spray paint evenly to the surface, holding the can about 10-12 inches away. |
5 | Apply multiple coats if needed, allowing the paint to dry completely between coats per the manufacturer’s instructions. |
6 | Let the painted surface dry and cure completely, which can take several hours to a few days, depending on the paint and environmental conditions. |
7 | Expose the painted surface to a light source to “charge” the glow particles. The longer the exposure, the brighter and longer-lasting the glow effect will be. |
Achieving Stunning Canvas Effects with Spray Paint
Spray paint is a versatile medium known for its quick-drying properties and smooth finish. When used on canvas, it can create striking and vibrant art pieces with a unique texture.
• Preparing Your Canvas for Spray Paint
Before you start applying spray paint, it’s essential to prepare your canvas to achieve the desired results.
1. Choosing the Right Canvas
For spray painting, it’s best to opt for a pre-primed canvas. Whether you opt for a stretched canvas or a canvas panel, ensure that it’s primed with gesso to provide better adhesion to the surface.
2. Applying a Background Layer
It’s recommended to add a background layer to your canvas. This can help cover any imperfections and add depth to your final artwork. You can use acrylic paint or even spray paint to create a solid, colored background.
3. Using a Protective Cover
When using spray paint, it’s crucial to cover the surrounding area to prevent any unintended paint splatters. Use a drop cloth, plastic sheet, or old newspapers to protect your workspace.
4. Masking Areas with Tape
If you want to create sharp lines or mask specific areas in your composition, use painter’s tape or masking tape to block off the sections.
• Essential Tools for Spray Painting on Canvas
Before you begin, gather the necessary tools to make your spray painting experience enjoyable and efficient.
- Spray paint: Choose high-quality, artist-grade spray paint for excellent coverage and vibrancy.
- Stencils: Use stencils to guide your designs and add intricate details to your artwork.
- Gloves: Protect your hands from paint with disposable gloves.
- Mask: Wear a mask to avoid inhaling harmful fumes while spray painting.
- Respirator: A respirator can provide additional protection against toxic fumes.
- Newspapers or drop cloth: Protect your work surface from paint splatters.
• Techniques for Creating Spray Paint Art on Canvas
Now that you have gathered your tools and prepared your canvas, let’s dive into some techniques for creating captivating spray paint effects.
1. Create Blurred Background Effects
To achieve a blurred or faded background, use spray paint to create layers from light to dark tones. After spraying the lighter colors first, gradually layer with darker shades, spraying from a distance to gently blend the colors.
2. Use Stencils for Intricate Detailing
Stencils can help create sharp lines and complex designs with ease. Place your stencil on the canvas, secure it with tape or weights, then spray paint over it. Carefully remove the stencil to reveal the design. You can create custom stencils, or purchase them from an art supply store.
3. Dabbing Method for Textured Effects
To create a textured effect on your canvas, spray the paint onto a crumpled piece of paper, sponge, or cloth. Dab the paint-soaked material onto your canvas to create a desired pattern or texture.
4. Add Depth with Shadows and Highlights
Adding shadows and highlights can give your artwork a sense of depth and realism. To create shadows, spray a darker color along the edges of your subject. For highlights, use a lighter color on the areas where the light hits the subject.
– 5. Abstract Techniques and Layering
Experiment with abstract techniques by using a variety of spray angles, distances, and layering. You can also try using splatter effects, dripping paint, or incorporating mixed media elements into your canvas.
• Tips for Successful Spray Painting on Canvas
- Test your spray paint: Before using it on your canvas, test the spray paint on a scrap piece of material to get a feel for the pressure, coverage, and color.
- Work in a well-ventilated area: Ensure that your workspace has adequate airflow to minimize fumes.
- Start with simple designs: Begin with basic shapes, patterns, and color schemes to build your confidence with spray paint techniques.
- Clean your nozzles: Regularly clean your spray paint nozzles to avoid clogging and uneven spray.
- Practice consistency: Spray paint can take some time to master, so practice and experiment to develop consistency in your techniques.
• Proper Care and Preservation of Spray Paint Art
To protect and preserve your spray paint art, you can use a clear protective spray or varnish. This can help protect your artwork from dirt, dust, and UV damage. To find the right protective spray or varnish, consult with an art supply store or check resources online.
In conclusion, creating a spray paint effect on canvas is all about mastering the tools and techniques, experimenting, and having fun with the art medium. As you practice, you will develop your unique spray paint style, resulting in uniquely striking and vibrant canvas art pieces.
Step | Description |
|---|---|
1 | Prepare your work area by laying down a drop cloth or newspaper to protect the surface from paint. |
2 | Choose the colors of spray paint that you want to use for your artwork. |
3 | Place the canvas on the protected surface, ensuring it is flat and stable. |
4 | Shake the spray paint can well for about 30 seconds to ensure the paint is mixed properly. |
5 | Hold the spray paint can about 6-12 inches away from the canvas and begin spraying in a sweeping motion. Apply a light coat of paint, allowing it to dry for a few minutes before adding more layers if desired. |
6 | Experiment with different techniques such as using a stencil, masking parts of the canvas with tape or paper, or layering colors to create the desired spray paint effect. |
7 | Allow the canvas to dry completely, usually for a few hours or overnight, before handling or displaying the artwork. |

