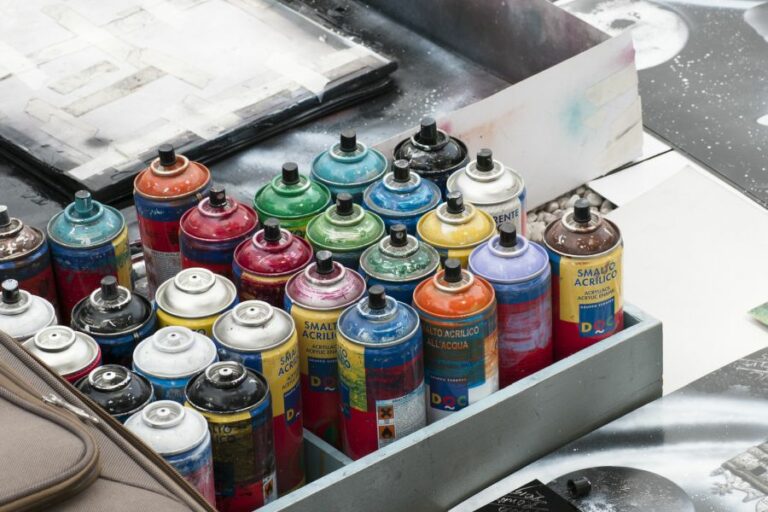
Quick Tips For Successful Plastic Spray Painting. What Pros Say
We all know achieving a professional-looking finish when spray painting plastic can be challenging. Fear not. I’m here to share some quick tips to make the process a breeze, ensuring a successful outcome.
Quick tips for successful plastic spray painting:>
For successful plastic spray painting, choose the appropriate paint, clean and prepare the surface, apply primer, and use proper painting techniques. Opt for specialized plastic paint, clean the surface with mild soap, sand it gently, apply a plastic-specific primer, and spray paint thin, even coats with proper techniques. Finish with a compatible clear sealant for added protection.

Looking for ways to achieve professional-looking results in your plastic spray painting projects? Continue reading for quick, easy-to-follow tips and tricks that will ensure your success in all your future spray-painting endeavors! You won’t want to miss these expert hacks!
Contents
- 1 Efficient Tips for Impeccable Plastic Spray Painting
- 2 Mastering the Art of Spray Painting Plastic Flawlessly
- 2.1 • 1. Choose the Right Paint
- 2.2 • 2. Clean the Surface Thoroughly
- 2.3 • 3. Sand the Surface for Better Adhesion
- 2.4 • 4. Apply a Plastic Primer (If Needed)
- 2.5 • 5. Apply the Spray Paint
- 2.6 • 6. Add a Clear Coat for Protection (Optional)
- 2.7 • 7. Allow for Proper Drying Time
- 2.8 • 8. Reassemble and Enjoy!
- 3 Insightful Advice for Painting Plastic Surfaces
- 4 Achieving Optimal Outcomes When Spray Painting
- 5 Preparing Plastic for Superior Spray Paint Adhesion
Efficient Tips for Impeccable Plastic Spray Painting
• Choosing the Right Spray Paint
Selecting the appropriate spray paint is crucial for a seamless and long-lasting finish. There are specific paints designed for plastic materials, which adhere better and prevent chipping or peeling.
Look for paints labeled as plastic paint or paint for plastics. Brands like Krylon, Rust-Oleum, and Valspar offer specialized plastic spray paints.
Keep in mind the environment where the painted object will be. If it is exposed to the sun or heat, use a paint that offers UV protection. For outdoor items, consider using water-resistant or weather-resistant spray paints.
• Prepping the Surface
For the best results, take the time to clean and prepare the plastic surface. Proper surface preparation is key to achieving a smooth and durable finish.
1. Clean the Surface
Thoroughly clean the plastic surface to remove any dirt, grease, or grime. Use mild soap and water or a plastic cleaner designed for the specific type of plastic.
Avoid using abrasive cleaners, which can scratch the plastic and cause the paint to chip. After cleaning, use a lint-free cloth to wipe down the surface and let it dry completely.
2. Sand the Surface
Gently sand the surface to create a rough texture, which will help the paint adhere better. Use fine-grit sandpaper (400-600 grit) and lightly rub it over the plastic in a circular motion.
Be careful not to overdo it, as too much sanding can damage the plastic. Wipe away any dust or debris with a tack cloth or a damp, lint-free cloth.
3. Apply a Primer
After sanding and wiping away the dust, apply a plastic-specific primer to the surface. Use a spray primer designed for plastic as it will provide better adhesion and coverage.
Remember to shake the can for at least a minute before applying and hold the can about 12 inches away from the plastic. Use thin, even coats and allow the primer to dry according to the instructions on the can.
• Painting Techniques
Now that your surface is prepped and ready, you can begin applying the spray paint. Keep these essential tips in mind while painting:
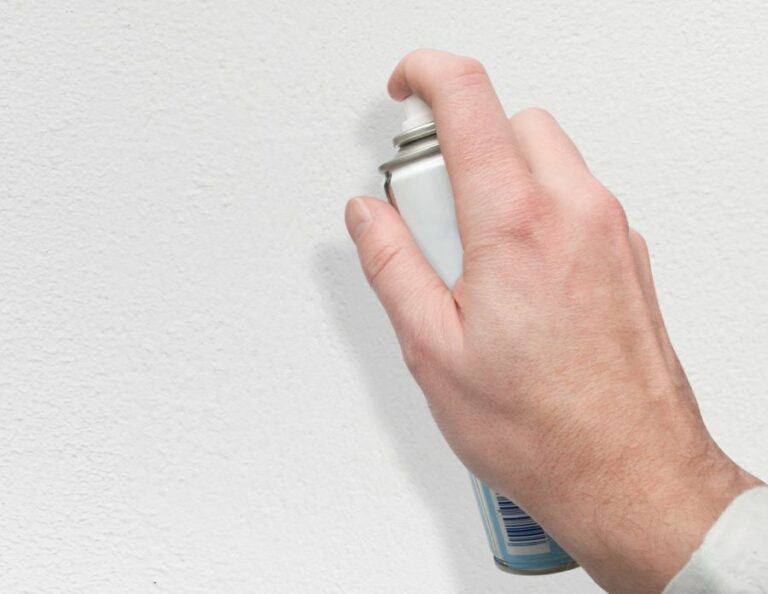
1. Apply Thin, Even Coats
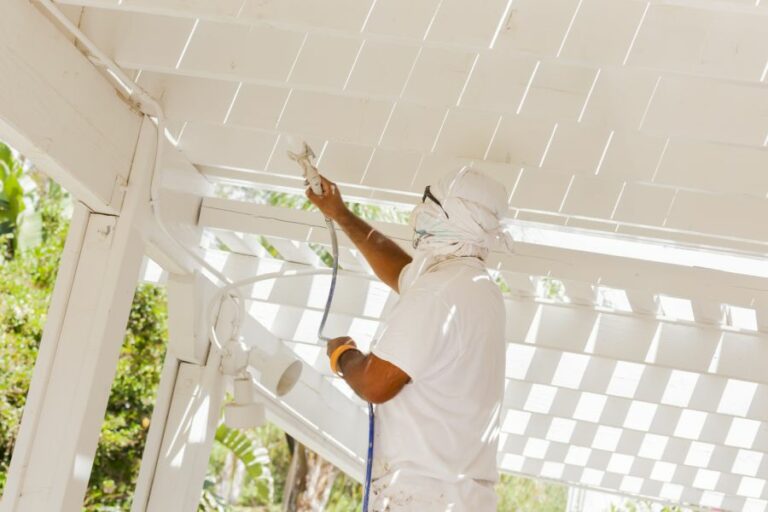
Start by shaking the can of paint for at least a minute to ensure even distribution of the pigment. Hold the can 8-12 inches away from the surface and begin to apply the paint using thin, even coats.
Overlapping each pass of paint by about 50% helps to prevent streaks or uneven coverage. Allow each coat to dry for the recommended amount of time, as indicated on the paint can.
2. Use Proper Spray Painting Techniques
Utilize proper spray painting techniques, such as maintaining a consistent distance from the object and moving in a smooth, sweeping motion.
Avoid stopping or starting the spray over the object, as this can cause uneven coverage, drips, or runs. Instead, start spraying slightly before the object and continue until you’ve passed the edge.
3. Multiple Coats and Cure Time
To achieve a rich, consistent color and finish, apply multiple coats of paint. Allow time for each coat to dry thoroughly, as indicated by the manufacturer. After completing the final coat, allow the paint to cure for a full 24 hours or longer if indicated on the paint can.
• Finishing Touches and Sealant
For added protection and durability, apply a clear sealant after the paint has cured. Choose a sealant compatible with the type of spray paint used. Follow manufacturer instructions for application distance, number of coats, and drying time.
Remember to also clean the spray paint nozzle after use to prevent clogging for future projects. This can be done by turning the can upside down and spraying until clear gas is released.
By following these quick tips and expert recommendations, you can achieve a smooth and successful finish on your plastic spray painting project. Remember, preparation is key, and patience in your painting technique will yield the best results.
Mastering the Art of Spray Painting Plastic Flawlessly
Spray painting plastic can be a challenging task, but with the right preparation and techniques, you can achieve professional-looking results.
• 1. Choose the Right Paint
Not all paints are suitable for use on plastic surfaces. Selecting the appropriate type of paint is critical to ensuring a long-lasting and appealing finish on your project. I recommend using paint specifically designed for plastics, such as Krylon Fusion or Rust-Oleum Paint for Plastic.
These products are formulated to bond better with plastic materials, helping to prevent peeling, chipping, and fading over time.
Alternatively, you can use a plastic primer as a base coat to ensure proper adhesion of regular spray paint. Look for products like Rust-Oleum Specialty Plastic Primer or Krylon Colormaxx Plastic Primer.
• 2. Clean the Surface Thoroughly
Preparing the plastic surface for painting is crucial to obtaining a smooth and flawless result. Start by cleaning the surface with warm, soapy water to remove any dirt, dust, or grease. Scrub gently with a sponge or soft brush, then rinse off the soap and let the plastic dry completely.
If the surface is particularly dirty or has residue from prior paint jobs, consider using a plastic cleaner such as Super Clean or Simple Green. These products are formulated to loosen and break down stains and grime, making it easier to clean the surface.
• 3. Sand the Surface for Better Adhesion
Sanding the plastic surface can help remove any imperfections and provide better paint adhesion. Start with medium-grit sandpaper (150-180 grit) to remove any scratches or rough spots. Sand in a circular motion, applying light pressure to avoid gouging the plastic.
Once the surface is smooth, switch to fine-grit sandpaper (240-320 grit) to achieve a smooth, even finish. Wipe the surface with a damp cloth to remove any sanding dust before proceeding.
• 4. Apply a Plastic Primer (If Needed)
If you are not using paint specifically designed for plastics, it is essential to apply a plastic primer as a base coat. This primer will help the paint bond to the plastic surface and improve the durability of your paint job.
Follow the manufacturer’s instructions for applying the primer, usually requiring a thin, even coat. Allow the primer to dry according to the recommended drying time on the label, typically between 30 minutes to 1 hour.
• 5. Apply the Spray Paint
With the surface properly prepared, it’s time to spray paint your plastic item. Following the instructions on the paint can, shake the can vigorously for about 1-2 minutes to ensure proper mixing of the paint.
Hold the can approximately 10-12 inches away from the surface and apply the paint in a steady, sweeping motion. Avoid lingering too long in one spot, as this can cause the paint to pool and create an uneven finish.
Apply multiple thin coats, allowing each coat to dry for the recommended time before applying the next. This will produce a more even, durable finish than trying to achieve the desired color in a single, heavy coat.
• 6. Add a Clear Coat for Protection (Optional)
To further protect your spray-painted plastic item and add a professional touch, consider applying a clear coat. A clear acrylic sealer can provide a durable, glossy finish that resists fading and chipping. Apply the clear coat in thin, even layers following the same technique as applying the spray paint.
• 7. Allow for Proper Drying Time
Allow your painted plastic item to dry for the recommended time specified on the paint can, typically between 24 to 48 hours. Keep the item in a well-ventilated area, away from direct sunlight and excessive heat or moisture. Proper drying time will ensure a smooth, long-lasting finish on your plastic project.
• 8. Reassemble and Enjoy!
Once the paint is fully dry, carefully reassemble any components or hardware that were removed before painting (if applicable). Your newly spray-painted plastic item is now ready to be admired and utilized!
In conclusion, by following these expert tips and recommendations, you can successfully spray paint plastic items to look like a professional job.
Proper preparation, using suitable paints, and taking the time to apply multiple thin coats can make all the difference when it comes to achieving a smooth, lasting finish. Enjoy the results of your hard work and creativity!
Step | Description |
|---|---|
1 | Clean the plastic surface thoroughly using soap, water and a sponge or cloth, then let it dry completely. |
2 | Lightly sand the surface if it is glossy, using a fine sandpaper (around 220-grit) to create a slightly rough texture for the paint to adhere to. Wipe away the sanding dust with a damp cloth and let it dry. |
3 | Apply a plastic primer following the instructions on the product. This will help the paint to bond with the surface better. |
4 | Allow the primer to dry completely as per the manufacturer’s instructions. |
5 | Shake the spray paint can well for about 30 seconds to ensure proper mixing of the paint. |
6 | Hold the spray can at a distance of around 10-12 inches from the surface and use a sweeping motion while spraying, ensuring that each pass slightly overlaps the previous one. |
7 | Apply multiple thin coats of paint, allowing each coat to dry as per the instructions on the can before applying the next one (usually around 10 minutes). This prevents drips and results in a smoother finish. |
8 | Allow the final coat of paint to dry as per the manufacturer’s instructions. This may require a few hours or overnight depending on the paint. |
9 | If desired, apply a clear coat or sealant to protect the painted surface and provide a glossier finish. |
10 | Allow the clear coat or sealant to dry thoroughly before using or handling the painted plastic item. |
Insightful Advice for Painting Plastic Surfaces
Painting plastic can be a challenging process, especially if you want your project to have a professional and sleek finish.
However, with the right preparation, materials, and techniques, you can achieve impressive results. In this expert guide, we will explore the best tips for painting plastic to ensure your project is a complete success.
• Choosing the Right Materials for Painting Plastic
– Select the Right Plastic-Compatible Primer
The first step in painting plastic is to ensure you are using a suitable primer, which will help the paint adhere to the surface. A plastic-compatible primer creates a bond between the plastic surface and the paint; you can find them at any hardware or paint store.
Rust-Oleum is one recommended brand for plastic primers, but it’s always a good idea to read labels and descriptions to make sure you’re getting the best product for your project.
– Choose a High-Quality Plastic Paint
The type of paint you choose is crucial for the durability and appearance of your project. I recommend using a paint specifically designed for plastic surfaces, as these paints are engineered to chemically bond with the plastic.
This will ensure a more durable and long-lasting finish. Brands like Krylon and Rust-Oleum have excellent ranges of paint specifically designed for plastics.
– Select a Clear Topcoat
To increase the durability of your painted plastic and enhance its appearance, applying a clear coat is essential. The clear coat protects your paint job from scratches, chips, and UV damage, ensuring your project remains in excellent condition.
There are various types of clear coats, such as matte, satin, or gloss, allowing you to choose the best finish for your project.
• Surface Preparation for Painting Plastic
– Clean the Plastic Surface
Before starting the painting process, clean the plastic surface thoroughly, removing any dirt and grime. Use a mild soap and warm water and a soft cloth or sponge to clean the surface gently. Rinse the plastic with clean water and pat it dry. Make sure that the item is completely dry before continuing.
– Sand the Surface
Sanding is an essential step in painting plastic, as it helps create a stronger bond between the primer and the surface.
Use fine-grit sandpaper (I recommend 800 to 1000 grit) to lightly sand the plastic in a circular motion, being careful not to damage the material. After sanding, wipe the surface with a clean cloth to remove any dust.
– Apply the Primer
Once your plastic surface is clean and sanded, it’s time to apply the primer. Hold the spray can about 12 inches away from the surface and apply the primer in thin, even coats. Allow the primer to dry according to the product’s instructions, which typically range from 30 minutes to 1 hour.
• Painting Techniques for Plastic
– Apply Multiple Thin Coats of Paint
When painting plastic, it’s crucial to apply multiple thin coats of paint instead of one thick coat. This technique ensures a smooth, even finish and helps prevent dripping and uneven coverage.
Hold the spray can about 12 inches away from the surface and apply a thin coat, moving in a steady, sweeping motion. Allow each coat to dry according to the paint’s instructions before applying the next coat. Generally, three to four coats of paint are sufficient for complete coverage.
– Maintain Ideal Temperature and Humidity
Temperature and humidity can play critical roles in the outcome of your paint job. The ideal temperature for spray-painting plastic is between 50°F and 90°F, with relative humidity below 85%. Avoid painting in extreme heat or cold, as it can cause the paint to dry too quickly or not adhere properly.
– Use Proper Spray-Painting Technique
Using the correct technique can make a significant difference in the quality of your paint job. Proper spray painting requires maintaining a consistent distance from the surface, about 12 inches, and using even, sweeping motions.
It’s essential not to focus the spray in one area for too long, as this can result in dripping or uneven coverage.
• Finishing Touches
Once your paint coats are dry, it’s time to apply the clear coat. Apply the clear coat in thin, even layers. Allow each coat to dry according to the product’s instructions, usually between 30 minutes and 1 hour. Generally, two to three coats of clear coat are enough to provide protection and a sleek finish.
After the clear coat has dried completely, your painted plastic project is complete! With the proper preparation, materials, and techniques, you will achieve a stunning and long-lasting result.
Tip | |
|---|---|
Clean the surface | Ensure that the plastic surface is clean and free of dirt, grease, or other contaminants before painting. |
Sand the surface | Lightly sand the plastic surface with fine-grit sandpaper to improve paint adhesion. |
Apply a primer | Use a plastic primer or an all-purpose primer to coat the surface, ensuring better adhesion of the paint. |
Choose the right paint | Select paints that are specifically formulated for plastic surfaces or use an all-purpose paint with good adhesion properties. |
Thin coats | Apply several thin coats of paint rather than one thick coat to ensure a smoother and more even finish. |
Allow drying time | Allow enough drying time between coats to avoid paint runs and achieve the best results. |
Seal the paint | Apply a clear sealer or topcoat to protect the paint and enhance its durability. |
Proper curing | Let the paint cure for the recommended time period to ensure the best results and durability. |
Achieving Optimal Outcomes When Spray Painting
Spray painting is an art that requires skill and technique to achieve a smooth, even, and professional-looking finish.
• Proper Preparation of the Surface
The first step to achieving a successful spray paint job is to thoroughly prepare the surface you’ll be painting. You need to ensure the surface is free from dirt, grease, and dust, as these can affect the adhesion and finish of the paint.
Clean the surface using a mild detergent and water, and allow it to dry completely. For metal surfaces, use a wire brush or sandpaper to remove any rust or oxidation.
– Sanding: The Key to a Smooth Surface
Sanding is essential for achieving a smooth surface and optimal paint adhesion. Use fine-grit sandpaper to lightly sand the entire surface, making sure to remove any existing paint, varnish, or gloss.
If you’re painting a wooden surface, always sand in the direction of the wood grain to prevent scratches. After sanding, wipe the surface with a clean, damp cloth to remove any dust or debris.
Priming: The Foundation for a Perfect Paint Job
Applying a primer is crucial for providing a strong base for spray paint to adhere to. Primers also help in masking any imperfections on the surface, ensuring a smooth and even final result.
Choose a primer that is suitable for the material you’re painting and follow the manufacturer’s instructions for application. Allow the primer to dry completely before moving on to the next step.
• Choosing the Right Spray Paint
Selecting the correct spray paint for your project is crucial to achieving the best results. Be sure to choose a high-quality paint that is compatible with the surface you’re working on. It’s also essential to consider factors such as drying time, durability, and coverage.
Don’t be afraid to invest in higher-priced spray paint, as it will likely yield better results in the long run.
– Proper Ventilation and Safety
Always work in a well-ventilated area when using spray paint, as the fumes can be harmful if inhaled for extended periods. Ideally, work outdoors or in a dedicated spray booth with exhaust fans.
Additionally, make sure to wear protective clothing, goggles, and a respirator mask to protect your skin, eyes, and lungs from paint particles and fumes.
• The Art of Spray Painting: Application Techniques
Now that you’ve prepared the surface and chosen the appropriate spray paint, it’s time to apply the paint. Follow these expert tips for the best possible outcome.
– Shake the Can: The Key to Consistent Color
Before you begin, shake the spray paint can for at least one minute to mix the paint thoroughly. This step is crucial for achieving a consistent color and smooth finish. Remember to shake the can occasionally during the painting process to maintain uniformity.
Proper Distance and Angle
To avoid drips and runs, hold the spray paint can approximately 8 to 12 inches away from the surface. Aim the nozzle directly at the surface and keep the can at a 90-degree angle for even coverage.
Test Spray Before Application
Always do a test spray on a scrap piece of material or cardboard to ensure proper paint flow and adjust your technique as needed.
Apply Thin, Even Coats
When spray painting, apply thin and consistent coats, rather than trying to achieve full coverage in a single pass. This method will result in a smoother finish and help avoid drips, runs, and unevenness. Allow each coat to dry according to the manufacturer’s instructions before applying the next layer.
Use a Steady, Back-and-Forth Motion
When applying spray paint, use a steady, sweeping motion, starting and stopping your spray off the edge of the surface. This technique helps prevent paint buildup and ensures a seamless finish.
• Putting on the Finishing Touches
Once the final coat of spray paint has dried completely, lightly sand the surface using ultra-fine grit sandpaper to remove any minor imperfections. Wipe the surface clean with a damp cloth, and apply a clear coat, if desired, to protect and seal the paint job.
By following these expert recommendations and taking the time to properly prepare the surface, choose the appropriate paint, and master your application technique, you can achieve the best results from your spray painting project. Now, go forth, and spray paint like a pro!
Preparing Plastic for Superior Spray Paint Adhesion
Priming plastic surfaces for spray paint is an essential step to ensure a smooth and long-lasting finish.
• Understanding the Importance of Priming
Priming plastic surfaces serves various purposes. Some advantages of using a primer before spray painting include the following:
- Adhesion: Primers help the paint adhere better to the plastic surface, ensuring a long-lasting bond.
- Smoothness: The application of primer creates a smooth surface, ensuring an even coat of spray paint.
- Protection: Primers protect the plastic surface from potential damage caused by the spray paint.
• Choosing the Right Primer for Plastic
Selecting the correct primer for your plastic is crucial to achieving desired results. Using a primer specifically formulated for plastic surfaces will ensure optimal adhesion and durability. Some recommended primers for plastic include:
To find the best primer for your specific plastic, examine the product labels, and conduct a small patch test on an inconspicuous area.
• Step-by-Step Guide to Priming Plastic for Spray Paint
– Step 1: Cleaning the Surface
Before priming, thoroughly clean the plastic surface to remove any dirt, grease, or contaminants. Use a mild detergent mixed with water and a soft cloth or sponge to clean the surface. Rinse off the soap with water and let it dry completely. Avoid using strong solvents that could damage the plastic.
– Step 2: Preparing the Area
Set up a well-ventilated workspace, preferably outdoors or in a garage with open doors and windows. Lay down drop cloths, newspapers, or a large piece of cardboard to protect the surrounding area from paint overspray.
Wear appropriate personal protective equipment, such as gloves, goggles, and a mask or respirator.
– Step 3: Sanding the Surface (Optional)
For better adhesion of the primer, you can slightly scuff the plastic surface with fine-grit sandpaper (320-400 grit). Ensure to sand the surface evenly and avoid creating deep scratches. Wipe the surface clean with a tack cloth or damp cloth to remove any sanding residue.
Keep in mind that sanding is optional and depends on the type of plastic and primer being used. Some primers are designed to bond with plastic surfaces without sanding. Remember to check the manufacturer’s instructions before sanding the surface.
– Step 4: Applying the Primer
Before applying the primer, shake the can well for approximately one minute to ensure that the contents are mixed thoroughly. Hold the can 8-12 inches away from the surface and apply a thin coat of primer by moving the can in a sweeping side-to-side motion. Overlapping each pass by 50% will ensure even coverage.
Allow the primer to dry according to the manufacturer’s recommendations, generally for 20-30 minutes.
– Step 5: Applying Additional Primer Coats (If Needed)
Most plastic surfaces will require 2-3 thin coats of primer for optimal results. If needed, apply additional coats, allowing each coat to dry as per the manufacturer’s instructions.
– Step 6: Inspecting the Surface
Before moving on to spray painting, inspect the primed surface for any drips, runs, or uneven areas. If needed, lightly sand the surface with 400-600 grit sandpaper and apply an additional coat of primer to ensure a smooth finish. Remember to remove any sanding debris with a tack cloth or damp cloth.
• Conclusion
Priming a plastic surface is a crucial step to ensure a smooth and durable spray paint finish. By following the steps outlined in this article, you will be well on your way to achieving professional-looking results.
Always remember to consult the primer manufacturer’s directions and conduct a patch test before working on your project.
Step | Instructions |
|---|---|
1 | Clean the plastic surface with warm soapy water and allow it to dry completely. |
2 | Lightly sand the surface with 220-grit sandpaper to create some texture for the primer to adhere to, then wipe away any dust with a tack cloth. |
3 | Apply a plastic adhesion promoter, following the manufacturer’s instructions, and wait for it to dry as per the recommended time on the product. |
4 | Shake the spray primer can well to ensure proper mixing and coverage. |
5 | Spray a light coat of primer onto the surface, holding the can about 10 to 12 inches away from the plastic, making steady, overlapping strokes. |
6 | Allow the primer to dry for the time recommended on the product, usually between 30 minutes to an hour. |
7 | Repeat steps 5 and 6 to apply additional coats of primer as needed, ensuring the surface is fully covered and even. |
8 | Allow the final coat of primer to dry for 24 hours before applying any spray paint. |