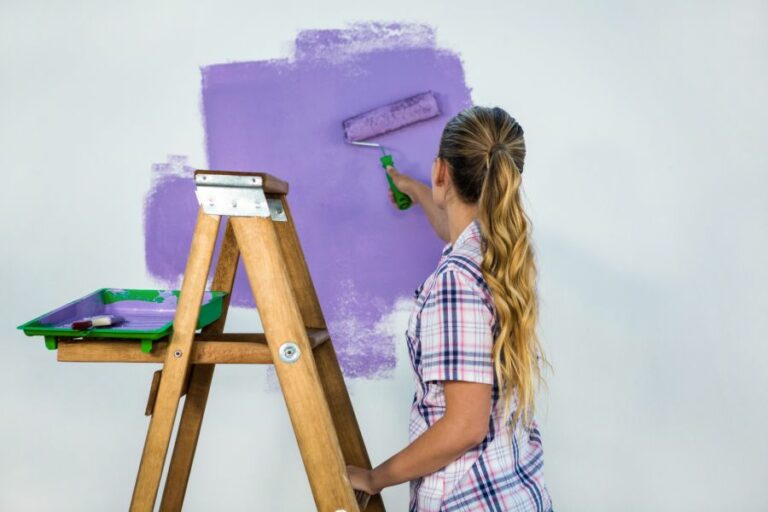
Surface Preparation For UV Paint Application. What Pros Say
When it comes to applying UV paint, proper surface preparation is crucial to achieve a flawless and long-lasting finish. With our expert guidance, you can master this crucial step and enjoy the vibrant results that come from a successful UV paint application.
Surface preparation for UV paint application:
Surface preparation is crucial for a successful UV paint application. It involves evaluating the surface, removing dirt, debris, grease, oil, rust, and oxidation, sanding the area, and priming (if needed). Proper preparation ensures improved paint adhesion, appearance, and long-lasting performance; consult the paint manufacturer’s guidelines for optimal results.

We’ve got you covered on everything you need to know about surface preparation for UV paint application! Learn the secrets to achieving a flawless, lasting finish – read on for expert tips, tricks, and techniques that will save you time and effort while ensuring a stunning result. Don’t miss out!
Contents
- 1 UV Paint Application: Preparing the Surface
- 2 Steps for Surface Preparation Before Painting
- 3 9-Step Guide to Surface Preparation
- 4 Top Surface Preparation Technique Overview
- 5 Final Stage of Surface Prep for Coating Application
UV Paint Application: Preparing the Surface
• Importance of Surface Preparation
Surface preparation is a critical step in ensuring the success and longevity of your UV paint application. Properly preparing the surface can lead to increased adhesion, better appearance, and improved performance of the paint in various environments.
Failure to prepare the surface can result in peeling or flaking paint, decreased durability, and an overall unsatisfactory result.
• Evaluating the Surface
Before starting, it is essential to evaluate the surface to determine its condition and the specific preparation steps needed. Assess the surface for any signs of contamination, oxidation, or damage that may cause adhesion problems during the UV paint application process:
- Dirt and debris
- Grease and oil
- Rust and oxidation
If any of these issues are found, they must be addressed during surface preparation.
• Cleaning the Surface
– Remove Dirt and Debris
Any contamination on the surface can interfere with paint adhesion or create an uneven appearance. Thoroughly clean the surface to remove all traces of dirt and debris.
Start by using a brush, vacuum cleaner, or compressed air to remove any loose particles from small crevices or surface irregularities.
For heavy soiling, use a damp sponge or cloth to wipe the surface. If necessary, use a mild detergent or surface cleaner specifically designed for use with UV paints. Rinse the surface thoroughly with clean water and allow it to dry before moving on to the next step.
– Degrease the Surface
One of the most common causes of paint adhesion problems is the presence of grease or oil on the surface. These contaminants must be removed to ensure the UV paint can properly bond to the surface.
To degrease the surface, choose a solvent or degreaser that is compatible with the substrate material and the UV paint. Test the product on a small, inconspicuous area first to ensure there are no adverse reactions.
Apply the degreaser with a clean, lint-free cloth, and work it into the surface. Follow up with a clean cloth to remove the dissolved grease, and repeat the process until all traces of grease are gone.
Note: Exercise caution when using solvents, as they can be harmful if inhaled or if they come into contact with the skin. Always work in a well-ventilated area and wear appropriate personal protective equipment (PPE).
– Remove Rust and Oxidation
Rust and oxidation can prevent proper adhesion and cause paint to corrode over time. Remove all signs of rust and corrosion before applying UV paint. A wire brush or sandpaper can be used for small, localized areas of rust.
However, for more extensive corrosion or surfaces with heavy oxidation, sandblasting or chemical rust removers may be necessary.
• Sanding the Surface
Sanding is an essential aspect of surface preparation for UV paint application. Sanding provides a “tooth” for the paint to adhere to, improving adhesion and long-term durability. Additionally, sanding can remove minor imperfections, such as scratches or small dents, to create a smooth, even surface.
Using sandpaper with the appropriate grit for the specific surface, start by sanding the entire area to be painted.
If the surface is in good condition, sand with medium-grit sandpaper (120-180 grit) to achieve the proper surface profile. For rough, uneven surfaces or those with significant imperfections, start with coarse-grit sandpaper (60-100 grit) before progressing to finer grits to achieve a smooth finish.
After sanding, remove any residual dust with a vacuum or tack cloth. The surface should now be clean, dull, and free of any contaminants or imperfections that could interfere with the UV paint’s performance.
• Priming the Surface
Priming can enhance paint adhesion and improve overall paint performance. Depending on the substrate and the specific UV paint being used, a primer may be required.
Consult the paint manufacturer’s recommendations to determine if a primer is needed for the application. Choose a primer designed for use with UV paint that is compatible with the surface material.
Apply the primer according to the manufacturer’s instructions, and allow it to dry thoroughly before proceeding with the UV paint application.
• Final Thoughts
Proper surface preparation is crucial for the successful application of UV paint. Take the time to clean, degrease, and address any rust or oxidation before sanding the surface to create a smooth, even profile. The result will be improved paint adhesion, appearance, and long-lasting performance.
Remember always to consult the paint manufacturer’s recommendations and carefully follow their guidelines for surface preparation, as well as application and drying times. By taking these steps, you can ensure a successful UV paint application that will stand the test of time.
Steps for Surface Preparation Before Painting
To ensure a long-lasting and flawless paint job, adequate surface preparation is crucial.
• Importance of Surface Preparation
Surface preparation is the process of removing contaminants and creating an ideal surface for the paint to adhere to. Properly preparing a surface can improve paint adhesion, reduce the risk of paint failure, and ultimately extend the life of the paint job.
• Cleaning the Surface
– Dust and Dirt Removal
Ensuring the surface is clean and free from dust and dirt is essential. These contaminants can cause poor adhesion and result in an uneven paint job.
To remove dust and dirt, use a soft bristle brush or a clean cloth to gently wipe down the surface. For tougher grime, use a sponge or cloth dipped in a mild detergent solution and then rinse with clean water.
– Degreasing
Oil, grease, and other similar contaminants can also interfere with paint adhesion. A suitable degreaser should be used to remove these substances. Appropriate degreasers include acetone, isopropyl alcohol, and TSP (trisodium phosphate).
Apply the degreaser to a clean cloth and gently scrub the affected area. Always follow the manufacturer’s instructions and safety precautions when handling chemicals.
– Mold and Mildew Treatment
Mold and mildew can cause paint to peel and discolor. Therefore, treating these growths is vital to a successful paint job. A mixture of bleach and water is generally effective for removing mold and mildew.
Apply the solution with a sponge or brush, scrubbing the surface until the growth is gone, and then rinse with clean water.
• Assessing the Surface Condition
– Paint Removal
Peeling, flaking, or bubbling paint should be removed before applying a new coat. This can be achieved with a scraper, wire brush, or paint remover. For larger areas, a power sander or sandblasting may be necessary. It is essential to remove all loose paint to ensure proper adhesion of the new coat.
– Filling Holes and Cracks
Holes, cracks, and other surface imperfections need to be filled and smoothed before painting. Use a suitable filler, such as wood filler or spackling compound, to fill the defect.
Apply the filler with a putty knife and smooth it flush with the surrounding surface. Once the filler has dried, sand the area with fine-grit sandpaper to create a smooth surface.
• Sanding the Surface
Sanding is a critical step in surface preparation for painting. Sanding the surface creates a rough, slightly porous texture, which aids paint adhesion. Use medium-grit sandpaper for most surfaces, progressing to finer grits if necessary.
Sand in a circular motion, applying only light pressure. Be sure to clean the surface free of sanding dust before proceeding.
• Priming the Surface
Priming is the final step before paint application. A primer is essential for many surfaces, particularly for porous materials or surfaces with uneven absorption, such as wood or masonry. The primer acts as a barrier, sealing the surface and providing a uniform substrate for the paint to adhere to.
Select a primer appropriate for the surface and type of paint to be used. Apply the primer with a brush, roller, or sprayer, following the manufacturer’s instructions. Allow the primer to dry completely before proceeding with the paint application.
• Conclusion
Proper surface preparation is the foundation of a successful paint job. By diligently following the steps outlined above, you will ensure that your paint job has the best possible adhesion, appearance, and lasting quality.
By cleaning, assessing, sanding, and priming, the surface will be ready for a flawless paint application.
Step | Description |
|---|---|
1 | Clean the surface: Remove dirt, grease, and dust to ensure proper paint adhesion. |
2 | Remove any loose or peeling paint: Use scrapers or sandpaper to get rid of any loose paint or coatings. |
3 | Sand the surface: Sand the surface smooth to enhance paint application and adhesion. |
4 | Fill any cracks or holes: Use appropriate fillers, such as wood filler or spackle, to patch any imperfections on the surface. |
5 | Prime the surface: Apply a primer coat to the cleaned and sanded surface to improve paint adhesion and appearance. |
9-Step Guide to Surface Preparation
Surface preparation is a crucial process in numerous fields, such as painting, coating, and adhesive applications. It ensures the longevity and optimal performance of the desired application.
• 1. Inspection and Assessment
Before starting the surface preparation process, it is essential to inspect and assess the surface’s current condition. Look for any signs of damage, contamination, or other irregularities that may negatively impact the application.
By doing so, you can identify specific requirements related to cleaning, repairing, and other preliminary steps.
• 2. Cleaning
After evaluating the surface condition, the next step is a thorough cleaning to remove dirt, dust, grease, and other contaminants. The cleaning method depends on the type of surface and the level of contamination. Techniques include:
- Hand cleaning with a brush or cloth
- Power washing
- Steam cleaning
- Solvent cleaning
Ensure that the cleaning method you choose is compatible with the surface and the intended application to avoid potential damage.
• 3. Repair and Restoration
If the surface has any damage or defects, repair them before proceeding with further preparation. Common issues include cracks, holes, peeling paint, or rust.
Depending on the surface and the type of damage, use appropriate techniques, such as filling holes with epoxy, patching cracks with concrete, or removing rust using a wire brush.
• 4. Degreasing
The presence of grease, oil, or other similar substances can lead to poor adhesion and reduced performance of paints, coatings, or adhesives. Use a suitable degreaser to remove these contaminants from the surface, and ensure it is properly rinsed to eliminate any residue.
• 5. Surface Profiling
Creating a surface profile improves the adhesion of coatings, paints, or adhesives to the surface. Profiling techniques vary depending on the type of surface and the intended application.
Abrasive blastings, such as sand or grit blasting, and acid etching are commonly used methods. Alternatively, you can use mechanical methods such as grinding, scarifying, or shot blasting.
• 6. Stripping
If the surface has any existing coatings or paint, it is crucial to strip them away to ensure proper adhesion and performance of the new application. Common stripping methods include:
- Chemical stripping using a paint remover
- Mechanical stripping using sanders, scrapers, or grinders
- Heat stripping with a heat gun or torch
Choose the safest and most efficient method based on the surface type, the coating to be removed, and the desired application.
• 7. Surface Drying
Moisture can negatively impact the adhesion and performance of paints, coatings, and adhesives. After thorough cleaning and stripping, make sure the surface is completely dry before proceeding.
You can accelerate the drying process using heaters, dehumidifiers, or fans, but remember to consult the manufacturer’s guidelines for optimal drying conditions.
• 8. Vacuuming
After completing the previous steps, it is essential to remove any remaining dust or debris from the surface. Use a vacuum with a HEPA filter to ensure the surface is completely clean and ready for the final step in the surface preparation process.
• 9. Priming
Priming is the final step in surface preparation for many applications. A primer helps enhance adhesion, fill surface irregularities, and create a uniform surface. Choose a primer compatible with the surface type and intended application, and follow the manufacturer’s instructions for the appropriate application technique and drying time.
By following these nine steps of surface preparation, you can ensure the longevity and optimal performance of your desired application. Proper planning, selection of appropriate tools, and attention to detail are key factors in achieving successful results.
Remember to always follow the manufacturer’s guidelines and safety recommendations throughout the process.
Step | Description |
|---|---|
1 | Remove loose materials |
2 | Clean the surface |
3 | Remove grease and oil |
4 | Remove rust and scale |
5 | Apply surface profile |
6 | Inspect and repair defects |
7 | Apply prime coating |
8 | Cure the surface |
9 | Final inspection and approval |
Top Surface Preparation Technique Overview
Surface preparation is a crucial step in various industries, such as painting, coating, and corrosion prevention. It ensures that the material’s surface is clean and free from contaminants, maximizing the performance and durability of coatings and treatments.
Among various surface preparation techniques, abrasive blasting has earned a reputation as the most common and effective method.
• Importance of Surface Preparation
Surface preparation is the process of cleaning and preparing a surface for the application of coatings, paints, or protective treatments. It is an essential step to ensure the longevity and effectiveness of the coating system. The primary objectives of surface preparation are to:
- Remove contaminants like dirt, grease, oils, and salts
- Roughen the surface to increase the adhesion between the coating and the substrate
- Eliminate surface defects that might compromise the coating’s performance
By ensuring a clean and acceptable surface profile, surface preparation techniques help prevent premature coating failures and increase the service life of the applied system.
• What is Abrasive Blasting?
Abrasive blasting, also commonly known as sandblasting or grit blasting, is a method of forcibly propelling a stream of abrasive material against a surface.
The process uses compressed air or high-pressure water to remove contaminants from a material’s surface and create a uniform, rough surface profile. Abrasive blasting has a wide range of applications, including:
- Cleaning and descaling surfaces
- Removing rust, paint, and coatings
- Preparing surfaces for painting and coating
- Finishing and polishing of metals and other materials
- Etching designs and patterns onto glass, stone, and metal surfaces
• Types of Abrasive Blasting
There are several types of abrasive blasting techniques based on the abrasive media and equipment used. Some of the widely used abrasive blasting techniques are:
– Dry Abrasive Blasting
Dry abrasive blasting, the most common type, involves propelling dry abrasive particles against the surface using compressed air. It efficiently removes contaminants, coatings, and rust and creates a highly textured surface.
Common abrasive materials used in dry blasting include sand, glass beads, steel grit, and aluminum oxide.
– Wet Abrasive Blasting
Wet abrasive blasting, or wet blasting, uses a combination of water and abrasive media to clean and prepare the surface.
Wet blasting not only eliminates dust but also reduces the need for containment measures, making it suitable for sensitive environments. Commonly used abrasives in wet blasting are garnet, glass beads, and plastic media.
– Vapor Abrasive Blasting
Vapor abrasive blasting is an advanced form of wet blasting in which an abrasive media and water are combined into a slurry before being propelled to the surface. This method ensures controlled abrasive delivery, reducing material consumption and dust emission.
Vapor abrasive blasting is highly effective at removing coatings and corrosion from delicate surfaces without causing harm.
• Factors to Consider When Selecting Abrasive Blasting Techniques
Choosing the appropriate abrasive blasting technique and media depends on various factors, including:
- Surface material and condition
- Type and thickness of coatings to be removed
- Desired surface profile and roughness
- Environmental considerations and restrictions
- Project timeline and budget
A comprehensive understanding of these factors, along with an evaluation of the advantages and limitations of each blasting method, is essential for effective surface preparation.
• Safety and Environmental Concerns
Abrasive blasting poses certain safety and environmental risks. Some of the precautions that must be taken during abrasive blasting operations include:
- Proper selection and use of personal protective equipment (PPE) such as helmets, gloves, and respirators
- Implementation of containment measures to prevent the release of debris and contaminants into the environment
- Regular monitoring of air quality and noise levels at the work site
- Proper disposal of spent abrasive materials, following local and federal regulations
Additionally, substituting hazardous or silica-containing abrasives with environmentally friendly, low-toxicity alternatives, like garnet and steel grit, can minimize the impact on both humans and the environment.
• Final Thoughts
Abrasive blasting is undoubtedly the most prevalent technique for industrial surface preparation. It effectively cleans surfaces, removes contaminants, and provides an adequate profile for the application of various coatings and treatments.
However, selecting the proper blasting technique and abrasive media is essential to ensure the desired results without compromising safety or harming the environment.
Final Stage of Surface Prep for Coating Application
The final stage of surface preparation before coating application is a critical step that can greatly impact the quality, durability, and longevity of the applied coating.
Properly prepared substrate surfaces will ensure excellent adhesion of the coating and help prevent coating failures, such as peeling, blistering, or delamination.
• Importance of the Last Stage of Surface Preparation
The last stage of surface preparation is vital in ensuring the proper adhesion of the applied coating to the surface. Without proper surface preparation, coatings may not adhere properly, leading to premature failure and costly repairs.
Additionally, a well-prepared surface can enhance the performance of the coating system, increasing its service life and providing better protection to the substrate beneath.
• Common Surface Preparation Methods
There are various surface preparation techniques that can be employed, depending on the type and condition of the substrate, as well as the specific requirements of the coating system being applied. Some of these techniques include:
– Abrasive Blasting
Abrasive blasting, or sandblasting, is a commonly used method of surface preparation, particularly for steel or concrete surfaces.
Utilizing high-pressure air and abrasive media, this method efficiently removes rust, mill scale, old paint, and other contaminants from the surface while creating a uniform profile for improved coating adhesion. There are several types of abrasive blasting, including:
- Dry abrasive blasting
- Wet abrasive blasting
- Vacuum-assisted abrasive blasting
In most cases, abrasive blasting is followed by a thorough cleaning to remove any residual dust or debris.
– Power Tool Cleaning
Power tool cleaning is another method of surface preparation primarily used to remove rust, old paint, or mill scale from steel surfaces. Some common power tools employed for this purpose include:
- Wire brushes
- Grinding wheels
- Needle guns
- Sanding discs
While power tool cleaning may not produce the same uniform surface profile as abrasive blasting, it can still be an effective means of surface preparation for certain applications and conditions.
– Chemical Cleaning
Chemical cleaning is often used to remove contaminants such as oil, grease, and soil from the surface before coating application. Chemical cleaning can be performed using various methods, such as:
- Solvent cleaning (using petroleum-based solvents)
- Alkaline cleaning (using alkaline-based compounds)
- Acid cleaning (using acid-based solutions)
It is important to rinse and neutralize the surface after chemical cleaning to ensure no residues are left behind, as these can interfere with the coating adhesion.
– Water jetting
Water jetting, or hydro blasting, uses high-pressure water to remove contaminants and loose or unsound paint from the surface. There are several levels of water jetting, depending on the pressure used:
- Low-pressure water jetting (< 5,000 psi)
- High-pressure water jetting (5,000 to 10,000 psi)
- Ultrahigh-pressure water jetting (10,000 to 40,000 psi)
Water jetting is often used in combination with other surface preparation methods, such as abrasive blasting or power tool cleaning, to help remove contaminants and create an even surface profile.
• Recommended Procedure for the Last Stage of Surface Preparation
To ensure optimal results when applying a coating, it is essential to follow a recommended procedure for the final stage of surface preparation. These steps can include:
- Select the appropriate surface preparation method(s): This will be based on factors such as the type of substrate, the condition of the surface, the coating system to be applied, and any specific project requirements.
- Carry out surface preparation: Implement the chosen surface preparation method(s), ensuring that any contaminants, unsound coatings, and other imperfections are effectively removed.
- Inspect the surface: Inspect the prepared surface to ensure it meets the specified requirements for cleanliness and surface profile. Use appropriate instruments and test methods for more accurate assessments, such as a Surface Profile Gauge to measure the surface roughness.
- Clean the surface: Thoroughly clean the surface with compressed air or a vacuum cleaner to remove any dust, debris, or residue that may have been left behind during the surface preparation process.
- Apply a test patch (optional): Before applying the full coating system, consider applying a test patch to a small section of the prepared surface to ensure proper adhesion and compatibility with the substrate.
- Apply the coating.: Once the surface has been properly prepared and inspected and any necessary test patches have been performed, proceed with applying the coating system as per the manufacturer’s recommendations.
By following these recommended steps, coupled with a meticulous approach to surface preparation, you can ensure the optimal adhesion and performance of your applied coating, ultimately extending the life of the project and reducing maintenance and repair costs.

