Effective Surface Preparation For Paint Adhesion. What Pros Say
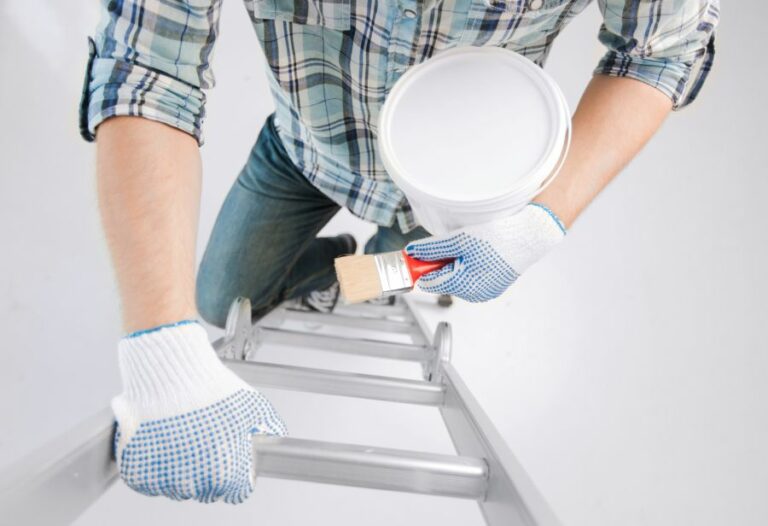
The secret lies in effective surface preparation for paint adhesion when achieving a flawless and long-lasting paint job. We understand the challenges and frustrations of painting surfaces, but fear not – we have the answers you’ve sought. Our expertise and experience in surface preparation will ensure you have a solid foundation for a professional and durable result.
Effective surface preparation for paint adhesion:
Effective surface preparation for paint adhesion involves thoroughly cleaning, repairing defects, priming, and final sanding. Ensuring surfaces are free of dirt, oil, and other contaminants, addressing cracks and peeling paint, and applying compatible primer results in long-lasting performance and professional-quality finishes.

Unlock the secrets to flawless paintwork! Dive deeper into effective surface preparation techniques and materials that ensure long-lasting paint adhesion. Say goodbye to peeling and chipping – read on and transform your painting projects today!
Contents
- 1 Optimal Surface Preparation Techniques for Paint Bonding
- 2 Techniques for Preparing a Surface for Enhanced Adhesion
- 3 Top Four Methods to Prep Surfaces for Adhesive Applications
- 4 Key Surface Preparation Strategies for Painting Success
- 5 Top Approaches to Achieve Strong Adhesion on Surfaces
Optimal Surface Preparation Techniques for Paint Bonding
Surface preparation is an essential step in ensuring the long-lasting performance and durability of any painting project. Properly preparing surfaces for painting ensures that the paint adheres evenly and consistently, leading to a professional-looking, high-quality finish.
• Importance of Surface Cleaning
The first step in preparing a surface for painting is a thorough cleaning. Dirt, oil, grease, and other contaminants can hinder paint adhesion and lead to premature paint failure. To prevent this, ensure the surface is free of dust, debris, and foreign substances that might affect the paint’s performance.
– Recommendations for Cleaning Surfaces
- Use a damp cloth or sponge, mild detergent, and water to clean most surfaces. Rinse with clean water and allow the surface to dry completely before moving on to the next step.
- For stubborn stains and dirt, a specialty cleaner or solvent may be necessary. Always follow the manufacturer’s instructions and take appropriate safety precautions when using chemical cleaners.
- In some cases, pressure washing can be an effective cleaning method, especially for exterior surfaces. However, use caution with this approach, as excessive pressure can cause damage to certain surfaces.
• Addressing Surface Defects
After cleaning, examine the surface for defects such as cracks, dents, peeling paint, or other imperfections that may require repair before painting. Addressing these issues early in the process is important to ensure a smooth and even paint application.
– Recommendations for Repairing Surface Defects
- Fill small cracks and holes using a suitable filler or spackling compound following the manufacturer’s instructions. Allow the filler to dry, then sand the repair smoothly using fine-grit sandpaper.
- For larger cracks or damaged areas, a more extensive repair may be necessary. This may involve removing loose or damaged material and applying a patching compound or other appropriate repair materials.
- Sanding or scraping might be needed to remove loose or peeling paint. When doing this, take care not to damage the underlying surface and ensure that all paint edges blend smoothly into the surrounding area.
• Surface Priming
After addressing surface defects and ensuring the surface is clean and prepared, it’s time to apply a primer. Primers serve multiple purposes, including improving paint adhesion, sealing porous surfaces, and providing a uniform base for the topcoat.
– Recommendations for Applying Primer
- Choose a primer that is compatible with your chosen paint type and the surface material being painted. Consult the paint or primer manufacturer’s instructions for specific guidance.
- Always follow the manufacturer’s recommended application methods and drying times for the primer. Failure to do so can result in poor adhesion or other issues during the painting process.
- For optimal adhesion, it’s important to apply the primer evenly and thoroughly, covering the entire surface area. Use a quality brush, roller, or spray application for the best results.
• Final Sanding and Surface Check
Before applying the paint, give the primed surface a light sanding with fine-grit sandpaper to create a smooth, even profile for the paint to adhere to. This step also helps to remove any remaining surface imperfections that might hinder paint adhesion.
– Recommendations for Final Sanding and Surface Check
- Use a 220-grit or finer sandpaper to lightly sand the entire surface, taking care not to damage the primer layer. A sanding sponge can be helpful for reaching tight spots or contours.
- After sanding, remove any dust or debris by wiping the surface with a clean, damp cloth or tack cloth.
- Take this opportunity to inspect the entire surface for any missed defects or issues that may require attention before applying the paint.
By following these steps and recommendations, you’ll ensure that your surface is properly prepared for optimal paint adhesion and long-lasting performance.
Don’t skip or cut corners on surface preparation — investing time and effort here will pay off in a professional, high-quality result that stands the test of time.
Techniques for Preparing a Surface for Enhanced Adhesion
• Importance of Surface Preparation
Preparing a surface for adhesion is a crucial step in ensuring strong and long-lasting bonds. It can significantly affect the overall performance of the adhesive and the outcome of the project. Lack of proper surface preparation can result in weak bonds, reduced durability, and even failure of the joint.
• Step-by-Step Process for Surface Preparation
1. Evaluation and Selection of Materials
Before starting the preparation process, it is essential to evaluate and select the right adhesive and materials for the specific application. Different materials have varying surface properties, and some adhesives may not bond well with certain surfaces.
To ensure compatibility, consult the technical datasheets of the adhesive and follow the manufacturer’s recommendations.
2. Cleaning the Surface
The presence of contaminants, such as dirt, grease, and oils, can considerably affect the adhesive bond strength. Removing these contaminants is a fundamental step in surface preparation.
Using Solvents
Start by using a clean cloth or paper towel, dampened with a suitable solvent, to wipe the surface. Common solvents for this purpose include:
- Isopropyl alcohol (IPA)
- Acetone
- Methyl ethyl ketone (MEK)
Always use solvents in a well-ventilated area and follow safety precautions as outlined by the solvent manufacturer.
After wiping the surface, use a clean, dry cloth to remove any remaining solvent residues. Repeat this process until the cloth or paper towel remains free of contaminants.
Mechanical Cleaning
Sometimes, contaminants can be difficult to remove using solvents alone. In such cases, employ mechanical cleaning methods such as:
- Sanding
- Abrasive blasting
- Wire brushing
After mechanical cleaning, remove the surface dust using compressed air or a clean, dry cloth dampened with a solvent.
3. Degreasing the Surface
Degreasing is essential for removing greasy or oily contaminants that could affect the adhesive bond.
Use an appropriate degreasing agent and follow the manufacturer’s guidelines for the best results.
4. Surface Activation
Surface activation aims to increase surface energy, which enhances the adhesive’s wetting ability and promotes stronger bonding.
Chemical Treatment
Some surfaces require chemical treatment to increase their surface energy. This step can involve using a primer, adhesion promoter, or surface conditioner. Consult the adhesive manufacturer’s recommendation for the proper chemical treatment.
Applying Heat
For some materials, heat can help activate the surface, resulting in better adhesion. Follow the adhesive manufacturer’s recommendation on the temperature and duration for heating the surface.
5. Apply the Adhesive
Once the surface is prepared, apply the adhesive as specified by the product’s instructions. The adhesive may require mixing or curing, so ensure to follow the manufacturer’s recommendations.
• Expert Recommendations
– Do a Test Bond
To ensure the surface preparation process is effective, perform a test bond before starting the main project. This step will help identify any issues with the adhesive selection or surface preparation method.
– Monitor Surface Energy Levels
For critical applications, monitoring surface energy levels can be helpful in ensuring proper adhesion. Using surface energy testing methods such as contact angle measurements or dyne testing can validate surface preparation effectiveness.
– Follow Safety Precautions
It’s essential to protect yourself and the environment while preparing surfaces for adhesion. Wear personal protective equipment such as safety glasses and gloves, ventilate the workspace, and follow all safety guidelines provided by the adhesive and solvent manufacturers.
• Conclusion
Preparing a surface for adhesion is a critical step in ensuring strong and lasting bonds. By following the outlined step-by-step process, consulting adhesive manufacturers’ recommendations, and incorporating expert advice, you can achieve optimal adhesion results for your project.
Step | Description |
|---|---|
1 | Clean the surface: Remove any dirt, dust, grease, or other contaminants from the surface to ensure proper adhesion. |
2 | Roughen the surface: Use sandpaper, steel wool, or other abrasive materials to create a slightly rough texture on the surface, which can improve adhesion. |
3 | Remove debris: After roughening the surface, remove any debris left behind by the process with a clean, damp cloth or brush. |
4 | Apply a primer or adhesion promoter: In some cases, applying a primer or adhesion promoter can help to improve the bond between the adhesive and the surface, especially for difficult-to-adhere surfaces. |
5 | Allow the surface to dry: After cleaning and priming the surface, allow it to dry completely before applying any adhesive materials. |
Top Four Methods to Prep Surfaces for Adhesive Applications
Adhesion is fundamental to achieving a strong bond between materials. However, the bond can only be as strong as the surface which it adheres to. Thus, surface preparation becomes an essential process when using adhesives.
– Cleaning the Surface
Cleaning a surface is the simplest step, yet a critical one, in ensuring strong adhesive bonds. Proper cleaning removes contaminants such as dirt, dust, grease, and oil that prevent solid contact between the adhesive and the surface.
I recommend using an appropriate cleaning agent, such as isopropyl alcohol, acetone, or a commercial degreaser, followed by a thorough rinse with clean water. This ensures the removal of dirt, grease, and other contaminants on the surface that could weaken the adhesive bond.
– Abrading the Surface
Abrading a surface helps to create a better mechanical bond by increasing its surface area, as well as removing any surface layer (such as oxide layers) that may negatively affect adhesion. Various methods can be used for abrasion, including sanding, grinding, or blasting (e.g., sandblasting or bead blasting).
Choosing the appropriate abrasive method depends on the type of material to be bonded and the application requirements. In general, a coarse abrasive is preferred for rougher surfaces, and a finer abrasive for smoother surfaces.
Personally, I recommend using sandpaper or abrasive pads for smaller, more delicate surfaces and grinding or blasting methods for larger, more robust surfaces. Always remember to clean the surface again after abrasion to remove any debris created by the process.
– Applying a Primer
Primers are coatings applied to a surface before applying an adhesive to enhance bonding performance. They offer various benefits, such as improving surface wettability, increasing bond strength, and providing chemical resistance to the bonded materials.
Selecting an appropriate primer is crucial since an incompatible primer may negatively affect adhesion. Adhesive manufacturers often provide guidance on selecting the right primer for their products, and it’s important to follow their recommendations.
I recommend applying a thin, uniform layer of primer to the surface, allowing it to dry completely before applying adhesive. This ensures that the primer functions optimally, creating a chemical bond with the surface and the adhesive.
– Using a Coupling Agent
A coupling agent, also known as a surface modifier, is a chemical compound that reacts with both the adhesive and the surface to be bonded, improving the adhesion between them chemically.
This method is particularly useful when bonding dissimilar materials or where the adhesive has weak adhesion on its own.
Coupling agents are typically applied as a thin coating to the surface, either in a diluted form or as a solution. In some cases, they can be pre-mixed with the adhesive before application.
One commonly used coupling agent is silane, which reacts with both the adhesive and the substrate, forming a strong bond. I recommend using a coupling agent specifically designed for the type of adhesive and material being bonded.
Ensure that the coupling agent is thoroughly mixed with the adhesive or uniformly coated on the surface before applying the adhesive. This will guarantee optimal results and improved bond performance.
• Conclusion
Proper surface preparation is critical for successful adhesive bonding. By following these four main methods cleaning, abrading, applying a primer, and using a coupling agent, you’ll create a strong bond that stands the test of time.
Always remember to consult the adhesive manufacturer’s guidelines and choose the appropriate method for your specific application.
Key Surface Preparation Strategies for Painting Success
Before you begin any painting project, proper surface preparation is crucial to ensure a successful outcome.
• Importance of Surface Preparation
Surface preparation is an essential step in painting because it ensures proper adhesion of paint to the surface, improves durability, and enhances the overall appearance of the painted surface. If you skip this crucial step or execute it improperly, you could face problems like paint peeling, chipping, or uneven paint coverage.
• Tools and Materials Needed
To execute a proper surface preparation, you will need the following tools and materials:
- Cleaning supplies (soap, water, sponge, and cloth)
- Sandpaper (various grits, depending on the surface)
- Scraper or putty knife
- Caulk and caulk gun (for sealing gaps and cracks)
- Masking tape and drop cloths (to protect surrounding areas)
- Primer (if necessary)
- Paintbrushes or roller (for applying primer and paint)
- Safety gear (gloves, goggles, and mask)
• Surface Preparation Techniques for Different Surfaces
Different surfaces require different preparation techniques in order to achieve the best results. Below are the techniques for some common surfaces:
– Wood
- Cleaning: Remove any dirt, dust, or debris from the wood surface using a cloth or sponge soaked in soap and water. Afterward, rinse the surface thoroughly with clean water and let it dry.
- Sanding: For a smooth finish, sand the wood surface using appropriate sandpaper grits. Start with coarse-grit sandpaper (60-80 grit) for rough surfaces and move to finer grits (120-180 grit) until the desired smoothness is achieved. Remember to sand in the direction of the wood grain.
- Removing Old Paint or Finish: If there’s an old paint or finish present, use a scraper or putty knife to remove it. You may also need to use a paint stripper for stubborn areas. Be sure to follow the manufacturer’s instructions when using paint strippers.
- Filling and Repairing: Fill any holes, gouges, or cracks with wood filler, following the manufacturer’s instructions. Once the filler has dried, sand the area smoothly.
- Priming: Apply a primer to seal the wood and promote paint adhesion. Allow the primer to dry according to the manufacturer’s instructions.
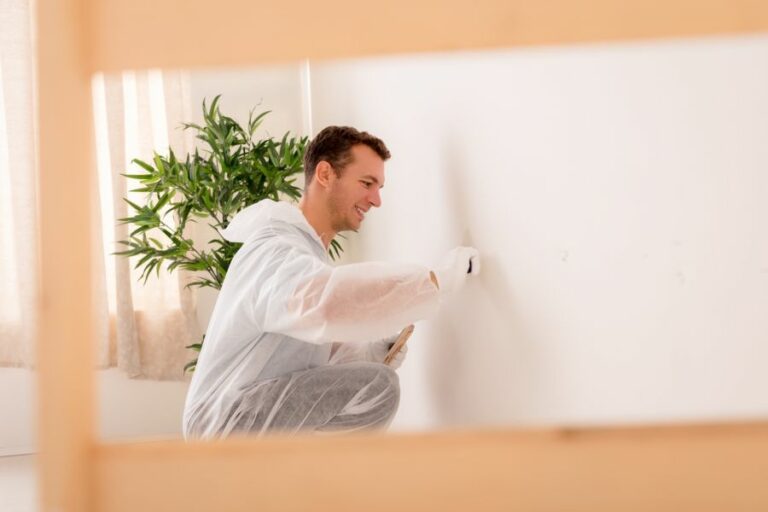
– Drywall
- Cleaning: Wipe down the drywall surface with a damp cloth to remove any dust or dirt.
- Repairing Holes or Damage: Use a putty knife to apply joint compound to the damaged area. Smooth the compound and allow it to dry before sanding it smooth.
- Sanding: Lightly sand the entire surface of the drywall with fine-grit sandpaper (180-220 grit) to ensure proper paint adhesion.
- Priming: Apply a primer specifically designed for drywall to help seal the surface and prevent paint from soaking in.
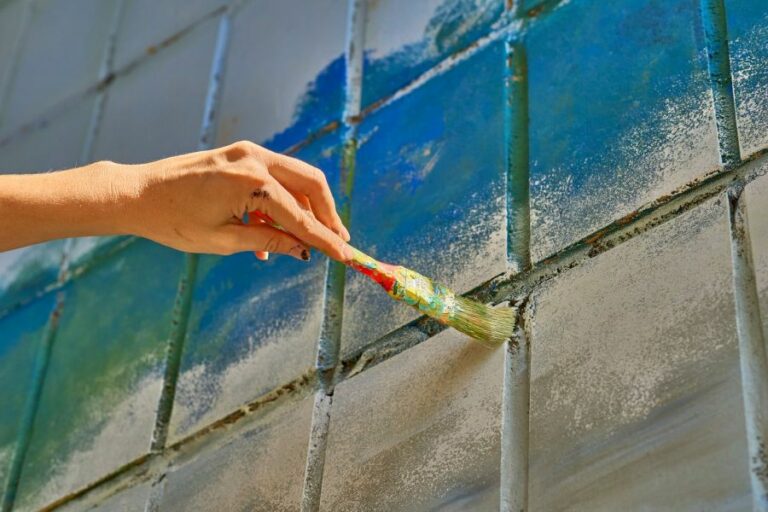
– Masonry (Concrete, Brick, or Stucco)
- Cleaning: Use a wire brush or a scraper to remove any loose debris from the surface. If there are stains or mold, use a mixture of water and mild detergent to clean the surface, then rinse thoroughly.
- Repairing Holes or Damage: For small cracks or holes, use a patching compound that is specifically designed for masonry surfaces. For larger cracks or damage, consult a professional for repairs.
- Sealing: Apply a masonry sealer to the surface to help fill any pores and promote paint adhesion.
- Priming: Use a primer specifically designed for masonry surfaces to promote proper paint adhesion and improve the final appearance of the painted surface.
– Metal
- Removal of Rust and Loose Paint: Using a wire brush or sandpaper, remove any loose paint, rust, or other debris from the metal surface.
- Cleaning and Degreasing: Clean the surface with a cloth soaked in a mild detergent and water solution, then rinse with clean water. To remove any remaining oils or grease, wipe down the surface with a cloth soaked in mineral spirits.
- Priming: Apply a corrosion-resistant primer to the metal surface to prevent future rust formation and promote paint adhesion.
• Tips for Successful Surface Preparation
- Always work in a well-ventilated area and wear proper safety gear.
- Take your time when preparing surfaces for painting, as rushing can lead to unsatisfactory results.
- If you are unsure about any part of the preparation process, consult a professional or review additional resources, such as articles or tutorials from reputable sources.
In conclusion, proper surface preparation is crucial for a successful painting project. By following the guidelines and techniques discussed in this article, you can ensure a durable, long-lasting, and visually appealing paint job on any surface.
Top Approaches to Achieve Strong Adhesion on Surfaces
Achieving good adhesion is essential in many applications, from the manufacturing of products to the bonding of materials in the construction industry. Good adhesion ensures the lasting performance and durability of products, while poor adhesion can lead to product failure or even safety hazards.
• Understanding Surface Preparation
One of the key factors in achieving good adhesion is proper surface preparation. This is because the condition of the surfaces being bonded directly influences the strength and durability of the adhesive bond.
Some of the critical aspects of surface preparation include cleaning, abrading, and conditioning the surfaces to ensure optimal bonding.
– Cleaning Surfaces
Before applying any adhesive, it is essential to clean the surfaces to remove any contaminants that might interfere with adhesion. Some common contaminants include dirt, dust, grease, oil, and mold-release agents.
The most effective cleaning method depends on the type and severity of the contamination. In general, a combination of cleaning techniques may be required to ensure the best results, such as using a detergent, a solvent, or even a specialized cleaner designed for specific substrates.
– Abrading Surfaces
In some cases, abrading the surfaces can significantly improve adhesion, especially when bonding smooth or low-energy surfaces.
Abrading increases the mechanical interlocking between the adhesive and the substrates by roughening the surfaces, providing more surface area for the adhesive to bond. Common abrasion methods include using sandpaper, an abrasive pad or brush, or sandblasting.
It is essential to clean the surfaces again after abrasion to remove any debris or dust created by the abrasion process.
– Conditioning Surfaces
Surface conditioning can enhance the bonding ability of certain materials, making them more receptive to adhesives. Conditioning methods can include chemical treatments, such as primers or silane coupling agents, and physical treatments, such as corona treatment or plasma treatment.
Primers are typically applied as a thin coating before the adhesive and can improve adhesion by modifying the surface chemistry, ensuring proper wetting of the adhesive, or forming a chemical bond with the substrate.
Silane coupling agents can be particularly useful when bonding glass or some metal and ceramic substrate because they can chemically bond to both the substrate and the adhesive.
Corona and plasma treatments alter the surface energy of the material and increase its ability to bond. These treatments are beneficial when bonding low-energy substrates like plastics and rubbers.
• Selecting the Right Adhesive
The choice of adhesive plays a crucial role in ensuring good adhesion. Different adhesives have varying characteristics in terms of handling properties, curing methods, and bond strength. Some factors to consider when selecting an adhesive include:
- Substrate compatibility: Ensure the adhesive is compatible with the materials being bonded. Incompatible adhesives can lead to weak or failed bonds.
- Temperature resistance: If the bonded materials are exposed to temperature extremes, select an adhesive with a suitable temperature resistance range.
- Curing method: Some adhesives require additional steps such as heat or moisture curing. Ensure you have the necessary equipment and preparation for these types of adhesives.
- Bond strength: Choose an adhesive that provides sufficient bond strength for your application. It may be necessary to consult with adhesive manufacturers or conduct your own tests to determine the best adhesive for your needs.
• Proper Adhesive Application
Implementing the correct application techniques is essential for achieving good adhesion. Some key aspects of proper adhesive application include:
- Applying the correct thickness: Applying too much adhesive can lead to a weaker bond, while too little adhesive may result in incomplete coverage. Follow the manufacturer’s recommendations for the appropriate adhesive thickness.
- Ensuring complete coverage: Ensure the adhesive covers the entire bonding area to prevent air pockets, voids, or weak areas in the bond line.
- Avoiding adhesive contamination: Ensure the adhesive remains free from contamination, such as dust or debris, which may compromise adhesion.
- Following curing guidelines: Follow the manufacturer’s guidelines for adhesive curing, including the recommended temperature, time, and pressure. Incorrect curing can result in weak or failed bonds.
• Periodic Testing and Inspection
Implementing regular inspection and testing procedures can help identify bond failures or weaknesses before they become critical issues. Non-destructive testing methods, such as ultrasonic inspection, can provide valuable information on the quality of adhesive bonds.
Additionally, establishing a consistent failure analysis procedure can help identify the root cause of bond failures, allowing improvements to the bonding process and preventing future issues.
In conclusion, ensuring good adhesion is a combination of proper surface preparation, adhesive selection, application technique, and ongoing inspection and testing.
By following these guidelines and drawing upon years of experience and knowledge, you can achieve strong and durable adhesive bonds in your projects.
Methods | Description |
|---|---|
Surface preparation | Clean and degrease the surfaces to remove contaminants, dust, and debris that may affect adhesion. |
Surface roughening | Increase the surface area and create mechanical interlocking by abrading or etching the surfaces to be bonded. |
Choosing the right adhesive | Select adhesives that are compatible with the materials being bonded, considering factors like temperature, humidity, and load requirements. |
Applying the correct amount of adhesive | Ensure a uniform film of adhesive is applied to the entire bonding area, avoiding too much or too little adhesive, which can lead to weak bonds. |
Appropriate curing conditions | Follow the manufacturer’s recommended curing time, temperature, and pressure to ensure the adhesive achieves maximum strength. |
Joint design | Choose a design that distributes stress evenly and minimizes peel or cleavage stresses, such as lap joints, scarf joints, or tongue-and-groove joints. |