Essential Pre-Paint Surface Preparations. What Pros Say
Before diving into a successful painting project, it’s crucial to ensure the surfaces you’re about to paint are properly prepared. Not only will this guarantee a flawless finish, but it will also prolong the life of your paint job. We have gathered essential pre-paint surface preparation tips to help you achieve professional results that will stand the test of time.
Essential pre-paint surface preparations:
Essential pre-paint surface preparations include cleaning the surface, smoothing and repairing imperfections, caulking gaps, and applying primer. These steps ensure proper adhesion and an even base for painting and contribute to a long-lasting, visually appealing paint job.

Wondering how to achieve a flawless paint job? Discover expert tips on essential pre-paint surface preparations that ensure long-lasting results. Read on as we unravel the secrets to a perfect finish!
Contents
- 1 Crucial Pre-Paint Surface Preparation Methods
- 2 Key Stages for Preparing Surfaces for Painting
- 3 The Ultimate 9-Step Guide to Surface Preparation
- 3.1 • 1. Inspection and Evaluation
- 3.2 • 2. Cleaning and Removal of Contaminants
- 3.3 • 3. Stripping of Old Coatings or Paint
- 3.4 • 4. Repairing Surface Damage
- 3.5 • 5. Surface Profiling
- 3.6 • 6. Protective Measures and Masking
- 3.7 • 7. Material Selection and Mixtures
- 3.8 • 8. Application of Primer
- 3.9 • 9. Surface Monitoring and Quality Assurance
Crucial Pre-Paint Surface Preparation Methods
Before diving into the painting process, it’s important to ensure proper surface preparation as a smooth, clean surface will be the foundation for successful, long-lasting paintwork of your interiors or exteriors.
• Cleaning the Surface
To create the best surface for paint to adhere to, it’s crucial to first clean the surface thoroughly. Dirt, grease, and dust can significantly impact the adhesion and smoothness of the paint job.
– Interior Surfaces
For interior surfaces like walls and ceilings, start by dusting the area with a soft brush or microfiber cloth. Follow up by washing the surface with water and mild detergent. Let the surface dry completely before moving on to the next step.
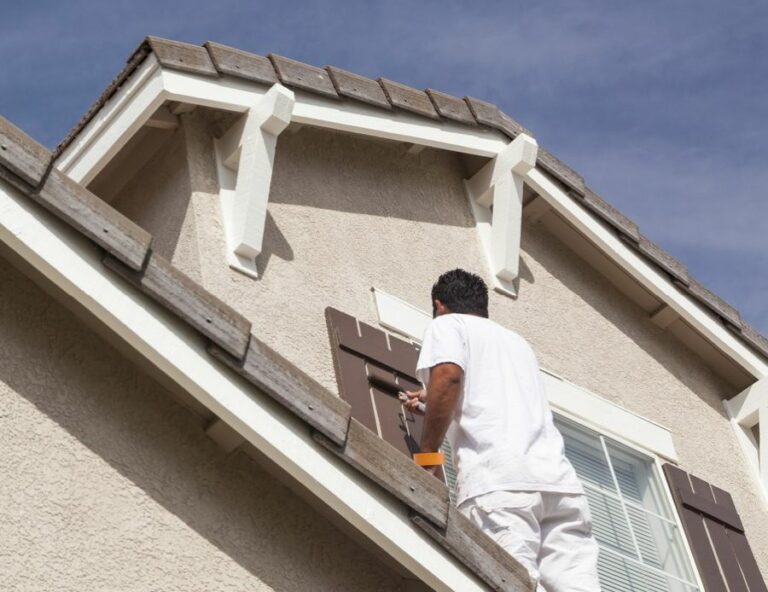
– Exterior Surfaces
For exterior surfaces, such as wood or stucco, start by scraping off any loose paint, dirt, and debris. A power washer can be an effective tool for this task, but remember to adjust the pressure accordingly to protect the surface. You can use a mildew-resistant cleaner for surfaces affected by mildew.
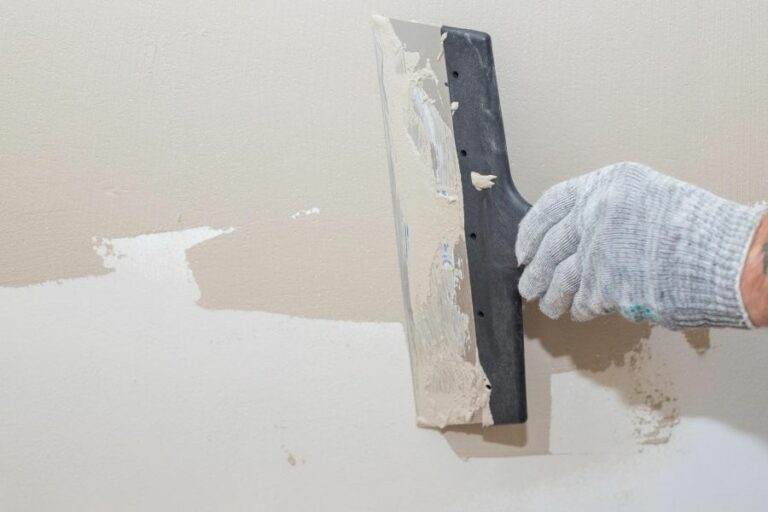
• Smoothing and Repairing
After cleaning, attentively inspect the surfaces for imperfections like cracks, holes, or peeling paint, as these will affect the paint job’s appearance and durability.
– Repairing Cracks and Holes
Utilizing filler compounds, patch the cracks and holes following the manufacturer’s instructions. For larger holes, it is advised to use putty or bonding agents. Allow these to cure, and sand them to achieve a smooth and even surface.
– Sanding
Sanding is crucial in ensuring a smooth surface and promoting better adhesion between the paint and your surface. Use the appropriate grit sandpaper for your task – finer grits for light imperfections and rougher grits for more significant issues.
Sand gently and thoroughly wipe away sanding dust before advancing to the next step.
– Caulking
Sealing gaps and seams between the surface and adjacent fixtures, such as door frames, windows, or baseboards, is essential to pre-paint surface preparations. Apply paintable caulk to these gaps and smooth the surface with a damp finger or tool. Allow the caulk to dry properly before proceeding.
• Priming the Surface
Applying a primer is another critical step in pre-paint surface preparation. Primers help improve the adhesion of your paint, provide an even base to paint upon, and contribute to a long-lasting finish.
– Choosing the Right Primer
Selecting the correct primer depends on the surface you’re working on and the paint you plan to use. It is recommended to consult with experts or refer to the product’s label for guidance in choosing an appropriate primer. Some common types of primers include:
- Adhesion primers: Ideal for surfaces that are hard to paint, such as glossy or slippery surfaces.
- Drywall primers: These are specifically formulated for new, untreated drywall or mudded surfaces.
- Stain-blocking primers: Utilized for surfaces that require sealing, such as wood knots, water stains, or nicotine marks.
– Applying Primer
Brush, roll, or spray the primer evenly across the surface, following the manufacturer’s instructions on coverage and application techniques. Allow the primer to dry before assessing if a second coat is required. Sand lightly between coats, and wipe away any dust before applying the subsequent coats.
• Final Tips and Recommendations
Professional painting results depend on thorough and precise pre-painting surface preparations. Remember, proper surface cleaning, repairing, sanding, and priming will help achieve a visually appealing result and ensure the durability and longevity of the paint job.
For comprehensive resources on surface preparations and painting techniques, refer to the Painting and Decorating Contractors of America (PDCA) or consult your local paint experts for personalized guidance.
Key Stages for Preparing Surfaces for Painting
Proper surface preparation is crucial for achieving a long-lasting and high-quality paint job.
• Importance of Surface Preparation
Before diving into the preparation steps, it is crucial to understand the importance of surface preparation. Proper preparation ensures good adhesion of the paint, enhances the paint’s durability, and ultimately provides a smooth, uniform finish.
Failure to prepare the surface adequately can lead to issues like peeling, blistering, and uneven paint coverage.
• Preparing Plastered Walls
– Step 1: Cleaning the Surface
First, remove any loose dirt, dust, or debris from the surface using a brush or vacuum cleaner. The presence of contaminants can hinder the adhesion of the paint, leading to a poor finish.
– Step 2: Repairing Surface Defects
Inspect the surface for holes, cracks, or uneven areas. If any defects are found, patch them using a suitable filler or putty. Make sure to follow the manufacturer’s instructions for the best results.
Tip: For larger repairs, it is recommended to use a plaster-based filler.
– Step 3: Sanding the Surface
Once the filler has completely dried, sand the repaired areas using medium-grit sandpaper to achieve a smooth and even surface. For an even smoother finish, it’s a good idea to sand the entire surface with a fine-grit sandpaper.
– Step 4: Applying a Primer
To improve adhesion and paint coverage, apply a suitable primer to the surface. Choose a primer designed for plastered walls and follow the manufacturer’s instructions regarding application and drying times.
Tip: For surfaces with higher moisture content, such as bathrooms, use a primer containing a mildewcide.
• Preparing Wooden Surfaces
– Step 1: Cleaning the Surface
Begin by removing any dirt, dust, or debris using a brush or vacuum cleaner. In addition, remove any existing paint or varnish using a paint stripper or sandpaper.
– Step 2: Repairing Surface Defects
Inspect the surface for defects, such as dents, gouges, or splintered areas. Fill any defects with a suitable wood filler, following the manufacturer’s instructions.
– Step 3: Sanding the Surface
Sand the wooden surface using medium-grit sandpaper in the direction of the wood grain. Make sure to sand the entire surface, including any repaired areas. For a smoother finish, use fine-grit sandpaper and repeat the sanding process.
Tip: It is a good idea to use a sanding block to maintain even pressure and achieve a uniform finish.
– Step 4: Applying a Primer
Apply a suitable primer to the surface to enhance paint adhesion and durability. Choose a primer specifically designed for wooden surfaces, and follow the manufacturer’s instructions regarding application and drying times.
Tip: For surfaces prone to tannin bleeds, such as cedar or redwood, use an oil-based primer.
• Preparing Metal Surfaces
– Step 1: Cleaning the Surface
Remove any loose rust, dirt, or grease from the surface using a wire brush or paint scraper. For stubborn dirt and grime, use a degreasing cleaner, making sure to rinse thoroughly with water afterward.
– Step 2: Removing Rust and Old Paint
If the metal surface contains rust or old paint, use a paint stripper or rust remover to eliminate it. Follow the manufacturer’s instructions for the best results.
Tip: In some cases, it might be necessary to use a power tool with a wire brush attachment to remove stubborn rust and old paint.
– Step 3: Sanding the Surface
Once the surface is clean and rust-free, sand it lightly using fine-grit sandpaper or a sanding sponge. This step promotes better adhesion of the paint to the metal surface.
– Step 4: Applying a Primer
Apply a suitable metal primer to the surface, following the manufacturer’s instructions. The primer enhances paint adhesion, prevents rust and corrosion, and provides a smoother, even finish.
Tip: For best results, choose a primer designed specifically for the type of metal being painted (e.g., iron, steel, or aluminum).
• Wrapping Up
Properly preparing the surface before painting is key to achieving a high-quality, long-lasting finish. Following the steps outlined in this guide, you can ensure proper surface preparation, whether painting plastered walls, wooden furniture, or metal surfaces.
The Ultimate 9-Step Guide to Surface Preparation
A thorough and effective surface preparation is essential to ensure the success and longevity of a painting or coating project. As an expert in the field, I have identified the following nine steps as crucial for surface preparation, regardless of the type or scale of the project.
These steps, when followed carefully and sequentially, guarantee the best results and can minimize the risk of potential issues down the road.
• 1. Inspection and Evaluation
Before starting any surface preparation process, a comprehensive inspection and evaluation of the area to be prepared is necessary. This step allows you to identify any existing defects, contaminants, or issues with the surface that need to be addressed.
Moreover, it helps determine the extent of surface preparation required for optimal results.
• 2. Cleaning and Removal of Contaminants
To ensure proper adhesion and performance of the new coating, it is essential to remove any substances or contaminants that may be present on the surface. These may include dirt, grease, oil, or other foreign materials.
Cleaning methods may vary depending on the type of contaminant, but common approaches include pressure washing, steam cleaning, solvent wiping, or chemical cleaning.
• 3. Stripping of Old Coatings or Paint
If the surface has an existing coating or paint, it must be stripped or removed to create a clean and receptive surface for the new application. Depending on the thickness and composition of the old coating, various methods, such as mechanical scraping, sanding, or chemical stripping, can be utilized.
• 4. Repairing Surface Damage
After clearing the surface of all contaminants and existing coatings, take the time to repair any defects or damages on the surface. This may include filling cracks and holes, smoothing rough areas, or addressing signs of corrosion.
Repair materials should be selected based on compatibility with the intended new coating or paint.
• 5. Surface Profiling
To improve the adhesion and performance of the new coating or paint, the surface may need to be profiled, creating an appropriate roughness or texture. Surface profiling methods can range from abrasive blasting, such as sandblasting, to mechanical methods like grinding or sanding.
The choice of method will depend on factors such as the surface material, the intended coating, and the desired level of adhesion.
• 6. Protective Measures and Masking
Before beginning the actual surface preparation process, it is essential to take appropriate protective measures to minimize any collateral damage or negative impacts on adjacent areas.
This may involve using drop cloths, masking tape, or plastic sheeting to cover sensitive fixtures, hardware, or surfaces not intended to be coated.
• 7. Material Selection and Mixtures
Once the surface is clean, free of defects, and properly profiled, it’s time to select the appropriate paint or coating material. Carefully read the product specifications and ensure the surface material and environmental conditions are compatible.
At this stage, any necessary additives, such as corrosion inhibitors or adhesion promoters, should be mixed with the paint or coating material according to the manufacturer’s recommendations.
• 8. Application of Primer
In many cases, the application of a primer is required to further enhance adhesion and seal the surface. The selected primer should be compatible with both the surface material and the intended coating.
The primer should be applied according to the manufacturer’s recommendations with regard to coverage, drying time, and layer thickness.
• 9. Surface Monitoring and Quality Assurance
Throughout the surface preparation process, it is crucial to constantly monitor and evaluate the quality of the work. This ensures that each step is accomplished effectively and any issues can be addressed promptly.
Utilizing reference standards, such as the SSPC Surface Profile Standard or the NACE Surface Preparation Standard, can help objectively assess the surface condition and the progress of the surface preparation.
Paying close attention to these nine steps of surface preparation will ensure that you start your coating or painting project on the right foot. By investing time, effort, and expertise in the surface preparation process, you can greatly increase the chances of success and obtain long-lasting, high-quality results.