Special Finishes Surface Preparation Guide. What Pros Say
Are you looking to transform your space with the perfect special finish but unsure of where to start? Look no further! With our comprehensive Special Finishes Surface Preparation Guide, we have all the information you need to achieve flawless and stunning results. From paint selection to preparation techniques, we’ll walk you through each step to ensure your special finish is both gorgeous and long-lasting.
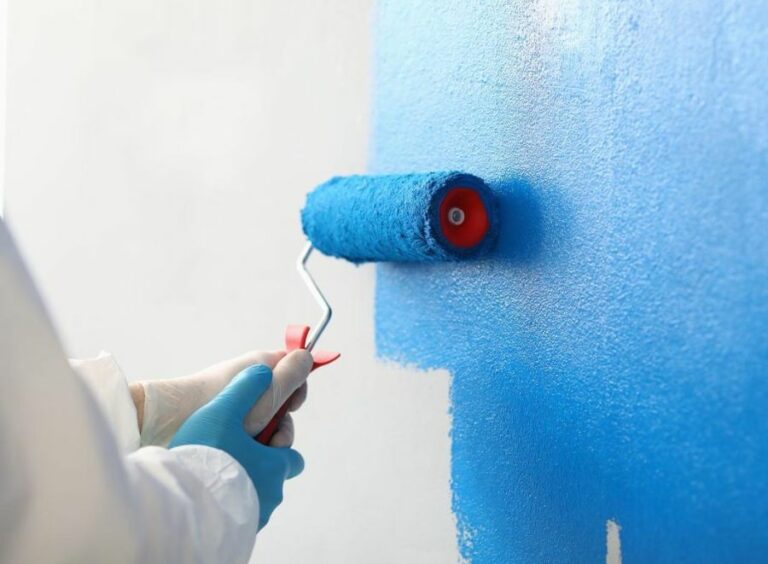
Special finishes surface preparation guide:
Surface preparation is vital for achieving professional and long-lasting special finishes on various materials. Proper preparation ensures adhesion, durability, and appearance of finishes, preventing issues like peeling and uneven color distribution. General surface preparation steps include assessing the surface, cleaning it, repairing imperfections, sanding, removing dust and debris, and priming if necessary. Additional preparation may be required for materials like wood, metal, concrete, and drywall.

Looking to achieve a flawless special finish for your surfaces? Our comprehensive guide covers essential techniques, tips, and tricks for successful surface preparation. Read on and unlock the secrets to stunning results that stand the test of time!
Contents
- 1 Comprehensive Guide to Unique Surface Finishing Techniques
- 2 Understanding SSPC-SP Standards in Surface Preparation
- 3 An In-Depth Look at the 8-Step Surface Preparation Process
- 3.1 • Step 1: Selection of the Proper Surface
- 3.2 • Step 2: Assess the Surface Condition
- 3.3 • Step 3: Remove Old Coatings or Finishes
- 3.4 • Step 4: Clean the Surface
- 3.5 • Step 5: Repair Surface Defects and Damages
- 3.6 • Step 6: Surface Profiling
- 3.7 • Step 7: Surface Priming
- 3.8 • Step 8: Final Inspection and Quality Control
- 4 Comparing SSPC SP11 and SP15: Key Differences Explained
- 5 Essential Tips for Preparing Surfaces for ST2 Painting
Comprehensive Guide to Unique Surface Finishing Techniques
Surface preparation is the key to achieving professional-looking and long-lasting special finishes on a variety of materials.
• Importance of Surface Preparation for Special Finishes
Proper surface preparation is crucial in ensuring the adhesion, durability, and overall appearance of any special finish. Failure to prepare a surface correctly can lead to peeling, bubbling, or uneven color distribution, resulting in a less-than-desirable final result.
• Types of Special Finishes
Before diving into surface preparation, let’s briefly discuss the types of special finishes you may encounter:
- Paint-based finishes: These include matte, satin, gloss, and high-gloss finishes that are applied using paint products.
- Faux finishes: Custom finishes such as marbling, wood graining, or embossing, which mimic the appearance of natural materials.
- Metallic and pearlescent finishes: Finishes that incorporate metallic or pearlescent materials for a unique, reflective appearance.
- Textured finishes: These finishes create a tactile surface through the application of textured products, such as sand, aggregate, or plaster.
• General Surface Preparation Steps
Whether you are working with paint-based, faux, metallic, pearlescent, or textured finishes, the following general surface preparation steps should be followed:
– Assess the Surface
Before starting, inspect the surface for any imperfections, such as cracks, holes, or uneven areas that need attention. Addressing these imperfections is crucial for a smooth and professional-looking finish.
– Clean the Surface
Remove all dirt, dust, and contaminants from the surface by wiping it down with a damp cloth or sponge. Use a mild detergent if necessary to remove any stubborn stains or residues.
– Repair Imperfections
Fill any cracks, holes, or uneven areas using an appropriate filler material, such as wood filler, spackling paste, or plaster. Once the filler has dried, sand the area smooth until it is level with the surrounding surface.
– Sand the Surface
For most special finishes, sanding the surface is essential to ensure proper adhesion and a smooth final appearance. Use a fine-grit sandpaper (between 180 and 220 grit) to lightly sand the entire surface, creating a slightly rough texture that will help the finish adhere properly.
– Remove Dust and Debris
After sanding, remove all dust and debris from the surface using a vacuum or a clean, damp cloth. Ensure the surface is completely dry before moving on to the next step.
– Prime the Surface (if necessary)
Depending on the material you are working with and the specific special finish you are applying, priming may be necessary. Prime the surface using a suitable primer to ensure proper adhesion, coverage, and overall performance of the finish.
Check the manufacturer’s instructions to determine if priming is recommended for your specific project.
• Surface Preparation for Specific Materials
In addition to the general surface preparation steps outlined above, there may be additional steps required, depending on the material you are working with:
– Wood
When working with wood, be sure to fill any knots or imperfections with wood filler and sand the surface smooth. Additionally, use a wood conditioner to help ensure even absorption of stain or finish.
– Metal
For metal surfaces, remove any rust or corrosion using a wire brush or sandpaper, and apply a rust-inhibiting primer before applying the special finish.
– Concrete
Concrete surfaces should be free of any loose or peeling paint, old sealers, or efflorescence. Clean the surface thoroughly and apply a concrete sealer to improve adhesion and durability of the special finish.
– Drywall
For new drywall, apply a drywall sealer or primer before applying the special finish. For previously painted drywall, make sure the surface is clean and free of loose or peeling paint and repair any imperfections before proceeding.
• Expert Tips for Professional Results
- Always work in a well-ventilated area when using products with strong fumes, such as paint thinners or stain removers.
- Practice on a spare piece of material before applying the special finish to your project to ensure you have the correct technique and desired result.
- For a uniform appearance, always apply the special finish in the same direction, either vertically or horizontally.
- Use high-quality brushes or rollers to achieve a professional-looking finish.
- Always follow the manufacturer’s instructions for proper application and drying times for each product used.
• Conclusion
Proper surface preparation is the foundation for a successful special finish project. By following the steps outlined in this guide and paying close attention to the specific needs of the material you are working with, you can achieve professional-looking and long-lasting special finishes on any surface.
Understanding SSPC-SP Standards in Surface Preparation
In the industrial coatings and corrosion control industry, surface preparation plays a critical role in ensuring long-lasting and effective coating jobs. It is responsible for removing any contaminants, debris, or defects that can undermine the integrity of the coating or paint.
One of the most comprehensive and widely-accepted standards for surface preparation is provided by the Society for Protective Coatings (SSPC), commonly referred to as SSPC-SP.
The SSPC is an American non-profit organization that sets guidelines and standards for the protective coating industry. It provides recommendations and certifications for contractors, inspectors, and manufacturers in this field.
• Different Types of SSPc-SP Surface Preparation Standards
The SSPC-SP surface preparation standards are categorized into various methods, depending on the type of media and equipment used for cleaning the surface. The primary types of SSPC-SP surface preparation methods include:
1. SSPC-SP1: Solvent Cleaning
This method involves the use of solvents or emulsion cleaners to remove oily or greasy contaminants from metal surfaces. It is the first step before moving on to more rigorous cleaning methods.
In many cases, solvent cleaning is used in conjunction with other surface preparation methods to achieve a cleaner and more uniform surface.
2. SSPC-SP2: Hand Tool Cleaning
Hand tool cleaning, as the name implies, is done with manual tools such as wire brushes, scrapers, or sanding blocks. This method is generally less intensive and is suitable for relatively clean surfaces with minimal rust or scaling present.
However, it is not recommended for use on heavily-corroded surfaces or when a high degree of surface cleanliness is required.
3. SSPC-SP3: Power Tool Cleaning
Power tool cleaning involves the use of power-driven tools such as rotary wire brushes, needle guns, or abrasive wheels to remove loose rust, mill scale, and old paint coatings. This method provides better cleanliness compared to hand tool cleaning and is more suitable for heavier layers of corrosion or paint.
However, power tool cleaning may not achieve the same level of cleanliness as abrasive blast cleaning, especially for severely degraded surfaces.
4. SSPC-SP5 /NACE No.1: White Metal Blast Cleaning
White metal blast cleaning is the most stringent of all the SSPC-SP standards, requiring the complete removal of all visible surface contaminants, including rust, mill scale, old paint, and any foreign materials.
An abrasive media such as sand, grit, or garnet is blasted onto the surface, ensuring a smooth and pristine finish. This method is recommended for critical applications where high-quality, long-lasting coatings need to be applied.
5. SSPC-SP6 / NACE No. 3: Commercial Blast Cleaning
Commercial blast cleaning is also carried out using abrasive media but allows for a less-demanding cleanliness level compared to white metal blast cleaning. Some tightly adhering residues of old paint or rust may still remain after the cleaning process.
However, this method still provides a reliable and cost-effective solution for a wide range of applications and industries, especially when white metal blast cleaning is not necessary.
6. SSPC-SP7 / NACE No. 4: Brush-Off Blast Cleaning
Brush-off blast cleaning is the least intensive of all the blast cleaning methods. It aims at removing loosely adhering surface materials without necessarily removing all the rust, mill scale, or tightly adhering paint.
It is generally used for applications where a complete removal of all contaminants is not essential, or for maintenance purposes.
• Importance of SSPC-SP Surface Preparation Standards
Adherence to SSPC-SP surface preparation standards is crucial in ensuring that protective coatings and paints achieve their intended performance, durability, and lifespan. The proper selection and application of these standards are vital for:
- Ensuring the correct removal of surface contaminants, which might otherwise lead to premature coating failure, corrosion, or reduced adhesion between the substrate and the coating.
- Achieving the desired surface profile or roughness, which enhances the mechanical bond of the applied coating.
- Saving time and resources by selecting the most appropriate surface preparation method for a given application, avoiding unnecessary or insufficient cleaning processes.
• Selecting the Right SSPC-SP Surface Preparation Method
Determining the most suitable surface preparation method is dependent on several factors, including the nature and condition of the substrate, the desired level of cleanliness, the type of coating to be applied, and project-specific requirements.
When selecting the most appropriate method, consider the following recommendations:
- Evaluate the existing condition of the substrate and the type and degree of surface contaminants.
- Consult with the coating manufacturer for their specific requirements and recommendations regarding surface preparation.
- Consider local environmental regulations and the availability of necessary resources, such as utilities, media, and disposal methods.
In conclusion, the SSPC-SP surface preparation standards are essential tools for professionals in the industrial coatings and corrosion control industry.
To learn more about SSPC-SP standards, visit the Society for Protective Coatings’ official website and familiarize yourself with the guidelines and requirements for each method. Following these globally-recognized standards will ultimately result in more effective and durable protective coating applications.
An In-Depth Look at the 8-Step Surface Preparation Process
• Step 1: Selection of the Proper Surface
Before we even start with the surface preparation process, it’s crucial to choose the right surface for your project. The selected surface should be durable, able to withstand the expected wear and tear, and compatible with the protective coating or finish you plan to apply.
For instance, concrete surfaces are perfect for outdoor flooring and walls, while metal surfaces are suitable for automotive or industrial applications.
• Step 2: Assess the Surface Condition
Understanding the current condition of the surface is the next essential step. Inspect the surface for any damages, defects, or contamination that may impair the performance of the protective coating or finishing.
Look for cracks, dents, rust, oil stains, or any other signs of damage. Make sure to document your findings for future reference.
• Step 3: Remove Old Coatings or Finishes
If the surface has any old coatings, finishes, or adhesives, it’s necessary to remove them before applying a new protective layer. You can use chemical strippers, blasting methods, or mechanical tools such as sanders and grinders to remove the old layers.
Aim to remove all traces of the previous finish, as it could interfere with the adhesion of the new coating.
• Step 4: Clean the Surface
Once the surface is free from contaminants, thoroughly clean it to further remove any remaining dirt or debris. Depending on the surface material and the type of contamination present, you may use solvents, detergent solutions, or simple water for cleaning.
Ensure the surface is completely dry before proceeding to the next step.
• Step 5: Repair Surface Defects and Damages
After cleaning, it’s time to repair any detected damages or defects. For concrete surfaces, use appropriate fillers or patch materials to fix cracks, holes, or other imperfections. For metal surfaces, consider welding or soldering to repair any dents or punctures.
Always allow the repair materials to dry or cure according to the manufacturer’s recommendations.
• Step 6: Surface Profiling
Surface profiling, also known as surface etching or abrading, is the process of creating a rough texture on the surface to promote better adhesion of the protective coating.
Surface profiling can be accomplished using abrasive blasting methods, such as sandblasting or shot blasting, or through mechanical tools like grinders and sanders.
Ensure the roughness level is consistent and matches the requirements of your chosen coating or finish.
• Step 7: Surface Priming
Priming is an essential step to enhance the bonding between the new protective coating and surface. Select a primer that is compatible with both your chosen coating and the surface material. Be sure to check the recommended application methods and drying times on the primer’s datasheet.
• Step 8: Final Inspection and Quality Control
Before applying the new protective coating or finish, conduct a final inspection of the surface to ensure it’s adequately prepared. Look for any missed spots, uneven repairs, or improper roughness levels. Address any identified issues before moving on to apply the protective coating.
By following these eight steps of surface preparation, you’ll ensure a high-quality final product that will offer long-lasting protection and durability for your surface.
In conclusion, adequate surface preparation is crucial for the success of any coating or finish application. It ensures better adhesion and performance of the protective layer, ultimately prolonging the lifespan of the finished surface.
Therefore, investing time and effort into each of these eight steps of surface preparation is indeed worthwhile.
Step | Description |
|---|---|
1 | Inspection |
2 | Cleaning |
3 | Removal of old coating |
4 | Sanding and smoothing |
5 | Degreasing |
6 | Chemical treatment |
7 | Priming |
8 | Profiling |
Comparing SSPC SP11 and SP15: Key Differences Explained
When working on projects that involve surface preparation and steel cleaning, you might come across the terms SSPC SP11 and SSPC SP15. These terms are used to refer to specific surface preparation standards developed by the Society for Protective Coatings (SSPC).
Although both standards relate to similar processes, they differ in their requirements and applications.
– SSPC SP11: Power Tool Cleaning to Bare Metal
SSPC SP11 is a widely used surface preparation standard for the cleaning of steel surfaces using power tools. This standard aims to remove all visible rust, mill scale, paint, and other contaminants from a steel surface.
The objective of SSPC SP11 is to achieve a bare metal surface that is ready for a protective coating application.
Key Requirements of SSPC SP11
- The steel surface must be cleaned using power tools, such as grinding wheels, power wire brushes, abrasive blast guns, or abrasive wheels, to remove rust, mill scale, and paint.
- The surface should have a minimum surface profile of 1 mil (25 micrometers).
- Stripes, spots, or other areas with tightly adherent mill scale, rust, or paint may remain on up to 5% of each square inch of the cleaned surface.
- Staining due to rust, mill scale, or previously applied paints may be evident on the cleaned surface, but it must not impact the adhesion of the coating.
When to Use SSPC SP11
SSPC SP11 is recommended for projects that require thorough surface preparation involving the removal of rust, mill scale, paint, and other contaminants without generating dust and airborne particles typically associated with abrasive blast cleaning.
It is most suited to maintenance projects with limited areas requiring treatment, particularly in confined spaces or sensitive environments where abrasive blasting is not practical or feasible.
– SSPC SP15: Commercial Grade Power Tool Cleaning
SSPC SP15 is another surface preparation standard that deals with power tool cleaning, but it requires a less rigorous level of cleanliness compared to SSPC SP11. As the name suggests, Commercial Grade Power Tool Cleaning provides a commercial level of cleanliness for steel surfaces.
Key Requirements of SSPC SP15
- The steel surface must be cleaned using power tools, such as grinding wheels, power wire brushes, abrasive blast guns, or abrasive wheels.
- The surface should have a minimum surface profile of 1 mil (25 micrometers),
- Stripes, spots, or other areas with tightly adherent mill scale, rust, or paint may remain on up to 33% of each square inch of the cleaned surface.
- The cleaned surface may have staining due to rust, mill scale, or previously applied paints.
When to Use SSPC SP15
SSPC SP15 is recommended for projects that do not require a high level of surface cleanliness and where a commercial grade of surface preparation is acceptable.
It is a cost-effective and faster alternative to SSPC SP11, mainly used in maintenance projects where a high level of cleanliness is not necessary, and the coating system to be applied does not demand specific surface preparation standards.
Examples include the application of less critical coatings in non-corrosive environments or areas with limited exposure to high levels of pollutants and weathering.
• Making the Right Choice: SSPC SP11 vs. SP15
In summary, the key difference between SSPC SP11 and SP15 lies in the level of cleanliness achieved after the power tool cleaning process. SP11 results in a cleaner surface with more contaminants removed, while SP15 provides a less rigorous level of cleanliness.
The choice between these two standards depends on the specific requirements of your project, the coating system to be applied, and the environmental conditions.
When considering which standard to use, consult the coating manufacturer’s specifications and understand the specific requirements of your project.
In order to achieve optimal performance and longevity of the applied protective coatings, it is crucial to adhere to the appropriate surface preparation standard. Proper surface preparation not only ensures strong adhesion but also provides a solid foundation for the long-term success of any coating system.
Specification | Description |
|---|---|
SSPC SP11 | Power Tool Cleaning to Bare Metal: Describes the use of power tools to clean surfaces of all visible rust, mill scale, paint, and foreign matter and achieve a minimum surface cleanliness, resulting in a bare metal surface. |
SSPC SP15 | Brush-Off Blast Cleaning: Describes a blast cleaning method where tightly adherent mill scale, rust, and paint remain on the surface. Brush-off blast cleaning is generally not used for new steel surfaces, but for maintenance purposes and the removal of weakly bonded coatings. |
Essential Tips for Preparing Surfaces for ST2 Painting
ST2 paint refers to a specific level of surface treatment, typically used for preparing metals before painting. The process involves a thorough cleaning and degreasing of the metal surface, followed by mild abrasion to remove old paint or rust.
Proper surface preparation is a crucial step in achieving a durable and high-quality paint finish.
• Importance of Surface Preparation for ST2 Paint
A well-prepared surface is essential for achieving a long-lasting and seamless paint finish. Surface contaminants or inadequately prepared surfaces can lead to poor paint adhesion, resulting in premature paint failure.
Furthermore, an insufficiently prepared surface can allow rust and corrosive materials to penetrate the paint layer, compromising the structural integrity of the metalwork.
As a professional with years of experience, I strongly recommend taking the time to understand and follow the steps outlined in this guide. Proper surface preparation can make all the difference in achieving a high-quality, long-lasting finish.
• Cleaning and Degreasing the Surface
– What You’ll Need
- A mild solvent, such as white spirits or mineral turpentine
- Clean, lint-free cloths or rags
- A soft brush or sponge
- Water and mild detergent
Before starting the ST2 paint process, it’s essential to thoroughly clean and degrease the metal surface. Begin by wiping the surface with a lint-free cloth dampened with a mild solvent, such as white spirits or mineral turpentine.
This will help remove any oil, grease, or other contaminants that might interfere with paint adhesion. Use a soft brush or sponge to access and clean any hard-to-reach areas.
Next, mix a mild detergent with water and use a clean cloth or sponge to wash the surface carefully. This step will help remove any remaining dirt, debris, or contaminants that could adversely affect the paint application.
Finally, thoroughly rinse the metal surface with clean water to remove any traces of detergent. It’s vital to ensure there’s no residual detergent left on the surface, as this can interfere with the paint’s adhesion. Allow the surface to dry completely before moving on to the next step.
• Removing Rust, Old Paint, and Surface Imperfections
– What You’ll Need
- Sandpaper or abrasive pads (80 to 120 grit)
- A wire brush or scraper
- A vacuum or brush for dust removal
Once the surface is clean and dry, the next step is to remove any rust, old paint, or surface imperfections. Start by using sandpaper or abrasive pads (usually 80 to 120 grit) to remove loose or flaking paint, rust, or other surface imperfections.
For larger, more stubborn patches of rust or paint, a wire brush or scraper may be necessary to remove the material.
During this process, it’s essential to be thorough but also gentle, as you don’t want to cause damage or gouges to the metal surface. The objective is to create a smooth and clean surface, free of any contaminants or loose materials for the paint to adhere to.
After removing rust, old paint, and surface imperfections, it’s important to remove any dust or debris generated during the abrading process. Use a vacuum or brush to clean the surface, ensuring that it’s clean and dust-free before moving on to the next step.
• Final Steps and Inspection
– What You’ll Need
- A bright light or strong flashlight
- A clean, dry cloth
Before applying paint, make sure to perform a final inspection of the surface. Shine a bright light or strong flashlight on the surface to identify any areas that still need attention. Look for any remaining rust, loose paint, or surface imperfections that could hinder paint adhesion.
In case you find any areas that require additional work, repeat the previous steps to ensure a clean, smooth surface.
Once you’re satisfied with the preparation, give the surface a final wipe-down with a clean, dry cloth to remove any remaining dust or debris. Your surface is now ready for ST2 paint application.
In conclusion, proper surface preparation is essential for achieving a high-quality, durable paint finish.
Following the steps outlined in this guide will help ensure that your metal surface is clean, degreased, and free of any contaminants or loose materials, ultimately leading to better paint adhesion and a longer-lasting finish.
For further information on preparing surfaces for ST2 paint, consult reputable resources like the American Society for Testing and Materials (ASTM) Standard Practice for Preparation of Paint Brushes for Evaluation.
This standard practice provides valuable information on the preparation and evaluation of various surfaces for painting.
Step | Description |
|---|---|
1 | Remove any rust, dirt, or debris from the surface. Clean the surface thoroughly to ensure proper paint adhesion. |
2 | Prepare the paint by stirring it well to ensure even consistency and pigment distribution. If necessary, mix paint with appropriate thinner according to manufacturer’s instructions. |
3 | Mask off any areas that are not to be painted to protect them from overspray. Use masking tape and newspaper or plastic sheeting. |
4 | Apply a primer coat if necessary, following the manufacturer’s instructions for application and drying times. A primer provides a better surface for paint adhesion and helps to prevent rust and corrosion. |
5 | Apply the ST2 paint using a brush, roller, or spray gun, following proper application techniques and safety precautions. Apply multiple thin coats, letting each coat dry according to the manufacturer’s instructions before applying the next. |
6 | Allow the final coat of paint to dry and cure according to the manufacturer’s instructions before using or touching the painted surface. If necessary, apply clear topcoat or sealer to enhance durability and appearance. |