Guide To Surface Preparation Tool Essentials
Are you searching for an all-inclusive guide to surface preparation tool essentials? Look no further. With years of hands-on experience, we’ve got you covered. Surface preparation is critical in various applications, from painting and coating to adhesive bonding and beyond. To help you achieve the perfect finish, we have compiled a detailed guide on the essential tools that promise to make your work efficient and hassle-free and ensure optimal results.
Guide to surface preparation tool essentials:
Essential surface preparation tools include surface cleaning tools (brooms, brushes, vacuums, and pressure washers), preparation tools (scrapers, putty knives, sanders, grinders, and chemical strippers), and repair tools (filling compounds, caulk, and sealant). Using these tools properly ensures project longevity, durability, and a high-quality finish.

Ready to dive into surface preparation but unsure about the right tools for the job? Our comprehensive guide has you covered! Read on to discover the essential tools and tips for a flawless finish that will make your next project a breeze. You won’t want to miss this!
Contents
- 1 Essential Tools for Effective Surface Preparation
- 2 Key Equipment for Perfect Surface Preparation
- 3 Discover the 8 Crucial Steps of Surface Preparation
- 4 Understanding the Importance of Surface Preparation
- 5 Mastering the Process: Steps for Surface Preparation
Essential Tools for Effective Surface Preparation
Surface preparation is a crucial step in any project, be it construction, painting, or any other application. Proper surface preparation ensures longevity, durability, and a high-quality finish for the project at hand.
• Surface Cleaning Tools
– Brooms and Brushes
A clean surface is a foundation for any project, and brooms and brushes will help you achieve that.
Stiff bristle brushes are excellent for removing dirt, dust, and debris from surfaces, while soft bristle brushes are perfect for delicate surfaces like glass and wood. A push broom is ideal for cleaning large areas like driveways and walkways.
– Dust and Debris Collection
A shop vacuum or dust collector will help you efficiently collect dust, debris, and other particles from your work area. Shop vacuums are especially useful for sucking up drywall dust and wood shavings while you’re working.
– Pressure Washers
Pressure washers are essential for removing stubborn stains, grime, and dirt from surfaces like concrete, brick, and wood. The water pressure enables you to clean surfaces efficiently and effectively.
Choose a pressure washer with the appropriate PSI (pounds per square inch) rating for your specific surface cleaning needs.
• Surface Preparation Tools
– Scrapers and Putty Knives
Scrapers and putty knives are excellent for removing old paint, caulk, and other materials from surfaces before applying a new layer. Invest in a good quality scraper that won’t easily bend or break under pressure and a variety of putty knife widths to adapt to different work situations.
– Sanders and Sanding Blocks
Sanding is an essential step for achieving a smooth, defect-free surface. Power sanders and sanding blocks will help you efficiently smooth surfaces and remove imperfections. Some common sanders you may need include:
- Orbital sanders: These are ideal for smoothing large, flat surfaces, such as wooden panels and doors.
- Detail sanders: These tools work well for intricate areas and narrow corners.
- Belt sanders: These are powerful tools suited for heavy-duty surface preparation tasks, like removing old paint or leveling rough surfaces.
– Grinders and Wire Brushes
Grinders and wire brushes are perfect for heavy-duty surface preparation tasks like rust removal, paint stripping, and smoothing rough surfaces. Choose the appropriate type of wire brush, grinding wheel, or attachment for your specific project.
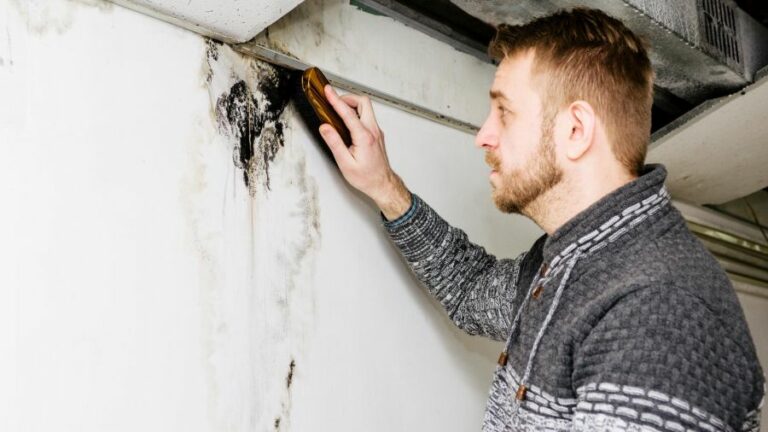
– Chemical Strippers
Chemical strippers can help you remove old paint, varnish, or other coatings from surfaces more efficiently. Be sure to follow the manufacturer’s instructions and safety guidelines when using these products.
Always work in well-ventilated areas, wear appropriate personal protective equipment, and dispose of chemical waste properly.
• Surface Repair Tools
– Filling and Patching Compounds
Wood fillers, joint compounds, and other patching materials are essential for repairing holes, dents, and other imperfections on surfaces.
Be sure to choose the right type of filler for the specific material you are working with (e.g., wood, drywall, or concrete). Properly filling and smoothing these imperfections will result in a better finish for your project.
– Caulk and Sealant
Caulk and sealant are essential for sealing gaps, joints, and cracks on surfaces, preventing moisture penetration, air leaks, and improving energy efficiency.
Different types of caulk and sealant are available for specific applications (e.g., silicon-based caulk for bathrooms and kitchens, acrylic-based caulk for paintable surfaces).
• Safety Equipment
Finally, personal protective equipment (PPE) is crucial to ensure your safety during surface preparation tasks.
This includes eye protection, gloves, masks, and hearing protection when using power tools. Depending on your specific project, you may also require respirators, coveralls, and safety footwear.
In conclusion, investing in the proper surface preparation tools and techniques is essential for ensuring the longevity, durability, and quality finish of your projects.
With the right tools, you can achieve professional results and make your surface preparation process efficient and accurate.
Key Equipment for Perfect Surface Preparation
Surface preparation is a critical step in many industries, such as construction, painting, flooring, and others. The equipment used for surface preparation is vital to ensure that the final product is of high quality and long-lasting.
• Abrasive Blasting Equipment
Abrasive blasting is a common method in surface preparation, which involves using high-pressure air to propel abrasive materials at the surface to remove contaminants, roughen the surface, or create a particular finish. Some of the commonly used abrasive blasting equipment include:
1. Pressure Blasters
Pressure blasters involve the use of pressurized air to propel abrasive material. These are typically portable and highly efficient, making them popular for smaller jobs. I recommend using a pressure blaster if you require a portable and efficient solution for surface preparation.
2. Siphon Blasters
Siphon blasters are less aggressive than pressure blasters but still provide effective surface cleaning. They are ideal for delicate surfaces that require careful and precise preparation. If you’re working on a project with sensitive surfaces, I recommend using a siphon blaster.
3. Wet Blasting Equipment
Wet blasting combines water and abrasive materials to clean surfaces, which is less aggressive and generates minimal dust. This dust suppression is vital, especially when working with hazardous materials such as lead-based paint.
I recommend using wet blasting equipment to meet environmental and regulatory requirements and maintain a safe working environment.
More information about abrasive blasting equipment can be found on the Occupational Safety and Health Administration (OSHA) website.
• Shot Blasting Equipment
Shot blasting involves propelling steel shots at high velocity to clean and prepare surfaces. It is commonly used in the automotive and metal industries for surface cleaning, rust removal, and overall surface preparation.
1. Wheelabrator
Wheelabrators use centrifugal force to propel steel shots at the surface. They are commonly used for large-scale projects and provide efficient and effective surface preparation.
I recommend using a Wheelabrator if you have a large-scale project that requires high-quality surface preparation.
2. Airless Shot Blasting
Airless shot blasters use mechanical force to propel steel shots at the surface. They are typically portable and suitable for smaller projects. They offer precise control and a clean finish, making them ideal for small and delicate surfaces.
As an experienced professional, I recommend airless shot blasters for smaller projects that require precise control.
• Grinding and Polishing Equipment
Grinding and polishing are essential for concrete and flooring preparation to correct uneven surfaces, remove contaminants, and improve the overall appearance.
1. Handheld Grinders
Handheld concrete grinders are portable and efficient for small-to-medium-sized projects. They are highly versatile, with various attachments available for specific tasks. I recommend handheld grinders for projects that require flexibility and portability for surface preparation.
2. Walk-Behind Grinders
Walk-behind grinders are larger and more powerful than handheld grinders, making them ideal for large-scale projects. They are equipped with diamond-impregnated discs to grind and polish surfaces effectively.
As a professional with experience, I recommend walk-behind grinders for large-scale projects that need aggressive grinding and polishing.
3. Planetary Grinders
Planetary grinders use multiple rotating disc attachments to grind surfaces evenly. They provide high-quality finishes, making them ideal for polishing concrete surfaces. I recommend planetary grinders for projects that require an even and polished surface.
Further resources about concrete grinding and polishing equipment can be found on the Portland Cement Association (PCA) website.
• Chemical Surface Preparation
Chemical surface preparation involves using solvents, acids, and other chemicals to remove contaminants and etch surfaces. Common chemical surface preparation products include:
1. Paint Strippers
Paint strippers help remove old paint, varnishes, and other coatings from surfaces. I recommend using paint strippers for projects with old or multiple layers of paint that require removal.
2. Acid Etching Solutions
Acid etching solutions, such as muriatic acid, are commonly used to clean and etch concrete surfaces. They are effective in dissolving and breaking down contaminants. However, I recommend using acid etching solutions carefully and following all safety precautions to protect both the surface and yourself.
• Surface Preparation Accessories
Various accessories enhance the efficiency and effectiveness of your surface preparation equipment. Some of the essential accessories include:
- Dust Collectors: These prevent dust from spreading and help maintain a clean working environment. I highly recommend using dust collectors to comply with environmental regulations and ensure a safe working environment.
- Personal Protective Equipment (PPE): PPE is essential when working with surface preparation equipment to protect yourself from potential hazards. This may include gloves, goggles, respirators, and protective clothing.
In conclusion, selecting appropriate surface preparation equipment is critical to achieving the desired outcome.
This comprehensive list of equipment and personal recommendations will aid in choosing the best equipment for your surface preparation projects. Remember to follow all safety precautions and consult manufacturer guidelines for optimal results.
Discover the 8 Crucial Steps of Surface Preparation
The process of surface preparation is a crucial component of any coating, painting, or adhesive application job.
Properly preparing the surface not only ensures the durability and quality of the final product but also enhances its aesthetic appeal. Let’s dive into the eight essential steps of surface preparation.
• 1. Assess and Choose the Appropriate Cleaning Method
Before starting any surface preparation, it’s essential to evaluate the substrate material and condition to choose the proper cleaning method.
Evaluate the presence of contaminants like dirt, dust, grease, or oils. It is also crucial to determine the existing coatings or treatments on the surface. Based on these factors, decide on the appropriate cleaning method, such as:
- Wet cleaning
- Dry cleaning
- Chemical cleaning
The NACE International and the Society for Protective Coatings (SSPC) provide specific standards and guidelines for the cleaning process.
• 2. Removing Loose Materials and Contaminants
Begin the surface preparation process by removing loose materials and contaminants from the surface. Use a wire brush, scraper, or other appropriate tool to eliminate rust, scale, and peeling paint.
This step is vital to prevent trapping contaminants under the new coating, which could lead to premature failure.
• 3. Degreasing and Cleaning
Grease, oils, and other residues need to be removed before the application of any coating or paint. Degreasers or cleaning solvents are typically used in this step.
After applying the cleaning agent, use a cloth or sponge to wipe away the contaminants. It is essential to completely remove the cleaning solvent, as any residue may interfere with the adhesion of the new coating. Rinse the surface thoroughly with water and allow it to dry.
• 4. Abrasive Blasting
Abrasive blasting is an advanced surface preparation technique that relies on using high-pressure air to propel abrasive particles against the surface. This method efficiently removes existing coatings, mill scale, and other surface imperfections. Commonly used abrasives include:
- Sand
- Aluminum oxide
- Steel grit
The selection of the abrasive media depends on the substrate material and the desired surface profile.
• 5. Chemical Stripping
Chemical stripping involves the use of specialized chemicals to remove existing coatings and other materials that could impede the adhesion of the new coating. Follow the manufacturer’s guidelines for the proper application, dwell time, and removal of the chemical stripper.
• 6. Grinding and Polishing
Grinding and polishing are often used in surface preparation when strict control over the surface profile is required. Angle grinders, sanders, and polishing machines can be used to:
- Remove existing coatings
- Smooth out rough surfaces
- Repair defects like dents or scratches
- Create a specific surface profile
I recommend selecting the appropriate grinding or polishing media based on your project requirements.
• 7. Inspection and Testing
Once the cleaning and surface preparation activities are completed, inspect the surface to ensure that all contaminants and imperfections have been removed.
Use visual inspection, flashlight illumination, and feeler gauges to verify the surface condition. Additionally, conduct testing to confirm proper surface profile and cleanliness following guidelines from NACE International and SSPC.
• 8. Surface Protection
After the surface has been properly prepared, it is essential to protect it from contaminants and corrosion. This protection can include the following:
- Applying a primer or sealer
- Installing a protective barrier or shielding
- Ensuring proper environmental controls during storage or transport
Always consult the coating or adhesive manufacturer’s guidelines for appropriate surface protection methods.
In conclusion, effective surface preparation is integral to the success of any coating or paint application. Following these eight steps will not only improve the appearance of the finished product but also ensure its longevity and durability.
Step | Description |
|---|---|
1 | Inspection of the surface |
2 | Removal of contamination |
3 | Removal of damaged or loose coatings |
4 | Surface roughening |
5 | Drying the surface |
6 | Application of the primer |
7 | Application of intermediate coats |
8 | Application of top coat |
Understanding the Importance of Surface Preparation
Surface preparation is an essential step in the application of coatings, adhesives, and other materials to various surfaces. This process is crucial for ensuring the longevity, durability, and efficiency of the applied substances.
By properly preparing a surface, you can prevent failures, defects, and other issues that may occur due to inadequate adhesion.
• The Goals of Surface Preparation
– Ensuring Proper Adhesion
One of the primary objectives of surface preparation is to promote strong adhesion between the applied material and the surface. Many factors can impact the bonding process, such as surface contaminants, uneven surfaces, and unsuitable substrates.
By adequately cleaning, smoothing, and priming the surface, you can ensure a successful bond that lasts for an extended period.
– Prolonging Material Life
Proper surface preparation can significantly extend the life of the applied material. For example, it can prevent coatings from peeling or flaking, thus saving time and money on repairs or replacements.
Additionally, a well-prepared surface can provide a barrier against moisture and other environmental factors, protecting the underlying substrate from damage and corrosion.
– Enhancing Appearance
Effective surface preparation can also enhance the overall appearance of the final product. By creating a smooth and uniform surface, you can ensure that paints and coatings result in a professional-looking finish.
This is especially important when working with high-visibility or high-traffic areas, where the visual appeal of the surface is of utmost importance.
• Recommendations for Effective Surface Preparation
– Assess the Surface
Before beginning the preparation process, take the time to inspect and evaluate the surface. Check for any obvious defects, such as cracks, uneven areas, or embedded contaminants.
Additionally, be aware of the type of material being applied and consider its compatibility with the surface. Some materials may require specific surface treatments to ensure proper adhesion.
– Clean the Surface
Properly cleaning the surface is a critical step in the surface preparation process. Remove any dirt, dust, grease, oil, or other contaminants that may inhibit adhesion.
Various methods can be used for surface cleaning, including power washing, solvent wiping, steam cleaning, and industrial cleaning agents. It is essential to choose an appropriate method based on the surface’s characteristics and the contamination’s severity.
– Chemical and Mechanical Methods
Surface preparation may involve chemical or mechanical treatments to remove contaminants or roughen the surface. Chemical methods include acid etching, pickling, and solvent cleaning.
Mechanical methods involve the use of abrasive tools, such as sandblasting, grinding, or shot blasting. The choice of method depends on the type of surface and the environment in which it is used.
– Apply Primer or Sealant
In some cases, the application of a primer or sealant may be necessary for optimized surface preparation. Primers help improve adhesion and create a uniform surface for the final product.
Sealants can be used to fill cracks or joints to create a smooth, even surface. Depending on the material being applied, select an appropriate primer or sealant to ensure a successful bond.
• Ensuring Compliance with Industry Standards
When working in commercial, industrial, or even residential settings, it is important to be aware of and adhere to industry-specific standards for surface preparation. These standards exist to ensure consistent results and to minimize the risk of material failure.
For example, the International Organization for Standardization (ISO) has established ISO 12944, a set of guidelines for surface preparation within the corrosion protection of steel structures industry.
Similarly, the Society for Protective Coatings (SSPC) and the National Association of Corrosion Engineers (NACE) have established standards for surface preparation for various types of substrates.
Familiarize yourself with these standards and follow the best practices they outline to achieve excellent results.
In conclusion, surface preparation plays a vital role in ensuring the successful application of coatings, adhesives, and other materials.
By understanding the importance of proper adhesion, material life, and appearance, and following the recommendations for assessment, cleaning, and treatment of surfaces, you can achieve long-lasting and aesthetically pleasing results.
Always ensure compliance with industry-specific standards, such as ISO, SSPC, or NACE, to guarantee the highest level of quality and performance.
For more information on surface preparation methods and best practices, refer to the SSPC website or consult other industry resources from reputable organizations.
Mastering the Process: Steps for Surface Preparation
Surface preparation is a crucial stage in many industrial and construction processes, such as painting, coating, and bonding. Properly preparing a surface ensures optimal performance and durability of the applied material.
• Assessing the Surface
– Identifying the Type of Surface
Before initiating the surface preparation process, it’s critical to identify the type of surface you’re dealing with. Common surfaces include:
- Concrete
- Steel
- Wood
- Plastics
Each surface type requires different preparation techniques for optimal results. For example, while sandblasting might be suitable for steel surfaces, it can damage softer surfaces like wood or plastics.
– Evaluating Surface Condition
Next, evaluate the condition of the surface, and identify any potential issues, such as:
- Rust
- Existing coatings or paint
- Contamination (grease, oil, dirt)
- Structural defects (cracks, holes, or dents)
By understanding the current condition of the surface, you can tailor the preparation methods to address specific issues.
• Cleaning the Surface
A clean surface is necessary for the successful adhesion of paint or coatings. The first step in surface preparation is removing any contaminants that can interfere with the bonding process. There are various methods for cleaning a surface, including:
– Manual Cleaning
Manual cleaning involves using tools like brushes, scrapers, or sandpaper to remove loose contaminants like dirt, rust, or old paint. This step is essential before applying any chemical cleaners or abrasive blasting techniques.
– Chemical Cleaning
Chemical cleaning involves using solvents or specialized detergents to remove oil, grease, and other stubborn contaminants. It is essential to choose the appropriate cleaner for the specific surface and contaminant, as well as follow the manufacturer’s instructions.
Always wear protective gear and work in a well-ventilated area. Following cleaning, rinse the surface with clean water to remove any chemical residues.
– Pressure Washing
Pressure washing is an efficient cleaning method for large surfaces and heavy contamination. High-pressure water jetting can effectively remove loose paint, rust, and grime.
However, care must be taken not to damage the underlying surface, especially for softer materials. Adjust the pressure and use appropriate nozzles to minimize the potential for damage.
• Preparing the Surface
After cleaning, the surface must be prepared to ensure optimal bonding of the applied material. The choice of surface preparation method will depend on the type of surface and the desired finish. Some popular preparation techniques include:
– Abrasive Blasting
A common preparation method for metal surfaces is abrasive blasting, which uses a high-pressure stream of abrasive material to remove rust, scale, and old coatings.
This process also creates a rough texture on the surface, promoting better adhesion for coatings. There are various types of abrasive blasting, including:
- Sandblasting
- Glass bead blasting
- Steel shot blasting
Select the appropriate type of abrasive and equipment for the specific surface type and desired result. Do not use abrasive blasting on delicate surfaces, as damage can occur.
– Grinding and Sanding
Grinding and sanding create a rough surface profile that enhances bonding. These methods are suitable for surfaces like wood, concrete, or steel. Choose the right sandpaper grit or grinding wheel based on the surface material and desired level of roughness.
– Acid Etching
Acid etching involves applying an acid solution to the surface, which reacts with the material to create a rougher texture.
This technique works primarily on concrete surfaces and should be carried out with care, following safety guidelines. After the acid treatment, neutralize and rinse the surface thoroughly with clean water.
– Repairing Defects
Address any structural defects such as cracks, holes, or dents. For concrete surfaces, fill and repair cracks or holes using products like epoxy or cementitious repair materials.
For steel surfaces, dents or cracks may require welding for repair. Wood surfaces can benefit from wood fillers and sanding for defect removal.
• Final Inspection and Recommendations
After completing the surface preparation steps, perform a final inspection to ensure that the surface is clean, free of defects, and has the desired texture for optimal bonding.
If additional cleaning or repair is necessary, address these issues before proceeding with the application of paint, coatings, or other materials.
In conclusion, proper surface preparation is crucial for achieving long-lasting and high-quality results in industrial and construction applications. By following the steps outlined in this article, you can ensure a successful outcome for your project.
For more information on surface preparation, the SSPC (Society for Protective Coatings) offers valuable resources and guidelines on industry standards and best practices.
Step Number | Description |
|---|---|
1 | Remove all loose and peeling paint, debris, and contaminants from the surface. |
2 | Clean the surface thoroughly to remove dirt, grease, and other contaminants that may prevent proper adhesion. |
3 | Repair any damaged areas or surface irregularities, such as cracks, holes, or rough patches. |
4 | Smooth out the surface using sandpaper, abrasive pads, or mechanical methods, such as grinding or sandblasting, if necessary. |
5 | Prime the surface, if needed, to provide a uniform and consistent base for the paint or other finish materials. |
6 | Apply the finish according to the manufacturer’s recommendations, such as application method, tools, ambient conditions, and proper drying time. |
7 | Inspect the finished surface to verify that it meets the desired appearance and performance requirements. |