Types Of Interior And Exterior Surface Preparation Techniques
Are you looking to give your home a fresh new look through painting but unsure about the best surface preparation techniques for interior and exterior projects? Worry not. We’ve got you covered! Painting not only enhances the appearance of your building but also extends its lifespan. However, achieving the desired results largely relies on choosing the proper surface preparation method.
Types of surface preparation techniques for exterior and interior painting:
Surface preparation techniques for exterior and interior painting include cleaning (pressure washing, hand washing, and TSP cleaning for exteriors; dusting, degreasing, and mildew removal for interiors), repairing and patching (caulking, wood repairs, filling holes and cracks, and drywall repair), sanding (wood, masonry, stucco, drywall, and plaster), and priming (using exterior or interior primers depending on the project). Proper preparation ensures paint adhesion, durability, and appearance.
Curious about the various surface preparation techniques for exterior and interior painting? We’ve got you covered! Keep reading to explore different methods to achieve a flawless finish and discover some pro tips to elevate your paint job. Don’t miss out on this valuable knowledge!
Contents
- 1 Exterior and Interior Painting: Surface Preparation Techniques
- 2 Various Surface Preparation Methods Explained
- 3 Exterior Painting: Tips for Surface Preparation
- 4 Essential Surface Preparations for a Perfect Paint Job
- 5 Popular Techniques for Surface Preparation in Painting
Exterior and Interior Painting: Surface Preparation Techniques
Proper surface preparation is a crucial step in the painting process, both for interior and exterior projects. A well-prepared surface ensures that the paint adheres properly, enhancing the durability and appearance of the finished product.
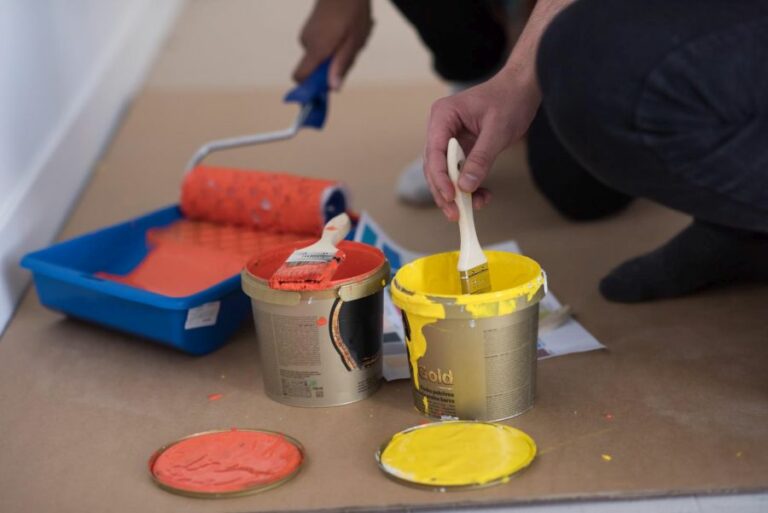
• 1. Cleaning
– Exterior Surface Cleaning
A clean surface is vital for the paint to adhere well. Exterior surfaces are often exposed to dirt, grime, mildew, and other contaminants that can negatively affect the adhesion and overall performance of the paint.
Before painting, it’s necessary to clean the surfaces thoroughly using the appropriate methods.
- Pressure washing: The most common way to clean exterior surfaces is by using a pressure washer. This method is particularly effective in removing heavy dirt, grime, and mildew buildup. It is important to exercise caution and use the right pressure settings to avoid damaging the surface.
- Hand washing: For more delicate surfaces, such as wood, hand washing with a soft-bristle brush and mild detergent is recommended. This method is gentle enough to prevent damage while effectively removing dirt and other contaminants.
- TSP cleaning: For stubborn stains and mildew, washing with a solution of trisodium phosphate (TSP) can be quite helpful. Be sure to follow the manufacturer’s instructions and use protective gear when handling TSP.
– Interior Surface Cleaning
Interior surfaces can accumulate dust, grease, and other impurities over time, which can compromise paint adhesion. Like exterior surfaces, cleaning methods vary depending on the surface material.
- Dusting: Use a soft cloth or duster to remove dust and cobwebs from walls and ceilings.
- Degreasing: Grease and grime buildup, especially in kitchens, can be removed by washing walls with a mild detergent or a solution of TSP. Rinse the surfaces with clean water afterward.
- Mildew removal: For interior surfaces affected by mildew, use a solution of bleach and water to remove it. Rinse the area thoroughly and ensure it is completely dry before painting.
• 2. Repairing and Patching
– Exterior Surface Repair
After cleaning the exterior surfaces, it is essential to repair any damage, such as cracks or holes, to ensure a smooth final result.
- Caulking: To fill gaps around windows, doors, and trim, use a high-quality exterior-grade caulk. Ensure the surfaces are clean and dry before applying the caulk.
- Wood repairs: For damaged wood surfaces, use a wood filler or epoxy to fill holes and cracks. Sand the repaired area smooth once the filler has dried.
– Interior Surface Repair
Similar to exterior surfaces, interior surfaces require repairs and patching as needed to achieve optimal paint adhesion and an aesthetically pleasing finish.
- Filling holes and cracks: Use a spackling compound to fill small holes and cracks in walls and ceilings. Allow the compound to dry, and then sand it smooth.
- Repairing drywall: For larger holes or damaged areas in drywall, a wall patch or drywall tape along with a joint compound will be necessary. This guide from the U.S. Department of Energy provides detailed instructions on repairing drywall.
• 3. Sanding
Sanding is an important step in surface preparation for both exterior and interior surfaces. It helps remove loose, flaking paint and creates a smooth, even surface for the new paint to adhere to.
- Wood surfaces: For wooden surfaces, use medium-grit sandpaper for the initial sanding, followed by fine-grit sandpaper to smooth the surface.
- Masonry and stucco: Masonry and stucco surfaces typically require less sanding, but use a coarse-grit sandpaper or a wire brush if needed to remove loose material.
- Drywall and plaster: For interior surfaces like drywall and plaster, use fine-grit sandpaper to smooth any rough areas or joints.
Remember to wipe surfaces clean of sanding dust before painting.
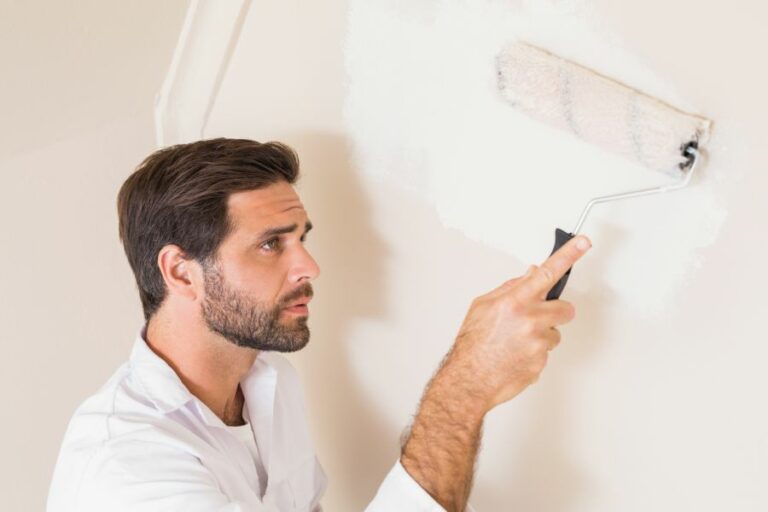
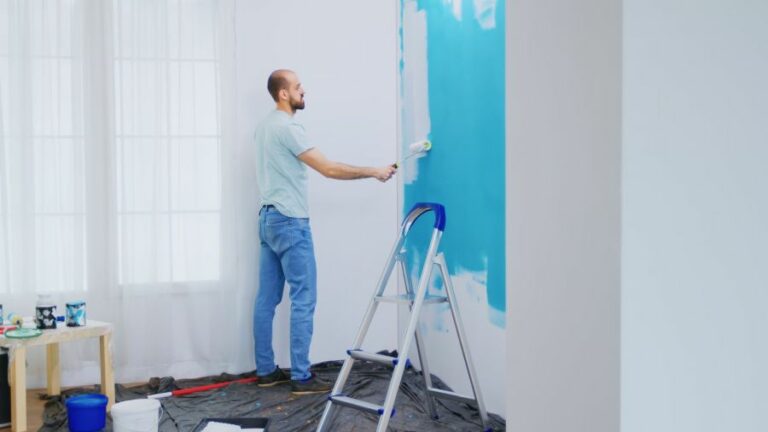
• 4. Priming
Applying primer is vital for both exterior and interior surfaces, as it enhances paint adhesion and overall durability. Primers also help seal porous surfaces, ensuring even and consistent paint coverage.
- Exterior surfaces: Choose a high-quality exterior primer compatible with the surface material and paint type. Follow the manufacturer’s instructions for application.
- Interior surfaces: Use an interior primer suited to the surface and paint type. Special primers, such as stain-blocking primers or adhesion primers, may be necessary for challenging surfaces or specific situations.
• Conclusion
Proper surface preparation is key to achieving a professional and durable painting result. Taking the time to ensure surfaces are clean, repaired, sanded, and primed properly will significantly improve the overall performance and appearance of both exterior and interior paint jobs.
Always follow best practices and use high-quality materials to guarantee the best possible outcome.
Technique | Exterior | Interior |
|---|---|---|
Cleaning | Washing with water, detergent, or pressure washing to remove dirt and grime from the surface | Wiping down walls with a damp cloth or sponge to remove dust and dirt |
Sanding | Using sandpaper or an electric sander to remove old paint, smooth rough spots, and ensure adhesion of new paint | Lightly sanding walls to remove imperfections and improve paint adhesion |
Scraping | Using a paint scraper or putty knife to remove loose or peeling paint before painting | Scraping off any loose or peeling paint to create a smooth surface |
Priming | Applying a primer to seal porous surfaces, hide stains or discolorations, and improve paint adhesion | Using a primer to ensure even coverage, hide stains or marks, and improve paint adhesion |
Caulking | Filling gaps between siding and trim with caulk to seal against water and air infiltration | Filling gaps between walls and trim or baseboards with caulk for a seamless finish |
Masking | Using masking tape or painter’s tape to protect windows, doors, and other surfaces not meant to be painted | Using painter’s tape to protect trim, windows, and other surfaces from paint |
Repairing Damages | Fixing any damages to the exterior surface, such as replacing rotten wood or repairing cracks | Repairing any damages to the walls, such as filling nail holes, fixing cracks, or patching drywall |
Various Surface Preparation Methods Explained
Surface preparation is a critical step in the process of painting, coating, or bonding materials to a substrate. Proper surface preparation ensures optimal adhesion, performance, and durability of the final product.
There are numerous surface preparation methods available, and the choice of method depends on factors such as the material of the substrate, the desired finish, and the type of coating or bonding material being used.
• Mechanical Surface Preparation Methods
– Abrasive Blasting
Abrasive blasting is a process that involves propelling abrasive material at high velocity against a surface. This causes the removal of contaminants, old coatings, and other unwanted materials, resulting in a clean and roughened surface. The most common types of abrasive blasting include:
- Sandblasting
- Shot blasting
- Grit blasting
- Slurry blasting
- Dry ice blasting
- Sponge blasting
I recommend using protective measures like wearing appropriate protective equipment, such as respirators and gloves, during the process, as abrasive blasting can generate dust and hazardous particles.
– Grinding
Grinding involves the removal of material from a surface using abrasive tools like grinding wheels, sanding discs, or flap wheels. This technique can be used for leveling, smoothing, and cleaning surfaces, as well as removing old coatings, rust, and other contaminants.
Grinding can be performed using hand-held or stationary tools, depending on the scale and requirements of the project.
– Scarifying
Scarifying is another mechanical method of surface preparation that involves the use of specialized equipment to remove surface contaminants and create a rough surface profile.
Scarifiers use rotating cutters or flails to abrade surfaces, remove coatings, and break up hard or dense materials like concrete. This technique is commonly used for preparing concrete surfaces for coatings, overlays, or repairs.
• Chemical Surface Preparation Methods
– Cleaning with Solvents
Cleaning with solvents involves using chemicals like acetone, xylene, or methyl ethyl ketone (MEK) to dissolve and remove contaminants, such as oils, grease, and waxes, from the surface.
Solvent cleaning is typically performed using a cloth or sponge saturated in the solvent, which is then wiped across the surface to remove contaminants.
– Acid Etching
Acid etching is a chemical surface preparation method that involves applying a solution of acid (such as hydrochloric or phosphoric acid) on the surface to remove surface contaminants, lightly roughen the surface, and expose the pores of the substrate.
This method is commonly used for preparing concrete surfaces for bonding, coating, or painting. Acid etching should be performed with proper safety precautions, including the use of acid-resistant gloves, goggles, and proper ventilation to avoid inhaling dangerous fumes.
– Alkaline Cleaning
Alkaline cleaning is another chemical method that involves the use of an alkaline (high pH) cleaning solution to remove contaminants, such as oils, grease, and dirt, from the surface.
This method is commonly used for cleaning metal surfaces, like steel and aluminum, prior to coating or painting. It is important to thoroughly rinse the surface with water after alkaline cleaning to remove any residual contaminants and cleaning solution.
• Thermal Surface Preparation Methods
– Flame Cleaning
Flame cleaning is a thermal method of surface preparation that uses a propane or oxyacetylene torch to burn off contaminants like oil, grease, and rust from a surface. The heat from the flame causes the contaminants to vaporize, leaving the surface free of contaminants.
This method is commonly used for cleaning steel surfaces, such as structural steel or ship hulls, prior to painting or coating.
– Thermal Spraying
Thermal spraying is a process that involves heating materials such as metal, ceramic, or plastic to a molten or semi-molten state and spraying them onto a substrate to create a coating.
This technique can be used for surface preparation by creating a rough or textured surface that promotes the adhesion of subsequent coatings or bonding materials. Thermal spraying can also be used to apply protective coatings that resist corrosion, wear, or erosion.
In conclusion, choosing the appropriate surface preparation method is crucial in ensuring the longevity and performance of coatings, bonds, and finishes. The choice of method depends on factors such as the type of substrate, the desired finish, and the coating or bonding material being used.
By understanding the different surface preparation methods available and their advantages and disadvantages, you can make an informed decision to achieve the best results for your project.
Type | Description |
|---|---|
Cleaning | Removal of surface contaminants such as dirt, grease, or oil using cleaning agents, solvents, or detergents. |
Abrasive Blasting | Using high-pressure air or water to propel abrasive materials against the surface to remove contaminants, mill scale, and create a desired surface profile. |
Grinding | Removing surface irregularities, contaminants, or old coatings with the use of hand-held or machine-driven abrasives such as grinding wheels, discs, or belts. |
Chemical Treatment | Using acids, alkalis, or other chemicals to dissolve or remove contaminants, mill scale, or rust from the surface. |
Mechanical Tooling | Using machines or hand tools such as scrapers, wire brushes, or needle guns to remove contaminants, rust, or old coatings from the surface. |
Ultrasonic Cleaning | Utilizing high-frequency sound waves and cleaning solutions to remove contaminants from surfaces, especially in areas that are difficult to reach, using other methods. |
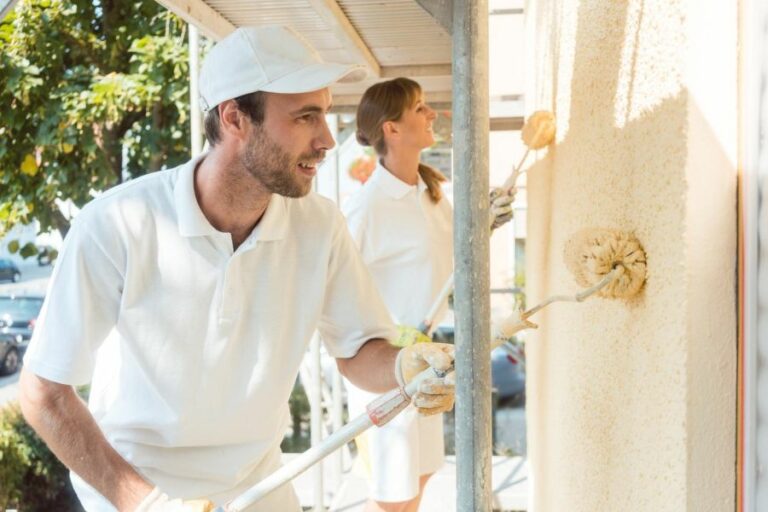
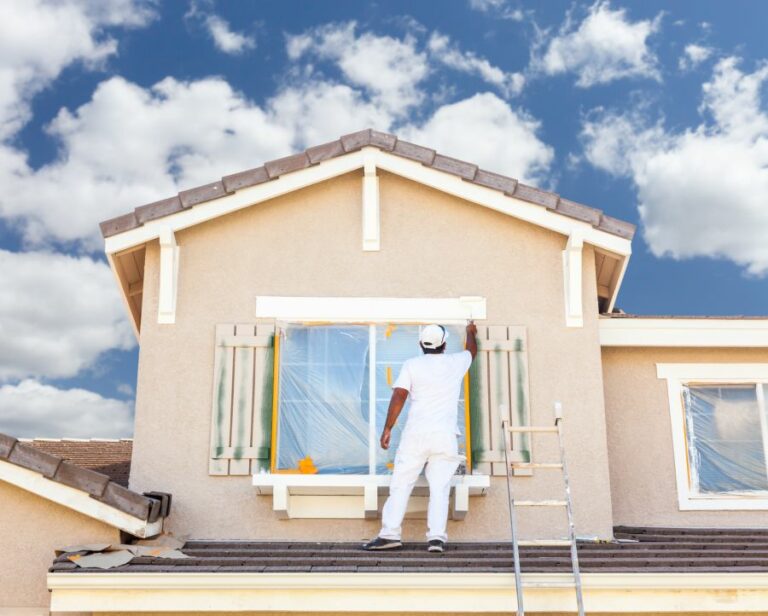
Exterior Painting: Tips for Surface Preparation
Preparing the surface of your home is a crucial step when it comes to exterior painting. Proper surface preparation will not only ensure the highest quality finish but also extend the life of your paint job.
• Choose the Right Time
Before starting the preparation process, it’s important to choose the right time for painting. Aim to work during dry, mild weather when temperatures are between 50-90°F (10-32°C). Avoid painting during rainy or highly humid conditions to ensure proper drying and adhesion of paint.
• Assess the Surface
Start by inspecting the surface of your home for signs of damage or wear. Keep an eye out for any cracks, holes, peeling paint, or other imperfections that need attention before painting. Make a note of any areas that require repair or special preparation.
• Gather Necessary Tools and Supplies
To effectively prepare a surface for exterior painting, gather the following tools and supplies:
- Pressure washer (optional but recommended)
- Scrapers
- Putty knife
- Wire brush
- Sandpaper (various grits)
- Patching compound or wood filler
- Caulking and a caulking gun
- Drop cloths, masking tape or painter’s tape, plastic sheeting
- Safety goggles and gloves
• Clean the Surface
Cleaning the surface is essential to ensure proper paint adhesion. The most effective way to remove dirt, mold, mildew, or moss is by using a pressure washer. This powerful tool cleans surfaces quickly and thoroughly, saving time and effort.
If you don’t have access to a pressure washer, use a garden hose with a high-pressure nozzle attachment along with a stiff-bristled brush to scrub the surface clean.
When using a pressure washer, be sure to use a 25- or 40-degree nozzle tip, hold the wand at a 45-degree angle, and start at the top of the wall, working your way down. Keep a distance of about 18-24 inches (45-60 cm) between the surface and the wand to avoid damage.
• Scrape and Remove Loose Paint
After cleaning the surface, any loose or peeling paint must be removed. Use a scraper, wire brush, or power sander to remove any loose, peeling, or damaged paint, focusing on the areas identified during the initial assessment.
When using a power sander, be sure to use fine or extra fine grit sandpaper to avoid gouging the surface.
• Repair Damaged Areas
Next, repair any damage found during the assessment. Common issues may include cracks, holes, or gaps in siding, trim, or other surfaces. For small holes or cracks, use a patching compound or wood filler to fill in and smooth out the surface.
For larger gaps, such as those found in siding or between window and door frames, use caulking to seal the gap and prevent moisture infiltration.
• Sand the Surface
In order to ensure a smooth, even finish, sand the surface of the area to be painted. Sanding helps remove any remaining loose paint, rough edges, or imperfections and helps promote paint adhesion.
Start with a coarse-grit sandpaper, such as 80-grit, and work your way up to a finer grit, like 200- or 220-grit, for a smooth finish.
Always sand along the grain of the wood, and be sure to wear safety goggles and a dust mask during this step.
• Protect and Mask Surrounding Areas
Before painting, protect any areas that should not be painted, such as windows, doors, hardware, outdoor plants, and lighting fixtures. Use drop cloths, masking tape, or painter’s tape to cover and protect these features.
• Prime the Surface (If Necessary)
Priming is an optional step and may not be necessary for all surfaces. However, it is recommended for porous surfaces, surfaces prone to moisture infiltration, or surfaces with significant repairs.
If you choose to prime the surface, select a primer that is appropriate for the substrate (wood, masonry, etc.) and follow the manufacturer’s instructions for application and drying time.
Now that the surface is properly prepared, it is time to apply the paint. By following these steps, you will ensure that your paint job not only looks great but also lasts as long as possible.
And for further guidance on surface preparation, consult the U.S. Department of the Interior’s guide on historic home preservation.
Steps | Description |
|---|---|
1. Inspection and Repair | Inspect the surface for any damages, such as cracks, holes, or rot. Make necessary repairs before painting. |
2. Cleaning | Clean the surface using a power washer or a brush to remove dirt, dust, mildew, and loose paint. |
3. Scraping and Sanding | Scrape off any remaining loose paint and sand the surface to create a smooth and even finish. Sand rough edges and transitions between painted and bare surfaces. |
4. Priming | Apply a suitable primer to the surface to improve paint adhesion and create a uniform base for the paint. |
5. Caulking | Apply exterior-grade caulk to seal gaps, joints, and seams. This helps in preventing moisture infiltration and creating a smoother finished appearance. |
6. Protective Measures | Take necessary protective measures like covering nearby plants, removing fixtures, and using painter’s tape to protect windows and other surfaces from paint splatters and drips. |
Essential Surface Preparations for a Perfect Paint Job
Proper surface preparation is a crucial step in achieving a high-quality, long-lasting paint job.
• Importance of Surface Preparation
Surface preparation plays an essential role in painting projects, as it directly impacts the finish, durability, and lifespan of the paint. A well-prepared surface ensures proper paint adhesion, preventing issues such as peeling, flaking, or premature aging.
It also helps to maintain the aesthetic appeal of the painted surface, contributing to the overall success of the project.
• Methods of Surface Preparation
Various methods are available for surface preparation, each suited to specific situations and surface types. Understanding the most appropriate method for the surface at hand is integral to achieving a satisfactory finish.
– Cleaning
The first step in surface preparation is cleaning. A thorough cleaning removes dirt, grease, and other contaminants that might impair paint adhesion. Ideally, a combination of vacuum cleaning, brushing, and washing with either water or a suitable cleaning agent should be employed.
The Environmental Protection Agency (EPA) provides guidelines on proper cleaning and maintenance of surfaces, especially for surfaces that contain lead-based paint, to ensure safety and compliance with regulations.
– Removal of Old Paint
If the surface to be painted has pre-existing layers of paint, it is necessary to remove these layers to ensure a proper bond between the new paint and the surface. There are various methods for removing old paint, including:
- Manual scraping: Using a scraper or a putty knife, gently scrape away the old paint layer.
- Chemical stripping: Applying a paint stripping solution, such as a paint remover or a specialized cleaning solution, to dissolve old paint layers.
- Heat stripping: Using a heat gun or a torch to loosen old paint, allowing for easy removal.
Be cautious with lead-based paint when employing these methods, as improper removal can pose a health risk. The EPA provides guidelines for the safe removal of lead-based paint.
– Sanding
Once the surface is clean and all loose materials have been removed, sanding may be required to create a smooth, even surface. Sanding not only helps to smooth out any irregularities but also creates a slightly rough surface that enhances paint adhesion.
Sandpaper of varying grits can be utilized depending on the roughness of the surface, starting with a coarser grit and finishing with a finer one.
– Filling and Repairing
Cracks, holes, and other imperfections on the surface should be filled and repaired before painting. Filling these imperfections provides a smooth, uniform surface for paint application.
Using a suitable filler or patching compound, fill and level the surface imperfections, then sand them down to blend seamlessly with the surface.
– Priming
Applying a high-quality primer is an essential step in surface preparation, especially for porous or heavily stained surfaces. Primers provide a suitable base for paint adhesion, help to seal porous surfaces, and improve the overall look of the final paint job.
Choosing the appropriate primer is crucial, as it should be compatible with both the surface material and the paint to be applied.
• Handling Different Surface Types
Different surfaces require specialized preparation techniques to ensure proper paint adhesion and longevity.
- Wood: For unpainted wooden surfaces, sanding the surface is necessary. Use a wood-specific primer and ensure it is fully dry before applying paint.
- Metal: Remove any rust or corrosion using a wire brush or sandpaper, then clean thoroughly. Use a metal-specific primer and allow it to dry before painting.
- Concrete and Masonry: New concrete surfaces should be given sufficient time to cure before painting. Clean the surface and repair any cracks before applying a masonry-specific primer.
- Drywall: Fill any holes or imperfections with a patching compound, sand smooth and apply a drywall-specific primer to prepare the surface for paint.
- Plaster: Fix any cracks or imperfections using a patching compound, sand smooth, and apply a plaster-specific primer.
- Previously Painted Surfaces: Thoroughly clean, remove old paint if necessary, patch any imperfections, sand smooth, and apply the appropriate primer based on the surface material.
• Final Thoughts
Proper surface preparation is vital to achieving a successful, long-lasting paint job. By accurately assessing the surface type and utilizing appropriate techniques, you can ensure proper paint adhesion and a visually appealing end result.
Regardless of the project size or scope, always prioritize safety, and adhere to any relevant regulations or guidelines, such as those provided by the EPA.
Step | Description |
|---|---|
Cleaning | Remove dirt, dust, grease, and other contaminants from the surface. |
Scraping/Sanding | Remove old paint, loose materials, and create a smooth surface for better paint adhesion. |
Repairing | Fill holes, cracks, and imperfections with appropriate filler or putty. |
Priming | Apply a primer to seal the surface and provide a base for the paint to adhere to. |
Caulking | Seal gaps, seams, and joints with caulk to prevent moisture and air infiltration. |
Masking | Cover areas that should not be painted, such as windows, doors, and trim, with tape or other protective materials. |
Popular Techniques for Surface Preparation in Painting
Surface preparation is a critical step in many industrial and manufacturing processes, as well as in construction and restoration projects. The quality of a surface’s preparation can have a significant impact on the performance and longevity of coatings, treatments, or bonding agents applied to it.
Among the many techniques available for surface preparation, abrasive blasting is the most common, versatile, and effective method.
• Abrasive Blasting: An Overview
Abrasive blasting, also known as sandblasting, is a process in which an abrasive material is forcibly propelled against a surface under high pressure, creating a roughened surface. This method is commonly used for:
- Removing corrosion, rust, and old paint from metal surfaces
- Cleaning and texturing concrete and masonry surfaces for painting, bonding, or sealing
- Preparing a surface for thermal spray coating, electroplating, or welding
- Etching or engraving designs on glass, stone, or metal surfaces
The effectiveness of abrasive blasting in accomplishing these tasks lies in its ability to clean and roughen the surface simultaneously, enhancing the adhesion of whatever material is applied afterward.
– Types of Abrasive Blasting Media
The choice of blasting media is an essential aspect of the success of the abrasive blasting process. Different media offer varying levels of abrasiveness, and some materials are better suited for specific applications than others. The most commonly used abrasive media include:
- Silica sand: A popular choice for its low cost and wide availability, silica sand effectively removes rust, paint, and mill scale from metal surfaces. However, its use is increasingly limited due to health concerns associated with silica dust inhalation.
- Garnet: A natural mineral abrasive, garnet is renowned for its durability and sharpness, making it especially suitable for heavy-duty applications such as removing corrosion and heavy rust.
- Steel grit: Used primarily for removing rust and heavy coatings from steel surfaces, steel grit is a hard, angular abrasive that produces minimal dust.
- Glass beads: Ideal for delicate or precision work, glass beads create a smooth finish while preserving the integrity of the base material. They are commonly used in applications like aerospace and automotive component cleaning.
The selection of the proper abrasive media depends on the surface material, the desired finish, and the need to maintain the integrity of the workpiece.
• Key Considerations in Surface Preparation using Abrasive Blasting
To achieve optimal results with abrasive blasting, several factors must be considered, including:
- Surface cleanliness: Before blasting, the surface should be free of oil, grease, dirt, and other contaminants that could interfere with the blasting process. Appropriate cleaning methods, such as solvent degreasing or chemical treatments, should be employed as needed.
- Proper equipment: The choice of abrasive blasting equipment heavily influences the quality and efficiency of the surface preparation process. Equipment should have the appropriate pressure and flow control capabilities, as well as a well-designed, effective dust collection system.
- Operator skill: The skill of the operator is critical in achieving the desired surface finish with abrasive blasting. Proper nozzle and blast angle selection, blast distance control, and thoroughness in covering the entire surface area need careful attention from the operator.
– Safety Considerations
Abrasive blasting can present potential health and safety risks for workers. Some of the primary hazards to be aware of include:
- Inhalation of dust: The fine dust produced during the abrasive blasting process can be hazardous if inhaled. Proper respiratory protection, along with adequate ventilation and dust collection systems, are essential for reducing this risk.
- Noise: The blasting process can generate high noise levels, and workers should be provided with proper hearing protection, such as earmuffs or earplugs.
- Flying debris: The risk of flying debris is present during abrasive blasting, especially when using hard, angular media. Workers should be equipped with protective goggles, face shields, or other suitable eye protection.
• Conclusion and Recommendations
Abrasive blasting stands out as the most common technique for surface preparation due to its outstanding versatility and effectiveness. It offers an unparalleled ability to clean and roughen a surface simultaneously, enhancing the adhesion of coatings, bonding agents, and other treatments.
When selecting the abrasive media and equipment, as well as considering the skill of the operator, the success of surface preparation using abrasive blasting can be further ensured.
As an expert in this field, I recommend staying abreast of advancements in abrasive media materials and blasting equipment technologies. Additionally, adherence to safety guidelines and regulations should be a top priority for any organization engaged in abrasive blasting operations.
Overall, careful planning, execution, and vigilance in monitoring safety can lead to successful surface preparation with abrasive blasting, adding significant value to projects across various industries.