Stripping Wallpaper And Other Coverings Before Interior Painting
When tackling the task of interior painting, one crucial step that often goes overlooked is stripping wallpaper and other coverings from your walls. This preparatory action ensures a smooth, high-quality finish that showcases your chosen paint color and overall room transformation.
Stripping wallpaper and other coverings before interior painting:
Before painting interiors, remove wallpaper and other coverings by preparing the workspace, gathering necessary tools, scoring the wallpaper, applying a wallpaper stripper solution, and gently scraping off the wallpaper. Clean, repair, and sand the walls, then prime them before applying a new coat of paint.

Ready to give your walls a fresh new look with a coat of paint? Hold on! First, make sure to properly strip old wallpaper and other coverings for a smooth, long-lasting result. Read on as we unveil the tricks and tips for successful wall preparation before kicking off your interior painting project.
Contents
- 1 Removal of Wallpaper & Other Coatings Before Painting Interiors
- 2 Selecting Wall Primers After Wallpaper Removal
- 3 Post-Wallpaper Removal: What Comes Next?
- 4 Wall Treatments Following Wallpaper Removal
- 5 Is Removing All Wallpaper Layers Vital Before Painting?
Removal of Wallpaper & Other Coatings Before Painting Interiors
• Preparing Your Workspace
Before starting the process of removing wallpaper or any other wall covering, it is essential to prepare your workspace. This will save you time and make the job more manageable.
Begin by moving your furniture away from the walls, and cover them with drop cloths or plastic sheets to protect the surfaces from debris and moisture. Additionally, lay drop cloths on the floor to avoid any staining or scratches.
If you’re working in a room with electrical outlets or switches, switch off the power supply, and remove the sockets and plates. Cover the exposed areas with masking tape to prevent water from seeping in, which could cause electrical problems.
It’s also essential to have good ventilation in the room. Open windows and turn on fans to help the room air out and dry when necessary.
• Tools and Materials Needed
Before diving into removing wallpaper or other wall coverings, gather the essential tools and materials you’ll need. Make sure to have the following items within reach:
- Wallpaper stripper solution (either a commercial product or a homemade solution made from equal parts white vinegar and water)
- Wallpaper scorer
- Putty knife or scraper
- Sponge or spray bottle
- Bucket
- Ladder or step stool
- Gloves and protective eyewear
• Stripping Wallpaper
– Step 1: Scoring the Wallpaper
To begin the stripping process, use a wallpaper scorer to create punctures or tears in the wallpaper. Gently press the scorer against the wall and move it in circular motions to create small holes in the paper. This will help the wallpaper stripper solution penetrate the adhesive layer more effectively.
– Step 2: Applying the Wallpaper Stripper Solution
Fill a bucket with the wallpaper stripper solution, and saturate your sponge, or transfer the solution into a spray bottle. Apply the solution generously to the wallpaper, ensuring that it covers the entire surface. Allow the solution to soak into the paper for about 15-20 minutes.
Have patience while the wallpaper absorbs the solution. The waiting time differs depending on the wallpaper material and the adhesive used. In some cases, you may need to apply more solutions after the initial soaking time, especially for stubborn or old wallpaper.
– Step 3: Removing the Wallpaper
Once the wallpaper has absorbed the solution, use a putty knife or scraper to gently lift the edge of the paper.
Be careful not to damage the wall underneath, as this could complicate your painting efforts. The paper should come off easily in strips or pieces, but if you find any areas where the paper is still firmly stuck to the wall, apply more solution and wait again before making another attempt.
– Step 4: Cleaning and Repairing the Walls
After removing the wallpaper, there may be residual adhesive on the walls. Use a sponge or cloth with warm water and mild detergent to clean this. Rinse the walls with clean water after cleaning to remove any detergent residue.
Inspect the walls for any damaged areas that need repairing. Fill any holes or dents with a pre-mixed patching compound, and sand the surface smooth once it has dried. Treat the affected areas with a mold removal solution if you encounter any mold or mildew.
• Removing Other Wall Coverings
If you have a different type of wall covering, such as wood paneling or paintable wallpaper, the removal process might differ from what’s described in the wallpaper removal section. In some cases, it might be necessary to consult a professional to ensure proper and safe removal.
For wood paneling, you can use a flat pry bar and carefully work it between the paneling and the wall, leveraging it out piece by piece.
For paintable wallpaper, follow the same process as described for regular wallpaper, but you may find it helpful to use a steamer or special solvent to aid in the removal process.
• Preparing to Paint
Before you grab your paintbrush, make sure your walls are ready for a new coat of paint by following these steps:
- Sand the walls to remove any remaining raised areas.
- Clean the walls with a mild detergent and water solution to remove dirt and dust.
- Fix any remaining imperfections in the walls by using a patching compound and sanding them smooth.
- Prime the walls, especially if you’re painting over a dark or bold color, to ensure proper paint adhesion and coverage.
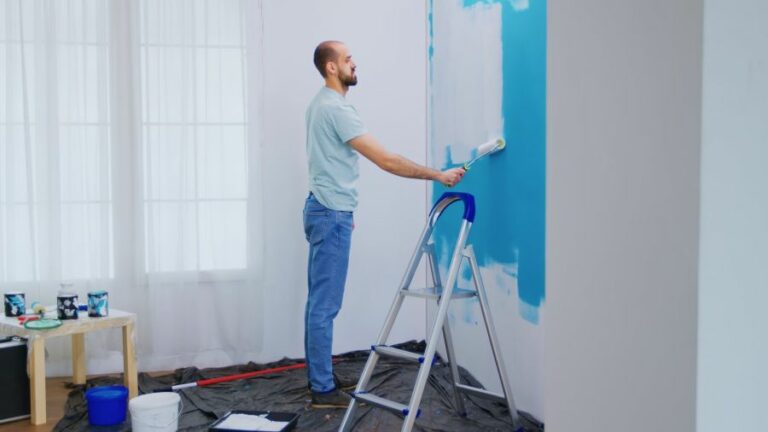
With your walls prepared, you’re finally ready to begin painting your room, transforming it into a fresh and welcoming space.
Selecting Wall Primers After Wallpaper Removal
Removing wallpaper can leave behind a less-than-perfect surface. To ensure a smooth paint job, it is essential to prime the walls after removing the wallpaper.
• Importance of Priming
Priming serves multiple purposes:
- Sealing surfaces: It seals porous surfaces, ensuring uniform saturation of paint.
- Better adhesion: It improves paint adhesion, reducing peeling and blistering.
- Enhanced finish: It helps achieve accurate color rendering, hiding stains and providing a smooth finish.
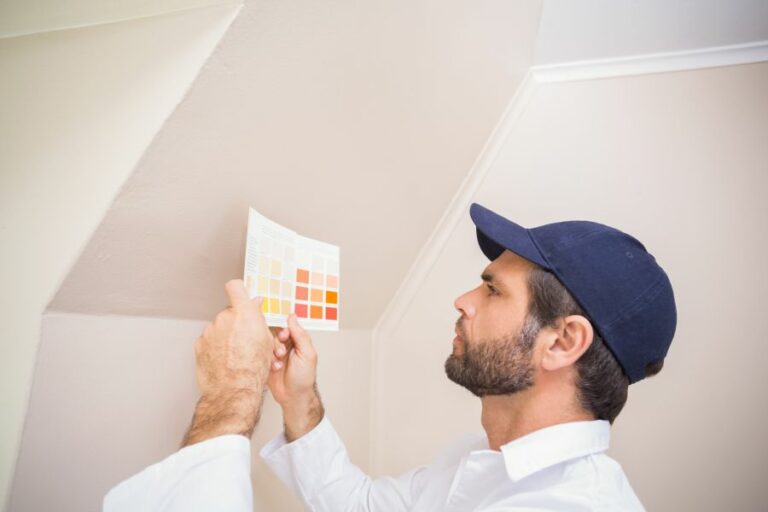
• Choosing the Right Primer
Several types of primers are available in the market, each designed for specific purposes. It is critical to select the appropriate primer for your walls. Some common types include:
- Latex: Oil-based primers work well on problematic surfaces, offering excellent adhesion.
- Oil-based: These primers are popular because of their ease of use and cost-effectiveness.
- Shellac-based: Ideal for sealing severe water stains, smoke damage, or stubborn odors.
For walls that were previously covered with wallpaper, a latex or oil-based primer is recommended. Latex primers offer quick-drying times and are easy to clean up. On the other hand, oil-based primers provide greater adhesion and more extended-lasting results.
• Step-by-Step Process for Priming Walls
1. Assess the wall condition
After removing wallpaper, check the walls for:
- Residual adhesive
- Uneven surfaces
- Damaged areas
- Mold
2. Clean the walls
Remove any residual adhesive using a wallpaper stripper or a mixture of water and fabric softener. Gently scrape off any persistent adhesive with a scraper, being careful not to damage the walls. Then, wash the walls with a mild soap and water solution.
3. Repair damaged areas
Fill holes and cracks using a joint compound or spackling paste. Wait for the compound to dry, as per the manufacturer’s instructions. Sand the repaired areas with fine-grit sandpaper to create a smooth surface.
4. Treat mold and mildew
If mold or mildew is present, scrub the affected areas with a diluted bleach solution or a mold-killing product before priming. Make sure to wear protective gloves and ensure proper ventilation while treating mold.
5. Sand the walls
Sanding the entire wall surface improves primer adhesion and ensures a smooth, polished look. Using fine-grit sandpaper, sand the walls in circular motions, then wipe off any dust using a damp cloth.
6. Remove dust and debris
After sanding, vacuum the room to eliminate dust and debris from both the walls and the surrounding area.
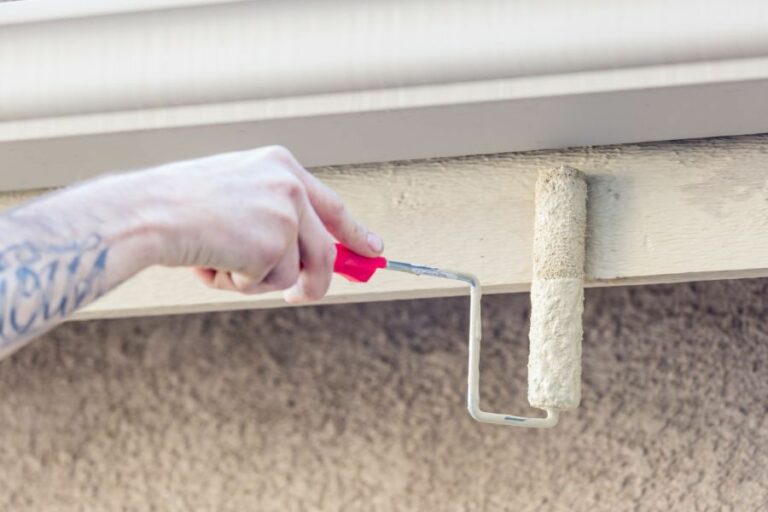
7. Apply the primer
Using a brush or roller, apply the chosen primer to the walls, beginning with the edges and working inwards. Typically, just one coat of primer is sufficient for most walls. However, if the walls are heavily stained or made of porous materials like new drywall, an additional coat may be necessary.
Allow the primer to dry according to the manufacturer’s directions.
8. Sand and clean, again
Once the primer is dry, lightly sand the walls for a final touch-up. Use a damp cloth to wipe the walls and remove any sanding dust.
The walls are now primed and ready for painting.
• Final Thoughts
Priming the walls after removing wallpaper is a crucial step to ensure a smooth, long-lasting paint job. Choosing the right primer and following the above step-by-step process will help you achieve professional results in your wall treatment project.
Step | Description |
|---|---|
1 | Clean and remove all wallpaper residue from the walls |
2 | Repair any damage or uneven surfaces on the wall |
3 | Choose a high-quality primer (oil-based, shellac-based, or latex) depending on your needs |
4 | Apply primer with a brush or roller, ensuring even coverage |
5 | Allow the primer to dry fully, following the manufacturer’s instructions |
6 | Once the primer is dry, apply the desired paint color or new wallpaper |
Post-Wallpaper Removal: What Comes Next?
Removing wallpaper is just the beginning of achieving your desired renovation goals. After the tiresome process of removing old wallpaper, the next steps are crucial to ensure a perfectly smooth finish and a flawless paint job or new wallpaper surface.
• Preparing the Walls
– Removing Wallpaper Adhesive Residue
Even after removing the wallpaper, a layer of adhesive residue often remains on the walls. This residue should be removed to create a clean surface for painting or applying new wallpaper.
You can also use a homemade solution, such as a mixture of warm water and white vinegar or a few tablespoons of dish soap. Using a sponge or cloth, gently scrub the walls with the solution to remove the residue, followed by rinsing with clean water. Allow the walls to dry thoroughly.
– Sanding the Surface
If your walls have a rough texture or inconsistencies after removing the adhesive residue, it is recommended to sand the surface to even out such imperfections. Use a fine-grit sanding sponge or a sanding pole with 120-150 grit sandpaper for a smooth finish.
Take extra precautions when sanding near electrical outlets and switches, as accidentally sanding the metal boxes may cause them to short circuit.
• Repairing Damages
– Assessing Wall Condition
Once you have sanded the walls, examine the surface for any damages, such as holes, cracks, or lifted seams. These imperfections must be addressed before priming and painting or hanging new wallpaper to achieve a professional and lasting result.
– Fixing Small Holes and Cracks
For small holes or cracks, use a premixed joint compound or a spackling paste to fill in the gaps. Apply the compound using a putty knife and overfill slightly to account for shrinkage.
Once the compound is dry, use a fine-grit sanding sponge to sand the patched area smooth, feathering the edges to blend in with the surrounding wall.
– Repairing Large Holes or Major Damage
Larger holes or extensive wall damage might require more extensive repairs, such as using a setting-type joint compound or installing a wall patch. These repairs usually involve cutting and installing new drywall, followed by taping and mudding the seams.
• Finishing Touch: Priming and Painting or Hanging New Wallpaper
– Priming the Walls: Importance and Benefits
Applying primer is an essential step, whether you plan to paint the walls or install new wallpaper. A primer seals in any remaining adhesive residue, provides a smooth surface for painting or wallpapering and ensures that the paint or wallpaper adhesive adheres well to the wall.
Using a primer also helps in achieving a uniform appearance and makes it easier to remove wallpaper in the future.
– Painting the Walls
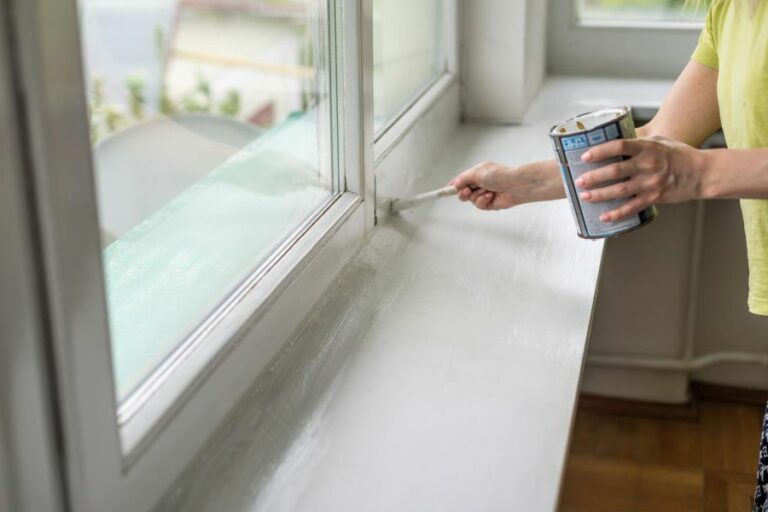
If you have chosen to paint the walls after removing wallpaper, it is crucial to use a high-quality paint and primer, as well as the proper tools for the job. For best results, use a roller for large areas and a brush for cutting in near the ceiling and trim.
Apply at least two coats of paint, allowing each coat to dry thoroughly before applying the next.
– Hanging New Wallpaper
When hanging new wallpaper, it is important to follow the manufacturer’s recommended installation instructions. Generally, this process involves preparing the wallpaper adhesive, applying it to the back of the wallpaper, and carefully positioning and smoothing the wallpaper on the wall.
Use a wallpaper smoothing brush to remove bubbles and wrinkles, working from the center of the panel towards the edges. Finally, trim off any excess wallpaper to achieve a neat and professional finish.
• Conclusion
In conclusion, the next steps after removing wallpaper entail preparing the walls, repairing any damages, and applying a primer before painting or hanging new wallpaper.
By diligently following these procedures, you will ensure a lasting and professional-looking result that will elevate the appearance of your space for years to come.
Wall Treatments Following Wallpaper Removal
• Introduction
Removing wallpaper can be a demanding task, but the challenge doesn’t end there. Once you have successfully removed the wallpaper, you will need to deal with what is left behind: uneven and possibly damaged walls.
• Preparing the Walls
– Assessing Wall Condition
Before covering the walls, it’s crucial to assess the current wall condition. After removing wallpaper, you might encounter a variety of issues, including leftover wallpaper adhesive, gouges, and uneven surfaces.
Identifying these problems will help you determine the necessary steps to achieve a smooth and well-prepared surface for covering.
– Cleaning and Repairing the Walls
After assessing the wall condition, you must clean and repair the surfaces as needed. Begin by removing any remaining wallpaper adhesive using a scraper or a damp sponge. If the adhesive is stubborn, you may need to use a wallpaper adhesive remover, which can be found at most hardware stores.
Next, repair any damaged areas. Fill gouges, cracks, or holes with a suitable filler (a premixed or powder filler would work best). Smoothen the filled areas using a putty knife or a sanding block and allow the filler to dry according to the product instructions.
– Sanding the Walls
Sanding is a crucial step in achieving a smooth surface that’s ready for covering. Using a medium-grit sanding block or an electric sander, lightly sand the walls to remove any remaining wallpaper adhesive and to even out any rough patches. Be sure to wear a dust mask and eye protection during this process.
After sanding, vacuum or wipe the walls to remove any dust.
• Choosing the Right Wall Covering
There are several options to choose from when covering walls after removing wallpaper. Your choice will depend on your personal preference, budget, and the current condition of your walls.
– Skim Coating
If you want a smooth, paint-ready surface, skim-coating your walls is a great option. Skim coating involves applying a thin layer of joint compound to the entire wall surface using a trowel or drywall knife.
To skim coat, first mix the joint compound to a smooth consistency. Apply a thin layer to the wall using upward and sideways strokes, smoothing the surface as evenly as possible. Allow the first coat to dry, then sand lightly and apply a second coat if necessary.
Finally, sand the surface smooth before wiping or vacuuming any dust. Your walls will then be ready for priming and painting. This comprehensive guide can help you complete a skim coating project with ease.
– Textured Paint
Textured paint can be an excellent alternative if you prefer a unique finish or want to conceal minor wall imperfections. Textured paint comes in various styles, including sand, popcorn, and orange peel, and can be applied using a roller or a brush. Consult the paint manufacturer’s instructions for the best results.
– Wall Paneling
Wall paneling is another option for covering walls and can offer a stylish and modern look. Panels are available in a wide range of materials, including wood, vinyl, and faux stone. These can be installed directly onto the wall using adhesive or nails, depending on the product specifications.
• Priming and Painting
After preparing the walls and choosing the desired wall covering, it’s time to prime and paint the surfaces. Begin by applying a high-quality primer to the entire wall surface, ensuring even coverage. A tinted primer can be useful if you plan to paint the walls a darker color.
Once the primer is dry, apply the paint using a roller or a brush following the paint manufacturer’s guidelines. Apply at least two coats, allowing each coat to dry before adding the next. Finish with a topcoat if desired for added durability.
• Conclusion
Covering walls after removing wallpaper can be a straightforward process if you follow the right steps. Begin by thoroughly preparing your walls, which includes assessing their condition, cleaning, repairing, and sanding.
Choose a suitable wall covering, such as skim coating, textured paint, or wall paneling, and finish with priming and painting. By adhering to these guidelines and tips, you will be well on your way to achieving a professional and polished wall finish.
Step | Description |
|---|---|
1 | Clean the wall surface: Remove any remaining adhesive residue, sand down any rough areas, and wipe down the walls with a damp cloth. |
2 | Repair any damage: Fill any holes or cracks with spackling compound or joint compound, and sand it smooth once it’s dry. |
3 | Apply a primer: Use a high-quality primer to cover the entire wall, providing a smooth and consistent surface for paint or new wallpaper to adhere to. |
4 | Choose your new wall covering: Decide whether to paint the wall, apply new wallpaper, or use a different wall covering material (such as wood paneling or shiplap). |
5 | Apply the new wall covering: Follow the manufacturer’s instructions for installing the new wall covering, being sure to apply it evenly and smoothly. |
Is Removing All Wallpaper Layers Vital Before Painting?
• The Importance of Proper Preparation
Painting over wallpaper can be a challenging task. People may be tempted to do it as a shortcut. However, it is essential to remove all layers of wallpaper before painting to ensure that the paint adheres properly and the final result is not compromised.
• Why Removing Wallpaper is Crucial
There are several reasons you need to remove all layers of wallpaper before painting:
– Paint Adhesion
Paint may not adhere well to the surface if the wallpaper is present. This can lead to peeling, cracking, and an overall unattractive appearance. By removing all layers of wallpaper, you are creating a clean and smooth surface for the paint to adhere to.
– Hidden Issues
Wallpaper can hide potential problems, such as mold, mildew, or damaged drywall. Removing the wallpaper allows you to address these issues before they become more significant and costly to repair.
– Bubbles and Seams
Painting over wallpaper can cause bubbles and seams to become more apparent, leading to an unprofessional and undesirable result. Removing the wallpaper will eliminate these imperfections, allowing for a smoother finish.
• Methods for Removing Wallpaper
– Chemical Strippers
Chemical strippers (also called wallpaper removers) are available in liquid or gel forms and can help break down the adhesive holding the wallpaper in place. Follow the instructions on the product label and always work in a well-ventilated area while using gloves and eye protection.
– Steam Removal
A wallpaper steamer is a device that uses hot water vapor to loosen the adhesive, allowing the wallpaper to be scraped off easily. Be cautious when handling the steamer, as it can lead to burns if misused.
– Dry Stripping
In some cases, wallpaper can be removed by simply using a putty knife or scraper to pry it away from the wall. This method may be more time-consuming and may require more repair work afterward due to potential damage to the wall.
• Tips for Successful Wallpaper Removal
– Be Patient
Removing wallpaper can be a time-consuming process, especially if multiple layers are present. Take your time and work in manageable sections to avoid feeling overwhelmed.
– Use the Right Tools
Some essential tools for wallpaper removal include a wallpaper scraper or putty knife, a scoring tool, a bucket of warm water, and a sponge for wiping down the walls. Using the right tools will make the job easier and more efficient.
– Repair and Clean the Wall
Once the wallpaper is removed, repair any damage to the wall, such as filling holes and smoothing out imperfections with a joint compound. Allow the repairs to be dry, then sand the wall smoothly. Finally, clean the wall with a damp cloth to remove any dust and residue.
• Preparing the Wall for Painting
After the wallpaper has been fully removed and the wall has been repaired, it’s essential to prime the wall before painting. Using a quality primer will ensure better paint adhesion, coverage, and durability.
Once the primer is dry, you’re ready to paint! Choose the desired finish and color and apply the paint evenly, allowing it to dry thoroughly between coats.
• Conclusion
In conclusion, removing all layers of wallpaper before painting is a crucial step, as it provides a clean and smooth surface for proper paint adhesion, reveals hidden issues, and prevents imperfections such as bubbles and seams from being visible.
By following the proper methods for removal, being patient and thorough, repairing and cleaning the wall, and using quality primers and paint, you will achieve a professional and lasting result.
Question | Answer |
|---|---|
Do you have to remove all layers of wallpaper before painting? | It is recommended to remove all layers of wallpaper before painting to ensure a smooth and even finish. However, in some cases, it may be possible to paint over wallpaper if it is in good condition, properly sealed, and prepared with an oil-based primer. |