Removing Wallpaper For Interior Paint Job. What Pros Say
If you’ve been dreading the whole process of removing old wallpaper before starting your interior paint job, worry no more! We’re here to help guide you through the necessary steps to make this task as painless as possible. With our expert tips and tricks, you’ll soon be ready to give your walls a fresh coat of paint and transform your space in no time.
Removing wallpaper for an interior paint job:
Proper wallpaper removal is essential for achieving a high-quality interior paint job. Ensure that you identify the type of wallpaper, gather the necessary tools, and follow a step-by-step removal guide, including scoring, applying solvent or water, removing wallpaper, cleaning, and repairing damaged walls before painting. A smooth, even surface is crucial for optimal paint adhesion and longevity.

Discover the best techniques to remove wallpaper and prepare your walls for a flawless paint job. Uncover expert tips and tricks to make the process a breeze. Read on to transform your space today.
Contents
- 1 Wallpaper Removal: Prepping Walls for Interior Painting
- 1.1 • Importance of Proper Wallpaper Removal
- 1.2 • Assess the Type of Wallpaper
- 1.3 • Gather Necessary Tools and Supplies
- 1.4 • Step-by-Step Guide to Wallpaper Removal
- 1.4.1 1. Protect Your Floor and Furniture
- 1.4.2 2. Loosen Wallpaper Edges
- 1.4.3 3. Score the Wallpaper
- 1.4.4 4. Apply Wallpaper Removal Solvent or Water
- 1.4.5 5. Remove the Wallpaper
- 1.4.6 6. Clean and Rinse the Walls
- 1.4.7 7. Use a Steamer for Stubborn Wallpaper
- 1.4.8 8. Repairing Damaged Walls
- 1.4.9 9. Sand and Prime
- 2 Preparing Walls for Painting Post-Wallpaper Removal
- 3 Optimal Wallpaper Removal Techniques for Painting
- 4 Painting Walls: Is It Possible After Wallpaper Removal?
- 5 Do Expert Painters Offer Wallpaper Removal Services?
Wallpaper Removal: Prepping Walls for Interior Painting
• Importance of Proper Wallpaper Removal
Before starting any interior paint job, it is crucial to properly remove the existing wallpaper. Failing to do so can result in a poor paint job, with bubbling or peeling paint. Moreover, leftover wallpaper adhesive can create an uneven surface, negatively impacting the final appearance of your freshly painted walls.
• Assess the Type of Wallpaper
Different types of wallpaper require different removal methods. Determine if the wallpaper is traditional, peel-and-stick, or vinyl.
Traditional wallpaper is applied with adhesive and generally requires the use of chemicals or steam to remove it, while peel-and-stick wallpaper can often be removed by simply peeling the paper from the wall. Vinyl wallpaper often requires a mixture of methods for effective removal.
• Gather Necessary Tools and Supplies
Removing wallpaper can be a time-consuming and labor-intensive process. To simplify the task, gather the following tools and supplies beforehand:
- Drop cloths
- Protective gloves
- Utility knife
- Wallpaper scoring tool
- Wallpaper removal solvent
- Spray bottle or paint roller
- Wallpaper scraper or putty knife
- Bucket and sponge
- Steamer (optional)
• Step-by-Step Guide to Wallpaper Removal
Follow these steps to effectively remove wallpaper and prepare your walls for an interior paint job.
1. Protect Your Floor and Furniture
Use drop cloths to cover and protect your floors, furniture, and countertops from water and debris. Additionally, remove any electrical outlet and switch plate covers to avoid damage.
2. Loosen Wallpaper Edges
Starting in a corner or seam, use a utility knife to gently lift and loosen the wallpaper edges. Try to peel off a corner or edge to test how easily the paper will come away from the wall.
3. Score the Wallpaper
A wallpaper scoring tool can significantly aid the removal process. Carefully roll the scoring tool on the wallpaper to create small punctures, allowing water or solvent to penetrate and loosen the adhesive.
4. Apply Wallpaper Removal Solvent or Water
Fill a spray bottle with wallpaper removal solvent or warm water. For non-vinyl wallpaper, apply the solution generously to a small section of the wall, avoiding oversaturation that could damage your walls or floors.
If dealing with vinyl wallpaper, use a paint roller to apply the solvent or water. Allow the solution to soak into the paper for 15-20 minutes.
Expert Tip: When using solvents, follow the manufacturer’s instructions and ensure proper ventilation in the room.
5. Remove the Wallpaper
Use a wallpaper scraper or putty knife to gently lift and remove the wallpaper. Start at an edge or seam and work in small sections, taking care not to damage the drywall underneath.
If the wallpaper is stubborn, reapply the solvent or water and let it soak for a few more minutes.
6. Clean and Rinse the Walls
Fill a bucket with warm water and use a sponge to clean the walls and remove any residual adhesive. Frequently rinse the sponge to avoid spreading adhesive residue.
7. Use a Steamer for Stubborn Wallpaper
If traditional methods prove ineffective, a steamer can be a powerful tool for removing stubborn wallpaper. Fill the steamer’s reservoir with water and let it heat up for the recommended time, then hold the steamer against the wallpaper to soften the adhesive before using a scraper to remove the paper.
Expert Tip: Follow the steamer’s instructions for the proper wait time and operating procedures to ensure safety and avoid damage to your walls.
8. Repairing Damaged Walls
Inspect the walls after removing the wallpaper to identify any damage that may need repair prior to painting. Fill small holes or dents with joint compound, using a putty knife to smooth the area.
9. Sand and Prime
Lightly sand the walls to create a smooth and even surface, and then apply a high-quality primer to ensure proper paint adhesion.
Following these steps will result in successful wallpaper removal and create the ideal foundation for a professional-looking interior paint job.
Be patient and thorough throughout the process, as this preparation work plays a critical role in the final appearance and longevity of your fresh paint.
Preparing Walls for Painting Post-Wallpaper Removal
• Step 1: Clear the Area
Before you start the process of preparing your walls for painting, it is essential to first clear the area surrounding the walls. Remove any furniture and decorations, and cover the floor with a drop cloth or plastic sheet to protect it from debris and paint splatters.
• Step 2: Remove Wallpaper Residue
After removing the wallpaper, there will likely be some lingering adhesive residue on the walls. To remove this residue, mix a solution of warm water and mild dish soap in a bucket. Using a sponge or soft cloth, gently scrub the walls with soapy water until all of the residue is removed.
You can use a non-abrasive scrubbing pad or a wallpaper removal solution for stubborn adhesive but always test it on a small, inconspicuous area first.
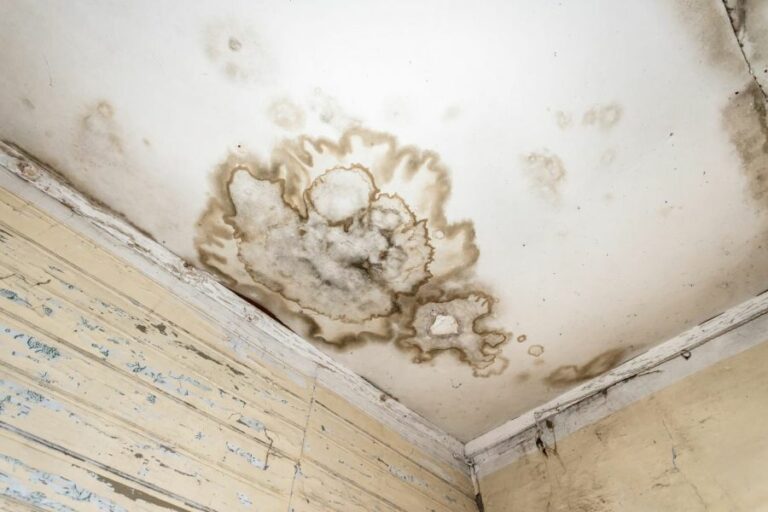
• Step 3: Repair Damaged Surfaces
Uneven or damaged surfaces can cause imperfections in the final paint job, so it is important to repair any damage to the walls before painting.
Inspect the walls for any cracks, holes, or dents, and use a pre-mixed patching compound to fill and smooth the damaged areas. Allow the compound to dry fully, according to the manufacturer’s instructions.
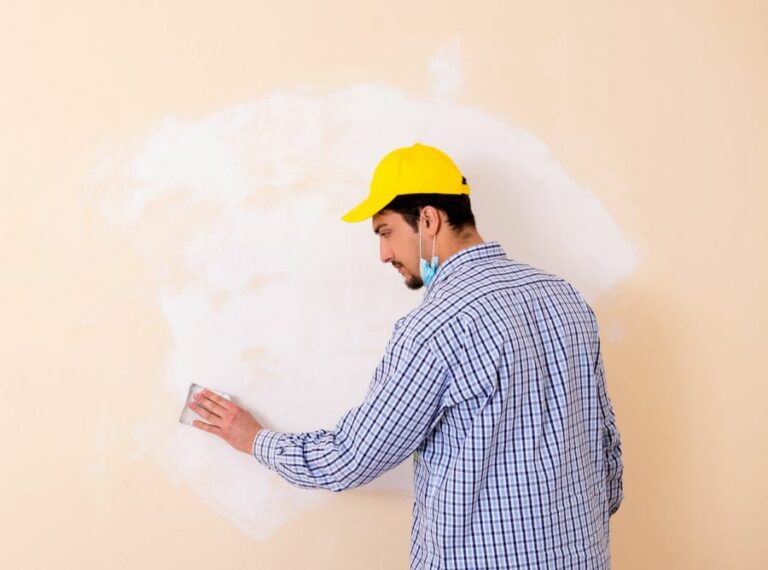
• Step 4: Sand the Walls
Sanding is essential for creating a smooth surface for the paint to adhere to properly. Using fine-grit sandpaper (150 to 220 grit), lightly sand the entire surface of the wall, paying special attention to any areas where the patching compound was applied.
Be sure to sand in a circular motion for the most effective results.
• Step 5: Clean the Walls
After sanding, it is crucial to clean the walls to remove all dust and debris. Use a vacuum cleaner with a brush attachment to remove the majority of the dust from the walls.
Follow this by wiping the walls with a damp cloth or sponge to pick up any remaining dust. Allow the walls to dry completely before proceeding.
• Step 6: Apply Primer
Applying a coat of primer is a critical step in preparing your walls for paint. Primer will provide a uniform surface for the paint to adhere to while also helping to seal any remaining wallpaper adhesive and prevent it from bleeding through the paint.
Use a brush or roller to apply a high-quality primer, such as one designed specifically for covering wallpaper, and let it dry according to the manufacturer’s instructions.
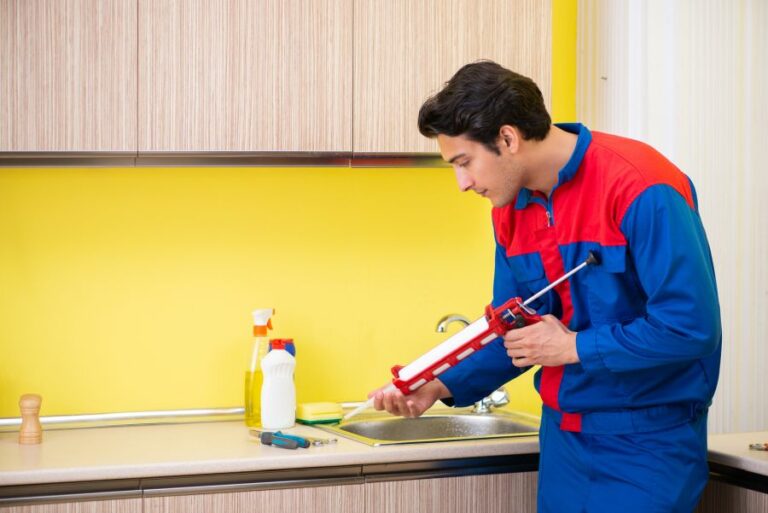
• Step 7: Caulk Gaps and Seams
For a professional-looking paint job, it is important to caulk any gaps or seams in the walls. This includes gaps between trim and the walls, as well as any seams or corners where the walls meet.
Use a paintable, acrylic-latex caulk and a caulking gun to apply a thin bead of caulk along the gaps or seams. Then, use a damp finger or a small tool to smooth the caulk, ensuring a seamless, finished look.
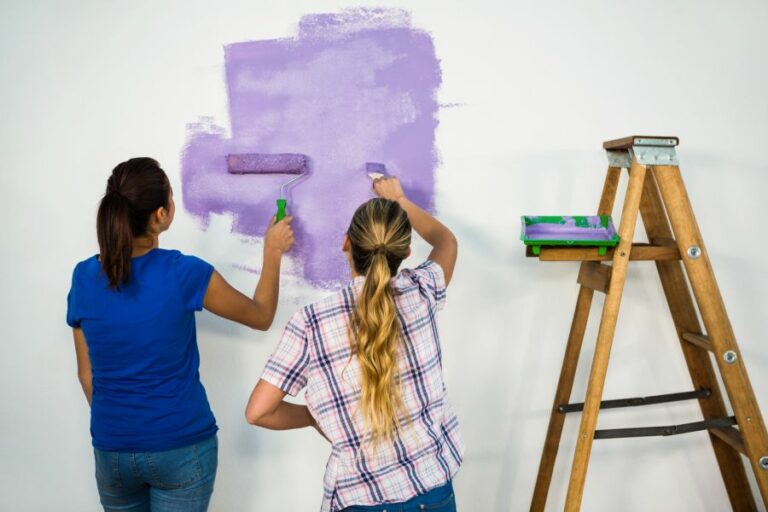
• Step 8: Start Painting
Now that your walls are correctly prepared, it is time to start painting. Use high-quality paint and apply it using a brush or roller, following the manufacturer’s instructions for the proper application technique.
Be sure to apply multiple coats if necessary, allowing each coat to dry fully before applying the next.
• Conclusion
Preparing walls for paint after removing wallpaper can be a time-consuming and detail-oriented process, but it is essential for achieving professional-looking results.
By following these steps and using high-quality materials and tools, you will create a smooth, durable surface that will serve as the perfect canvas for your new paint job.
Step | Description |
|---|---|
1. Remove the remaining adhesive | Use a mixture of hot water and soap or a wallpaper remover solution to soften and dissolve any remaining adhesive from the walls. Wipe or scrape it off with a sponge or putty knife. |
2. Repair damages | Inspect the walls for any gouges, holes, or other damages. Patch them using spackling compound or a pre-made patch and allow it to dry completely. |
3. Sand the walls | Smooth any rough areas or patched spots on the walls with sandpaper or a sanding block. Vacuum away dust and wipe down the walls with a damp cloth. |
4. Clean the walls | Thoroughly wash the walls with a mixture of warm water and mild detergent to remove any remaining dirt, residue, or dust. Rinse with clean water and allow the walls to dry. |
5. Apply primer | Apply a coat of primer to the walls using a roller or brush to ensure good adhesion of the paint and even coverage. Allow the primer to dry according to the manufacturer’s instructions. |
Optimal Wallpaper Removal Techniques for Painting
• Preparation is Key
The process of removing wallpaper may not be the most exciting task, but it is an essential one to achieve the perfect finish when painting your walls. The key to success is proper preparation and having the right tools and techniques at your disposal.
• Assess the Situation: Different Wallpaper Types
Before starting the wallpaper removal process, it’s essential to determine the type of wallpaper you are working with, as this will impact the most effective removal method. There are three common types of wallpaper: strippable, peelable, and traditional.
- Strippable Wallpaper: As the name suggests, this wallpaper can be easily removed by pulling it away from the wall in large strips. This type is the easiest to remove and requires minimal tools and effort.
- Peelable Wallpaper: This type features a top layer that can be peeled away, leaving a thin backing layer on the wall. The backing layer is typically removed with water and a scraper.
- Traditional Wallpaper: This is generally the most difficult to remove, as it does not easily peel or strip away from the wall. It may require more specialized techniques or tools.
• Gather the Right Tools and Supplies
To effectively remove wallpaper, having the appropriate tools and supplies on hand is essential. The following items are common materials needed for wallpaper removal:
- Plastic drop cloths or tarps
- Ladder or step stool
- Screwdriver for removing outlet covers and switch plates
- Wallpaper scraper or putty knife
- Wallpaper scorer or perforator
- Wallpaper steamer or hot water mixed with dish soap in a spray bottle
- Garbage bags or a bin for discarded wallpaper
- Sponge or damp cloth for cleaning surfaces
- Safety goggles and gloves
• Step-by-Step Guide to Removing Wallpaper
– Step 1: Prepare the Room
Start by removing any furniture, curtains, or wall decorations from the room. Place drop cloths or tarps on the floor to protect it from any debris or water.
Turn off the power to the room and remove any outlet covers or switch plates. Safety goggles and gloves are recommended to protect your eyes and hands from any injuries or irritants.
– Step 2: Test a Small Area
Before diving into the removal process, it’s helpful to test a small, inconspicuous area to determine the most effective method. This may entail attempting to peel or strip the wallpaper or using a solution or steamer to assess how easily it comes off the walls.
– Step 3: Score the Wallpaper (Optional)
For traditional wallpaper or areas where removal is proving difficult, using a wallpaper scorer or perforator can help. This tool creates small holes in the wallpaper, allowing water or steam to penetrate and loosen the adhesive.
– Step 4: Apply Water or Steam
For peelable and traditional wallpaper, applying moisture is crucial to loosening the adhesive and making removal easier. This can be accomplished with a wallpaper steamer or by spraying hot water mixed with dish soap onto the walls.
When using a steamer, follow the manufacturer’s instructions, and work in small sections to avoid potential damage to the wall. For a hot water solution, generously spray the walls and allow the mixture to soak in for several minutes before moving on to the next step.
– Step 5: Scrape Away the Wallpaper
Using a wallpaper scraper or putty knife, carefully remove the wallpaper by working from top to bottom and gently pushing the scraper under the wallpaper. Be cautious not to damage the wall underneath, especially if the wall is composed of materials such as drywall or plaster.
– Step 6: Clean the Walls
Once all the wallpaper has been removed, use a sponge or damp cloth to thoroughly clean the walls, removing any residue, glue, or debris. Additional scraping may be necessary for stubborn spots.
– Step 7: Allow the Walls to Dry
To ensure a smooth surface for painting, it is crucial to allow the walls to dry completely. This may take anywhere from a few hours to a day, depending on the humidity and temperature in the room.
• Expert Recommendations for Wallpaper Removal
From personal experience, my top recommendations for successful wallpaper removal include:
- Be patient: Wallpaper removal can be a time-consuming process, but rushing or using excessive force can lead to damage to the walls.
- Utilize a wallpaper steamer: While a hot water solution can be effective, a wallpaper steamer can significantly speed up the process and make removal more efficient.
- Know when to call in a professional: If you’re unsure about the wallpaper type or are struggling with the removal process, it may be worth considering hiring a professional to ensure the best results.
In conclusion, removing wallpaper before painting is a task that requires patience, proper tools, and technique. By following the steps outlined above and considering personal recommendations, you will be on your way to creating a beautifully painted space in your home.
| Best Way to Remove Wallpaper before Painting | |
|---|---|
| 1. Protect your floor and furniture | Cover your floor and nearby furniture with drop cloths or plastic sheets to prevent damage from water and scraping. |
| 2. Turn off power to the room | Make sure all electrical outlets and switches are covered and the power to the room is turned off for safety purposes. |
| 3. Test for removable wallpaper | Gently try to peel the wallpaper from a corner to check if it is removable. If it peels away easily, continue to remove the entire wallpaper manually. |
| 4. Score the wallpaper | If the wallpaper does not peel away easily, use a wallpaper scoring tool to create small holes in the wallpaper. This will allow water or wallpaper remover solution to penetrate the adhesive. |
| 5. Apply wallpaper remover solution | Mix hot water and wallpaper remover solution, following the product’s instructions. Apply the solution to the wallpaper using a sponge or spray bottle, ensuring the wallpaper is saturated. |
| 6. Wait and reapply if necessary | Allow the remover solution to soak into the wallpaper for 15-20 minutes. If the wallpaper is not easily removable with a scraper, reapply the solution and wait another 15-20 minutes. |
| 7. Scrape the wallpaper | Using a wallpaper scraper, gently scrape away the saturated wallpaper, being careful not to damage the wall surface. |
| 8. Clean the walls | Once the wallpaper is removed, clean the walls with a sponge and warm water to remove any remaining residue or adhesive. Allow the walls to dry completely before painting. |
| 9. Repair and prepare walls for painting | Fill any holes or imperfections with spackling compound, sand the walls smooth, and apply primer to ensure an even and long-lasting paint application. |
Painting Walls: Is It Possible After Wallpaper Removal?
Absolutely! Painting walls after removing wallpaper is an excellent option to update and refresh your home’s interior. In fact, painting provides a durable, long-lasting finish that is often easier to clean and maintain in comparison to wallpaper.
However, before grabbing a paintbrush and getting started, it’s essential to follow specific steps and best practices.
• The Importance of Proper Wall Preparation
It’s crucial to ensure the wall is properly prepared after removing wallpaper. This is because any remaining glue, debris, or irregularities on the surface can affect the final look, durability, and finish of the paint job.
To start, gather the necessary tools and materials, such as:
- A scraper or putty knife
- Wall cleaner or detergent
- Sandpaper or a sanding block
- A sponge or damp cloth
- A vacuum or brush
- A primer
- Paint and paintbrushes or rollers
Additionally, it’s essential to keep safety in mind while working. Always wear protective gear, such as gloves and goggles, and ensure the area is well-ventilated.
– Step 1: Remove Remaining Glue and Debris
After removing wallpaper, there may still be some glue residue and debris left on the wall. It’s vital to thoroughly remove any leftover adhesive to ensure a smooth surface for painting. Use a scraper or putty knife to gently scrape away any visible glue or residue.
Next, mix a solution of warm water and a mild detergent, like dishwashing soap. Use a sponge or damp cloth to wash the wall with the soapy solution, focusing on removing any remaining residue. Rinse the wall with clean water and allow it to dry completely before moving on to the next step.
If you encounter stubborn glue or residue, you can also use a commercial adhesive remover, following the manufacturer’s instructions.
– Step 2: Repair Imperfections
While some minor imperfections might be covered by paint, significant cracks or holes should be repaired for a professional and seamless finish. Use a premixed patching compound or joint compound to fill any cracks or holes, and smooth the surface using a putty knife.
Once the compound is dry, sand the repaired areas with medium-grit sandpaper until the surface is smooth and even with the surrounding wall.
– Step 3: Sand and Clean the Wall
Sanding the wall is an essential step in ensuring a smooth, even surface before painting. Use a fine-grit sandpaper or sanding block to lightly sand the entire wall.
This step helps remove any remaining wallpaper residue and scuffs, and it also creates a slightly “rough” surface, which allows the paint to adhere better.
After sanding, vacuum or brush the wall to remove any dust and debris. You may also use a slightly damp cloth to wipe the surface, but ensure the wall is completely dry before moving on to the next step.
– Step 4: Apply Primer
Priming the wall is a crucial step in achieving excellent paint adhesion and an even, long-lasting finish. Apply a high-quality primer with a paintbrush, roller, or sprayer, following the manufacturer’s recommendations for coverage and dry time.
A stain-blocking primer is especially recommended if there are any ink or dye stains on the wall from the removed wallpaper, as it helps prevent the stains from bleeding through the paint.
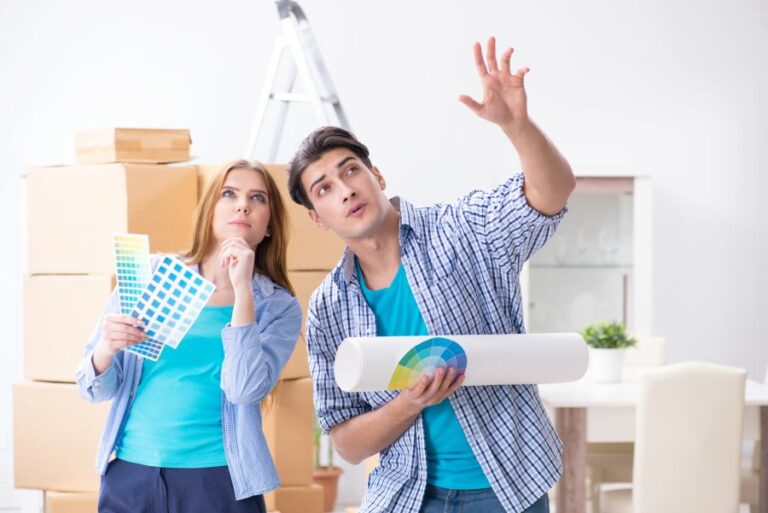
– Step 5: Paint the Wall
Now it’s time for the fun part of painting! Choose high-quality paint in the desired color and finish. Keep in mind that certain finishes, such as satin or eggshell, are more durable and easier to clean than flat or matte finishes.
Apply the paint using a brush, roller, or sprayer, following the manufacturer’s recommendations for coverage and dry time. Typically, two coats of paint are recommended for even coverage, but ensure the first coat is completely dry before applying the second coat.
• Conclusion
In conclusion, painting a wall after removing wallpaper is a fantastic way to update the look and feel of your home. By following the proper steps and best practices outlined in this article, you can achieve a beautiful, durable, and professional-looking paint job.
Remember to always keep safety in mind and choose high-quality materials for the best results.
Step | Description |
|---|---|
1. Remove wallpaper | Ensure that you have completely removed the wallpaper and any remaining adhesive. |
2. Clean the wall | Wipe down the wall with a damp cloth or sponge to clean away any residue. |
3. Repair wall damage | Fill any holes, cracks, or damaged areas with joint compound and sand smooth when dry. |
4. Apply primer | Apply a high-quality primer to the wall. This will help the paint adhere and create a smooth surface. |
5. Paint the wall | After the primer has dried, paint the wall using your chosen color and type of paint. |
Do Expert Painters Offer Wallpaper Removal Services?
• Introduction to Wallpaper Removal Services
The process of updating or renovating a space often involves the removal of old wallpaper. Many homeowners might wonder if hiring professional painters will also allow for the removal of wallpaper before painting.
The answer to this question is a resounding “yes.” Most professional painters provide wallpaper removal services, as they have not only the necessary expertise but also the right tools for the job.
• Reasons to Consider Wallpaper Removal
There are several reasons why you might want to remove wallpaper from your walls before painting, some of which are listed below:
– Updating the Aesthetic
Trends in interior design and personal preferences can change over time, which means that the wallpaper that once looked perfect might not suit your needs or tastes anymore. Removing wallpaper can pave the way for updated color palettes, textures, or wall finishes.
– Damage to Wallpaper
Over time, wallpaper can become damaged due to normal wear and tear, water damage, or simply through peeling. This can result in an unpleasant appearance and the need for removal before painting or applying new wallpaper.
– Preparing Walls for Painting
Attempting to paint over wallpaper can lead to uneven results and cause issues in the future, including peeling or bubbling. Removing the wallpaper before applying a fresh coat of paint ensures a long-lasting, professional finish.
• Factors Affecting Wallpaper Removal
Before hiring professionals, you should be aware that certain factors can impact the ease and cost of wallpaper removal. Some of these factors include:
– Type of Wallpaper
Different types of wallpaper materials can affect the difficulty of removal. For instance, vinyl wallpaper can be challenging to remove due to its non-porous nature. It’s crucial to communicate the type of wallpaper you have to professional painters so they can accurately assess the labor and cost involved.
– Wall Condition
The condition of your walls plays a significant role in the wallpaper removal process. If there are any existing damages, such as cracks or holes, it may require additional repairs after the wallpaper has been removed, which could impact the overall cost and timeline.
– Adhesion Method
The method used to adhere the wallpaper to the walls can also impact the removal process. Some adhesives are more difficult to remove than others, and professional painters must assess the specific situation to determine the best approach.
• Advantages of Hiring Professional Painters for Wallpaper Removal
While some homeowners may be tempted to remove wallpaper on their own, there are several benefits to hiring professional painters for the task, including:
– Expert Knowledge and Experience
Removing wallpaper can be a time-consuming and complex job, especially for a novice. Professional painters possess the experience and knowledge needed to efficiently remove wallpaper while avoiding damage to the walls underneath.
– Appropriate Tools and Techniques
Professionals have access to specialized tools and products that are designed for wallpaper removal, such as steamers or chemical solvents. They also have a deep understanding of the appropriate techniques to utilize based on the type of wallpaper and adhesive.
– Proper Wall Preparation
After the wallpaper has been removed, the walls will need to be prepped before new paint or wallpaper can be applied. Professional painters have experience in addressing any necessary repairs and ensuring the walls are properly primed for a smooth and lasting finish.
– Saves Time and Effort
Wallpaper removal can be a labor-intensive process, particularly for those without experience. Hiring professional painters can save homeowners both time and effort, allowing them to focus on other aspects of their renovation projects.
• Final Thoughts and Recommendations
Based on my personal experience, I would highly recommend hiring professional painters to handle wallpaper removal projects. Not only do they possess the expertise and tools to complete the task efficiently, but they also save you valuable time and effort.
Furthermore, these professionals are well-equipped to prepare the walls and ensure a smooth, lasting finish, whether you choose to paint or reapply wallpaper.
For more information on selecting the right professional painter and understanding the cost of wallpaper removal, check out the Painting and Decorating Contractors of America (PDCA) website, a reputable organization that provides resources and guidance to homeowners and professionals alike.