Prepping Surfaces: Paint Remover Tips. What Pros Say
Imagine the satisfaction of finally tackling that paint job you’ve been putting off, only to realize you’re not quite sure how to prep the surface just right. Don’t worry; we’ve crafted a comprehensive guide on paint remover tips to help you achieve the perfect outcome.
Prepping surfaces: paint remover tips:
To prep a surface for painting, choose the right paint remover: solvent-based for most surfaces, bio-based for indoor projects, or caustic for multiple paint layers. Ensure a well-ventilated area, wear protective gear, and follow manufacturer instructions. Clean, repair, and prime the surface before applying paint remover, then apply, remove, and clean as directed.

Ready to tackle your next paint removal project? Read on as we reveal expert tips and tricks for prepping surfaces like a pro. Learn how to choose the right tools and techniques to make your work effective and efficient. Don’t miss out on the full guide!
Contents
- 1 Surface Preparation: Expert Advice on Paint Removal
- 2 Cleaning Techniques for Surfaces Post Paint Stripping
- 3 Expert Guidance for Effective Paint Remover Usage
- 3.1 • Choose the Right Paint Remover for the Job
- 3.2 • Read and Follow the Product’s Instructions
- 3.3 • Use Personal Protective Equipment (PPE)
- 3.4 • Work in a Well-Ventilated Area
- 3.5 • Test a Small Area First
- 3.6 • Apply the Paint Remover Evenly and at the Correct Thickness
- 3.7 • Allow Adequate Dwell Time
- 3.8 • Use the Proper Tools and Techniques for Paint Removal
- 3.9 • Dispose of Waste Materials Properly
- 3.10 • Clean and Rinse the Surface
- 4 Optimal Duration for Paint Remover on Surfaces
- 5 Ideal Solutions for Soaking Parts to Eliminate Paint
- 6 Top Methods for Efficient Paint Removal from Surfaces
Surface Preparation: Expert Advice on Paint Removal
A successful paint job starts with proper preparation. To ensure an even and long-lasting finish, it’s essential to remove old paint, dirt, and debris from the surface.
• Choosing the Right Paint Remover
There are different types of paint removers available, each suited to specific tasks. Here’s a breakdown of the most common types and their recommended uses:
– Solvent-Based Paint Removers
These removers use strong chemicals to dissolve or soften the paint, making it easier to scrape off. They work well on most surfaces but can have a strong odor. It’s essential to work in a well-ventilated area and wear protective gear.
One particularly effective type of solvent-based paint remover is methylene chloride, but it should be used with caution due to its high toxicity.
– Bio-Based Paint Removers
These environmentally-friendly removers use natural ingredients to remove paint without harmful fumes. They’re a great option for indoor projects but may require longer working times than their solvent-based counterparts. Soy-based and citrus-based paint removers are popular choices in this category.
– Caustic Paint Removers
Caustic paint removers contain strong alkaline chemicals that break down the paint’s bond to the surface. They’re effective at removing multiple layers of paint but can potentially damage certain surfaces, so it’s essential to test a small area first.
Wear proper protective gear and follow the manufacturer’s instructions when using caustic paint removers.
• Safety Tips for Using Paint Removers
To minimize hazards during the paint removal process, keep these safety tips in mind:
- Always work in a well-ventilated area when using paint removers, especially those with strong fumes or vapors.
- Wear appropriate protective gear, including gloves, goggles, and a respirator when necessary.
- Follow the manufacturer’s instructions for the specific paint remover you’re using.
- Dispose of paint waste and materials according to local regulations.
• Preparing Different Surface Types
Before applying the paint remover, make sure the surface is ready for treatment. Depending on the material, you may need to take additional steps:
– Wood Surfaces
- Wash: Remove dirt and debris by washing the surface with warm, soapy water. Rinse thoroughly and allow the wood to dry completely.
- Sand: Smooth out any rough areas or remove loose paint by lightly sanding the surface. Wipe away dust with a tack cloth.
- Repair: Fill cracks and holes with wood filler, then sand and wipe clean.
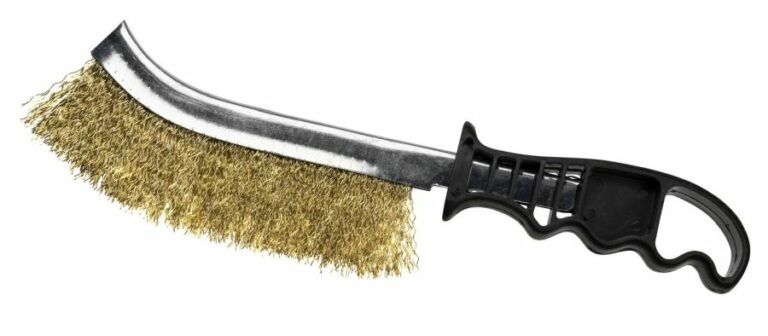
– Metal Surfaces
- Clean: Remove grease and dirt with a degreaser, then rinse with water and allow to dry.
- Remove Rust: Use a rust remover or a wire brush to remove any rust spots. Wipe the surface clean and let it dry.
- Prime: Apply a rust-inhibiting primer to provide a protective base for the paint.
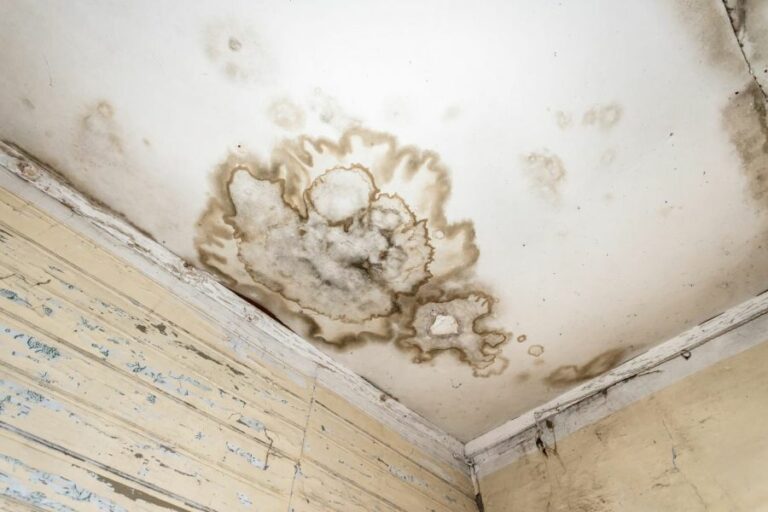
– Masonry Surfaces
- Clean: Remove dirt, mold, and mildew with a solution of water and mild detergent. Rinse and let dry.
- Repair: Fill any cracks or holes with masonry patching compound, and smooth with a putty knife. Let the repairs cure, then sand if necessary.
- Seal: Apply a masonry sealer to protect the surface and promote paint adhesion.
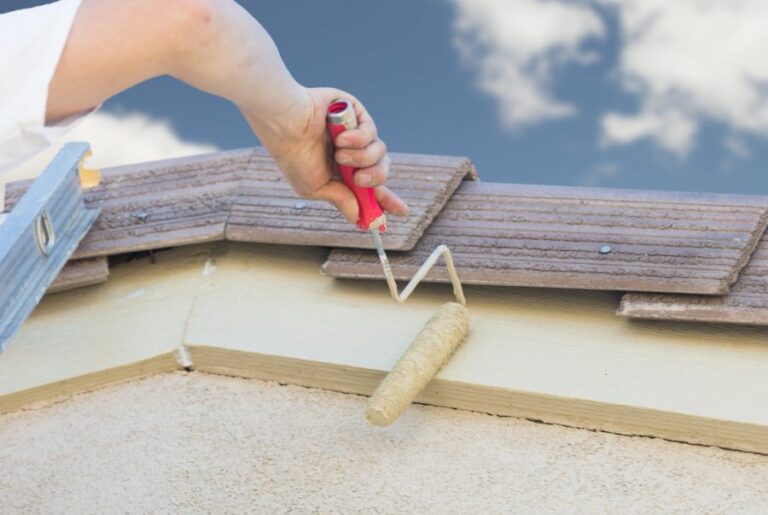
• Applying Paint Remover
Once the surface is prepared, it’s time to apply the paint remover. Follow these steps for best results:
- Protect: Cover nearby surfaces and objects with drop cloths or plastic sheeting to prevent damage.
- Apply: Use a brush to apply a thick, even layer of paint remover, following the manufacturer’s directions for application and working time.
- Remove: After the allotted time, use a scraper or a stripping tool to carefully lift the softened paint from the surface. Be sure not to gouge or damage the material underneath.
- Clean: Wipe the surface with a clean cloth or steel wool to remove any remaining paint remover residue. If necessary, repeat the removal process until all layers of paint are gone.
By selecting the right paint remover and following these expert tips, you can prepare any surface for a professional-quality paint job. With proper safety precautions and attention to detail, you’ll be on your way to achieving a beautiful and lasting result.
Cleaning Techniques for Surfaces Post Paint Stripping
Properly cleaning surfaces after stripping paint is essential for both safety and achieving a professional-looking result.
• Safety Precautions Before Cleaning
Before starting the cleaning process, it’s crucial to take necessary safety measures while dealing with toxic paint debris and chemicals.
– Wear Protective Gear
Always wear appropriate protective clothing, such as gloves, goggles, and a mask. This will ensure that you do not accidentally inhale any harmful dust particles or come into direct contact with harsh chemicals.
– Dispose of Paint Properly
The Environmental Protection Agency (EPA) has guidelines for disposing of paint waste. Visit the EPA’s website for more information on proper paint waste disposal.
• Cleaning Materials and Tools
It’s essential to choose the right materials and tools for cleaning surfaces after stripping paint. Here are some items you may need:
- Soap and water
- Paint thinner or mineral spirits
- Clean rags or paper towels
- Scrubbing brush or plastic scraper
- Vacuum cleaner with a HEPA filter
• Cleaning Methods
Various methods can be employed to clean surfaces after removing paint. The choice of method depends on the surface material and type of paint that was stripped. Below, we discuss a few methods and their suitability for different surfaces.
– Soap and Water Method
This method is ideal for water-based paints on surfaces such as wood, metal, and plastic. Follow these steps to clean the surface:
- Mix a few drops of mild dish soap into warm water.
- Dip a clean rag or sponge into the soapy water and wring out the excess.
- Gently wipe down the surface to remove any remaining paint residue.
- Rinse the rag and repeat until the surface is clean.
- Allow the surface to dry completely before moving on to the next step in your project.
– Paint Thinner or Mineral Spirits Method
This method is suitable for cleaning surfaces like wood and metal, particularly when dealing with oil-based or solvent-based paints.
- Dampen a clean rag or paper towel with paint thinner or mineral spirits.
- Gently rub the surface to remove any remaining paint residue.
- Replace the rag or paper towel as it becomes dirty.
- Continue until the surface is clean and free of paint residue.
- Allow the surface to dry completely before moving on to the next step in your project.
– Scrubbing Brush or Plastic Scraper Method
This method is useful when dealing with stubborn paint residue on surfaces like brick or concrete.
- Use a scrubbing brush or plastic scraper to gently remove any remaining paint residue.
- Be sure to use a brush or scraper that is specifically designed for the type of surface to avoid damaging the material.
- If necessary, dampen the brush or scraper with a small amount of water or paint thinner, but be cautious if using chemical solvents.
- Wipe the surface down with a clean, damp cloth to remove any remaining dust and debris.
- Allow the surface to dry completely before moving on to the next step in your project.
– Vacuum Cleaner with HEPA Filter Method
This method is ideal for large surfaces and when dealing with a large amount of paint debris.
- Use a vacuum cleaner with a HEPA filter to capture and remove paint dust and debris from the surface.
- Be sure to empty the vacuum and replace the filter as needed to maintain its efficiency.
- Follow up with one of the previously mentioned methods to ensure the surface is completely clean and free of paint residue.
• Final Thoughts
After stripping paint, it’s vital to thoroughly clean the surface before moving on to the next step in your project.
Properly cleaning surfaces not only ensures a professional-looking result but also protects your health by preventing exposure to toxic paint particles and chemicals.
By following the appropriate cleaning method for your surface and paint type, as well as adhering to safety precautions, you’ll be well on your way to a successful project.
Step | Description |
|---|---|
1 | Gather necessary cleaning materials such as a scraper, soft brush, cloth, and warm water. |
2 | Scrape off any remaining paint residue using the scraper. |
3 | Brush the surface with a soft brush to remove any loose paint particles and dust. |
4 | Dampen a cloth or sponge with warm water and gently wipe down the surface to remove any remaining residue. |
5 | For stubborn spots, use a clean cloth or sponge with water mixed with a little mild detergent or white vinegar. |
6 | If needed, repeat the steps until the surface is clean and free of paint debris. |
7 | Allow the surface to dry completely before applying new paint or finishing. |
Expert Guidance for Effective Paint Remover Usage
Paint removal can be a tedious and time-consuming process, but with the right tools, techniques, and precautions, you can achieve a clean and fresh surface, ready for a new coat of paint or finishing touches.
By adhering to the following tips for using paint remover, you’ll be able to carry out an efficient and safe paint removal process.
• Choose the Right Paint Remover for the Job
There are numerous types of paint removers, each suited for different surfaces and types of paint:
- Solvent-based removers: These are best suited for removing oil-based paints, varnishes, and shellac. They come in liquid, gel, or aerosol form.
- Caustic-based removers: Ideal for removing multiple layers of paint from wood or metal surfaces but not recommended for use on fiberglass or other delicate surfaces.
- Bio-based removers: Made from sustainable resources, these removers are effective on water-based paints and are safer to use indoors due to their low odor and toxicity levels.
Take the time to research the best option for your specific project, as using the wrong paint remover could cause damage to the surface or be ineffective at removing the paint.
• Read and Follow the Product’s Instructions
Always read and follow the manufacturer’s instructions on the paint remover’s label. These instructions provide information on the proper application, dwell time, and removal process, ensuring the paint remover works effectively and safely.
• Use Personal Protective Equipment (PPE)
Wearing proper PPE is crucial when using paint removers, as the chemicals in the removers can be hazardous. Some recommended PPE items include:
- Protective gloves: Depending on the remover, you may need latex, nitrile, or chemical-resistant gloves.
- Safety goggles: To protect your eyes from splashes and irritation.
- Respirator or face mask: To protect your lungs from harmful fumes, particularly when using solvent or caustic-based removers.
- Protective clothing: Long sleeves and pants, along with closed-toe shoes, to protect your skin from direct contact with the remover.
• Work in a Well-Ventilated Area
To minimize exposure to potentially harmful fumes, work outdoors or in a well-ventilated area whenever possible. If you must work indoors, open windows and doors and use exhaust fans to help increase ventilation.
It’s also wise to avoid working with paint removers near open flames or other sources of ignition, as some removers are flammable.
• Test a Small Area First
Before applying the paint remover to the entire surface, test it on a small inconspicuous area. This will ensure that the remover is effective and that no damage is done to the surface. Once you are satisfied with the results, proceed with the full application.
• Apply the Paint Remover Evenly and at the Correct Thickness
Most paint removers need to be applied in a thick layer to work effectively. Use a brush, roller, or spray applicator to apply an even layer of the remover, following the manufacturer’s recommended thickness. Uneven or too-thin applications can lead to incomplete or patchy paint removal.
• Allow Adequate Dwell Time
The dwell time, or the time the paint remover needs to remain on the surface to break down the paint, varies depending on the product and the type of paint being removed.
Always refer to the manufacturer’s instructions for the recommended dwell time, and resist the temptation to scrape or scrub before the remover has had enough time to work. It may take several applications and longer dwell times for particularly stubborn paint.
• Use the Proper Tools and Techniques for Paint Removal
Once the paint has softened and started to lift, use appropriate tools like plastic or metal scrapers, brushes, or abrasive pads to remove the paint.
Always work in the direction of the wood grain or the natural lines of the surface to avoid scratching or gouging the material. For intricate or detailed surfaces, use smaller tools or even toothpicks to carefully remove the paint.
• Dispose of Waste Materials Properly
After removing the paint and paint remover, be sure to properly dispose of the waste materials, as they can be hazardous. Consult your local waste management facility or regulations for information on proper hazardous waste disposal.
• Clean and Rinse the Surface
Finally, after all paint has been removed, thoroughly clean and rinse the surface with water, mild detergent, or another recommended cleaning solution to remove any remaining residue.
By following these tips for using paint remover, you can achieve a clean, paint-free surface while minimizing risks to your health and safety. Always remember that patience, proper preparation, and attention to detail are key to an effective and successful paint removal project.
Tip | Description |
|---|---|
Choose the right type of paint remover | Select a paint remover suitable for the type of paint and surface to be treated. |
Work in a well-ventilated area | Ensure proper air circulation to minimize the risk of inhaling toxic fumes. |
Wear appropriate protective gear | Use gloves, goggles, and masks while handling paint removers to avoid skin, eye, and respiratory irritation. |
Follow the manufacturer’s instructions | Read and adhere to the guidelines provided with the paint remover product for optimum results and safety. |
Test on a small, inconspicuous area | Apply the paint remover to a small area first to ensure compatibility and determine effectiveness. |
Apply the paint remover evenly | Cover the entire surface with a consistent layer of paint remover for uniform results. |
Allow adequate time for paint removal | Give the paint remover time to work as specified in the product guidelines before proceeding to scrape or wash off the paint. |
Clean the surface after paint removal | Wash the surface with water or an appropriate cleaner to remove all residue and remaining paint. |
Dispose of waste properly | Make sure to properly dispose of paint residue, used paint remover, and other waste materials according to local regulations. |
Optimal Duration for Paint Remover on Surfaces
Paint removal is a crucial step when renovating, restoring or simply repainting surfaces such as walls, furniture, or vehicle parts. One of the most commonly used solutions for this task is a chemical paint remover, also known as a paint stripper.
Applying this substance effectively and efficiently is essential to successfully remove unwanted paint and prevent damage to the underlying surface.
• Understanding the Types of Paint Removers
It’s essential to know that not all paint removers are created equal. There are different types suited for various surfaces and types of paint. The three most common paint remover categories include:
- Solvent-based paint removers: These are the most widely used due to their effectiveness in removing most types of paint. They are generally composed of strong chemicals that dissolve paint, making it easy to scrape off. However, these chemicals can be harmful if not used correctly, and they often emit strong fumes.
- Bio-based paint removers: These are a more eco-friendly alternative to solvent-based removers. They contain natural ingredients that effectively remove paint without causing harm to humans, animals, or the environment. They usually have a slower working time compared to solvent-based removers.
- Caustic-based paint removers: These contain strong alkaline agents that break down paint on surfaces. Caustic-based removers are useful for removing oil-based paints, but they may damage certain materials like aluminum, fiberglass, or plastic.
• Determining the Optimal Timeframe
The length of time to leave paint remover on the surface primarily depends on the type of paint remover used and the specific paint that needs to be removed. It is essential to follow the manufacturer’s instructions and recommendations as they provide valuable information on the ideal waiting time.
– Solvent-Based Paint Removers
For solvent-based paint removers, the average waiting time ranges between 15 minutes to 24 hours. In most cases, leaving the paint stripper for 30 minutes to 1 hour should be sufficient for achieving the desired results.
It is recommended to start scraping off a test area with a paint scraper or putty knife after half an hour, checking whether the paint has softened enough to be removed effectively.
– Bio-Based Paint Removers
Since bio-based paint removers have a slower working process, the waiting time typically ranges from 1 hour to 48 hours. It is essential to monitor the progress and test whether the paint is effortless to remove after leaving the paint remover on for an hour.
If the paint remains hard and difficult to remove, consider waiting for a longer period, and regularly checking back to assess the progress.
– Caustic-Based Paint Removers
Caustic-based paint removers generally require a waiting time of 1 to 8 hours. However, as these removers can damage specific materials, it is essential to monitor the surface and test paint removal after an hour. In some cases, if the paint has not softened after the initial waiting period, it may be necessary to reapply the paint remover and wait again.
• Recommendations for Effective Paint Removal
To achieve the best results when using paint remover, follow these recommendations:
- Always use protective gear like gloves, safety goggles, and a respirator to avoid contact with chemicals.
- Work in a well-ventilated area to prevent the buildup of harmful fumes.
- Apply a generous amount of paint remover on the surface, ensuring even coverage.
- Be patient and avoid rushing the process; letting the paint remover work effectively will yield better results.
- Always follow the manufacturer’s instructions for the specific paint remover you are using.
In conclusion, the time required for paint remover to remain on a surface before washing it off primarily depends on the type of paint remover and the specific paint being removed. Remember to exercise caution, be patient, and closely monitor the surface for the most effective and best results.
Question | Answer |
|---|---|
How long should paint remover remain on the surface before it is washed off? | It varies depending on the type of paint remover and paint, usually ranging from 15 minutes to 24 hours. Always follow the manufacturer’s instructions on the product label. |
Ideal Solutions for Soaking Parts to Eliminate Paint
When it comes to removing paint from various types of parts, it’s important to know the right solution to use. There are many options available, and choosing the right one can save you time and effort.
• Chemical Paint Removers
Chemical paint removers are some of the most popular choices for removing paint from various parts. They come in a variety of forms, including liquids, gels, and sprays.
– Solvent-Based Removers
Solvent-based paint removers contain chemicals that dissolve the paint, allowing it to be wiped or scraped away easily. Some of the most common solvents used in these products are:
- Methylene Chloride: A powerful paint remover that’s very effective on epoxy and polyurethane paints. However, it should be used with caution, as it can be hazardous to one’s health if not handled properly. Here’s a useful link that will help you understand how to handle methylene chloride safely.
- Acetone: A milder solvent that works on a wide range of paint types, including automotive paints.
- Toluene and Xylene: These solvents are often found in lacquer thinners and are effective at taking off various types of paints.
When using solvents, make sure to wear gloves and work in a well-ventilated area. Additionally, some solvents may damage certain surfaces, so it’s essential to test a small, inconspicuous spot before applying the product to the entire part.
– Bio-Based Removers
Bio-based paint removers provide an eco-friendly alternative to traditional solvent-based products. These removers use natural ingredients, such as soy, orange oil, or lactic acid, to break down and remove paint.
Bio-based removers tend to work more slowly than solvent-based options, but they are generally safer to use and have less of an impact on the environment. It is important to note that these products may not be as effective on heavily applied or very durable paint types.
• Abrasive Methods
Sometimes, soaking parts in a chemical solution isn’t the best approach for removing paint. Alternative methods, such as abrasive techniques, can be effective in these instances.
– Sanding
Sanding is an effective technique for removing paint from flat surfaces, such as metal parts or wooden furniture. For large surfaces, using an electric sander can save time and effort, while hand-sanding might be more suitable for small or intricate parts.
Start with a coarse grit sandpaper, and gradually work your way to finer grits to ensure a smooth, even finish. Remember always to wear appropriate safety gear, such as a dust mask and safety goggles, while sanding.
– Media Blasting
Media blasting, also known as abrasive blasting or sandblasting, is a process in which a high-pressure stream of abrasive material (media) is targeted at a surface to remove paint or other coatings. Various media types can be used, including:
- Glass beads: Ideal for removing paint without damaging the underlying surface. Suitable for use on stainless steel, aluminum, and other delicate materials.
- Aluminum oxide: Effective on rust, paint, and other coatings. Suitable for use on metal parts.
- Walnut shells: A gentle, non-toxic blasting media that’s ideal for removing paint from more delicate parts, such as antique furniture or items with intricate details.
Before using media blasting, ensure that you have the proper equipment and safety gear, as the process can generate significant dust and debris.
• Infrared Paint Removers
Infrared paint removers are a newer technology that uses heat to soften the paint, making it easy to scrape away. These devices work by emitting infrared rays, which are absorbed by the paint and cause it to soften without damaging or igniting the underlying material.
In general, infrared paint removers are safe, effective, and efficient in removing paint from various surfaces, especially when dealing with lead-based paints or difficult-to-reach areas. However, they can be more costly than chemical or abrasive methods.
• Final Thoughts
Ultimately, the best solution for soaking parts to remove paint will depend on the specific material, type of paint, and your own personal preferences.
It is always essential to follow the instructions on paint removal products and take necessary safety precautions, such as wearing gloves, eye protection, and working in well-ventilated areas.
By choosing the right paint remover and using it correctly, you can ensure that your parts will be free from paint and ready for their next application.
Methods | Solution |
|---|---|
Chemical paint remover | Paint strippers or solvents such as acetone or mineral spirits |
Household cleaners | Ammonia-based cleaners, isopropyl alcohol, or oven cleaner |
Natural solutions | White vinegar or lemon juice mixed with baking soda |
Commercial paint removal solutions | Products like Super Clean, Krud Kutter, or Purple Power |
Top Methods for Efficient Paint Removal from Surfaces
Paint stains and unwanted paint marks can be a real eyesore, whether they are on walls, furniture or clothing. There are numerous methods to remove paint from different surfaces, but choosing the right one is crucial to avoid causing damage.
• Assessing the Paint Type and Surface Material
Before diving into the paint removal process, it’s essential to identify the type of paint and the surface material. Depending on whether the paint is water-based, oil-based, or latex-based, the removal techniques will differ.
Surface materials such as wood, metal, plastic, or fabric also affect the method used for paint removal. One helpful resource for identifying paint types is the EPA website.
• Removing Paint from Walls
– Water-Based Paints
If the paint on the wall is water-based, warm water and mild detergent will usually suffice for removal. Follow these steps:
- Wet a sponge with warm, soapy water.
- Gently rub the affected area in a circular motion.
- Wipe the area with a clean, damp cloth.
- Dry the surface with a soft towel.
– Oil-Based and Latex-Based Paints
For oil-based and latex-based paints, use a paint removal solvent or gel. Follow these guidelines:
- Apply the paint remover according to the manufacturer’s instructions.
- Wait for the paint to soften or blister.
- Using a scraper, gently scrape off the softened paint.
- Clean the area with warm, soapy water.
- Dry the surface with a soft towel.
• Removing Paint from Wood
– Sanding
For small wooden surfaces, sanding is a recommended method to remove paint.
- Choose sandpaper with an appropriate grit size (coarser grit for thicker paint layers, finer grit for light paint layers).
- Wear a mask, goggles, and gloves for safety.
- Sand the surface evenly.
- Wipe away the dust and clean the surface.
– Chemical Strippers
For larger wooden surfaces, chemical paint strippers are a more efficient option.
- Apply the chemical stripper according to the manufacturer’s instructions.
- Wait for the paint to bubble and loosen.
- Using a scraper or a stripping brush, gently remove the paint.
- Clean the surface with water or mineral spirits (depending on the stripper type).
- For a smooth finish, sand the surface lightly.
• Removing Paint from Metal
– Heat
Applying heat to the metal surface is a safe and effective method for paint removal.
- Use a heat gun, propane torch, or even a hair dryer for small areas.
- Maintain a safe distance to avoid overheating the surface, and wear gloves for safety.
- Slowly heat the area until the paint begins to bubble and blister.
- Use a scraper to gently remove the loosened paint.
- Clean and polish the metal when finished.
– Chemical Strippers
Chemical strippers can also be used for paint removal on metal.
- Apply the chemical stripper specifically designed for metal surfaces, following the manufacturer’s instructions.
- Wait for the paint to bubble and loosen.
- Use a scraper or a stripping brush to gently remove the paint.
- Clean the surface with mineral spirits and a cloth.
• Removing Paint from Fabric
– Acrylic Paints
For acrylic paint stains on fabric, try these methods while the paint is still wet:
- Rinse the fabric under cold running water.
- Apply a mild detergent to the stain.
- Gently rub the detergent into the stain, then rinse with cold water.
- Launder the fabric as usual.
– Oil-Based and Latex-Based Paints
For oil-based or latex-based paint stains, follow these steps:
- Scrape away as much paint as possible using a blunt-edged tool.
- Apply a paint removal solvent or gel to the affected area, following the manufacturer’s instructions.
- Gently blot the stain with a clean white cloth.
- Launder the fabric as usual.
In conclusion, the best method for removing paint from surfaces greatly depends on the paint type and the surface material. By identifying these factors and following the guidelines in this article, paint removal can be effective and hassle-free.
Surface Type | Recommended Paint Remover |
|---|---|
Wood | Solvent-based paint stripper |
Metal | Acetone or mineral spirits |
Plastic | Isopropyl alcohol or plastic-safe paint remover |
Glass | Razor blade or glass scraper |
Concrete | Masonry paint stripper or power washer |
Brick | Paint remover gel or power washer |