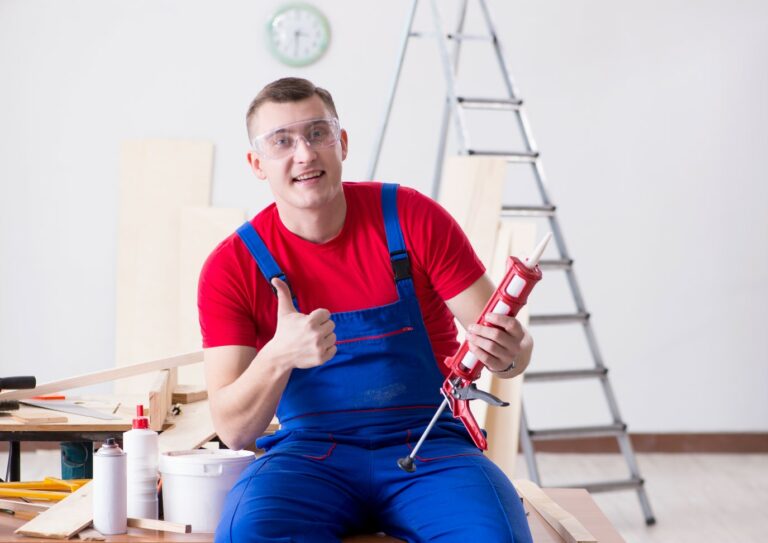
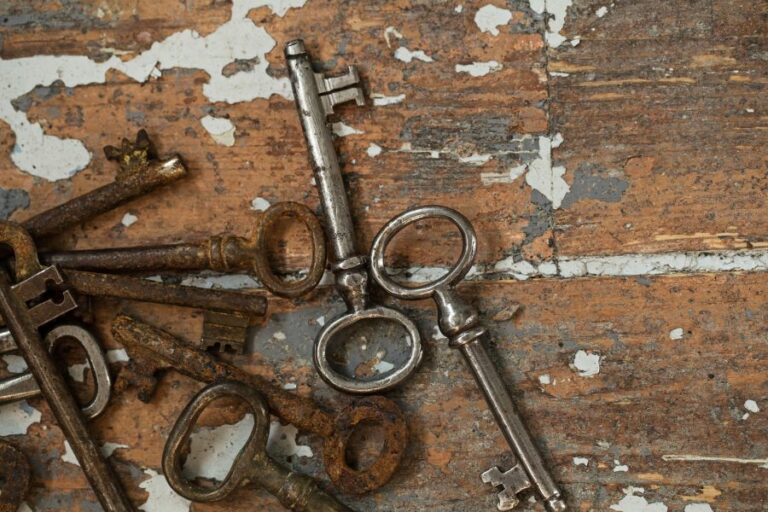
Paint Prep: How To Remove Wall Coverings, What Pros Say
Transforming your space with a fresh coat of paint can dramatically change the look and feel of a room. However, before you can work your magic, it’s essential to properly prepare the surface by removing any old wall coverings. Worry not, as we are here to guide you through this process step by step, from identifying the type of wall covering you have to how to safely and effectively remove it.
Paint prep: how to remove wall coverings:
Remove existing wall coverings like wallpaper, paneling, tile, or textured coatings to prepare walls for painting. Use appropriate tools such as a utility knife, steamer, pry bar, or power sander for removal. Afterward, clean and repair the walls as needed before applying paint for a smooth finish.

Ready to refresh your walls? Discover the best techniques for removing old wallpaper, paneling, and other wall coverings in our step-by-step guide.
Say goodbye to outdated interiors and hello to a fresh, modern space. Keep reading to learn essential tips and tricks to tackle your paint prep project with ease.
Contents
- 1 Wall Coverings Removal: A Guide to Paint Preparation
- 2 Effective Methods for Removing Wall Coverings
- 3 Eliminating 20-Year-Old Wallpaper Borders: A How-To
- 4 Priming a Wall after Wallpaper Removal: Is it Necessary?
- 5 Preparing Drywall for Repainting after Wallpaper Removal
Wall Coverings Removal: A Guide to Paint Preparation
Before diving into your painting project, one crucial step is properly preparing the walls. In many cases, this means removing existing wall coverings. Proper removal will ensure a smooth finish and prevent any issues in the long run.
• Types of Wall Coverings
There’s a wide variety of wall coverings available, from wallpaper to paneling. Identifying the type of wall covering you’re dealing with will help determine the best removal approach. Some common types include:
- Wallpaper: A decorative paper or vinyl used to cover walls.
- Paneling: Either wood or pressed-fiber sheet materials are used as a decorative and functional wall covering.
- Tile: Ceramic, porcelain, or stone tiles are often used in wet areas like kitchens and bathrooms.
- Textured coatings: Thick, textured coatings applied directly to the wall can be removed with specialized tools and techniques.
• Tools and Materials Needed
Gathering the correct tools and materials in advance will save you time and headache during the removal process. Some commonly needed items include:
- Drop cloths or plastic sheeting
- Safety goggles and gloves
- Utility knife
- Scoring tool (for textured wall coatings)
- Pry bar (for paneling)
- Steamer or liquid wallpaper remover (for wallpaper)
- Damp cloth (for cleaning)
- Sandpaper and/or power sander (for smooth finishes)
• Wallpaper Removal
Wallpaper can be divided into two categories: peelable and non-peelable. We will first discuss the process of removing non-peelable wallpaper:
- Cover the floors: Lay down drop cloths or plastic sheeting to protect the floors from water and debris.
- Score the wallpaper: Use a wallpaper scoring tool or the edge of a utility knife to create several small perforations in the wallpaper. This will allow the wallpaper remover solution to penetrate the adhesive.
- Apply wallpaper remover: Rent or buy a wallpaper steamer or apply a liquid wallpaper remover solution to the scored wallpaper. Follow the instructions provided with the product for best results.
- Scrape off wallpaper: Once the adhesive has softened, gently scrape away the wallpaper using a plastic scraper or utility knife. Work in sections, ensuring the remover is properly applied before scraping.
- Clean the walls: After completely removing the wallpaper, use a damp cloth to clean the walls and remove any remaining adhesive residue.
For peelable wallpaper, simply pull back a corner and gently peel away, being cautious not to damage the wall underneath.
• Paneling Removal
To remove paneling from a wall, follow these steps:
- Remove any trim: Use a utility knife to cut through any caulk or paint connecting the trim to the wall, then carefully pry off using the pry bar.
- Locate nails: Identify the location of nails securing the paneling to the wall, often found along the seams or edges.
- Pry up paneling: Insert the pry bar between the paneling and the wall near one of the nail locations, and gently pry the paneling away from the wall.
- Continue prying: Continue prying away the paneling along the remaining nail sites, working from one edge to the other. Be cautious not to damage the wall underneath.
- Clean the walls: Remove any remaining nails or adhesive from the walls.
• Tile Removal
Removing tiles from a wall can be done using the following steps:
- Prepare the work area: Cover the floors with drop cloths or plastic sheeting to protect them from debris.
- Wear safety equipment: Put on safety goggles and gloves to protect yourself while working.
- Break the first tile: Using a hammer and chisel, carefully break through one of the tiles to create an opening.
- Pry away tiles: Insert the chisel between the adjacent tiles and gently pry them away from the wall. Repeat this process until all tiles are removed. Be cautious not to damage the wall underneath.
- Smooth the walls: Sand any rough areas and remove any remaining mortar or adhesive from the wall using a scraper or power sander.
• Textured Coating Removal
Finally, to remove textured wall coatings, follow these steps:
- Cover the floors: Lay down drop cloths or plastic sheeting to protect the floors from debris.
- Score the coating: Use a scoring tool or the edge of a utility knife to create several small, shallow cuts in the coating to facilitate removal.
- Scrape off the coating: Using a scraper or putty knife, gently scrape away the textured coating from the wall.
- Sand the walls: Once the coating is fully removed, use sandpaper or a power sander to achieve a smooth surface.
After you have successfully removed the wall covering, the walls should be properly cleaned and repaired as needed before applying paint. Following these steps will prepare your walls for a professional-looking paint finish.
For further information on paint preparation and removal techniques, consult resources like Painting and Decorating Contractors of America or look for local workshops and classes in your area to gain hands-on experience.
Step | Description |
|---|---|
1 | Clear the room and cover the floor with drop cloths to protect it from debris and water. |
2 | Turn off the electricity in the room, remove outlet covers and switch plates, and cover the outlets with tape to prevent water from getting inside. |
3 | Start at a corner or seam and use a utility knife to make a small incision in the wall covering, then gently pull it away from the wall. |
4 | Use a wallpaper steamer or a mixture of water and wallpaper remover to soak the wall covering and let it sit for 15-20 minutes to soften the adhesive. |
5 | Peel off the wallpaper or wall covering using a wide scraper or putty knife, being careful not to damage the wall underneath. |
6 | Remove any remaining adhesive on the wall using a sponge and more wallpaper remover solution, then rinse the wall thoroughly with water. |
7 | Allow the wall to dry completely before repairing any damage, such as filling holes or cracks with spackle and sanding the surface smooth. |
8 | Prime the wall with a suitable primer to ensure the paint adheres properly and provides a smooth, even finish. |
Effective Methods for Removing Wall Coverings
Renovating a home often entails removing existing wall coverings to make way for new designs or to expose the original structure. The process of removing wall coverings can be labor-intensive and time-consuming.
• Preparing for Wall Covering Removal
Before delving into the specific techniques for each type of wall covering, it helps to follow these general preparation steps:
Gather necessary tools and materials: To remove different wall coverings, you will need a variety of tools and materials, such as:
- Utility knife
- Scoring tool
- Wide putty knife or scraper
- Ladder or step stool
- Bucket
- Soft cloth or sponge
- Chemical wallpaper remover or steam wallpaper remover
- Trash bags or tarp to collect debris
Protect your work area: Place drop cloths, plastic sheeting, or newspapers on the floor near the walls to catch any debris or liquid during the removal process.
Remove any obstacles: Clear the room of any furniture, decorations, and outlet covers near the wall covering.
• Removing Wallpaper
Wallpaper removal can be tedious, but with the right approach and tools, the process can be simplified.
– Step 1: Perforate the Wallpaper
Using a wallpaper scoring tool or a utility knife, create small holes in the wallpaper’s surface to facilitate easier penetration of the removal solution or steam. Be careful not to press too hard, as you don’t want to damage the underlying wall.
– Step 2: Apply the Wallpaper Removal Solution or Steam
There are two primary methods to loosen wallpaper adhesive: using a chemical wallpaper removal solution or a steam wallpaper remover.
Chemical Wallpaper Remover
- Following the manufacturer’s instructions for dilution, mix the wallpaper removal solution with hot water in a bucket.
- Soak a soft cloth or sponge in the solution and apply it generously to the wallpaper.
- Allow the solution to sit for 15-20 minutes to soften the adhesive.
Steam Wallpaper Remover
- Fill the steamer’s water reservoir and allow it to heat up per the manufacturer’s instructions.
- Apply the steam to the wallpaper for approximately 30 seconds, holding the steamer plate against the punctured surface.
– Step 3: Scrape Off the Wallpaper
After the adhesive has softened, use a wide putty knife or scraper to remove the wallpaper, working from the top of the wall down. If the wallpaper comes off with difficulty, apply additional removal solution or steam and let it sit for a few more minutes before attempting to scrape again.
– Step 4: Clean the Walls
Once the wallpaper has been removed, use a soft cloth or sponge soaked in water to clean any residue from the walls gently. Allow the walls to dry completely before proceeding with any repairs, painting, or applying new wall coverings.
• Removing Painted Paneling and Wood Paneling
Removing painted paneling or wood paneling requires a more careful approach, as the surface beneath may need to be repaired or prepped for new coverings.
– Step 1: Cut and Pry
Using a utility knife, make a horizontal cut along the top edge of the paneling. Then, use a pry bar or wide putty knife to loosen and remove the paneling from the wall. Start with a single panel to gauge the ease of removal and the condition of the underlying wall.
– Step 2: Remove Nails or Fasteners
Upon removing the paneling, locate any remaining nails or fasteners and carefully remove them using needle-nosed pliers or the claw end of a hammer.
– Step 3: Repair and Prep the Wall
Evaluate the condition of the wall beneath the paneling. If necessary, repair any damage, remove remaining adhesive or residue, and sand the surface to create a smooth foundation for new coverings.
• Tips for Removing Fabric or Textile Wall Coverings
Fabric and textile wall coverings can be more challenging to remove, depending on the type of adhesive used. A combination of wallpaper removal techniques and careful scraping is best for tackling these materials.
- Start by using a scoring tool or utility knife to create small holes in the fabric surface.
- Apply a wallpaper removal solution or steam to the fabric, allowing it to penetrate the material and soften the adhesive.
- Use a wide putty knife or scraper to gently remove the fabric from the wall, taking care not to damage the underlying surface.
- Clean and prep the wall with wallpaper removal.
Removing wall coverings can be a long and arduous process, but by following these techniques and utilizing the appropriate tools, you can effectively remove and replace outdated or damaged materials.
Eliminating 20-Year-Old Wallpaper Borders: A How-To
• Introduction
A wallpaper border can add style and personality to a room, but outdated wallpaper borders can reduce the aesthetic appeal of a space.
Removing a 20-year-old wallpaper border might seem like a daunting task, but with the right tools, techniques, and patience, it is possible to achieve a clean and refreshed look.
• Assessing the Type of Wallpaper Border
Before attempting to remove the wallpaper border, it is important to determine the type of wallpaper and backing material. This information will help you decide on the best removal method. In general, wallpaper borders can be divided into three categories:
- Non-pasted wallpaper: This type of wallpaper border requires a separate adhesive for application.
- Pre-pasted wallpaper: These borders come with an adhesive backing that needs water for activation.
- Peel-and-stick wallpaper: This type of wallpaper border features a self-adhesive backing and does not require any additional adhesive.
Check the edges of the wallpaper border for any indications of its type. Non-pasted and pre-pasted wallpapers usually have more rigid edges, while peel-and-stick wallpapers have more flexible edges.
• Removal Methods
Once you have assessed the type of wallpaper border, you can now choose the appropriate removal method.
– Method 1: Dry Peeling
Ideal for:
- Peel-and-stick wallpapers
Tools and materials required:
- Putty knife or plastic scraper
- Ladder (if necessary)
Steps:
- Begin at a corner or seam of the wallpaper border.
- Carefully insert the putty knife or plastic scraper under the edge of the wallpaper border.
- Gently lift the edge and start peeling the border away from the wall.
- Continue peeling the border, using steady pressure and maintaining a consistent angle to avoid tearing the paper.
- If sections of the border become stuck, use the putty knife or plastic scraper to assist with removal.
– Method 2: Wet Removal
Ideal for:
- Pre-pasted and non-pasted wallpapers
Tools and materials required:
- Wallpaper perforator or scoring tool
- Sponge or cloth
- Warm water
- Liquid dish soap or wallpaper remover solution
- Putty knife or plastic scraper
- Ladder (if necessary)
- Towels or plastic sheeting (for protecting the floor)
Steps:
- First, score the wallpaper border using a wallpaper perforator or scoring tool. This will create tiny holes that allow water and wallpaper remover solution to penetrate and loosen the adhesive.
- Mix warm water with a few drops of liquid dish soap or follow the instructions on the wallpaper remover solution packaging.
- Protect the floor beneath the wallpaper border by placing towels or plastic sheeting.
- Soak a sponge or cloth in the water and wallpaper remover solution, and thoroughly wet the wallpaper border. Be sure to cover the entire border, especially the seams and edges.
- Allow the water and wallpaper remover solution to soak into the border for at least 15-20 minutes. You may need to reapply the solution to particularly stubborn areas.
- Use a putty knife or plastic scraper to carefully scrape the wallpaper border from the wall, working from top to bottom.
- Continue scraping and removing the border, reapplying the water and wallpaper remover solution as needed.
- Once the border is completely removed, clean any remaining adhesive residue from the wall with a damp sponge or cloth.
• Tips for Successful Wallpaper Border Removal
- Be patient and take your time during the removal process. Attempting to rush or force the removal can result in damage to the wall.
- Work in small sections to keep the wallpaper border wet and ensure that the adhesive is adequately loosened.
- For particularly stubborn adhesive, consider using a commercial wallpaper remover or a mixture of water and white vinegar (in a 1:1 ratio).
- If the border has been painted over, you may need to use a paint scraper or a heat gun to soften the paint before removing the border.
- After the border is removed, it is essential to clean and prepare the wall before applying new wallpaper or paint.
• Conclusion
With the proper tools, techniques, and patience, removing a 20-year-old wallpaper border is a manageable and rewarding project.
By assessing the type of wallpaper border and carefully following the steps outlined in this comprehensive guide, you can transform your living space and create a fresh, updated look.
Step | Description |
|---|---|
1 | Prepare the area by covering the floor with a drop cloth or old newspaper to catch any debris. |
2 | Use a scoring tool to perforate the wallpaper border, making it easier for the removal solution to penetrate. |
3 | Mix a wallpaper removal solution by either using a store-bought product or a mixture of warm water and fabric softener (1:1 ratio). |
4 | Apply the solution to the wallpaper border with a sponge or spray bottle, soaking the border thoroughly. Allow it to sit for 15-20 minutes. |
5 | Use a plastic scraper or putty knife to gently lift and remove the wallpaper border. Be careful not to damage the wall surface. |
6 | Wipe down the wall with a damp cloth to remove any leftover adhesive or residue. |
7 | Allow the wall to dry completely before repainting or applying new wallpaper. |
Priming a Wall after Wallpaper Removal: Is it Necessary?
The short answer is yes, you should prime a wall after removing wallpaper.
This is because walls can become damaged or uneven when wallpaper is removed, and priming helps to create a smooth and even surface for paint or new wallpaper to adhere to.
• Benefits of Priming a Wall After Removing Wallpaper
There are several benefits to priming a wall after removing wallpaper. These include:
- Creating a Smooth Surface: Priming a wall helps to fill in any imperfections, such as holes, cracks, or uneven texture caused by the removal process. This creates a smooth surface that will allow paint or new wallpaper to adhere evenly.
- Preventing Wallpaper Adhesive Residue: When wallpaper is removed, adhesive residue can remain on the wall. This residue can make it difficult for paint or new wallpaper to adhere properly. Priming the wall helps to seal the adhesive residue, ensuring that it does not interfere with the new paint or wallpaper.
- Improving Paint Adhesion: Primers are designed to create a better bond between the wall and the paint. This helps to ensure that the paint will adhere properly and last longer.
- Enhancing Paint Color and Coverage: Priming a wall can help to enhance the color and coverage of the paint being applied. The primer provides a uniform, light-colored surface that allows the paint color to appear more vibrant and consistent.
- Sealing in Stains: Some primers also contain stain-blocking properties, which help to seal in any stains that may have been caused by the wallpaper adhesive or other sources. This ensures that the stains do not bleed through the new paint or wallpaper.
• Types of Primers
There are several types of primers available on the market, and choosing the right one for your project is essential. Some of the most common types of primers include:
- Latex-Based Primer: This is a water-based primer that is easy to clean up and adheres well to most surfaces. It is often recommended for priming walls after wallpaper removal due to its ability to seal in wallpaper adhesive residue.
- Oil-Based Primer: This type of primer is highly adhesive and recommended when dealing with stains, such as water or smoke damage. However, it takes longer to dry and requires mineral spirits for clean-up.
- Shellac-Based Primer: This primer has superior stain-blocking properties and is recommended when dealing specifically with tough stains. It dries quickly and adheres well but has a strong odor and requires denatured alcohol for clean-up.
- New Drywall Primer: This type of primer is specifically designed for new drywall construction and may not be as effective for priming walls after removing wallpaper.
When choosing a primer, be sure to read the label carefully to ensure that it is suitable for your specific project and surface.
• Steps to Prime a Wall After Removing Wallpaper
Following the proper steps to prime a wall after removing wallpaper is essential to achieve the best results. Here’s a recommended process:
- Clean the Wall: After removing the wallpaper, thoroughly clean the wall to remove any remaining adhesive, dirt, or debris. A solution of water and dish soap or a commercially available wallpaper adhesive remover can be effective for this task. Rinse the wall with clean water and allow it to dry completely.
- Repair Any Damage: If there are any cracks, holes, or uneven texture on the wall, fill them in with a suitable patching compound, following the manufacturer’s instructions. Once the patching compound is dry, sand the repaired areas smooth using fine-grit sandpaper.
- Apply the Primer: Using a brush or roller, apply the chosen primer to the wall, following the manufacturer’s instructions for coverage and drying time. Be sure to cover the entire surface, including any patched areas.
- Sand the Wall: Once the primer is dry, lightly sand the wall using fine-grit sandpaper. This will help to create a smooth, even surface for the paint or new wallpaper to adhere to.
- Remove Dust: Wipe down the wall with a damp cloth or tack cloth to remove any dust created by sanding.
- Apply Additional Coats: If needed, apply additional coats of primer, allowing for proper drying time and sanding between coats, until the desired level of coverage is achieved.
Once these steps are complete, the wall is ready for paint or new wallpaper application. By properly priming the wall after removing wallpaper, you will ensure a smooth, even surface and a professional-looking result.
Step | Description |
|---|---|
1 | |
2 | Clean the wall thoroughly to remove any remaining adhesive or residue. |
3 | Inspect the wall for any damage, such as holes, cracks, or peeling paint. |
4 | Repair any damage by patching holes, smoothing rough areas, or sanding peeling paint. |
5 | Prime the wall with a high-quality primer to ensure a smooth and consistent base for paint. |
6 | Apply a fresh coat of paint to the primed wall. |
Preparing Drywall for Repainting after Wallpaper Removal
If you’ve recently removed wallpaper from your walls, it’s essential to prepare the underlying drywall properly before applying new paint or wallpaper. Proper preparation is crucial for achieving a smooth, professional-looking finish.
• Step 1: Assess the Condition of the Drywall
Before beginning any preparation work, examine the drywall to identify any damage or imperfections. Look for dents, gouges, scratches, or torn paper facings.
If you spot any severe damage or large holes, it may be necessary to replace the affected drywall section. We recommend consulting a professional for extensive repairs or replacements.
• Step 2: Remove Remaining Wallpaper Adhesive
Even after removing the wallpaper, there may still be some residual adhesive on the walls. It’s essential to clean off this adhesive entirely, as it can cause issues when applying new paint or wallpaper.
To remove the adhesive, mix equal parts warm water and white vinegar in a spray bottle. Spray this solution onto the walls and allow it to soak for a few minutes.
Next, use a scraper or putty knife to gently scrape away the softened adhesive. Take care not to damage the drywall in the process.
Once the majority of the adhesive has been removed, wipe down the walls with a damp sponge or cloth to ensure there’s no remaining residue. Allow the drywall to dry completely before moving on to the next step.
• Step 3: Repair Minor Drywall Damage
Small dents, scratches, and torn paper can be easily repaired using a joint compound. Apply a thin layer of the compound over the damaged area using a putty knife. Be sure to feather the edges to blend them seamlessly with the surrounding drywall.
Allow the joint compound to dry for the recommended time on the product’s label, usually 24 hours. Once it’s dried, use fine-grit sandpaper to smooth the repaired area, ensuring there are no rough or raised edges. Wipe away any sanding dust with a damp cloth.
• Step 4: Seal the Drywall
Before applying paint or new wallpaper, it’s important to seal the drywall with a high-quality primer. A primer will create a smooth, uniform base for your new wall covering and prevent any stains or existing colors from bleeding through.
Select a primer specifically designed for drywall and follow the manufacturer’s instructions for application. We recommend using a roller for even coverage. Allow the primer to dry completely; this typically takes a few hours, but refer to the product’s label for the exact drying time.
• Step 5: Sand and Clean the Drywall
After the primer has dried, lightly sand the drywall with a fine-grit sandpaper. This step helps to create a smooth surface for your new paint or wallpaper to adhere evenly. Be careful not to sand too aggressively, as this can damage the drywall.
Once you’ve finished sanding, wipe down the walls with a damp cloth to remove any dust or debris. Having a clean surface before applying paint or wallpaper is crucial, as any tiny particles can cause imperfections in your finished wall.
• Step 6: Apply Your New Paint or Wallpaper
With your drywall properly prepared, you’re now ready to apply your new paint or wallpaper. Follow the manufacturer’s instructions carefully to ensure the best results.
For paint, we recommend using high-quality brushes or rollers for even coverage and a professional-looking finish. Apply at least two coats, allowing each one to dry fully before adding the next.
For wallpaper, ensure the paste is mixed correctly and evenly applied to the back of the wallpaper. Use a smoothing tool to minimize wrinkles or bubbles as you apply it to the wall.
• In Conclusion
Preparing drywall after removing wallpaper is a crucial step in achieving professional-looking results. By following the steps outlined above, you can transform your walls and create a fresh, updated look for your space.
It’s essential to be patient and take the time to complete each step thoroughly, ensuring your efforts result in a smooth and seamless finish.
Step | Description |
|---|---|
1 | Remove any remaining wallpaper adhesive using a wallpaper adhesive remover or a mixture of warm water and dish soap. Apply the solution to the wall and let it sit for a few minutes before scraping off the adhesive with a plastic scraper or a sponge. |
2 | Rinse the walls with clean water to remove any remaining adhesive residue and allow them to dry completely. |
3 | Inspect the walls for any damage, such as gouges or holes, and repair them using joint compound and a putty knife. Allow the compound to dry and sand it smooth using fine-grit sandpaper. |
4 | Apply a layer of primer to the drywall to seal any porous areas and create a smooth surface for painting. Allow the primer to dry according to the manufacturer’s instructions. |
5 | Once the primer is dry, you can proceed with painting or applying new wallpaper to your prepared drywall. |