Perfect Paint Finish Using Caulk & Seal
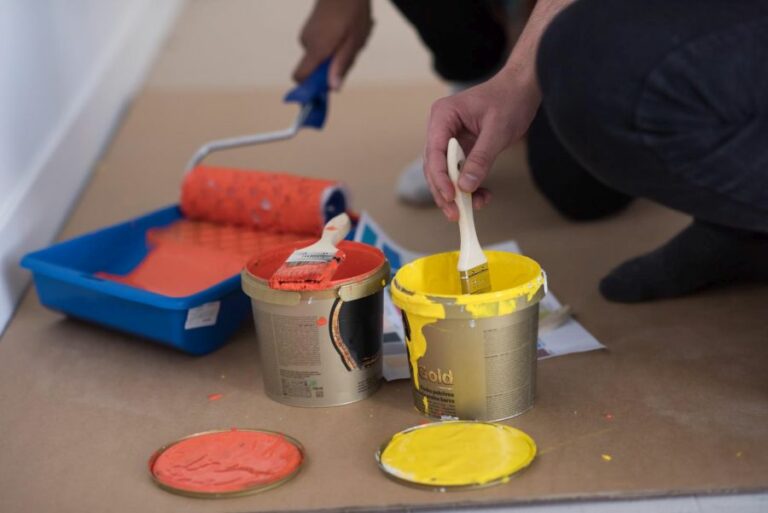
Are you tired of uneven and unprofessional-looking paint finishes and want to learn the secret to a perfect paint job? Well, you’ve come to the right place! With the right preparation and techniques, achieving that flawless finish is entirely within your grasp. In this article, we’ll dive into the key elements of utilizing caulk and seal to ensure a smooth and pristine paint finish for your next project.
Perfect paint finish using caulk & seal:>
To achieve a perfect paint finish, use the appropriate caulk and sealant, such as acrylic caulk, siliconized acrylic caulk, or polyurethane sealant, and follow proper application techniques. These materials fill gaps, cracks, and seams, preventing moisture and air infiltration. It is crucial to paint over the caulk or sealant with compatible, high-quality paint for a seamless result.

Want to achieve a flawless paint finish? Discover the secrets to using caulk and seal for perfectly smooth walls and joinery in our in-depth guide. Read on to learn the techniques to make your painted surfaces look professionally done! Don’t settle for less than perfect.
Contents
- 1 Achieve Flawless Paint Finish with Caulk & Sealant
- 2 Creating Precise Paint Lines using Caulk: A Guide
- 3 Painting Over Caulk vs. Caulking Over Paint: Which is Best?
- 4 Do Expert Painters Rely on Caulking Techniques?
- 5 Using a Paintbrush for Caulk Application: Is it Possible?
Achieve Flawless Paint Finish with Caulk & Sealant
A perfect paint finish can enhance the overall appearance of your painted spaces and add value to your property. One of the key components to achieving this flawless result is the proper use of caulk and seal.
• Choosing the Right Caulk and Seal
Selecting the right caulk and seal is crucial for ensuring a perfect paint finish. These materials help fill gaps, cracks, and seams in surfaces and prevent moisture and air infiltration. Here are some recommendations for choosing the best caulk and seal products:
1. Acrylic Caulk
Acrylic caulk is a popular choice for various applications due to its ease of use and versatility. It dries fast and adheres well to wood, metal, and masonry. Additionally, acrylic caulk can be easily cleaned up with water and is paintable once fully cured.
2. Siliconized Acrylic Caulk
Siliconized acrylic caulk is similar to acrylic but with added silicone for improved flexibility and adhesion. This type of caulk works well for filling gaps and cracks in areas prone to movement, such as door and window frames.
It also offers enhanced resistance to moisture and mildew, making it suitable for bathrooms and kitchens.
3. Polyurethane Sealant
Polyurethane sealant is a high-performance, moisture-curing product that provides excellent adhesion to a wide range of surfaces. It is often used for exterior applications due to its strong resistance to weather, sunlight, and temperature fluctuations.
• Proper Application Techniques for Caulk and Seal
To attain a perfect paint finish, it is essential to apply caulk and seal correctly. Below are several techniques that can help ensure a smooth and seamless result:
1. Surface Preparation
Before applying caulk or sealant, thoroughly clean the surface to remove any dust, dirt, or debris. For best results, use a mild detergent and rinse with water. Allow the surface to dry completely before proceeding.
2. Cutting the Caulk Tube and Loading the Caulking Gun
For a smooth application, cut the caulk tube’s tip at a 45-degree angle. This allows for easy control and even distribution of the caulk along the surface. Before loading the caulking gun, puncture the inner seal of the tube. This helps dispense the caulk easily and consistently.
3. Applying the Caulk or Sealant
Hold the caulking gun at a 45-degree angle that aligns with the surface. Apply steady pressure on the gun trigger while maintaining an even pace. Use your free hand to guide and support the gun, ensuring a uniform application.
4. Smoothing the Caulk
After applying the caulk or sealant, use a dampened finger, a caulk smoothing tool, or a wet cloth to smooth the bead, pressing it firmly into the joint or crack.
This step ensures that the caulk adheres properly to the surface, fills the gap thoroughly, and creates a seamless appearance.
5. Cleanup and Curing
Immediately remove any excess caulk or sealant with a wet cloth, keeping in mind that most products become more difficult to clean up as they dry.
Allow the caulk or sealant to cure for the manufacturer’s recommended time before painting or exposing it to moisture.
• Painting Over Caulk and Sealant
To ensure a seamless paint finish, it is crucial to paint over the caulk or sealant with high-quality paint that is compatible with the caulk or sealant.
Most latex-based paints work well with acrylic, and siliconized acrylic caulks, while polyurethane sealants may require a specific type of paint. Always consult the manufacturer’s guidelines for compatibility and recommended cure times before painting.
In conclusion, the perfect paint finish begins with the right caulk, sealant materials, and proper application techniques. By following these guidelines and recommendations, you can achieve a seamless and long-lasting result that enhances your property’s overall appearance and value.
Creating Precise Paint Lines using Caulk: A Guide
Achieving perfect paint lines is essential in any painting project, whether it is a professional job or a DIY home improvement. A neat, clean finish can make all the difference in giving your work a polished, professional look. One of the best ways to achieve this perfection is by using caulk.
• Choosing the Right Caulk for the Job
Caulks come in various types, each designed for specific applications. It is crucial to select the right caulk for your particular painting project to ensure optimal performance and long-lasting results. Here are the most common types of caulk you can find:
- Acrylic caulk: Ideal for indoor use, it is perfect for filling gaps and cracks in walls, baseboards, and trim. This type of caulk is paintable and can blend well with your paintwork.
- Silicone caulk: This waterproof, flexible caulk is suitable for kitchen and bathroom applications, where moisture resistance is essential. It doesn’t accept paint readily, so its not ideal for achieving perfect paint lines.
- Elastomeric caulk: This type of caulk offers flexibility and excellent adhesion to various surfaces. It is paintable and can be used for both indoor and outdoor applications.
For best results, we recommend using a high-quality, paintable acrylic latex caulk whenever you aim to achieve perfect paint lines.
• Preparing the Surface for Caulking
Before applying caulk, it is important to prepare the surface properly. This will ensure that the caulk adheres well and that you can achieve the best possible finish. Here are the steps to follow for surface preparation:
- Clean the surface: Remove any dirt, dust, or debris from the surface using a damp cloth or sponge. Make sure the surface is clean and free from contaminants that may interfere with the adhesion of the caulk.
- Remove old caulk: If there is old caulk on the surface, use a putty knife or a caulk-removal tool to scrape it off. This will ensure that the new caulk can adhere properly to the surface.
- Dry the surface: Allow the surface to dry completely before applying the new caulk. This typically takes a few hours, but it is critical for optimal adhesion.
- Mask the area: Use painter’s tape to mask the areas adjacent to the line where you will be applying the caulk. This will help you achieve a clean, sharp edge and prevent the caulk from spreading to unwanted areas.
• Applying the Caulk for Perfect Paint Lines
With the surface prepared, it’s time to apply the caulk. Here are the steps to follow:
- Load the caulk gun: Cut the nozzle of the caulk tube at a 45-degree angle, puncture the inner seal, and insert it into the caulk gun.
- Apply the caulk: Hold the caulk gun at a consistent angle and apply gentle pressure to the trigger, running a smooth bead of caulk along the desired line. Focus on maintaining steady pressure and speed for an even bead.
- Smooth and shape the caulk: While the caulk is still wet, use a damp finger or a caulk-smoothing tool to shape the caulk and press it firmly into the gap or joint. Wipe away any excess with a damp sponge or cloth.
- Remove the painter’s tape: Carefully peel away the painter’s tape while the caulk is still wet. Doing this prevents the caulk from forming a skin that may tear when you remove the tape later.
- Allow the caulk to dry: Follow the manufacturer’s recommendations regarding drying time before painting over the caulk. This can range from 30 minutes to several hours, depending on the specific product.
• Expert Tips for the Best Results
Here are a few expert tips to help you achieve perfect paint lines using caulk:
- Practice your technique on a scrap piece of material before tackling your actual project.
- If you struggle with maintaining consistent pressure on the caulk gun, consider using a dripless caulk gun.
- When dealing with deep gaps or joints, fill them with foam backer rods before applying the caulk.
- For a slightly textured look, use a paintbrush instead of a sponge to brush away excess caulk.
• Conclusion
Achieving perfect paint lines with caulk is an essential skill for any professional or DIY painter.
By carefully selecting the right caulk, preparing the surface, and following the proper application techniques, you can achieve sharp, clean lines that will make your paint job look polished and professional.
Step | Description |
|---|---|
1 | Apply painter’s tape to each side of the area where you want the perfect paint line. |
2 | Use a caulk gun to apply a thin bead of caulk along the edge of the painter’s tape. |
3 | Use your finger or a smoothing tool to spread the caulk, creating a seal between the tape and the surface. |
4 | Allow the caulk to dry for a short period, but not completely. It should be tacky but not wet. |
5 | Begin painting the desired area, painting over the caulk line as well. |
6 | Before the paint dries completely, carefully remove the painter’s tape, peeling it back at a 45-degree angle. |
7 | Review your perfect paint line and make any touch-ups if necessary. |
Painting Over Caulk vs. Caulking Over Paint: Which is Best?
• Importance of Caulk and Paint
Both caulk and paint serve essential roles in completing and maintaining the appearance and overall function of various surfaces. Caulk is typically used to seal gaps and protect surfaces from moisture and air infiltration, while paint provides protection and visual appeal.
• Painting Over Caulk
– The Benefits
When the paint is applied over the caulk, it provides additional protection to the caulk and the substrate. This is particularly true for acrylic and silicone caulks that are paintable.
Painting over caulk ensures that the caulk and surrounding area have a uniform appearance in terms of color, texture, and sheen. It also increases the longevity of the caulk by adding an extra layer of protection from the elements.
– The Process
For optimal results, follow these steps when painting over caulk:
- Clean the surface: Ensure that the area around the caulk is clean and free of debris or dust.
- Apply primer (if necessary): It’s recommended to apply a primer to the caulk, particularly for silicone-based caulks, to ensure that the paint adheres properly.
- Allow to dry: Give the primer enough time to dry before painting.
- Apply paint: Use high-quality paint and apply it evenly over the caulk and surrounding area.
If the caulk is already cured, you may paint over it (typically after 24 hours). Keep in mind that some caulk is specifically formulated to be paintable, while others are not.
• Caulking Over Paint
– When It’s Necessary
In some cases, caulking over paint is necessary. For instance, if there are gaps or cracks that have emerged after the paint has been applied, they will need to be sealed with caulk to prevent moisture and air infiltration.
In this situation, it is essential to use caution and follow proper steps to ensure the best result possible.
– The Process
To achieve a professional finish when caulking over paint, adhere to these guidelines:
- Clean the area: Remove any dirt or debris from the painted surface to ensure proper adhesion of the caulk.
- Select the right caulk: Choose a high-quality, paintable caulk that is compatible with the painted surface. This will aid in achieving a seamless and durable finish.
- Apply the caulk: Using a caulk gun, apply the caulk carefully along the gaps or cracks, ensuring even distribution.
- Smooth the caulk: Utilize a caulk-smoothing tool to eliminate excess caulk and create a neat, finished appearance.
- Allow to cure: It’s crucial to allow the caulk to cure properly before attempting to paint over it, typically 24-48 hours, depending on the type of caulk used.
• Recommendations
Based on professional experience, it’s generally better to paint over caulk rather than caulk over paint. Painting over caulk provides a uniform appearance and additional protection to the caulk and increases the overall longevity of the material.
However, there might be situations where caulking over paint is necessary, such as when gaps or cracks emerge after painting. In these instances, using a high-quality, paintable caulk and following proper application techniques will ensure the best results.
Ultimately, the key to successfully incorporating caulk and paint in any project is proper preparation, using high-quality materials, and adhering to best practices for application.
With these principles in mind, you can achieve a durable, long-lasting, and visually appealing result that enhances and protects your surfaces.
Do Expert Painters Rely on Caulking Techniques?
• Importance of Caulking in Painting Projects
Caulking plays a significant role in the overall outcome of a painting project. It is a process that involves filling gaps, cracks, and joints between surfaces to prevent drafts, water, and pests from entering your home.
Moreover, caulking ensures a neat, uniform finish that enhances a paint job’s appearance. It is essential for both interior and exterior painting projects.
• Professional Painters and Caulking Services
Yes, professional painters do perform caulking services as part of their comprehensive painting projects. Professional painters understand the crucial role that caulking plays in achieving an excellent finish and ensuring the paint job’s longevity. As a result, they provide a full range of caulking services, including:
- Inspection and Assessment: Professional painters carefully inspect the surfaces to identify gaps, cracks, or joints requiring caulking. They will then recommend the appropriate caulking material and technique to address these issues.
- Surface Preparation: Proper surface preparation is critical for successful caulking. Professional painters will clean and remove any debris, dirt, or old caulk that may hinder the new caulk’s adhesion.
- Applying Caulk: Skilled painters know how to apply caulk accurately, ensuring a clean, smooth finish without any mess or waste.
- Final Touches: After the caulk has cured, professional painters will sand, prime, and paint the surfaces, blending the caulk seamlessly with the rest of the paintwork.
– Caulking Materials Used by Professional Painters
There are various caulking materials available, each designed for specific applications and surface conditions. Some common types of caulk used by professional painters include:
- Acrylic Latex Caulk: Suitable for both interior and exterior purposes, it offers excellent adhesion and flexibility. It can be painted over and is easy to clean up with water.
- Silicone Caulk: Known for its excellent durability and flexibility, it is best for non-porous surfaces like glass, metal, and tile. It is not paintable but available in various colors to match different surfaces.
- Polyurethane Caulk: Ideal for sealing joints and gaps in masonry, concrete, and wood, this type of caulk is highly durable and paintable.
- Butyl Rubber Caulk: Suitable for exterior use, it is highly effective in sealing joints between different materials like metal and masonry.
Professional painters will choose the appropriate caulking material based on factors such as surface type, exposure to moisture, and whether painting is required.
– Tips for Proper Caulking
Though caulking might seem like a straightforward task, it requires skill and experience to achieve a professional finish. Some useful tips for proper caulking include:
- Choose the Right Caulk: Selecting the appropriate caulking material is crucial for a successful application. Consider factors such as surface type, exposure to moisture, and paint compatibility.
- Proper Surface Preparation: Ensure the surface is clean, dry, and free from debris or old caulk before applying the new caulk.
- Use a Quality Caulk Gun: Invest in a good-quality caulk gun to achieve a smooth, even application with minimal effort.
- Smooth the Caulk Bead: After applying the caulk, use a damp finger or a specialized tool to smooth out the bead, ensuring a clean finish.
- Allow the Caulk to Cure: Different caulking materials have different curing times. Follow the manufacturer’s instructions and allow the caulk to cure before sanding, priming, or painting the surface.
• Conclusion
Caulking is an essential aspect of a painting project that skilled professional painters do provide as part of their services. Professional painters ensure a seamless, high-quality finish by choosing the appropriate caulking material, preparing the surfaces correctly, and using the proper technique.
Using a Paintbrush for Caulk Application: Is it Possible?
Caulking is essential in maintaining the integrity of any structure, whether it be a residential building, an industrial facility, or a commercial property. A proper caulking job can help prevent water infiltration, seal gaps, and improve the overall aesthetics of an area.
• The Paintbrush Method
The short answer to this question is yes, you can apply caulk with a paintbrush. However, it is not the most common or recommended method for applying caulk.
A paintbrush can be used as a supplementary tool for spreading or smoothing out caulk, rather than as the primary tool for application. There are a few instances and circumstances where the paintbrush method may be beneficial, such as:
– Detail Work
In situations where precision is required, a small paintbrush can be used to dab caulk onto fine, intricate areas. For example, tight corners or small grooves could benefit from this delicate method of application.
– Smoothing Caulk
A paintbrush can also be utilized for smoothing caulk after it has been applied using a caulking gun, particularly in areas where it is difficult to reach with a finger or a traditional caulk-smoothing tool. In this case, the paintbrush is used to ensure a clean and even finish.
– Using Latex-Based Caulk
Latex-based caulks can be more conducive to application with a paintbrush, as they are generally water-soluble and can be easily cleaned up should any mishaps occur during application.
• Tips for Using a Paintbrush for Caulking
If you choose to use a paintbrush for caulking, consider the following tips and recommendations to ensure a successful outcome:
- Select the Right Brush: Choose a paintbrush that is compatible with the type of caulk you are using. A brush with soft, synthetic bristles is often recommended for latex-based caulks, as the bristles won’t absorb the caulk.
- Dip and Apply: When using a paintbrush, avoid overloading the brush with caulk. Lightly dip the brush into the caulk and gently spread it over the surface, being mindful not to disrupt any existing caulk lines or create an uneven finish.
- Clean the Brush: It’s essential to regularly clean the paintbrush during the caulking process to prevent the caulk from hardening on the bristles. For latex-based caulks, this can be done using clean water.
- Smooth Any Excess: After applying the caulk with a paintbrush, use a tool such as a plastic spoon, putty knife, or your finger to smooth out any excess, ensuring a clean, even finish.
• Alternative Caulking Methods
While it is possible to apply caulk with a paintbrush, other preferred caulking methods can offer a more efficient and effective outcome. Some alternatives include:
– Caulking Gun
A caulking gun is the most common and recommended tool for applying caulk. It allows for controlled dispensing of the caulk, resulting in cleaner lines and less waste.
– Squeeze Tube
For smaller projects or tighter spaces, a squeeze tube of caulk may be an ideal solution. It is easy to maneuver and control, allowing for precise application.
– Pre-formed Caulk Strips
For some applications, pre-formed caulk strips are available. These strips can be placed directly onto the surface and require no additional tools for application.
In conclusion, while it is possible to apply caulk with a paintbrush, it is generally not the recommended method for most projects.
A paintbrush can be a useful supplementary tool for smoothing or fine detail work, but a caulking gun or other specialized tools are often more suited to deliver the best outcome.
Question | Answer |
|---|---|
Can you apply caulk with a paintbrush? | While it’s not commonly done or recommended, it may be possible to apply caulk using a paintbrush in certain situations. However, using a caulking gun or a handheld applicator is typically the preferred method for better control, precision, and a more professional finish. |