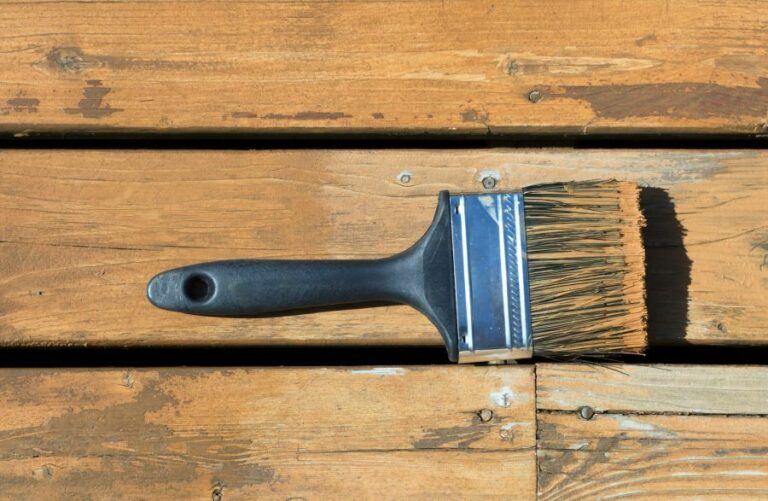
Get Smooth Paint Results By Caulking Edges
Are you tired of uneven paint edges that ruin the look of your freshly painted walls? We have the perfect solution for you! Discover the simple yet effective caulking edge technique to achieve the desired smooth paint results.
Get smooth paint results by caulking edges:
Caulking edges is essential for achieving smooth paint results and a professional finish. It involves sealing gaps and cracks using a suitable caulk, such as paintable acrylic latex. Proper surface preparation, application techniques, and paint compatibility are vital in ensuring a clean and polished look while also providing benefits like energy efficiency and reduced moisture infiltration.

Ready to achieve smooth paint results like a pro? Discover the benefits of caulking edges before painting and learn expert techniques to fill gaps and joints seamlessly. Read on to unlock the secrets of a flawless finish!
Contents
- 1 Achieve Seamless Paint Outcomes with Edge Caulking
- 2 Attain a Flawless Finish Using Caulk for Smoothing
- 3 Create Impeccable Paint Lines Using Caulk Technique
- 4 Painting Walls: Should You Caulk the Edges?
- 5 Master the Art of Painting Edges with Caulk Application
Achieve Seamless Paint Outcomes with Edge Caulking
• Importance of Caulking Edges
Achieving smooth paint results is crucial for a professional-looking finish. One of the key techniques to ensure a clean and polished look when painting is caulking edges.
Not only does caulking make the paint job look better by sealing gaps and cracks, but it also provides added benefits like increased energy efficiency and reduced infiltration of moisture and insects.
• Choosing the Right Caulk
There are multiple types of caulk available on the market, each formulated for specific purposes. Some common types include:
- Acrylic Latex: A good general-purpose caulk that is paintable, water-based, and has mildew resistance.
- Silicone: A waterproof, flexible, and durable caulk that works well in areas with a lot of moisture, such as bathrooms and kitchens. It is not paintable.
- Elastomeric Latex: A high-performance, flexible caulk that is paintable and can fill larger gaps.
For most painting projects, Consumer Reports suggests using paintable acrylic latex caulk for the best results.
• Preparing the Surface for Caulking
Before applying caulk, it is essential to prepare the surface properly. Following these steps will ensure a clean and smooth application:
- Clean the area: Remove any dirt, debris, or loose paint from the surface using a brush or damp cloth.
- Remove old caulk: If any old caulk remains, use a caulk removal tool or scraper to remove it.
- Dry the surface: Ensure that the area is completely dry before applying the new caulk.
• Applying the Caulk
Once the surface is prepared, it’s time to apply the caulk. Here are some tips for a smooth application:
- Use a high-quality caulking gun: Investing in a reliable caulking gun with a smooth trigger and consistent pressure will make applying the caulk much easier.
- Cut the tip at an angle: Cutting the tip of the caulk tube at a 45-degree angle will help create a clean application. Be sure to cut it to the desired bead size.
- Apply steady pressure: When using a caulking gun, apply even and steady pressure to the trigger for a consistent bead of caulk.
- Smooth the caulk: After applying the caulk, use a caulk-smoothing tool, or your finger, to smooth the bead before it dries.
- Clean up: Have a damp cloth or sponge on hand to clean up any excess caulk that may be on the surface or your hands.
• Paint Compatibility
When selecting a caulk, be sure to check that it is compatible with your choice of paint. Some specific caulks may require a waiting period after the application before painting, while others may not be paintable at all.
Reading the label on the caulk and paint products will provide the necessary information.
• Additional Tips for a Professional Finish
- Before starting the project, practice using the caulking gun and smoothing the caulk on a scrap piece of material or cardboard.
- Caulk any gaps, cracks, or seams between the trim and wall, and around windows and door frames.
- Be mindful of the drying time of the caulk, as some types may shrink after drying, requiring a second application.
- Utilize painter’s tape to create straight lines and prevent the caulk from getting onto unintended surfaces.
• Conclusion
Caulking edges are a crucial technique for achieving smooth paint results in any painting project. By selecting the right caulk, preparing the surface, and applying the caulk properly, you can ensure a clean and professional-looking finish.
Remember that practice makes perfect; mastering caulking techniques will improve your overall painting skills and give you the confidence to tackle any DIY project.
Attain a Flawless Finish Using Caulk for Smoothing
Caulking is an essential process for any homeowner, as it helps to create a watertight seal around windows, doors, sinks, and other areas in the home.
Achieving a smooth finish with caulking may seem like a daunting task, but with proper preparation, technique, and attention to detail, it can be done with precision and efficiency.
• Choosing the Right Caulk
The first step to achieving a smooth finish with caulking is to choose the appropriate product for your specific project. There are various types of caulks available, and selecting the correct one is crucial for the success and longevity of your work.
- Silicone Caulk: This type of caulk is waterproof and ideal for use in wet areas like bathrooms, kitchens, and outdoor applications. It is flexible, durable, and can withstand extreme temperatures.
- Acrylic Latex Caulk: This water-based caulk is easy to apply, paintable, and cleans up easily with water. It is best suited for interior applications, such as sealing gaps around windows, doors, and baseboards.
- Polyurethane Caulk: With excellent adhesion properties and resistance to weathering, polyurethane caulk is a great choice for outdoor applications and works well on multiple surfaces, such as wood, masonry, and metal.
To learn more about different types of caulks and their applications, visit the U.S. Department of Energy website.
• Gather the Necessary Tools
Before starting any caulking project, it’s important to gather the necessary tools and materials. Having everything accessible and ready to go will make the process smoother and more efficient. Here are some essential tools for a successful caulking project:
- Caulking gun
- Utility knife or razor blade
- Small bucket of water
- Clean, damp cloth or sponge
- Painter’s tape
- A straight-edged tool, such as a putty knife or plastic spoon
• Preparing the Surface
Proper surface preparation is crucial for smooth and successful caulking. These are the steps to follow:
- Clean the surface: Remove any dirt, dust, or debris from the area to be caulked. A clean surface will ensure proper adhesion of the caulk to the material.
- Remove old caulk: If you’re re-caulking an area, ensure to remove any old or damaged caulk using a utility knife, scraper, or putty knife.
- Wipe the area with a damp cloth: After removing old caulk, wipe down the surface with a clean, damp cloth to remove any residual debris and to ensure proper adherence of the new caulk.
- Apply painter’s tape: To achieve clean, straight lines, apply painter’s tape on either side of the gap before applying the caulk. This will help you get a professional-looking result.
• Applying the Caulk
Once the surface is prepared, it’s time to start applying the caulk. Here are the steps to ensure a smooth and even application:
- Cut the tip of the caulk tube: Use a utility knife or a razor blade to cut the tip of the caulk tube at a 45-degree angle. The size of the opening depends on the width of the gap you want to fill smaller gaps require a smaller opening, and vice versa.
- Load the caulk tube into the caulking gun: Insert the caulk tube into the caulking gun and secure it in place, ensuring the tip is aligned with the gun’s tip.
- Apply the caulk: Hold the caulking gun at a 45-degree angle and apply steady pressure on the trigger, while gradually moving the gun along the gap. Keep a consistent speed and pressure to ensure an even bead of caulk.
- Smooth the caulk: After applying the caulk, use a straight-edged tool, such as a putty knife or a plastic spoon, to smooth the bead and ensure proper adhesion to the surface. Dip the tool in water before smoothing to prevent it from sticking to the caulk.
- Remove excess caulk: Wipe away any excess caulk with a clean, damp cloth or sponge.
- Remove the painter’s tape: Carefully remove the painter’s tape from the surface while the caulk is still wet to ensure clean lines.
- Allow the caulk to cure: Consult the manufacturer’s instructions for the specific drying time of the caulk you are using. Avoid applying pressure or cleaning the area before the caulk is fully cured.
• Tips for a Perfect Finish
Here are some additional recommendations to achieve a smooth finish when caulking:
- Practice on a piece of cardboard or a scrap material before starting on your actual project to get comfortable with the process and to adjust the cutting size of the tube’s tip.
- Avoid applying caulk in extreme temperatures or high humidity, as this may affect the curing process.
- Use a consistent speed and pressure when applying the caulk to avoid an uneven bead.
- Do not cut the hole in the tip of the caulk tube too large, as this may make it difficult to control the amount of caulk dispensed.
- Periodically clean the tip of the caulking gun with a damp cloth to ensure a consistent flow of caulk.
By following these guidelines, you can achieve a smooth and professional finish when caulking any surface in your home. With the right tools, technique, and attention to detail, you’ll be able to tackle any caulking project with confidence and proficiency.
| How do you smooth finish with caulking? | |
|---|---|
| 1. Gather necessary tools | Make sure you have a caulking gun, a tube of caulk, a utility knife or scissors, a cup of water or a wet rag, and a caulk finishing tool or your finger. |
| 2. Prepare the surface | Clean and dry the area where the caulk will be applied to ensure proper adhesion and a smooth finish. |
| 3. Cut the nozzle | Use a utility knife or scissors to cut the tip of the caulk tube nozzle at a 45-degree angle. Make sure the size of the cut matches the desired bead size. |
| 4. Load the caulking gun | Insert the tube of caulk into the caulking gun and secure it in place. Squeeze the trigger until the plunger makes contact with the tube. |
| 5. Apply the caulk | Place the nozzle at the beginning of the seam and begin squeezing the trigger to release the caulk. Keep a steady pace and pressure to create a uniform bead. |
| 6. Smooth the caulk | Use a caulk finishing tool or a wet finger to gently press down and smooth the caulk bead, ensuring it fills the seam and creates a neat appearance. |
| 7. Clean up | Wipe away any excess caulk with a wet rag or sponge and let the caulk dry according to the manufacturer’s instructions. |
Create Impeccable Paint Lines Using Caulk Technique
Painting a room can be a rewarding experience, but achieving perfect paint lines can sometimes be a challenge.
• Importance of a Clean Surface
Before starting any painting project, it is essential to ensure that the surface is clean and free from debris. Dust, dirt, and other particles may cause imperfections in your paint lines, so prepare your surfaces using a mild cleaning solution and a damp cloth.
After the surface has dried, inspect it for any remaining debris and remove it with a soft brush or cloth. The Environmental Protection Agency provides information on proper cleaning techniques that are safe for various surfaces.
• Choosing the Right Tape
The tape you choose for your project plays a critical role in achieving clean paint lines. For best results, select a painter’s tape that is designed for your specific surface type, such as smooth or textured surfaces.
Look for tapes with strong adhesion but will not damage the surface when removed. It is also helpful to select a tape that is UV-resistant if the area will be exposed to direct sunlight.
• Proper Tape Application
To ensure a crisp edge, apply the tape correctly by following these steps:
- Measure and cut the tape to the desired length.
- Line up the tape along the edge where the paint line will be.
- Press down on the tape using your fingers, ensuring it adheres evenly and without wrinkles.
- Run a flat tool or plastic scraper along the edge of the tape to create a tight seal.
• Using Caulk to Seal Gaps
Caulk is a reliable solution to seal gaps and create a clean paint line. It is essential, however, to choose the right type of caulk for your project. Acrylic latex caulk works well with a wide range of surfaces and is paintable, making it an ideal choice for most home improvement projects.
Follow these steps when using caulk to create a perfect paint line:
- Cut the caulk tube tip at a 45-degree angle, ensuring the opening is small enough for the desired bead size.
- Load the caulk tube into a caulking gun.
- Apply a thin bead of caulk along the edge of the tape.
- Gently smooth the caulk with a finger or damp cloth, removing any excess.
- Allow the caulk to dry for the time specified on the packaging.
• Painting Techniques
To achieve the best results when painting over the caulked edge, follow these tips:
- Use a high-quality brush with angled bristles for precise application along the tape edge.
- Load the brush with paint but avoid overloading, as this can cause paint to seep under the tape.
- Apply the paint in long, smooth strokes, working away from the tape edge to minimize seepage.
- Once the area has been painted, allow the paint to dry slightly before removing the tape.
• Tape Removal
Removing the tape at the right time is crucial for achieving a crisp paint line. Follow these guidelines for tape removal:
- Allow the paint to dry slightly but not completely. The paint should still be tacky but not wet.
- Carefully lift one end of the tape and pull it back on itself at a 45-degree angle.
- Continue to pull the tape slowly and evenly, keeping a consistent angle.
- Inspect the paint line for any imperfections and touch it up with a small brush if necessary.
• Final Thoughts
Achieving perfect paint lines with caulk is a skill that requires patience and practice. By following the tips and techniques outlined in this article, you can overcome common challenges and create beautifully crisp paint lines for your next painting project.
Should you require further guidance, many painting professionals and home improvement stores offer workshops and additional resources to assist in mastering this skill.
Step | Description |
|---|---|
1 | Choose the right type of caulk. Use a paintable caulk that is easy to clean up with water, such as an acrylic or latex caulk. |
2 | Prepare the surface. Ensure the area where you will be applying caulk is clean, dry, and free of dust, dirt, and debris. |
3 | Apply painter’s tape. Use the tape to mask off the area where you want a clean paint line. Press the edges of the tape firmly against the surface to create a tight seal. |
4 | Apply caulk. Cut the tip of the caulk tube at a 45-degree angle, then use a caulking gun to apply a thin bead of caulk along the edge of the painter’s tape. The bead should be just thick enough to cover the edge of the tape. |
5 | Smooth the caulk. Run a wet finger or a dampened clean cloth along the bead of caulk to create a smooth, even seal. |
6 | Paint immediately. Begin applying paint to the surface right after smoothing the caulk. This ensures that the caulk does not have time to dry and will prevent any ridges from forming. |
7 | Remove the tape. As soon as you finish painting, carefully and slowly remove the painter’s tape to reveal a perfectly straight paint line. |
Painting Walls: Should You Caulk the Edges?
When it comes to achieving a professional finish in any painting project, proper preparation is key. This includes the proper application of caulking along with the edges and corners of your walls.
Caulking serves to create a seamless transition between surfaces and provide a clean, finished appearance for your paint job.
• Why You Should Caulk Edges of Walls Before Painting?
Caulking the edges of walls serves a variety of purposes, all of which contribute to a better-looking and long-lasting paint job. Some major reasons to caulk edges before painting include:
– Improved Aesthetics
Caulk helps to bridge gaps between walls and trim, creating a smooth and clean transition. This results in a more polished and refined appearance, elevating the overall quality of your paint job.
– Moisture Barrier
Caulk prevents water and moisture from seeping into the crevices between the wall and adjacent surfaces (like baseboards or crown molding). This can help protect your walls from potential water damage and mold growth, which may otherwise be time-consuming and costly to repair.
– Increased Energy Efficiency
By sealing gaps and cracks with caulk, you are also eliminating drafts and reducing heat or cooling loss. This, in turn, can improve your home or office’s energy efficiency, leading to potential cost savings on your utility bills.
– Enhanced Paint Adhesion
Caulk provides an even, uniform surface for the paint to adhere to. This helps prevent issues like uneven coverage or peeling and ensures a durable, long-lasting finish.
• Choosing the Right Caulk for Your Project
There are various types of caulk available on the market, each designed for specific needs and applications. When selecting the best caulk for your painting project, consider the following factors:
– Paintability
Ensure that the caulk you choose is paintable, as not all types can be easily painted over. Paintable caulk typically contains acrylic or latex compounds, both of which bond well with paint.
– Flexibility
Caulks with a higher degree of flexibility can better accommodate the natural expansion and contraction of building materials. This can help prevent your caulk from cracking or separating from the surfaces, ensuring a longer-lasting seal.
– Durability
Look for a caulk that is formulated for lasting performance and resistance to moisture, mold, and discoloration. A high-quality caulk will provide a more durable seal, protecting your paint job and surfaces for years to come.
One widely recommended option for interior paint projects is DAP Alex Plus, an acrylic latex caulk with silicone that offers excellent flexibility and adhesion and is easy to paint over.
• How to Caulk Edges of Walls Before Painting
Before you begin, gather the following supplies:
- Paintable caulk
- Caulking gun
- Painter’s tape (optional)
- Damp cloth or sponge
- Utility knife or scissors
Follow these steps to seamlessly caulk the edges of walls for a professional finish:
1. Prepare the Surface
Clean the surfaces you plan to caulk thoroughly, ensuring they are free of dust, dirt, and debris. This will ensure better adhesion and reduce the risk of contaminants compromising the seal.
2. Cut the Caulk Tube
Using a utility knife or scissor, cut the tip of the caulk tube at a 45-degree angle. Ensure that the opening size matches the size of the gap you need to fill.
3. Apply the Caulk
Load the caulk tube into your caulking gun, and apply steady pressure to the trigger as you guide the nozzle along the edge of the wall. Maintain a consistent speed and pressure to achieve an even bead.
4. Smooth the Caulk
Using a damp cloth or sponge, smooth the caulk into the seam to create a smooth, even surface. Ensure the caulk is pressed firmly into the gap and that there are no visible air bubbles or gaps.
5. Remove Excess Caulk
Immediately remove any excess caulk using a damp cloth or sponge, ensuring the remaining bead is flush with the adjacent surfaces.
6. Allow Caulk to Dry
Refer to the manufacturer’s instructions for the recommended drying time. It is essential to let the caulk fully cure before applying paint to ensure proper adhesion and a professional finish.
By caulking the edges and corners of your walls before painting, you’ll be one step closer to achieving a professional, long-lasting paint job. With the right materials, tools, and technique, caulking can significantly improve the appearance and performance of your painted surfaces.
For more information on best practices in painting preparation, check out resources like the Painting and Decorating Contractors of America (PDCA).
Master the Art of Painting Edges with Caulk Application
If you’re looking to achieve a professional finish when painting your home, one of the most important techniques to master is painting edges with caulking. This method ensures that your edges are smooth, crisp, and clean, without any unsightly gaps or uneven paint lines.
• What You’ll Need
Before you begin, gather the following supplies:
- Paint and primer
- Caulking (latex painters’ caulk)
- Caulking gun
- Angled paint brush
- Painters’ tape
- Clean, damp cloth
- Utility knife
• Preparing the Surface
Begin by preparing your space for painting. Remove any furniture, fixtures, or decorations, and lay down a drop cloth to protect the floor from paint splatters.
Next, thoroughly clean the area you’re planning to paint, especially the edges. Any dirt, dust, or grease on the surface can make it difficult for the paint and caulking to adhere properly.
Tip: For further guidance on preparing surfaces for painting, the U.S. General Services Administration offers a detailed guide that may be helpful.
• Applying Primer
Before painting, it’s essential to apply a high-quality primer to the walls. This will help create a smooth, even surface for the paint to adhere to and will ensure a longer-lasting finish. Be sure to apply primer to the edges you’ll be caulking as well.
• Taping off the Edges
Once your primer has dried, use painter’s tape to mask off the areas you don’t want to be painted. This will help you achieve clean, straight lines when applying the caulking and paint. Be sure to press the tape firmly against the surface to prevent any paint from bleeding under the edge.
• Applying Caulking
Load the caulking gun with latex painters’ caulk, and cut the tip of the tube at a 45-degree angle. Begin applying a thin bead of caulking to the edge you’re working on, using steady pressure and a consistent speed to avoid blobs or gaps.
Remember, it’s always better to apply too little caulking than too much, as you can add more later if needed.
Tip: Hold the caulk gun at a consistent angle as you work; this will help ensure a neat, even application.
• Smoothing the Caulking
Immediately after applying the caulking, use a clean, damp cloth or your finger to smooth it into the seam, making sure it’s level with the surrounding surface. This will help ensure a seamless transition from the painted edge to the caulked area.
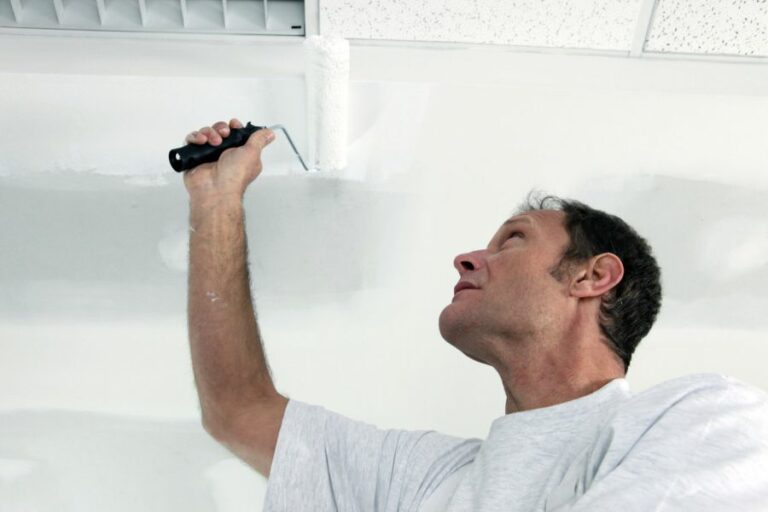
• Painting the Edges
As soon as you’ve smoothed the caulking, it’s time to paint the edges. Using an angled paint brush, carefully apply paint to the edge, overlapping the caulking slightly. The paint will help to create a strong bond between the wall and the caulking, making your edges even more durable.
Tip: To ensure clean lines, try to avoid brushing the paint against the edge of the painter’s tape.
• Removing the Painters’ Tape
Wait for the paint to dry slightly (but not completely), and then carefully remove the painter’s tape by pulling it back on itself at a 45-degree angle. This will help to create a crisp, clean edge without pulling off any paint or caulking.
• Final Touches
Inspect your work to ensure there are no gaps, cracks, or uneven lines. If you notice any imperfections, simply use a utility knife to trim away any excess caulking or paint and touch up as needed.
In conclusion, with the right tools and techniques, it’s possible to achieve professional results when painting edges with caulking. Remember, preparation is key.
A clean, primed surface will help ensure a smooth, even finish. And using high-quality latex painters’ caulk along with an angled paint brush will help you achieve the perfect edge every time.
Step | Description |
|---|---|
1 | Prepare the surface by cleaning it and removing any dirt, dust, or debris. |
2 | Apply painter’s tape to protect the areas you don’t want to paint. |
3 | Choose a paintable caulk and apply a thin bead along the edge where you want to paint. |
4 | Smooth the caulk with your finger or a caulk smoothing tool to create a straight, clean edge. |
5 | Allow the caulk to dry according to the manufacturer’s recommendations. |
6 | Apply a coat of primer (if necessary) and paint over the caulk, ensuring to maintain a straight line along the edges. |
7 | Allow the paint to dry fully, and remove the painter’s tape. |