How To Paint Outdoor Shutters, 25 Things You Should Know
If you’ve been thinking about giving your home’s exterior a fresh new look, painting the outdoor shutters is an excellent and cost-effective way to make a significant impact. You’re in the right place to learn how to achieve a professional-looking outcome, even if you’re a beginner. We’ll guide you through the essential steps and insider tips for preparing, choosing the right paint, and applying seamless coats on your outdoor shutters.
How to paint outdoor shutters:
To paint outdoor shutters, first, choose high-quality exterior paint and primer. Remove shutters from your home and clean them thoroughly. Repair any damage and sand the entire surface. Wipe off sanding dust, then apply a thin coat of primer and let it dry. Apply multiple thin, even coats of paint, allowing each to dry. Finally, reattach the shutters to your home.

Discover the secrets to giving your outdoor shutters a fresh, professional-looking makeover! Read on and find out the best tips, techniques, and materials to paint like a pro, from prepping to finishing touches. Don’t miss our all-in-one guide to transforming your home exterior beautifully!
Contents
- 1 Guidelines on Painting Exterior Shutters for a Fresh Look
- 2 What Type of Paint is Suitable for Outdoor Shutter Applications?
- 3 Should You Opt for Spray Painting or Brush Painting When Painting Shutters?
- 4 What is the Most Efficient and Effortless Method for Painting Shutters?
- 5 Which Type of Paint is Suitable for Painting Vinyl Shutters?
- 6 Evaluating the Superior Option: Painting or Replacing Vinyl Shutters?
- 7 What is the process for painting wooden shutters on the exterior of a home?
Guidelines on Painting Exterior Shutters for a Fresh Look
Painting outdoor shutters can give your home a fresh and updated look. However, you must follow the proper steps to ensure a lasting, high-quality finish.
• 1. Choose the Right Paint and Primer
When it comes to outdoor shutters, it’s essential to use high-quality paint specifically designed for exterior use. Acrylic latex or 100% acrylic paint is highly recommended because it is durable, weather-resistant, and easy to clean.
In addition to the paint, you’ll also need a good primer to ensure proper adhesion and longevity of the paint job. Opt for a bonding primer or an oil-based primer to create a solid, even foundation for the paint.
• 2. Remove Shutters and Clean
Before you can begin painting, you must remove the shutters from your home. Carefully use a screwdriver or drill to remove the screws or nails holding the shutters in place. Be mindful of any additional fixtures, such as hinges or hooks that may also need to be removed.
Once you’ve removed the shutters, it’s essential to clean them thoroughly. Dirt, dust, and grime can prevent paint from adhering properly, leading to a less-than-perfect result. Use a mixture of warm water and mild soap to clean the shutters, then rinse them with a hose and allow them to dry completely.
• 3. Prep Shutters for Painting
After the shutters have dried, take some time to inspect and repair any damage, such as cracks, holes, or loose slats. If necessary, use wood filler or exterior-grade caulk to fill in any gaps or imperfections, then sand those areas smoothly.
Next, sand the entire surface of the shutters with medium-grit sandpaper (around 80-100 grit) to roughen the surface and promote paint adhesion. Be sure not to miss any spots, including the edges and corners, for the best possible results.
Once you’ve completed the sanding process, it’s essential to remove any sanding dust or debris. Use a tack cloth or a microfiber cloth to wipe the shutters clean.
• 4. Prime the Shutters
With the shutters clean and prepped, you’re now ready to apply the primer. Place the shutters on a drop cloth or another protective surface to prevent any damage or mess to the surrounding area.
Using a high-quality paintbrush or paint sprayer, apply a thin, even coat of primer to both sides of the shutter, working from the top down. Be sure to cover all edges and slats, working the primer into any crevices or detail work.
Allow the primer to dry according to the manufacturer’s instructions, typically between 2-4 hours.
• 5. Painting the Shutters
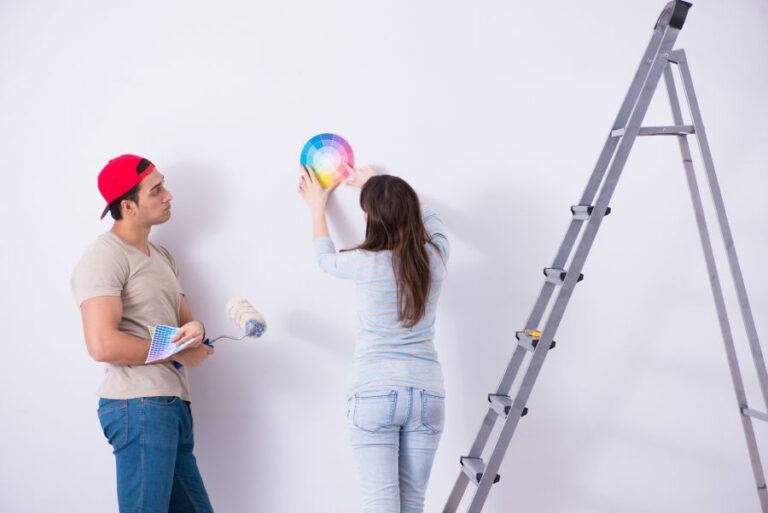
Once the primer is dry and your shutters are ready for paint, it’s time to let your creativity shine. Choose a paint color that complements your home’s exterior and enhances its overall curb appeal.
When painting, use a high-quality paintbrush or paint sprayer to apply thin, even coats of paint, working from the top of the shutter down. It’s essential to avoid applying too much paint at once, as thick or uneven coats can lead to drips, runs, or an uneven finish.
Allow the first coat of paint to dry according to the manufacturer’s instructions, then apply a second coat to ensure even coverage and a durable finish. If necessary, apply additional coats of paint, allowing each to dry in between applications fully.
• 6. Reattach Shutters
After the paint has fully dried and cured, you can reattach the shutters to your home. Use the original hardware, such as screws, nails, and hinges, to secure the shutters in place. You may also choose to replace the hardware with fresh or updated pieces that coordinate with the new paint.
Once the shutters are reattached, step back and admire your handiwork.
• Final Thoughts
Properly painting outdoor shutters not only improves the appearance of your home but also extends the life of the shutters by protecting them from the elements. By following these steps and using high-quality materials, you can achieve professional, lasting results that enhance the beauty of your exterior.
Step | Description |
|---|---|
1 | Remove shutters from the house and lay them on a flat surface. |
2 | Clean the shutters thoroughly with soap and water, and let them dry completely. |
3 | Sand the shutters to remove any peeling paint or rough spots. |
4 | Apply a coat of primer specifically made for outdoor surfaces, and let it dry according to the manufacturer’s instructions. |
5 | Paint the shutters with appropriate exterior paint. Use a brush or a paint sprayer for an even finish. Apply at least two thin coats, allowing adequate drying time between each coat. |
6 | Once the paint is completely dry, reattach the shutters to the house. |
What Type of Paint is Suitable for Outdoor Shutter Applications?
When enhancing the appearance of your home’s exterior, one key aspect to consider is the type of paint you use on your outdoor shutters. With so many options available, it’s important to choose a paint that is both long-lasting and well-suited for your shutters.
• A Brief Overview of Paint Types
There are two primary types of paint that are most commonly used on outdoor shutters: oil-based and water-based (latex) paints. Each type of paint has its own strengths and weaknesses, which we will cover in more detail below.
– Oil-Based Paints
Oil-based paints have been around for centuries and have a proven track record of durability and longevity.
They are particularly well-suited for use on wood and metal surfaces because of their ability to penetrate and adhere well to these materials. Some benefits of using oil-based paint on outdoor shutters include the following:
- Superior adhesion and penetration of wood and metal surfaces
- Excellent durability and resistance to chipping, peeling, and fading
- Smooth, glossy finish that remains consistent over time
However, there are also a few drawbacks to consider when using oil-based paint, such as:
- Longer drying time compared to water-based paints
- Strong odor and potentially harmful fumes during application
- Routine maintenance is needed to maintain the finish
– Latex-Based Paints
Latex-based or water-based paints are a more modern, eco-friendly alternative to oil-based paints. These paints have gained popularity due to their ease of use and less harmful impact on the environment. Here are some of the benefits of using latex-based paint on outdoor shutters:
- Quick drying time
- Lower odor and less harmful VOCs (volatile organic compounds) during application
- Easier cleanup with soap and water
- Excellent durability, especially when using 100% acrylic formulas
However, some potential drawbacks of latex-based paint include:
- Less overall adhesion and penetration compared to oil-based paints
- Susceptibility to cracking or peeling when exposed to extreme temperature fluctuations
• Selecting the Best Paint for Your Outdoor Shutters
Now that we have covered the basic attributes of both oil-based and latex-based paints, let’s discuss which type is best suited for your specific outdoor shutter material and environment.
– Wood Shutters
When painting wood shutters, it is essential to use paint that can penetrate the surface well and offer strong adherence. Oil-based paints are generally recommended for wood shutters due to their superior penetration and adherence properties.
However, if you prefer a water-based option, look for a high-quality 100% acrylic latex paint that has been specifically formulated for use on wood surfaces.
– Vinyl Shutters
Vinyl shutters can be more challenging to paint due to their unique material properties. It’s essential to select a paint that has been specifically designed for use on vinyl surfaces, such as 100% acrylic latex paint.
These paints offer excellent adhesion to the vinyl surface, ensuring your shutters will remain vibrant and durable over time.
– Metal Shutters
When painting metal shutters, you’ll want to use a paint that provides strong adherence and rust prevention. Oil-based paints are typically recommended for metal surfaces due to their excellent adhesion and ability to prevent rust formation.
However, water-based acrylic paints designed for metal surfaces can also provide a durable finish if applied correctly.
– Preparing Your Shutters for Painting
Before you begin painting your shutters, it’s crucial to properly prepare the surface to ensure the best results. Here are some tips to help you prepare your shutters for painting:
- Clean the surface of any dirt, dust, or mildew using a mild detergent and water solution. Rinse thoroughly and allow the surfaces to dry completely.
- Sand any rough areas or peeling paint until smooth.
- Remove any hardware and cover any areas you do not want to be painted with painter’s tape.
- Apply a high-quality primer specifically designed for your shutter material before painting. Priming ensures a smooth, consistent finish and improves paint adhesion.
• Applying the Paint
Once your shutters are clean, dry, and prepped, you can begin to apply the paint. Regardless of the type of paint you choose, make sure to follow the manufacturer’s guidelines for application and dry times. In general, you will want to:
- Stir the paint thoroughly before application.
- Use a high-quality brush or paint roller suited for your shutter material.
- Apply two or more thin, even coats of paint, allowing each coat to dry completely before applying the next one.
In conclusion, the type of paint you choose for your outdoor shutters largely depends on the shutter material and your personal preferences.
Both oil-based and latex-based paints have their strengths and weaknesses, but ultimately, the key is selecting a high-quality paint that is specifically formulated for your shutter’s material. Proper surface preparation and application are also essential to ensuring a long-lasting, beautiful finish.
For more detailed information and guidance, consult expert resources from reputable organizations such as Princeton University’s Paint Info Center.
Paint Type | Description | Advantages | Disadvantages |
|---|---|---|---|
Acrylic Latex Paint | Water-based paint made with acrylic resins. | Easy to clean up, quick-drying, excellent color retention, and has low odor | Not as durable as oil-based paint, requires more frequent maintenance |
Oil-Based Paint | Paint made with a drying oil, such as linseed oil or tung oil. | Creates a hard, durable surface, better adhesion, and better protection from moisture and weather conditions | Longer drying time, more difficult to clean up, and has a strong odor |
Exterior Semi-Gloss or Gloss Paint | Paint with a glossy finish that reflects light. | Good durability, easier to clean, and highlights architectural details | May show surface imperfections more clearly |
Should You Opt for Spray Painting or Brush Painting When Painting Shutters?
When it comes to painting shutters, homeowners often find themselves puzzled between two popular methods – spray painting and brush painting. Deciding which technique to use can be challenging as both options have their pros and cons.
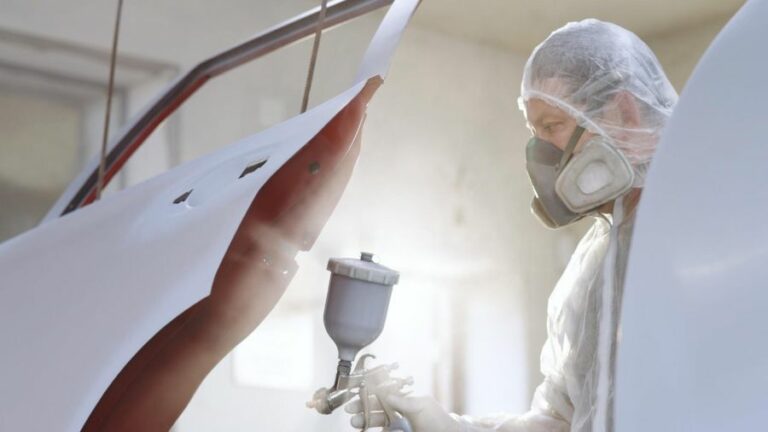
• Spray Painting Shutters: Pros and Cons
– Pros
- Efficiency: Spray painting is undoubtedly the faster method of the two. Large surfaces can be covered in a matter of minutes, which allows the shutters to be completed much quicker than when using a brush.
- Smooth Finish: One of the major advantages of spray painting is the ability to achieve a flawless, even finish with no brush marks. This results in a more professional-looking outcome.
- Ease of Use: Spray painting generally requires less skill and experience compared to brush painting shutters. Even beginners can achieve decent results with some practice.
– Cons
- Equipment and Cost: Spray painting equipment can be expensive, especially if you’re not planning to use it frequently. A quality paint sprayer, the necessary paint, and other supplies can add up quickly.
- Overspray and Masking: Spray painting can cause overspray, and that means extra time spent on masking and protecting surrounding areas. This step increases overall prep time and the chances of making a mistake.
- Waste: Spray painting often leads to more paint waste compared to brush painting. Some of the paint gets dispersed into the air instead of landing on the shutters.
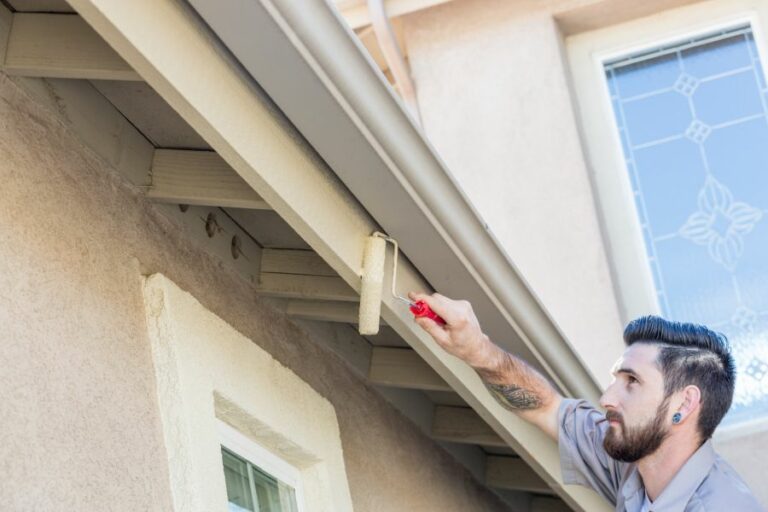
• Brush Painting Shutters: Pros and Cons
– Pros
- Cost-Effective: Brush painting is usually less expensive than spray painting. You only need brushes, paint, and some basic supplies that can be found at your local hardware store.
- Precision: With brush painting, you have better control over the paint application, meaning less risk of accidental paint coverage on unwanted areas.
- Lower Waste: As mentioned before, brush painting usually uses less paint than spray painting due to the absence of overspray.
– Cons
- Time-Consuming: Brush painting shutters take significantly more time compared to spray painting. Large areas can take hours of meticulous work to complete.
- Skill-Dependent: Achieving a smooth and professional-looking finish with brush painting shutters usually demands more skill and experience. Amateurs might struggle to get satisfactory results.
- Possible Brush Marks: One of the main drawbacks of brush painting is the potential for brush marks on the shutters, which might require extra sanding and refinishing.
• Recommendations and Best Practices for Painting Shutters
– When to Choose Spray Painting
Spray painting shutters is recommended when:
- You have multiple shutters to paint, and time is a crucial factor.
- A smooth, professional-looking finish is desired without visible brush marks.
- You’re willing to invest in the necessary equipment.
To make the most of spray paint, it’s essential to follow a few steps:
- Invest in a high-quality paint sprayer to ensure an even, consistent application.
- Use the correct paint type for your sprayer and shutters.
- Mask off and protect surrounding areas to prevent overspray damage.
– When to Choose Brush Painting
Brush painting shutters is recommended when:
- The project is relatively small, and time is not a significant concern.
- You’re working on a tight budget.
- You possess the skill and experience to achieve a smooth finish.
To optimize brush painting results, consider the following tips:
- Choose high-quality brushes that are suitable for the paint type being used.
- Apply multiple thin coats of paint instead of a single thick coat for an even finish without dripping or sagging.
- Sand the shutters between coats to eliminate any brush marks.
Ultimately, the choice between spray painting and brush painting shutters will depend on your specific needs and preferences. Both methods have their advantages and drawbacks, and careful consideration should be taken when determining the best technique for your project.
For further guidance on painting shutters, the Environmental Protection Agency offers helpful tips and recommendations for safely handling paint projects.
What is the Most Efficient and Effortless Method for Painting Shutters?
Boosting your home’s curb appeal is possible with a fresh coat of paint on your shutters.
• Materials and Tools You Will Need
- Paint (choose acrylic latex paint for easy application and longer-lasting finish)
- Primer (if your shutters are not pre-primed)
- Sandpaper (100 to 220 grit)
- Paintbrushes (2-inch and smaller angled brushes)
- Paint roller (for larger shutters)
- Paint tray
- Ladder (if shutters are high up)
- Drop cloth or newspapers
- Screwdriver or drill (for removing shutters)
- Cleaning supplies (soap, water, and sponge)
- Painter’s tape (if painting while shutters are mounted)
• Prepping the Shutters
– Step 1: Remove Shutters from the House (Optional)
It is highly recommended to remove shutters for a more efficient and better-quality paint job. This allows you to easily paint all sides and avoid any paint dripping onto your home’s exterior. Use a screwdriver or drill to remove screws and carefully take down the shutters.
If you prefer not to remove shutters, use painter’s tape to mask off the surrounding areas of the house to protect it from paint splatters.
– Step 2: Clean the Shutters
Clean shutters to remove dirt, dust, and mildew before painting. You can use a mixture of soap and water with a sponge to scrub the surface. Rinse with clean water and let the shutters dry completely before proceeding.
– Step 3: Sand the Shutters
To create a smooth painting surface, lightly sand shutters using 100 to 220 grit sandpaper. Focus on areas with peeling paint, rough patches, or uneven surface. Wipe off the sanding dust with a clean cloth.
– Step 4: Apply Primer (If Necessary)
If your shutters are not pre-primed or if you want to change the color drastically, primer is necessary for better paint adhesion and coverage. Apply a thin, even coat of primer using a paintbrush or roller, allowing it to dry according to the manufacturer’s instructions.
• Painting the Shutters
– Step 1: Choose the Right Paint
Choose an acrylic latex paint for its durability, easy application, and resistance to fading. Check the label to make sure the paint is suitable for outdoor use and adheres well to materials such as vinyl or wood.
– Step 2: Apply the First Coat
Pour the paint into a paint tray and use a 2-inch brush or roller to apply a thin, even coat on the shutters. Begin with the edges, and then move on to the flat surfaces, being careful not to over-apply paint which can lead to drips.
For shutters with slats or louvers, use a smaller angled brush to paint between the slats. Maintaining a consistent painting direction will give a cleaner result.
– Step 3: Allow the Paint to Dry
Allow the first coat to dry according to the paint manufacturer’s instructions, usually between 2 to 4 hours. It’s essential to let the paint dry completely to avoid an uneven finish and to make the subsequent coat easier to apply.
– Step 4: Assess the Need for a Second Coat
Once the first coat is dry, check the coverage and decide if a second coat is necessary. A second coat is typically needed when painting shutters a drastically different color or if the first coat appears uneven or patchy.
– Step 5: Apply the Second Coat (If Necessary)
If a second coat is required, follow the same process as in Step 2, making sure to apply a thin, even coat. Allow the second coat to dry completely before proceeding.
– Step 6: Allow Paint to Cure
Allow the paint to cure for the recommended time based on the manufacturer’s instructions, typically 24 to 48 hours. Properly cured paint ensures a durable, long-lasting finish on your shutters.
• Reattaching the Shutters
After the paint has fully cured, reattach the shutters to your home using a screwdriver or drill if removed earlier. Take care not to damage the new paint job while mounting the shutters.
• Final Thoughts and Expert Recommendations
In conclusion, painting shutters is an easy and affordable way to enhance your home’s appearance. When done correctly, your shutters will have a professional, long-lasting finish that withstands outdoor elements.
For further information and guidance on painting home exteriors, visit the U.S. Department of Energy’s guide on exterior walls in their energy-saving section.
Which Type of Paint is Suitable for Painting Vinyl Shutters?
• Choosing the Right Paint for Vinyl Shutters
Vinyl shutters are a versatile and durable addition to any home’s exterior. They require very little maintenance and are resistant to moisture, rot, and pests, making them a popular choice among homeowners.
However, over time, the color of your vinyl shutters may begin to fade or look outdated. Repainting your vinyl shutters is an excellent way to give your home a fresh new look without the hassle and cost associated with replacing them.
To ensure a professional-looking result that will last, it’s important to choose the right type of paint.
There are a few key factors to consider when selecting paint for your vinyl shutters:
- Type of paint: For best results and long-lasting durability, choose a paint specifically formulated for vinyl surfaces. Look for products labeled as “vinyl safe” or “vinyl exterior paint.”
- Paint finish: Opt for a semi-gloss or satin finish for your vinyl shutters, as these finishes have good adhesion and are less likely to crack, peel, or fade compared to high-gloss finishes.
- Color stability: Lighter colors tend to hold up better against the sun’s UV rays than darker shades, so consider choosing a lighter color to limit potential fading and match the existing color better.
One highly recommended paint type for vinyl shutters is 100% pure acrylic latex paint, which offers excellent adhesion, flexibility, and durability. You can find this type of paint at most hardware stores or online retailers.
• Cleaning and Preparing Your Vinyl Shutters for Painting
Before you begin painting, it’s essential to take the time to clean and prepare your shutters properly. This preparation process will ensure a smooth, long-lasting finish.
- Remove the shutters: If possible, carefully remove your vinyl shutters from your home and place them on a clean, flat surface.
- Clean the shutters: Thoroughly clean the shutters using a mild detergent and water mixture. A sponge, brush, or cloth is suitable for this task. Be sure to remove all dirt, grime, and chalky residue. Rinse the shutters with clean water and allow them to dry completely before moving on to the next step.
- Light sanding: Lightly sand the shutters using fine-grit sandpaper to create a rough surface, allowing the paint to adhere better. Be sure to remove any resulting dust particles with a cloth.
- Prime (if necessary): While most high-quality exterior paints are self-priming, double-check the paint label to see if a separate primer is needed. If so, apply a primer specifically formulated for vinyl surfaces and allow it to dry completely before painting.
• Painting Your Vinyl Shutters
Once your shutters are clean, dry, and prepped, it’s time to apply the paint. Here are the steps to ensure a professional-looking result:
- Apply the first coat: Using a high-quality brush or roller, apply an even coat of your chosen vinyl-safe paint to the shutters. Be sure to cover all surfaces, including the edges and any decorative cutouts. Allow the paint to dry completely based on the manufacturer’s recommended drying time.
- Apply the second coat (if necessary): If the first coat did not provide even and complete coverage, apply a second coat of paint, allowing it to dry completely as well. Some lighter colors may require an additional coat for the desired result.
- Reinstall the shutters: Once the shutters are completely dry, carefully replace them on your home, making sure they are securely fastened in place.
By choosing the right paint and carefully following the steps listed above, you’ll achieve a professional, long-lasting result for your vinyl shutters. Taking the time to properly clean and prepare your shutters will also help extend their lifespan and protect them from weathering and wear. Happy painting!
Type of paint | Description |
|---|---|
100% Acrylic Latex Paint | This paint is water-based, durable, and adheres well to vinyl material. It also resists fading and mildew. |
Urethane-Modified Acrylic Paint | Combines the benefits of acrylic and urethane paints, providing excellent adhesion, durability, and fade resistance. |
Vinyl-Safe Paint | Specifically formulated for use on vinyl, this paint won’t cause warping or buckling and provides excellent color retention. |
Evaluating the Superior Option: Painting or Replacing Vinyl Shutters?
• Considering the Options
When it comes to updating the appearance of your home’s exterior, one common area that can have an impressive impact on curb appeal is the shutters. Vinyl shutters, in particular, are popular options for homeowners due to their durability, affordability, and ease of maintenance.
However, over time, these shutters can fade or become worn, leading homeowners to the decision of whether to paint or replace them.
• The Benefits of Painting Vinyl Shutters
– Cost-Efficiency
One benefit of painting vinyl shutters is that it is typically more cost-effective than replacing them completely. The cost of paint and necessary supplies is often significantly lower than purchasing new shutters.
This may be an important consideration for homeowners on a tight budget or those looking to update their home’s exterior appearance without spending a lot of money.
– Customization
Another advantage of painting vinyl shutters is that it allows you to customize the color to match your home’s exterior design perfectly. This is not always possible when purchasing new shutters, as the available color selections may be limited.
Moreover, painting the shutters allows you to change the color in the future if you decide to update your home’s exterior again.
– Environmental Impact
By choosing to paint your existing vinyl shutters rather than replace them, you are also reducing waste and energy consumption associated with manufacturing new shutters. This is a more eco-friendly option for homeowners who are concerned about their impact on the environment.
– Faster Project Completion
Painting vinyl shutters can also be a faster process than replacing them entirely. While removing and installing shutters can be time-consuming, painting them often involves a few simple steps of cleaning, priming, and applying the desired paint color.
The U.S. Department of Energy provides tips on selecting energy-efficient and durable shutters to save on energy bills and ensure maximum longevity for your home.
• The Benefits of Replacing Vinyl Shutters
– Improved Durability
One of the primary reasons why homeowners choose to replace their vinyl shutters is to obtain improved durability. Over time, vinyl shutters can become brittle and more susceptible to cracking or breaking.
Replacing them with new, higher-quality shutters can provide added longevity and resistance to damage from the elements.
– Enhanced Energy-Efficiency
Newer vinyl shutters often have better energy efficiency properties than older models. Replacing your shutters with energy-efficient options can help improve your home’s insulation and reduce energy costs. This can be particularly significant for those living in areas with extreme temperature fluctuations.
– Modern Designs
Replacing vinyl shutters allows you to choose from a variety of modern designs that may better suit your home’s exterior appearance. This can be particularly beneficial for homeowners who want to update the look of their homes or those looking to sell their property.
– Warranties
Many manufacturers offer warranties on new vinyl shutters, which can provide a sense of security and protection for homeowners. Additionally, the warranty may cover any potential manufacturer defects or issues with the shutters, which could save homeowners money in the long run.
• Making Your Decision: Painting or Replacing Vinyl Shutters
In order to make an informed decision about whether to paint or replace your vinyl shutters, consider the following questions:
- What is your budget for this project? If you are on a tight budget, painting the shutters may be the more affordable option.
- How important is customization to you? If you want to match your shutters’ color to your home perfectly or change the color in the future, painting may be the more suitable choice.
- Are your shutters in good condition, or are they showing signs of wear and damage? If they are significantly worn or damaged, replacement may be the better option for improved durability and performance.
Ultimately, the best choice for your vinyl shutters will depend on your individual preferences, budget, and the current condition of your shutters.
By considering the advantages and disadvantages of each option, you can make a decision that best fits your needs and helps enhance your home’s exterior appearance.
What is the process for painting wooden shutters on the exterior of a home?
A fresh coat of paint on your outdoor wood shutters can dramatically improve the curb appeal of your home. Painting the shutters may seem like a daunting task, but by following the steps outlined in this article, you can achieve professional results with a little time and effort.
• Preparing the Shutters for Painting
Before you begin to paint, it is essential to properly prepare the shutters. This ensures that the paint adheres correctly and lasts longer.
– Clean the Shutters
Start by removing any dirt, mold, or mildew from the shutters. This can be done using a solution of 1 part bleach to 4 parts water. Scrub the surface of the shutters with a nylon brush, and then rinse them thoroughly with clean water. Allow them to dry completely before moving on to the next step.
– Remove Old Paint and Loose Wood
If the shutters have been painted previously and the paint is peeling or flaking, use a paint scraper and a wire brush to remove the loose paint and wood fibers. This step may take some time and effort, but it is crucial to achieve a smooth surface for the new paint to adhere to.
– Repair Damaged Areas
Inspect the shutters for any damaged areas, such as cracks, splits, or rot. Use a wood filler or epoxy to fill in small cracks and holes. For larger damages or rot, it may be necessary to replace the damaged portions of the shutter or even consider buying new shutters.
– Sand the Shutters
Sanding the shutters is an essential step to ensure a smooth surface for the paint to adhere to. Use medium-grit sandpaper (such as 120-grit) to sand the entire surface of the shutters. Be sure to sand any areas where old paint or wood fibers were removed and the entire surface to promote paint adhesion.
– Wipe Down and Prime the Shutters
After sanding, wipe down the shutters to remove any dust or debris. Next, apply a high-quality exterior primer designed for wood surfaces.
This provides a base for the paint and ensures an even and durable finish. Follow the manufacturer’s directions and allow the primer to dry completely before moving on to painting.
• Choosing the Right Paint and Tools
Selecting the appropriate paint and tools for your shutters is crucial for achieving a high-quality and lasting finish.
– Select Exterior Paint
Choose a high-quality exterior paint for the shutters, preferably one that is specifically formulated for wood surfaces. Either acrylic or oil-based paint can be used, but acrylic paints are generally more resistant to cracking, peeling, and fading.
It is important to select a paint that is specifically designed for exterior use, as these paints contain added ingredients to resist weathering and UV damage.
– Pick Tools for Painting
For painting outdoor wood shutters, it is best to use a high-quality paintbrush, as it allows for better control and more even coverage. A 2 to 3-inch angled brush is ideal for most shutter sizes. Additionally, you may want to invest in a paint sprayer for larger projects or if you prefer a smoother finish.
• Painting the Outdoor Wood Shutters
Now that the shutters have been properly prepared and you have selected the appropriate paint and tools, you can begin painting the shutters.
– Apply the Paint
Using the paintbrush or paint sprayer, apply the paint evenly to the surface of the shutters, taking care to follow the direction of the wood grain. You may need to apply multiple coats of paint to achieve full coverage and the desired color.
Be sure to allow each coat to dry according to the manufacturer’s directions before applying the next coat.
– Paint the Edges
Don’t forget to paint the edges of the shutters, as these areas can be susceptible to weathering and may be visible when the shutters are open.
– Allow the Paint to Dry
After applying the final coat of paint, allow the shutters to dry completely, following the manufacturer’s recommendations for drying time. This typically takes around 24 hours but may vary depending on the paint type.
• Reinstalling the Painted Shutters
Once the shutters have dried completely, they can be reinstalled in your home. Use the same hardware and mounting techniques you used to remove the shutters initially.
– Inspect and Maintain the Shutters
After the shutters have been reinstalled, make sure to inspect them regularly for signs of damage, wear, or peeling paint. As needed, clean the shutters with a mild soap and water solution, and repaint when necessary to maintain a fresh and durable appearance.
By following these steps, you can successfully paint your outdoor wood shutters and give your home a fresh and updated look.
Step | Description |
|---|---|
1. Remove the shutters | Remove the wood shutters from the exterior of the house using a screwdriver or drill. |
2. Clean the shutters | Use a brush or sponge with mild soap and water to clean dirt, dust, and debris from the shutters. Rinse and allow them to dry completely. |
3. Sand the shutters | Sand the shutters using sandpaper, removing any old paint or rough areas. Wipe down the shutters again to remove any residual dust. |
4. Apply primer | Apply a coat of primer specifically designed for exterior wood surfaces. Allow the primer to dry according to the manufacturer’s instructions. |
5. Apply exterior-grade paint | After the primer is dry, apply at least two coats of high-quality, exterior-grade paint. Allow each coat to dry thoroughly before applying the next one. |
6. Reattach the shutters | Once the paint is completely dry, reattach the shutters to the exterior of the house using the previously removed hardware. |