Paint For Outdoor Shutters, 25 Things You Should Know
Looking to improve your home’s curb appeal? A fresh coat of paint on your outdoor shutters can make a difference. I’ll discuss the best paint options for outdoor shutters, ensuring durability and a vibrant finish. I will also guide you through the process, from selecting the perfect color to applying techniques.
Paint for outdoor shutters:
Choosing the right paint for outdoor shutters is essential for durability and aesthetics. Suitable paint types include water-based acrylics, oil-based enamel, and latex paint, each with advantages and disadvantages. Considerations for color selection include coordination with siding and trim, home style, and sunlight exposure. Properly prepare, paint, and maintain shutters by cleaning, sanding, priming, applying paint in thin coats, and regularly inspecting and cleaning for long-lasting results and enhanced curb appeal.

Discover the best paint options for your outdoor shutters to ensure durability and longevity. Learn about various finishes, colors, and application techniques to enhance your home’s curb appeal and protect shutters from harsh weather conditions. Happy painting!
Contents
- 1 Exterior Shutter Paint for Outdoor Use
- 2 Which Type of Paint is Most Suitable for Painting Shutters?
- 3 Is it Possible to Paint Exterior Shutters?
- 4 What is the Most Effective Method for Painting Plastic Outdoor Shutters?
- 5 What is the Process for Painting Aged Exterior Shutters?
- 5.0.1 – Gather Your Materials and Tools
- 5.0.2 – Step 1: Remove the Shutters
- 5.0.3 – Step 2: Prepare the Work Area
- 5.0.4 – Step 3: Clean and Inspect the Shutters
- 5.0.5 – Step 4: Remove Old Paint and Sand the Shutters
- 5.0.6 – Step 5: Apply Primer
- 5.0.7 – Step 6: Paint the Shutters
- 5.0.8 – Step 7: Inspect and Touch Up
- 5.0.9 – Step 8: Reattach the Shutters
- 5.0.10 – Step 9: Enjoy the Refreshed Look
- 5.1 • Conclusion
Exterior Shutter Paint for Outdoor Use
Choosing the right paint for your outdoor shutters is crucial in ensuring the durability and aesthetics of your exterior windows. It is important to select a paint that can withstand the various elements it will be exposed to, such as sunlight, rain, and possible damage from insects or animals.
• Types of Paint Suitable for Outdoor Shutters
Several types of paint are available for use on your outdoor shutters, each with advantages and disadvantages. The most common paint types include:
– Water-Based Acrylic Paint
Water-based acrylic paint is popular due to its low toxicity and easy clean-up. It dries quickly, provides a durable finish that prolongs the life of the shutters, and resists yellowing from UV exposure. Be sure to select a high-quality paint that is specifically designed for exterior use.
– Oil-Based Enamel Paint
Oil-based enamel paint has a reputation for providing a smooth, long-lasting finish with excellent adhesion to the surface. This type of paint is known to be more durable than water-based acrylics, but it is more difficult to clean up and requires longer drying times.
Applying a suitable primer when using oil-based paint is essential to ensure the best possible adhesion and protection for your shutters.
– Latex Paint
Latex paint is a versatile, water-based paint that easily adheres to most surfaces, including wood, metal, and vinyl.
Its quick drying time and resistance to chipping, peeling, and fading make it a popular choice for outdoor shutters. Like acrylic paint, choosing high-quality latex paint designed for exterior use is important.
• Color Selection and Performance
When it comes to choosing the perfect color for your outdoor shutters, it’s essential to think about the overall curb appeal and the effect the paint color will have on your home’s exterior. Consider these factors when selecting your shutter paint color:
- Coordinate with your home’s siding and trim color. A complementary color palette will create a cohesive and aesthetically pleasing exterior.
- Think about the style and period of your home. For instance, historic or traditional homes may look best with classic colors, while a modern home could showcase bolder, more contemporary hues.
- Factor in the amount of sunlight that your shutters will be exposed to daily. Darker colors may fade more quickly under direct sunlight, whereas lighter colors will show dirt more easily.
It is recommended to test your chosen paint color on a small section of the shutter before fully committing, as colors can look different depending on the surface material and lighting conditions.
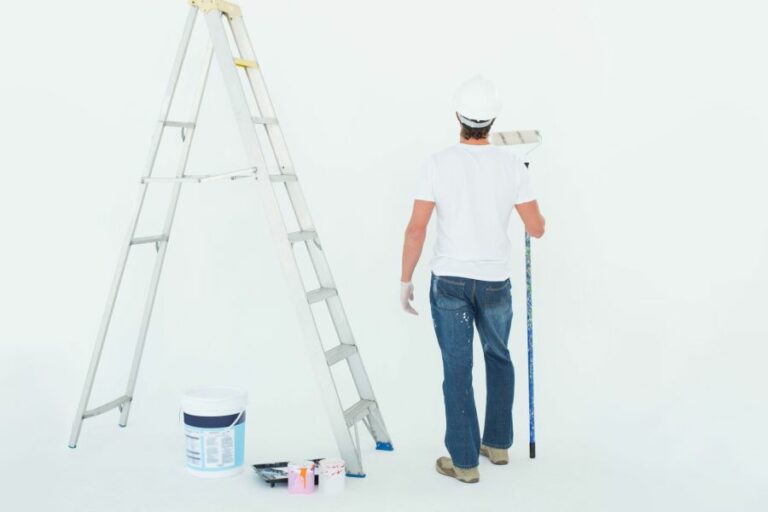
• How to Paint Outdoor Shutters
Now that you’ve selected the best paint and color for your outdoor shutters follow these steps for a professional and long-lasting result:
- Prepare the shutters: Clean the shutters thoroughly to remove any dirt, dust, or debris. Sand any rough areas and remove peeling paint. If the shutters have never been painted before, or you are changing paint types, apply a suitable primer for the chosen paint.
- Protect your workspace: Lay down drop cloths or plastic sheeting to protect the surrounding area from paint drips or spills.
- Apply the paint: Using a good-quality paintbrush or paint sprayer, apply the paint using thin, even coats. Two coats are typically recommended, allowing ample drying time between coats as the paint manufacturer directs.
- Reinstall the shutters: Once the paint has fully cured, reinstall the shutters on your home, not damaging the fresh paint job.
• Maintaining Your Outdoor Shutters
To keep your freshly painted outdoor shutters looking their best for as long as possible, follow these maintenance tips:
- Regularly inspect your shutters for signs of damage or wear. Repair and touch up the paint as needed to avoid more significant issues from developing.
- Clean your shutters with a gentle cleanser and soft brush, taking care not to damage the paint surface. Rinse thoroughly with water and allow to air dry.
- Periodically lubricate any moving parts, such as hinges, to ensure they continue to operate smoothly and prevent rust.
- Consider adding a clear, UV-resistant topcoat to your shutters for added protection from sun damage.
In conclusion, selecting the right paint type and color for your outdoor shutters is crucial for both the durability and appearance of your home’s exterior. Properly preparing, painting, and maintaining your shutters will ensure they provide years of protection and enhance your home’s curb appeal.
Which Type of Paint is Most Suitable for Painting Shutters?
Finding the best paint for painting shutters can be a daunting task. With many options available in the market, it’s essential to understand the different types of paints and their benefits before making a decision.
• Acrylic Paints
Acrylic paint is a popular choice for homeowners due to its durability, fast-drying properties, and ease of use. Known for adhering well to various surfaces, acrylic paints are water-resistant, making them suitable for exterior shutter projects.
– Advantages of Acrylic Paints
- Water-based: Acrylic paint is easy to clean from brushes and other surfaces with warm water and soap, making it ideal for do-it-yourself painters.
- Quick-drying: The fast-drying properties of acrylic paints allow for shorter waiting times between coats, completing your project faster.
- Low VOCs: Acrylic paints emit fewer volatile organic compounds (VOCs) than oil-based options, making them a more environmentally-friendly choice.
- Adhesion: Acrylic paint creates a strong bond with various surfaces, including wood, vinyl, and metal shutters.
– Disadvantages of Acrylic Paints
- Coverage: Acrylic paint may require more coats to achieve the desired level of opacity or color, particularly for darker shades.
- Compatibility: Some paints may not be compatible with oil-based primers or previous oil-based paint layers. Be sure to check the product’s compatibility before applying.
Recommendation: After thorough research and personal experience with various brands, I recommend Sherwin Williams’ Emerald Rain Refresh for the best results with acrylic paint on shutters.
• Latex Paints
Latex paint is another popular choice for painting shutters, as it shares many advantages with acrylic paints. It is a water-based paint with excellent adhesion, dries quickly, and has low VOC emissions.
– Advantages of Latex Paints
- Weather-resistant: Latex paints have excellent resistance to cracking, peeling, and mildew, making them well-suited for exterior shutters.
- Easy application: Latex paint is easy to apply using brushes, rollers, or sprayers and can be easily cleaned up with water.
- Flexibility: The natural flexibility of latex helps the paint withstand temperature fluctuations and other environmental factors, improving the paint’s overall longevity.
– Disadvantages of Latex Paints
- Susceptibility to freezing: Latex paint can be adversely affected by freezing temperatures during application or storage, potentially leading to diminished paint quality.
- Coating capabilities: Similar to acrylic paints, latex paints may require more coats to achieve the desired coverage or color, particularly for darker shades.
Recommendation: I recommend Behr Premium Plus Exterior Paint for those seeking a high-quality latex shutter paint option.
• Oil-based Paints
Oil-based paints, also known as alkyd paints, have been widely used for years. While not as common today due to environmental concerns, these paints offer some unique advantages for certain shutter materials and conditions.
– Advantages of Oil-based Paints
- Curing properties: Oil-based paints cure through oxidation rather than drying, creating a harder, more durable finish that is resistant to chipping and peeling.
- Coverage: Oil-based paints generally provide better coverage with fewer coats than water-based counterparts.
– Disadvantages of Oil-based Paints
- Longer drying time: Oil-based paints take longer to dry, potentially extending project duration and increasing the risk of debris, insects, or dust sticking to the wet paint.
- Cleanup: Cleaning brushes and other equipment requires solvents, making cleanup more involved and challenging.
- VOC emissions: Higher levels of VOCs emitted by oil-based paints are a significant hurdle for those concerned with environmental factors or odor.
Recommendation: I recommend Benjamin Moore’s Impervex Latex High Gloss if you prefer an oil-based paint for shutter projects.
• Key Factors to Consider
When selecting the best paint for your shutters, consider the following factors:
- Material and surface preparation: Depending on the shutter material (wood, vinyl, metal), you may need to prepare the surface differently, including using a primer or sanding to ensure proper adhesion.
- Weather conditions: Be mindful of temperature and humidity when painting your shutters, as both can affect paint performance.
- Paint type and compatibility: Ensure that your chosen paint is compatible with the shutter’s material and any previous paint layers.
- Maintenance and durability: Select a paint that requires minimal maintenance and will withstand the test of time.
By considering these factors, alongside the advantages and disadvantages of each paint type, you can confidently choose the best paint for your shutter project, giving your home a stunning and durable facelift.
Paint Type | Pros | Cons |
|---|---|---|
Acrylic Latex Paint | Water-based, easy to clean, UV-resistant, expands and contracts with temperature changes | Not as durable as oil-based paints |
Oil-Based Paint | Very durable, high-gloss finish, abrasion-resistant | Difficult to clean, longer drying time, less environmentally friendly |
Exterior Alkyd Paint | Durable, abrasion-resistant, adheres well to most surfaces | Slower drying time, requires turpentine or mineral spirits for clean-up |
Aerosol Paint | Easy application, no brush strokes | Less control, not as durable as other paint types, needs multiple coats |
Is it Possible to Paint Exterior Shutters?
Painting exterior shutters enhances your home’s aesthetic appeal and protects them from harsh weather conditions. With the proper knowledge and technique, you can definitely paint your outside shutters and achieve a professional finish.
• Materials and Tools Needed for Painting Outside Shutters
Here is a list of materials and tools you need to paint your exterior shutters:
- Paint, either latex or oil-based exterior paint
- Primer
- Paintbrush or paint roller
- Paint sprayer (optional)
- Sandpaper, 120-grit, and 220-grit
- Painters tape
- Drop cloth or plastic sheeting
- Screwdriver or drill
- Ladder or scaffold
- Paint tray
- Bucket and clean water
- Stir stick for paint
- Cloth or rag
• Choosing the Right Paint and Primer for Your Shutters
Choose a high-quality, durable exterior paint when selecting paint for your shutters. The two common types of paint to consider are latex and oil-based paints. Latex paint is water-based, easy to clean up, and environmentally friendly.
It also dries quickly, resists chipping and blistering, and offers good color retention. On the other hand, oil-based paint takes longer to dry, produces strong fumes, and requires a special clean-up. However, it offers superior durability and still displays an excellent finish.
You should also select a suitable primer for your shutters. An oil-based primer is ideal for wooden shutters, while an acrylic-based primer is suitable for plastic, vinyl, or composite shutters. The use of primer not only provides a stable base for the paint but also helps to achieve a consistent finish.
• Prepare for Painting: Removing and Cleaning Shutters
First, remove the shutters from your home’s exterior walls. Removing them simplifies the cleaning and painting process and ensures you don’t overlook hidden areas or miss spots.
To remove the shutters, use a screwdriver or a drill to detach them from the walls. If your shutters use hinges, make sure to mark the accompanying frames, so you can easily reattach them later.
Once the shutters are removed, clean them thoroughly to remove dirt, grime, mildew, and any peeling paint. Use a cloth or rag with warm, soapy water to clean vinyl, composite, or metal shutters.
For wooden shutters, use a soft-bristled brush to avoid damaging the surface. After cleaning, allow the shutters to dry completely.
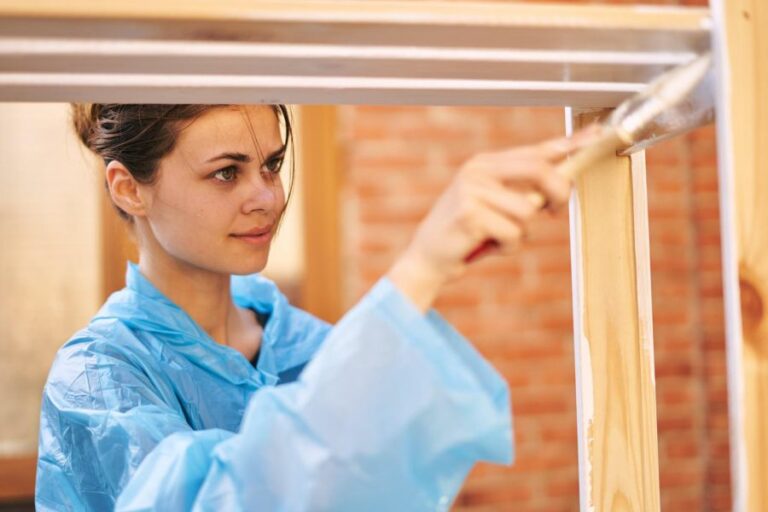
• Sanding, Priming, and Taping
The next step is to prepare the shutters’ surface for painting. For wooden shutters, sand the surface to remove any rough spots or loose paint. Start with 120-grit sandpaper and finish with 220-grit for a smooth finish. Wipe down the shutters with a clean, damp cloth to remove the dust.
Now, apply the primer to the shutters using a paintbrush or paint roller, following the manufacturer’s instructions on the container. The primer creates an even base and will help your paint adhere to the shutters. Allow the primer to dry as per the recommended drying time, which is typically a few hours.
Once the primer is dry, use painter’s tape to cover any areas you don’t want to be painted, such as hardware or hinges.
• Painting the Shutters
When applying paint, you have the option to use a brush, roller, or paint sprayer. A paint sprayer can provide a smooth, even coat of paint but requires a little more skill to use effectively. A paintbrush or roller can also produce great results with proper technique.
To paint the shutters, pour your paint into a tray and stir it well. Apply the paint in thin, even coats, moving in the same direction as the slats or panels. This helps to avoid drips and ensure an even distribution of paint.
Allow the first coat to dry according to the manufacturer’s instructions, and then apply a second coat.
• Reinstalling Your Painted Shutters
After the final coat of paint has dried completely, remove the painter’s tape and reinstall the shutters on your home’s exterior walls. Use a ladder, scaffold, or another means of reaching the height required for reattachment.
Ensure the shutters are securely fastened before stepping back and admiring your beautiful, newly painted shutters.
Painting your outside shutters is a manageable project that delivers both aesthetic and functional benefits. When done correctly, a well-executed paint job will improve your home’s curb appeal and offer protection for years to come.
Question | Answer |
|---|---|
Can you paint outside shutters? | Yes, painting outside shutters is a common way to refresh their appearance and protect them from weathering. |
What is the Most Effective Method for Painting Plastic Outdoor Shutters?
Painting plastic outdoor shutters can be a cost-effective way to refresh the appearance of your home, but there are several factors to consider in order to achieve a professional and long-lasting finish.
• Preparing the Shutters for Painting
Before starting any painting project, preparing the surface properly is essential to ensure the paint adheres effectively and provides a durable finish. Follow these steps for optimal results:
– Cleaning the Shutters
Begin by removing the shutters from your home’s exterior. Lay them on a flat surface and thoroughly clean both sides with a solution of mild soap and water, using a soft-bristled brush to remove any dirt or debris. Rinse the shutters with clean water and allow them to dry completely.
– Lightly Sanding the Surface
To promote paint adhesion, lightly sand the surface with fine-grit sandpaper (around 220-grit). This will create small abrasions for the paint to grip onto while keeping the process gentle enough not to damage the plastic. Wipe down the shutters with a clean, dry cloth to remove any sanding dust.
– Repairing any Damage
Inspect the shutters for any damage, such as cracks or chips in the plastic. If you find any, use exterior-grade plastic filler to repair the damage according to the manufacturer’s instructions. Once the filler has hardened, sand it smooth and wipe down the surface again.
• Choosing the Right Paint for Plastic Shutters
The type of paint you choose is crucial for achieving a successful outcome. Here are some recommendations based on our experience:
– Acrylic Latex Paint
Acrylic latex paint is a popular choice for painting plastic shutters due to its durability, flexibility, and resistance to fading. It also has low levels of volatile organic compounds (VOCs), making it an environmentally friendly option.
Be sure to use high-quality exterior-grade acrylic latex paint, and choose a paint with built-in ultraviolet (UV) protection for added longevity.
– Plastic Adhesion Promoter
Before applying the acrylic latex paint, I recommend using a plastic adhesion promoter specifically designed to improve the bond between paint and plastic surfaces.
Apply the promoter to the shutters according to the manufacturer’s instructions, and allow the recommended drying time before proceeding to paint.
– Paint Spray or Brush
While both spraying and brushing techniques can be used for painting plastic shutters, spraying is generally the preferred method, as it provides a smooth, even finish without brushstrokes. However, if you do choose to brush, use a high-quality synthetic brush for the best results.
• Painting the Shutters
With proper preparation and materials in hand, it’s time to paint. Here are the steps to follow for a professional finish:
– Priming
While not strictly necessary when using acrylic latex paint, applying a primer specifically designed for plastic can further improve adhesion and provide a smoother finish. Apply a thin, even coat of primer to both sides of the shutters and allow it to dry according to the manufacturer’s instructions.
– Applying the Paint
Using your chosen method (spray or brush), apply a thin, even coat of acrylic latex paint to the shutters. Be sure to use long, straight strokes to minimize the risk of drips or uneven coverage.
Allow the paint to dry according to the manufacturer’s guidelines and verify whether a second coat is necessary for optimal coverage and durability.
– Reinstalling the Shutters
Once the final coat of paint has dried completely, reinstall the shutters on your home, taking care not to scratch or chip the newly-applied paint.
• Final Tips for a Successful Project
Here are some expert tips to help ensure your painting project is a success:
- Work in a well-ventilated area, preferably outside or in a garage.
- Choose a moderate temperature and low humidity day for painting, as extreme conditions can affect paint adhesion and drying times.
- Take your time and don’t rush the preparation or application process; patience is key to achieving a professional-looking result.
- Slightly overlapping strokes while spraying will prevent thin spots or uneven coverage.
Following these guidelines, you will be well on your way to achieving a beautifully-painted set of plastic outdoor shutters, enhancing your home’s curb appeal and overall aesthetic.
Step | Description |
|---|---|
1 | Clean the shutters with soapy water and a brush to remove dirt and grime. |
2 | Rinse the shutters with clean water and let them dry completely. |
3 | Lightly sand the shutters with fine-grit sandpaper to promote paint adhesion. |
4 | Wipe down the shutters with a damp cloth to remove any dust and debris from sanding. |
5 | Apply a coat of primer specifically designed for plastic surfaces and let it dry according to the manufacturer’s instructions. |
6 | Apply the first coat of paint, preferably using a paint sprayer for an even and smooth finish. Be sure to use a paint that is designed for use on plastic surfaces and is suitable for outdoor use. |
7 | Allow the first coat of paint to dry according to the manufacturer’s instructions. |
8 | Apply a second coat of paint if necessary for full coverage and let it dry. |
9 | Reattach the shutters to the house once the paint is completely dry. |
What is the Process for Painting Aged Exterior Shutters?
Painting old exterior shutters can give your home a fresh and updated look.
– Gather Your Materials and Tools
Before you begin, it’s essential to have the proper materials and tools on hand. Here’s a list of what you’ll need:
- Paint (preferably high-quality exterior paint)
- Primer (oil-based or latex)
- Paintbrushes (one for the primer and a clean one for the paint)
- A drop cloth or newspapers to protect the surface underneath the shutters
- 180-grit and 80-grit sandpaper
- A soft cloth or tack cloth for wiping down the shutters
- A cordless screwdriver or drill
- A scraper for removing old paint
- Wood filler (optional)
- Exterior-grade caulk (optional)
– Step 1: Remove the Shutters
First, remove the shutters from your home using a cordless screwdriver or drill. Be cautious not to damage the siding of your house or the shutters themselves during this process. As you remove the shutters, make a note of which shutter belongs to which window to make reinstallation easier later on.
– Step 2: Prepare the Work Area
Lay a drop cloth or newspaper on the ground in a well-ventilated area to catch any paint drips or debris. Place the old shutters on top of the protective material.
– Step 3: Clean and Inspect the Shutters
Ensure your shutters are free of dirt, dust, and debris. Use a soft cloth to wipe them down. Inspect the shutters for any holes, cracks, or damages. Use wood filler to repair any damage, following the manufacturer’s instructions. Allow the filler to dry as directed.
– Step 4: Remove Old Paint and Sand the Shutters
Using a scraper, carefully remove any old, flaking paint from the surface. You may need to use a finer scraper or even a utility knife to get into the tight corners and grooves. Be cautious not to gouge the wood or damage the shutters during this process.
Next, use 80-grit sandpaper to rough up the surface of the shutters. Sand in the direction of the wood grain to improve paint adhesion. After the initial sanding, switch to 180-grit sandpaper to smooth the surface.
Once you’ve finished sanding, wipe down the shutters with a tack cloth or soft cloth to remove any dust or debris.
– Step 5: Apply Primer
Applying primer to the shutters is essential for ensuring proper paint adhesion and long-lasting results. Use a paintbrush to apply an even coat of oil-based or latex primer to each shutter, starting with the edges and working toward the center.
Allow the primer to dry according to the manufacturer’s instructions.
– Step 6: Paint the Shutters
Once the primer is fully dry, it’s time to paint. Use a clean paintbrush to apply a coat of high-quality exterior paint, working in the same order as when you applied the primer. Start with the edges and work toward the center of the shutter.
It’s best to apply two thin coats of paint rather than one thick coat, as this will result in a more even and durable finish. Allow the paint to dry according to the manufacturer’s instructions.
– Step 7: Inspect and Touch Up
Inspect the shutters for any missed spots or uneven areas. Touch up any necessary areas with additional paint and allow it to dry thoroughly.
– Step 8: Reattach the Shutters
Use your cordless screwdriver or drill to reattach the shutters to your home, placing them back in their original positions. If necessary, use exterior-grade caulk to seal any gaps between the shutters and your house siding.
– Step 9: Enjoy the Refreshed Look
With the shutters reattached, step back and admire your home’s fresh, updated look. With proper care and maintenance, your newly painted shutters should last for years to come.
• Conclusion
In summary, painting old exterior shutters is an excellent way to improve your home’s curb appeal and extend the life of your shutters.
By gathering the necessary materials and tools, removing and preparing the shutters, applying primer and paint, and reattaching them to your home, you can achieve professional-looking results that make a significant difference in your home’s appearance.
Step | Description |
|---|---|
1 | Remove the shutters from the exterior of the house. |
2 | Clean the shutters with soap and water, removing dirt, dust, and any loose paint. |
3 | Allow the shutters to dry completely. |
4 | Sand the shutters with a fine-grit sandpaper to remove any remaining loose paint and create a smooth surface for painting. |
5 | Wipe the shutters with a damp cloth to remove any dust or debris from sanding. |
6 | Apply a coat of primer to the shutters, allowing it to dry according to the manufacturer’s instructions. |
7 | Apply one or two coats of exterior paint, allowing each coat to dry according to the manufacturer’s instructions. |
8 | Once the paint is completely dry, reattach the shutters to the exterior of the house. |