Analyzing Surfaces For Proper Preparation. What Pros Say
When it comes to ensuring a successful outcome for your project, one critical aspect is often overlooked: analyzing surfaces for proper preparation. We have the knowledge and experience to help you confidently master this skill, and look at the critical factors in assessing various surfaces, guaranteeing your final product’s strong foundation and longevity.
Analyzing surfaces for proper preparation:
Surface preparation is crucial for the success of painting or coating projects, ensuring the final result’s quality, durability, and longevity. Analyzing surfaces involves visual inspection, testing for contaminants and moisture, and assessing surface profiles. Surface preparation methods include cleaning, abrasive blasting, power tool cleaning, chemical stripping, and waterjet cleaning. Properly prepared surfaces enhance the durability and longevity of coatings.

Uncover the secrets to achieving flawless surfaces every time! Dive deeper into the critical techniques and methodologies for proper surface preparation across various materials. Stay tuned for expert tips and tricks to ensure your projects always start off on the right foot.
Contents
- 1 Examining Surfaces for Adequate Preparation
- 2 Different Surface Preparation Techniques Explored
- 3 Key Steps for Thorough Surface Preparation
Examining Surfaces for Adequate Preparation
• Importance of Surface Preparation
Preparing a surface properly is crucial for the success of any painting or coating project.
Whether it’s a simple home painting job or a complex industrial application, surface preparation plays a significant role in determining the quality, durability, and longevity of the final result.
Inadequate or improper surface preparation can lead to various problems, such as peeling, bubbling, or premature failure of the coating system.
• Types of Surfaces and Common Issues
There are several types of surfaces that require proper preparation, including metallic, concrete, and wood surfaces. Each type of surface has its own unique set of issues and challenges that must be addressed during the preparation process. Some common issues that may be encountered include:
- Rust and corrosion on metallic surfaces
- Efflorescence and moisture issues in concrete surfaces
- Decomposition and rot in wooden surfaces
• Steps for Analyzing Surfaces
1. Visual Inspection
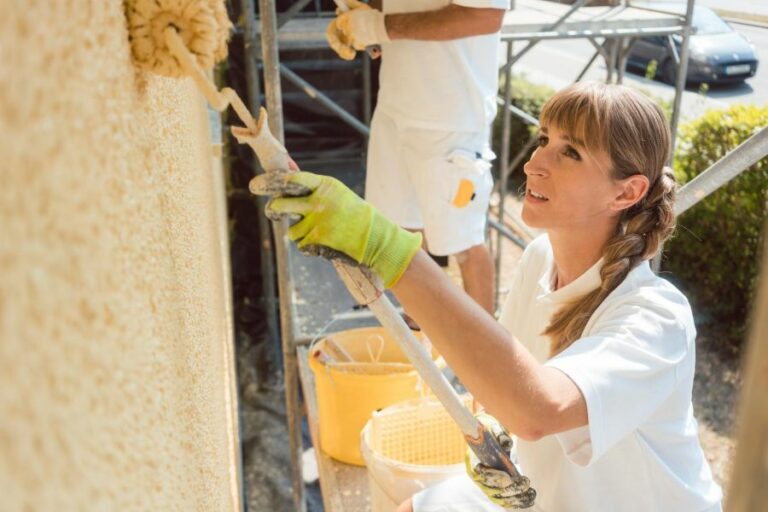
The first step in analyzing a surface is conducting a thorough visual inspection. Look for any obvious signs of damage, such as cracks, dents, peeling paint, or rust. Keep note of these areas, as they will need to be addressed during the surface preparation process.
2. Testing for Contaminants
Contaminants like dirt, grease, oil, or salts can have a detrimental effect on the adhesion and performance of the applied coating. Use appropriate testing methods to detect the presence of these contaminants on the surface.
3. Testing for Moisture
Moisture levels can significantly impact the adhesion and performance of coatings, especially on concrete surfaces. Use a moisture meter to check for the presence of any moisture on the surface.
For concrete surfaces, I recommend using tests such as the ASTM F1869 (Calcium Chloride Test) or ASTM F2170 (Relative Humidity Test).
4. Assessing Surface Profile
The surface profile, which refers to the roughness and texture of the surface, is another crucial aspect that must be analyzed.
The appropriate surface profile ensures proper mechanical adhesion of the coating and depends on the type of coating being applied. Surface profile measurement methods include using a replica tape, surface comparator, or surface roughness gauge.
• Surface Preparation Methods
Based on my experience and the analysis of the surface, I recommend using one or more of the following surface preparation methods:
1. Cleaning
Remove any loose dirt, dust, or debris from the surface using a brush, cloth, or vacuum cleaner. Additionally, remove any contaminants, such as grease or oils, by using suitable cleaning solvents or degreasers.
2. Abrasive Blasting
This method involves the use of abrasive media, such as sand, steel shot, or crushed glass, to clean and remove corrosion, old coatings, and contaminants from the surface. Abrasive blasting can also help in achieving the desired surface profile.
3. Power Tool Cleaning
Use power tools such as wire brushes, grinders, or sanders to remove rust, old coatings, and contaminants from the surface. This method is suitable for small areas or surfaces with complicated shapes.
4. Chemical Stripping
Chemical stripping involves the use of chemical agents to remove old coatings or contaminants from the surface. This method is ideal for delicate surfaces where mechanical cleaning methods may cause excessive damage.
5. Waterjet Cleaning
High-pressure waterjet cleaning can be utilized for cleaning and removing contaminants without the use of abrasive media. This method is suitable for surfaces that have strict environmental regulations or require minimal dust generation.
• Final Thoughts
In conclusion, analyzing surfaces for proper preparation is an essential step in ensuring the success of any painting or coating project. Consider various factors such as surface type, contaminants, moisture, and surface profile in your analysis.
By addressing these issues and following the recommended surface preparation methods, you can greatly increase the durability and longevity of your painting or coating project.
Different Surface Preparation Techniques Explored
Surface preparation is a critical step in many industrial processes, as it ensures the durability, efficiency, and safety of various materials and equipment.
As an expert in the field, I’ve seen how different types of surface preparation can help maintain the integrity of these systems by removing contaminants, promoting adhesion, and enhancing performance.
• Mechanical Surface Preparation
Mechanical surface preparation involves using tools and equipment to manually remove contaminants or create specific surface profiles. These methods are popular due to their efficiency and versatility, making them suitable for different materials and applications.
– Abrasive Blasting
Also known as sandblasting, abrasive blasting is a technique that employs high-pressure air or water to propel abrasive particles onto the surface.
This effectively removes rust, paint, and other contaminants while providing a textured profile to enhance adhesion. I recommend using abrasive blasting for large-scale projects where the surface requires rapid and thorough cleaning.
– Grinding
Grinding employs abrasive wheels or discs to remove material from the surface, resulting in a smooth, even finish. Suitable for both metal and concrete surfaces, this method can remove paint or coatings and level uneven areas.
As grinding can generate significant heat and noise, I advise using proper personal protective equipment (PPE) and following safety guidelines.
– Needle Scaling
Needle scaling is especially effective for the removal of rust or scaling from metal surfaces. It employs a tool with a bundle of sharp needles that are repeatedly impacted against the surface, breaking away rust and other contaminants.
I recommend needle scaling for hard-to-reach areas and surfaces with irregular shapes.
• Chemical Surface Preparation
Chemical methods involve the application of cleaning solutions or chemical agents to modify surface properties. These are typically used when surfaces cannot withstand the rigors of mechanical methods or when contaminants are not easily removable through other means.
– Acid-Etching
Acid-etching employs acidic solutions, typically muriatic or phosphoric acid, to dissolve contaminants on the surface and create a rough profile. This process is commonly used on concrete surfaces prior to the application of paint or coatings to enhance adhesion.
However, acid-etching generates hazardous fumes and by-products, so I strongly advise taking proper safety precautions and disposing of waste materials responsibly.
– Solvent Cleaning
Solvent cleaning uses various organic solvents to break down and remove contaminants such as oil, grease, and waxes. The choice of solvent often depends on the specific material and contaminant in question.
Be sure to use appropriate ventilation and PPE, as many solvents produce toxic fumes and pose a fire risk.
• Thermochemical Surface Preparation
Thermochemical methods involve the use of heat or temperature-controlled reactions to modify the surface properties. These are typically employed for metal surfaces, where the formation of new chemical compounds can improve physical characteristics or protect against corrosion.
– Heat Treatment
Heat treatment involves exposing the material to controlled high temperatures to modify its properties, such as hardness, strength, and ductility. This can be accomplished through processes like annealing, quenching, and tempering.
When selecting a heat treatment method, I recommend considering the specific material and desired properties to achieve optimal results.
– Conversion Coating
In the conversion coating process, chemicals react with the metal surface to form a protective layer that inhibits corrosion and enhances adhesion. Common conversion coatings include phosphate, chromate, and oxide layers.
I recommend this method for metal surfaces that require additional corrosion resistance or improved bonding with paints and other coatings.
• Conclusion
In summary, there is a variety of surface preparation methods available, each suited to specific materials, contaminants, and desired outcomes. Mechanical methods like abrasive blasting, grinding, and needle scaling can address large-scale or rapid cleaning needs, while chemical techniques are useful for delicate materials or stubborn contaminants.
Thermochemical methods, such as heat treatment and conversion coating, are particularly suited for metal surfaces. When selecting a method, understanding the specific requirements of each project, being mindful of safety precautions, and leveraging professional expertise are key to achieving optimal results.
Surface Preparation Method | Description |
|---|---|
Cleaning | Removal of dirt, grease, oil, or other contaminants from the surface. |
Abrasive Blasting | Using a high-velocity stream of abrasive material to remove contaminants, roughen the surface and achieve the desired profile. |
Chemical Stripping | Using chemicals to remove paint, rust, and other contaminants from the surface. |
Hand Tool Cleaning | Using hand tools such as scrapers, wire brushes, or sandpaper to remove contaminants and roughen the surface. |
Power Tool Cleaning | Using power tools like grinders, sanders, or needle guns to clean and prepare the surface. |
Water Jetting | Using high-pressure water to remove contaminants and roughen the surface. |
Ultrahigh-Pressure Water Jetting | Using ultrahigh-pressure water to remove contaminants, coatings, and achieve the desired surface profile. |
Etching | Applying chemical etchants to produce a chemically roughened surface. |
Key Steps for Thorough Surface Preparation
Proper surface preparation is a crucial step in ensuring the success of any coating, painting, or adhesive project. It helps in achieving optimal adhesion, performance, and longevity of the applied material.
• Determine the Surface Type and Condition
Before starting the surface preparation process, it is essential to identify the surface type and its condition. This information will help in selecting the appropriate methods and materials needed for preparing the surface.
- Surface Type: Understand the material you are working with, such as concrete, wood, metal, or plastic. Each surface type requires different preparation techniques and products.
- Surface Condition: Assess the surface for any existing coatings, contaminants, or damage that may affect adhesion, performance, or appearance. Typical surface imperfections include rust, paint, oil, grease, dirt, mold, and mildew.
• Cleaning the Surface
The first step in surface preparation is cleaning. A clean surface is essential for proper adhesion, and any dirt or contaminants may cause failure in the applied material. There are several methods to achieve a clean surface, depending on the material and contaminants present:
- Washing: Using soap and water, scrub the surface to remove dirt and other loose debris. Rinse thoroughly with clean water and allow the surface to dry completely.
- Dusting: For interior surfaces, such as walls and ceilings, use a dry cloth or vacuum cleaner to remove surface dust.
- Degreasing: If grease or oil is present, use a degreaser to remove these contaminants. Follow the manufacturer’s instructions and rinse the surface with clean water.
- Mold and Mildew Removal: Use a 1:3 bleach-to-water solution to treat surfaces affected by mold or mildew. Apply the solution with a sponge or brush, let it sit for 15 minutes, and then rinse with clean water.
• Surface Repairs and Restoration
After cleaning, perform any necessary surface repair or restoration work to correct any damage or defects. Proper surface repair will enhance adhesion and overall appearance. Depending on the surface type and condition, common repairs may include:
- Rust: Remove rust with a wire brush or sandpaper for metal surfaces. Afterward, apply a rust-converting primer to protect against future rust formation.
- Peeling Paint: Scrape and sand any peeling, flaking, or blistering paint from wood or other surfaces. Repairs may include the use of wood filler, spackling, or a skim coat of joint compound.
- Cracks and Holes: Fill any cracks or holes with an appropriate filler or patching compound for the surface material. Sand the area smooth once the filler is dry.
• Abrasion Techniques
Abrasion techniques help roughen the surface to improve adhesion for coatings, adhesives, and other materials. The right technique depends on the surface type and the material being applied. A few common techniques include:
- Sandblasting: Also known as abrasive blasting, this method is used primarily for metal, concrete, and brick surfaces. It involves propelling a stream of abrasive material against the surface to remove contaminants and create a rough profile. Protective equipment and proper containment are essential to prevent environmental harm and ensure worker safety.
- Sanding: Use sandpaper to create a smooth and even surface for wood, drywall, or other materials. Choose the appropriate grit size and type of sandpaper for your specific surface.
- Etching: Chemical etching uses acid or other chemicals to roughen the surface, particularly for concrete or metal surfaces. Follow the manufacturer’s recommendations for using the appropriate etching solution and rinsing procedure.
• Priming and Sealing
Once the surface is clean, free from defects, and properly abraded, applying a primer or sealer may be necessary. Primers and sealers help improve adhesion, even out the surface, and ensure consistent color and appearance.
- Priming: Applying a primer (such as latex, oil-based, or metal-specific primer) to wood or other porous surfaces will help seal the surface and create an even base for the topcoat.
- Sealing: Concrete and other porous surfaces may require a sealer to prevent the penetration of water, moisture, or contaminants. This step helps ensure the durability and longevity of any applied coatings.
• Surface Preparation Precautions
Throughout the surface preparation process, safety should always be a top priority. To ensure safety and best results, follow these precautions:
- Personal Protective Equipment (PPE): Wear appropriate safety gear, such as goggles, gloves, and respirators, to protect from dust, chemicals, and other hazards during the preparation process.
- Ventilation: When using chemical cleaners or abrasive processes, ensure proper ventilation to prevent respiratory issues and other health concerns.
- Containment: To prevent environmental damage, properly contain sandblasting or chemical waste.
By following these guidelines and recommendations for proper surface preparation, you will increase the success, durability, and appearance of your coatings, adhesives, and other applied materials. Remember, thorough preparation leads to better results and a longer-lasting finish.
Step | Description |
|---|---|
1 | Clean the surface |
2 | Remove any loose, flaking, or peeling paint |
3 | Repair damages, gaps, and cracks |
4 | Sand and smooth the surface |
5 | Remove dust and debris with a tack cloth |
6 | Prime the surface if necessary |