Banish Mold In the Surface Preparation Process. What Pros Say
It’s no secret that mold can wreak havoc on a project, compromising the integrity and durability of a surface. But worry not, as we’ve got the knowledge and expertise to tackle this pesky invader head-on. By understanding the root causes of mold formation and employing effective techniques to banish it in your surface preparation process, you can set the stage for a pristine and long-lasting result.
Banish mold in the surface preparation process:
To banish mold during surface preparation, start by fixing moisture sources such as leaks and poor ventilation. Use protective gear when removing mold and clean, mild cases with detergent, while severe cases may need commercial mold removal products or professional help. Prepare surfaces by sanding, using mold-resistant primer, paint, and sealing gaps. Prevent future growth by keeping humidity low, ensuring proper ventilation, and regularly inspecting susceptible areas. Follow EPA guidelines for best results.

Discover the secrets to effectively banishing mold during the surface preparation process in our comprehensive guide. Learn about essential tools, techniques, and safety measures to ensure a mold-free finish. Read on and give your surfaces the flawless, healthy foundation they deserve!
Contents
- 1 Eliminate Mold During Surface Preparation
- 2 Effective Methods for Mold Removal on Surfaces
- 3 Eradicating Mold on Porous Materials
- 3.1 • Identifying Mold Growth on Porous Surfaces
- 3.2 • Addressing the Root Cause: Preventing Mold Growth
- 3.3 • Safety Measures when Dealing with Mold
- 3.4 • Preparing the Area and Materials for Mold Removal
- 3.5 • Removing Mold from Porous Surfaces
- 3.6 • Finally, Dispose of Mold-Contaminated Items
- 3.7 • Conclusion
- 4 Mold Abatement Duration: What to Expect
- 5 Safely Remove Mold to Prevent Spore Dispersal
Eliminate Mold During Surface Preparation
Mold is a common problem in most homes and commercial buildings, and it is crucial to address this issue before starting any surface preparation process. Mold can have detrimental effects on the health of the building occupants and compromise the structural integrity of these spaces.
• Identify the Source of the Mold
Before tackling the mold issue, begin by identifying its source. Mold thrives in moist conditions and is commonly found in areas such as bathrooms, basements, and around leaking pipes.
By addressing the underlying moisture problem, you will prevent mold from recurring after the surface preparation process. Some common sources of moisture include:
- Leaking pipes
- Roof leaks
- Poor ventilation
Once the source of moisture has been fixed, proceed to clean and prepare the surfaces.
• Protective Measures for Mold Removal
Mold removal can be hazardous, so it is important to take the necessary precautions to ensure personal safety. This includes:
- Wearing gloves: Use rubber, latex, or nitrile gloves when handling mold-infested materials.
- Wearing a mask: Choose a mask that is rated N95, which filters out most mold spores and particulates.
- Wearing protective clothing: Coveralls or long-sleeved clothing should be worn to protect the skin against mold spores.
- Ventilating the area: Open windows and doors and use fans to improve air circulation during the mold removal process.
• Mold Removal Techniques
There are several techniques that can be employed for effective mold removal, some of which include the following:
1. Cleaning Moldy Surfaces with Detergent
For surfaces that are only mildly affected by mold, a thorough cleaning with detergent and water should suffice. This method involves:
- Mixing a detergent solution
- Scrubbing the moldy surface using a brush
- Rinsing the surface with clean water
- Drying the area thoroughly to prevent mold recurrence
2. Using Mold Removal Solutions
For more severe mold cases, a stronger mold removal solution is necessary. Some commercial solutions include:
- Hydrogen peroxide
- Vinegar
- Baking soda
- Commercial mold removal products
To use these solutions, follow the instructions provided by the manufacturer. Always spot-test the solution on a small area before applying it to the entire mold-affected surface.
3. Removing Mold from Porous Surfaces
Porous surfaces, such as drywall and carpets, are more challenging to clean due to their ability to absorb and trap moisture. In some instances, it may be necessary to remove and replace these materials.
4. Hiring a Professional Mold Remediation Service
For severe cases of mold infestation, it is advisable to consult a professional mold remediation service to ensure proper mold removal and disposal of contaminated materials.
• Proper Surface Preparation After Mold Removal
Once the mold has been effectively removed, the surfaces must be prepared for repainting or refinishing. This may involve:
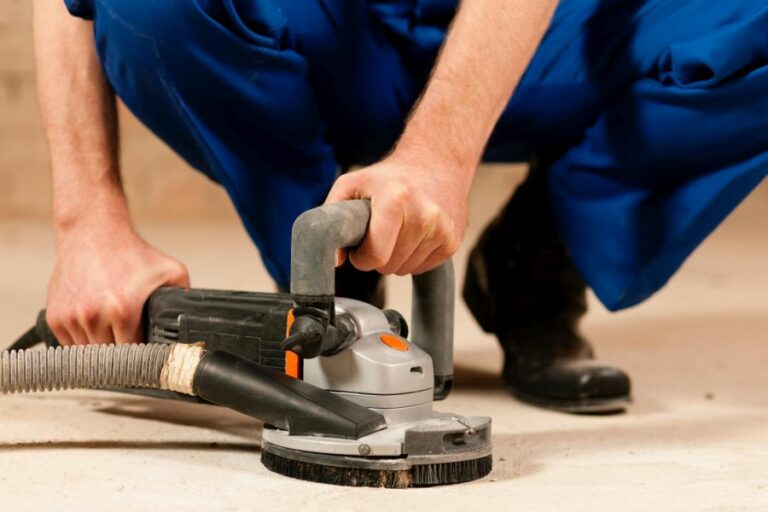
- Sanding surfaces to remove any remaining mold or stains
- Using a primer that is mold-resistant and stain-blocking
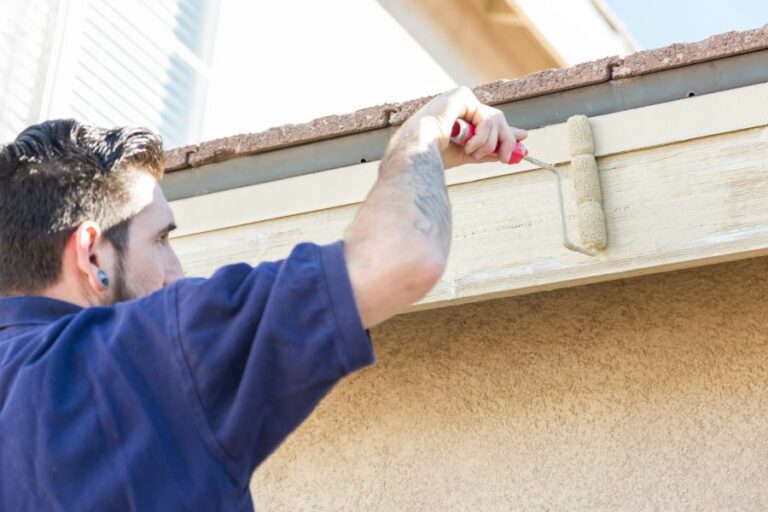
- Applying paint or finish that is mold-resistant, ensuring longer-lasting protection against mold
- Sealing gaps, cracks, and seams in walls and ceilings to prevent potential moisture infiltration
• Preventing Future Mold Growth
To prevent mold from recurring after surface preparation, take preventive measures by addressing the root cause of the issue, which is typically moisture. Some practical steps include:
- Ensuring proper ventilation in moisture-prone areas, such as bathrooms
- Checking for potential water leaks and fixing them promptly
- Keeping humidity levels below 60% to discourage mold growth
- Regularly inspecting areas that are susceptible to mold and taking timely action where necessary
As a final recommendation, always consult the Environmental Protection Agency’s (EPA) guidelines on mold remediation and surface preparation.
By adhering to these best practices, you can successfully banish mold during the surface preparation process and maintain a clean and healthy environment.
Effective Methods for Mold Removal on Surfaces
Mold is a common and persistent problem that can cause damage to surfaces and materials and even pose health risks. Eliminating mold is essential to maintaining a healthy living environment.
• Identifying Mold on Surfaces
The first step in mold removal is identifying if your home or workspace has mold growing on surfaces. Mold comes in various colors, such as black, green, and gray, and has a distinct musty odor.
It typically thrives in damp, warm, and humid conditions, making areas like bathrooms, kitchens, and basements prone to mold growth.
The Environmental Protection Agency (EPA) provides valuable resources and guidelines for identifying and remedying mold problems in residential and commercial spaces.
• Removing Mold from Non-Porous Surfaces
Non-porous surfaces include materials like glass, metal, and sealed tiles. Cleaning mold from these surfaces is generally more straightforward due to their resistance to moisture penetration. Follow these steps to remove mold effectively from non-porous surfaces:
- Prepare the area: Wear protective gloves and a face mask to prevent contact with mold spores. Open windows to ensure proper ventilation during the cleaning process.
- Use a suitable cleaning solution: Household cleaners like bleach, white vinegar, or commercial mold removers can be used. Diluted bleach (1 cup of bleach to 1 gallon of water) is particularly effective in removing mold from non-porous surfaces.
- Apply the cleaning solution: Using a sponge or cloth, apply the cleaning solution to the moldy surface. Leave it in place for a few minutes to allow the solution to penetrate and break down the mold.
- Scrub the surface: With a stiff-bristle brush, scrub the mold until it’s no longer visible. You can use a smaller brush or toothbrush for hard-to-reach areas.
- Rinse the surface: Rinse the area thoroughly with water to remove any remaining cleaning solution and mold residue.
- Dry the surface: Using a clean cloth or paper towel, dry the surface thoroughly to prevent moisture from promoting mold regrowth.
• Removing Mold from Porous Surfaces
Porous surfaces like wood, drywall, and unsealed tiles are more challenging to clean, as they can absorb moisture and provide a suitable environment for mold to grow. Here are some steps to remove mold from porous surfaces:
- Evaluate the extent of mold damage: If mold damage is limited, DIY cleaning may be sufficient. However, if an extended area is affected or mold has penetrated deep into the material, consider hiring a professional mold remediation service.
- Choose a cleaning solution: For porous surfaces, it’s essential to select a cleaning solution that will not promote further mold growth. White vinegar, borax, or a specialized mold cleaning agent are effective options.
- Apply the cleaning solution: Dampen a sponge or cloth with the chosen cleaning solution and gently apply it to the moldy surface. Avoid saturating the material to prevent moisture from causing further damage.
- Scrub and disinfect: Using a soft-bristle brush, scrub the surface gently to remove visible mold. Apply a disinfectant to the area, following the product’s instructions.
- Dry the area: Allow the surface to air dry, preferably with open windows or fans to promote ventilation. Drying may require several days, depending on the environmental conditions.
• Preventing Mold Regrowth
Once you have successfully removed mold from surfaces, taking preventative measures can help maintain a mold-free environment. Here are some tips:
- Control humidity levels by using dehumidifiers or air conditioners.
- Ensure proper ventilation in damp areas like bathrooms and kitchens by using exhaust fans.
- Frequently clean and dry potential mold hotspots, such as shower curtains and bathroom tiles.
- Fix any water leaks and ensure that water drains away from your home’s foundation.
• Health Risks Associated with Mold Exposure
Mold exposure can lead to various health issues, such as allergies, asthma, and respiratory problems.
According to the Centers for Disease Control and Prevention (CDC), individuals with weakened immune systems, pre-existing respiratory conditions, or allergies are more susceptible to the adverse effects of mold exposure.
In conclusion, effective mold removal and prevention are essential for maintaining a healthy living environment. Understanding how to clean different surfaces and implementing preventative measures will help keep mold at bay and protect the health of those within the affected area.
Step | Description |
|---|---|
1. Assess the situation | Determine the extent of mold damage and whether you can clean it yourself or need professional help. |
2. Ensure safety | Wear protective gear such as gloves, safety goggles, and a mask to protect yourself from mold exposure. |
3. Ventilate the area | Open windows and doors to allow fresh air in during and after the mold removal process. |
4. Remove moldy items | Discard any items that are heavily infested with mold and cannot be cleaned. |
5. Select a cleaning solution | Choose a cleaning solution that is effective against mold, such as bleach, vinegar, or a commercial mold remover. |
6. Apply the cleaning solution | Apply the cleaning solution to the moldy surface and let it sit for the recommended time before scrubbing. |
7. Scrub the mold | Use a scrub brush or a non-abrasive sponge to remove the mold from the surface. |
8. Rinse and dry the surface | Rinse the cleaned surface with water, then dry it thoroughly to prevent mold regrowth. |
9. Dispose of mold-contaminated materials | Place mold-contaminated materials in a sealed plastic bag before disposing of them to prevent mold spores from spreading. |
10. Address the underlying issue | Identify and fix the cause of excess moisture in the area, such as a leak, to prevent mold from returning. |
Eradicating Mold on Porous Materials
Mold is a common household problem that can pose a serious health risk, especially on porous surfaces.
• Identifying Mold Growth on Porous Surfaces
It is crucial to understand that mold thrives in damp, dark conditions. Identifying mold growth early can help prevent severe damage to surfaces and objects. Mold typically appears as black, brown, green, or yellow spots on surfaces, accompanied by an unpleasant musty smell.
Tip: If you notice a moldy smell but cannot visibly see any mold, try using a flashlight in dark corners or enlist the help of a professional to inspect your property.
• Addressing the Root Cause: Preventing Mold Growth
Before attempting to remove mold, it is vital to address the root cause of the problem: moisture. Here are some measures to prevent mold growth:
- Repair water leaks in roofs, pipes, or walls
- Ensure your home has proper ventilation
- Use a dehumidifier or air conditioner to maintain relative humidity levels below 60%
- Implement proper insulation and sealing techniques to avoid condensation
Important: In severe mold cases, it is advisable to consult a professional. The Environmental Protection Agency (EPA) provides guidance on mold situations that typically require professional help, including areas larger than 10 square feet or if mold growth is a result of contaminated water.
• Safety Measures when Dealing with Mold
Always take precautions when handling mold, as exposure can lead to health issues such as allergies, infections, or respiratory problems. Protect yourself by:
- Wearing gloves (preferably rubber)
- Wearing a mask (N-95 rated)
- Wearing goggles to protect your eyes
- Using a well-ventilated work area
• Preparing the Area and Materials for Mold Removal
Before starting the mold removal process, gather the necessary cleaning supplies and prepare the work area:
- Assemble cleaning supplies like a brush, bucket, and disposable cloth(s)
- Get a mold-killing cleaning solution, such as a bleach solution (1 cup of bleach in 1 gallon of water) or one specifically formulated for porous surfaces.
- Move any furniture or items away from the affected area
- Cover the surrounding area with plastic sheeting to protect from mold spores
• Removing Mold from Porous Surfaces
Remove mold from porous surfaces through the following steps:
– Wooden Surfaces
- Using a stiff brush, gently scrub the moldy area with the cleaning solution, ensuring not to damage the wood in the process
- Use a disposable cloth to wipe any mold residue
- Thoroughly dry the area by using fans or heaters
- Keep an eye on the area for regrowth, and repeat the process if necessary
Recommendation: Applying a mold-resistant sealant to the clean, dry surface can further protect it from future mold growth.
– Drywall
- Scrub the moldy area with a cloth or sponge damped in the cleaning solution, avoiding excessive use of liquid to prevent further water damage
- Wipe the area dry with a disposable cloth and continue to dry as much as possible
- Monitor the area for any signs of mold regrowth
Note: If mold infestation is severe, it may be necessary to remove and replace affected drywall sections.
– Fabrics and Upholstery
- First, take the item outside and brush off any visible mold spores
- Pre-treat the moldy area with a stain remover, following the manufacturer’s guidelines
- Wash the item according to its care instructions, adding a cup of white vinegar during the rinse cycle
- Thoroughly dry the item, preferably in sunlight
Caution: If the mold has caused fabric discoloration, consult a professional cleaner.
• Finally, Dispose of Mold-Contaminated Items
Properly dispose of any mold-contaminated materials (cloths, sponges, etc.) in sealed bags to prevent the spread of mold spores. Clean and disinfect all tools used in the mold removal process.
• Conclusion
Getting rid of mold on porous surfaces can be challenging, but by addressing the root cause, taking safety measures, and following the steps in this guide, successful mold removal is possible.
Regularly monitoring and maintaining your home’s moisture levels will help prevent mold growth in the future.
Step | Description |
|---|---|
1 | Inspect the surface for mold growth and determine the extent of the problem. |
2 | Wear protective gear such as gloves, mask, and goggles before starting the mold removal process. |
3 | Ventilate the area by opening doors and windows or using fans to improve airflow. |
4 | Use a vacuum cleaner with a HEPA filter to collect spores from the affected surface. |
5 | Prepare a cleaning solution of one part white vinegar and one part water, or use a commercial mold removal product. |
6 | Scrub the affected area with a stiff brush dipped in the cleaning solution, making sure to get into all the crevices. |
7 | Rinse the area thoroughly with clean water and use a cloth or sponge to remove any remaining mold debris. |
8 | Allow the surface to dry completely, ideally using fans or dehumidifiers to speed up the drying process. |
9 | Monitor the area for any signs of mold regrowth and repeat the process if necessary. |
Mold Abatement Duration: What to Expect
Mold is a common problem in homes and buildings, as it thrives in damp conditions and can cause health problems if not addressed promptly.
• The Importance of Timely Mold Abatement
Mold can cause allergic reactions, respiratory issues, and other health problems. Prolonged exposure to mold can lead to chronic conditions such as asthma and other respiratory illnesses.
To protect the health of building occupants, it is essential to address mold issues as soon as they are identified. The faster the mold is abated, the better the chances of preventing long-term damage to both the occupants and the structure itself.
• Factors that Affect Mold Abatement Duration
Several factors determine how long it will take to abate mold from a building, such as:
1. The Extent of Mold Contamination
The more extensive the mold contamination, the longer the abatement process will take. Small, localized outbreaks can be relatively quick to address, while more widespread issues will require more time and effort.
2. Location of Mold Growth
The mold that is growing in easily accessible areas, such as on walls or ceilings, is generally easier and faster to abate than mold building up in hidden or confined spaces.
Mold growing in crawlspaces, inside walls, or within HVAC systems may require more invasive techniques and additional time to remediate.
3. Material Types
Different materials react differently to mold growth and the abatement process. Porous materials, such as drywall or insulation, can be more difficult to clean and may require complete removal and replacement.
Non-porous materials like metal or tile surfaces can be cleaned more quickly and easily.
4. Method of Mold Abatement
The method used for mold abatement can impact the duration of the project. Some techniques can be completed more quickly than others, while certain situations may call for more time-consuming methods.
For example, using chemicals or ozone machines to kill mold spores can be faster than physically removing contaminated materials but may not always be the most effective choice.
• Estimated Timelines for Mold Abatement
Based on the factors mentioned above, mold abatement can take as little as a few hours to several weeks to complete. Here are some general estimates for different scenarios:
- Small-scale mold issues: A minor mold outbreak, such as a bathroom with a bit of surface mold, could take a professional anywhere from a few hours to a day to abate.
- Moderate mold issues: If mold is localized but more extensive or has infiltrated porous materials, it might take a few days to a week to remediate.
- Significant mold problems: For extensive mold growth affecting large portions of the building or hard-to-reach areas, the abatement process could take several weeks to complete. In such cases, occupants may need to vacate the premises during the process.
It’s essential to remember that the exact timeline for mold abatement will depend on the specific situation and various factors involved.
The best course of action is to consult with a professional mold abatement company to assess the extent of the problem and provide an accurate estimate for your particular situation.
• Recommendations for Effective Mold Abatement
Here are some recommendations to ensure proper and timely mold abatement:
- Hire a professional: Mold abatement should be carried out by trained and certified professionals who follow industry guidelines for safety and effectiveness. A skilled professional will help ensure the process is completed correctly and in a timely manner.
- Address the source of moisture: Mold cannot grow without moisture, so make sure to identify and resolve the source of the moisture issue, such as leaky plumbing or poor ventilation. This step is crucial to preventing mold from recurring.
- Contain the affected area: To prevent the spread of mold spores throughout the building, it’s vital to seal off and contain the affected area during the abatement process.
- Dispose of contaminated materials: Porous materials that have been affected by mold may need to be removed and properly disposed of to ensure complete mold removal.
- Follow-up inspection: After the mold abatement process has been completed, a follow-up inspection should be conducted to ensure that all mold has been removed and that the moisture source has been fixed.
In conclusion, the amount of time needed to abate mold varies based on several factors, including the extent of mold growth, the location of the mold, the type of materials involved, and the abatement methods used.
To ensure thorough and timely mold remediation, it’s crucial to hire a professional mold abatement company and address the underlying source of moisture.
For more information on mold abatement, visit the Environmental Protection Agency’s (EPA) guide on Mold Remediation in Schools and Commercial Buildings.
Abatement Type | Duration |
|---|---|
Small Area (10 sq.ft or less) | 1 to 2 days |
Moderate Area (10-100 sq.ft) | 3 to 7 days |
Large Area (100 sq.ft or more) | 7 to 21 days |
Severe Infestation (HVAC, Walls, Floors) | 1 to 2 months |
Safely Remove Mold to Prevent Spore Dispersal
Mold is a common problem in many households, and when not addressed promptly, it can lead to various health problems and damage to the structure of a building.
When trying to remove mold, however, it is vital to do so without spreading spores, as this would only worsen the problem. The following steps can help you effectively eliminate mold without spreading spores.
• Identifying the Mold
The first step in getting rid of mold is identifying its extent and the type of mold present. Mold can appear in different colors (such as black, green, or white) and have a musty or earthy smell.
It is helpful to inspect the areas most prone to mold growth, such as damp corners, basements, bathrooms, and behind appliances like washing machines or refrigerators. The Environmental Protection Agency provides useful information to help you identify mold in your home.
• Preparing the Area and Protecting Yourself
Before starting the mold removal process, proper precautions should be taken to ensure safety and prevent the spread of mold spores. These include:
– Ventilation and Isolation
Close off the affected area from the rest of the house by closing doors and covering vents or air ducts with plastic sheeting and tape. This will prevent mold spores from spreading to other areas during cleaning.
Make sure to open windows or doors within the affected area to ventilate the space, but avoid using fans, as this may cause spores to become airborne.
– Protective Gear
Wear appropriate personal protective equipment (PPE), including a well-fitting N-95 or N-99 respirator mask, non-porous gloves, protective eyewear, and disposable or washable clothing that can be removed immediately after cleaning.
• Safely Removing the Mold
Once you have taken the necessary precautions, you can start the mold removal process. Using the proper techniques and cleaning agents is essential to effectively eliminate mold and minimize the chances of spreading spores. Some effective methods are as follows:
– Cleaning with Detergent and Water
For surfaces that are not porous, such as glass, metal, and plastic, a simple solution of detergent and water can be used to clean the mold.
Use a non-abrasive brush or sponge to gently scrub the moldy surface, ensuring not to disperse mold spores into the air. After scrubbing, use a damp cloth to wipe away any remaining mold and cleaning solution.
– Using a Mold Removal Solution
For porous surfaces, such as wood and drywall, using a mold removal solution specifically designed for these materials is recommended.
Common solutions include products containing hydrogen peroxide, vinegar, or bleach. Be sure to follow the manufacturer’s instructions carefully when using these products.
Remember to avoid mixing different cleaning agents, as this can produce harmful fumes. It is essential to test the solution on a small area of the surface first to ensure it will not cause damage or discoloration.
– Disposal of Moldy Materials
In some cases, it may be necessary to dispose of mold-infested materials that cannot be cleaned, such as carpets, curtains, or pieces of drywall.
Make sure to place any moldy materials in heavy-duty plastic bags and seal them tightly before disposal. This will help prevent the escape of mold spores during transportation.
• Preventing Mold Regrowth
After removing the mold, it is essential to take steps to prevent regrowth. The following actions can be taken to help prevent future mold issues:
– Addressing Moisture Issues
Mold thrives in damp conditions, so addressing the source of moisture in your home is crucial. This may include fixing leaks, upgrading ventilation systems, and using dehumidifiers in areas prone to dampness.
– Routine Cleaning and Inspection
Regularly cleaning your home, especially damp or vulnerable areas, will help keep mold at bay. Additionally, routine inspections can catch early signs of mold before it becomes a significant issue.
By following these steps, you can effectively and safely remove mold without spreading spores, protecting the health of your household and the integrity of your home.
If, however, the mold issue proves to be extensive or you are unsure about handling the problem, it is recommended to seek professional help from a qualified mold remediation expert.
Step | Description |
|---|---|
1 | Identify the moldy areas in your home. |
2 | Seal off the affected area with plastic sheeting and tape to prevent spores from spreading to other parts of the home during cleanup. |
3 | Wear protective gear such as gloves, goggles, and a mask while cleaning to protect yourself from exposure to mold spores. |
4 | Use a damp cloth or sponge with mild detergent to wipe down moldy surfaces. Avoid using excessive amounts of water, as this can cause mold spores to spread through the air. |
5 | For porous materials, such as drywall or ceiling tiles, it may be necessary to remove and replace the affected materials to prevent mold regrowth. |
6 | After cleaning, dry the affected areas thoroughly to prevent the mold from returning. |
7 | Dispose of any materials used in the cleaning process (e.g., cloths, sponges, and protective gear) in a sealed plastic bag to prevent mold spores from spreading. |
8 | Address the source of moisture that led to mold growth (e.g., fix leaks, and improve ventilation) to prevent future mold problems. |