Proper Surface Preparation For Repainting Painted Surfaces
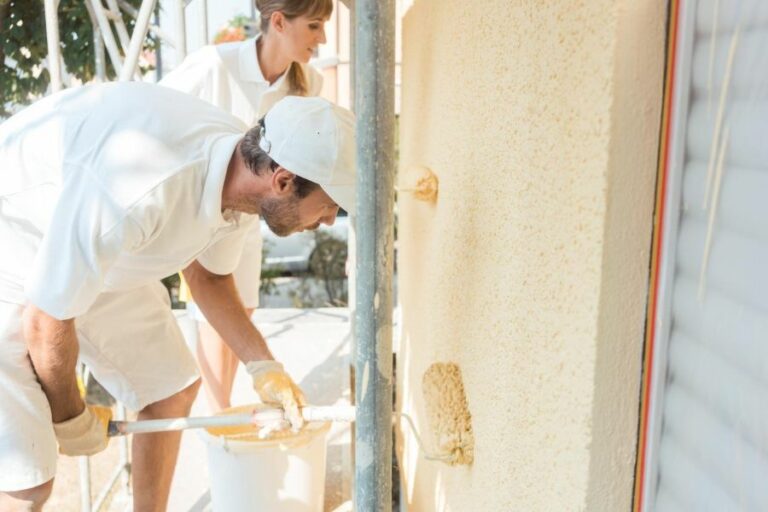
Repainting your space can be a fantastic way to revitalize its look and feel. But did you know that proper surface preparation is the key to achieving a long-lasting, professional-looking finish? Fret not, because we’ve got you covered!
Proper surface preparation for repainting previously painted surfaces:
To properly prepare a pre-painted surface for repainting, identify the paint type, assess the surface condition, and clean it thoroughly. Then, scrape off loose or peeling paint and sand the surface evenly. Repair any damaged areas, apply a primer if necessary, and ensure the surface is free of dust before repainting for a professional, durable finish.

You’ve decided to refresh your space with a new coat of paint, but how can you ensure a flawless finish? Proper surface preparation is the key to achieving professional results!
Read on to discover tips and techniques for repainting previously painted surfaces, ensuring longevity and beauty in your home makeover project.
Contents
- 1 Correct Surface Preparation for Repainting Pre-Painted Areas
- 2 Necessary Pre-Work Before Repainting Aged Painted Surfaces
- 3 Techniques for Painting Over Existing Painted Surfaces
- 4 Is Sanding Required for Repainting Painted Surfaces?
- 5 Is Primer Essential for Repainting Pre-Painted Surfaces?
Correct Surface Preparation for Repainting Pre-Painted Areas
Ensuring proper surface preparation is essential to achieving an excellent, long-lasting paint job.
• Identify the Type of Paint on the Surface
Before beginning the preparation process, it’s important to identify the type of paint currently on the surface in question.
This will help you make informed decisions about the appropriate steps to take during the preparation process.
To perform a quick test, you can rub a cotton ball soaked in rubbing alcohol on the painted surface. If the paint comes off easily, it’s likely a latex-based paint; if it doesn’t, it’s likely oil-based. You can also refer to the original paint cans (if available) for more information on the type of paint used.
Remember that it is not advisable to paint latex-based paint directly over oil-based paint without proper preparation, as it may cause the new paint to peel off.
• Assess the Condition of the Painted Surface
Carefully inspect the painted surface for any signs of damage or wear, such as:
- Peeling or flaking paint
- Cracks or holes
- Mold or mildew
- Stains or discoloration
These issues will need to be addressed during the surface preparation process.
• Clean the Surface Thoroughly
Before repainting, it’s crucial to clean the surface in order to remove dirt, dust, grease, and other contaminants that might prevent the new paint from adhering properly.
Use a mild detergent or a specially-formulated cleaner for painted surfaces combined with warm water. A sponge or soft brush can be effective for removing stubborn dirt or grime.
After cleaning the surface, be sure to rinse it with clean water and allow it to dry completely before moving on to the next steps.
• Scrape Off Loose or Peeling Paint
Scraping away any loose or peeling paint is necessary in order to create a smooth and even surface for the new paint to adhere to. A putty knife, scraper, or wire brush can be used to remove the damaged paint.
When scraping, be gentle to avoid causing damage to the underlying surface. It may be helpful to hold the scraper at a slight angle, rather than perpendicular to the surface, during this process.
• Sand the Surface
Sanding is an essential step for ensuring proper adhesion of the new paint and creating a smooth, consistent finish. Depending on the current paint’s condition and the type of surface, different grits of sandpaper may be needed. Here are some general guidelines:
- For surfaces with existing glossy or semi-gloss paint, use fine-grit sandpaper (180-220 grit) to create a slightly roughened surface that will help the new paint adhere.
- For surfaces with an existing matte or flat paint, use medium-grit sandpaper (120-150 grit) to remove any minor imperfections and ensure a smooth finish.
After sanding, it’s crucial to remove any dust or debris from the surface, as these can inhibit proper paint adhesion. Use a vacuum with a brush attachment or a tack cloth to clean the surface thoroughly.
• Repair Damaged Areas
Cracks, holes, and other imperfections in the surface should be repaired prior to painting to ensure a flawless finish. Use a high-quality filler, such as spackling compound for small cracks and holes or a two-part wood filler for larger repairs on wooden surfaces.
Once the filler is dry, sand the repaired area to create a smooth and even surface. Don’t forget to remove any dust or debris after sanding.
• Apply Primer
Priming is important for promoting proper adhesion of the new paint and providing a uniform surface for the topcoat, particularly if you’re switching paint types (i.e., painting over oil-based paint with latex-based paint).
Use a high-quality primer appropriate for the type of surface and the paint you’ll be using. Be sure to follow the manufacturer’s instructions for proper application and drying time.
After the primer has dried, you may need to lightly sand any areas where the primer has raised the surface texture and remove any dust before applying the topcoat.
By following these steps and giving careful attention to surface preparation, you’ll be well on your way to achieving a professional, long-lasting paint job.
Necessary Pre-Work Before Repainting Aged Painted Surfaces
When it comes to repainting an old painted surface, proper preparation is essential for achieving a professional and long-lasting result.
• Cleaning the Surface
The first step to take before repainting any surface is a thorough cleaning. Dirt, grease, and grime may negatively affect the adhesion of the new paint, leading to poor results or paint failure.
- Remove loose debris: Start by using a broom or vacuum to remove dust, cobwebs, and loose debris from the surface.
- Wash the surface: Use a mild detergent mixed with warm water to wash the surface, removing stains, grease, and dirt. Use a sponge, cloth, or soft brush to avoid damaging the existing paint.
- Rinse: Rinse the surface with clean water to remove any remaining detergent residue.
- Allow to dry: Wait for the surface to be completely dry before proceeding to the next step. This may take a day or two, depending on the weather conditions and the surface material.
• Inspecting the Surface
Before repainting an old surface, it is crucial to inspect for any existing issues that may impact the paint’s adhesion or appearance.
- Check for paint issues: Look for signs of old paint issues, such as peeling, blistering, or flaking. These issues will need to be addressed before applying new paint.
- Note problem areas: Make a note of any rust, mold, mildew, or water damage, as they will need to be treated and repaired before repainting.
- Inspect caulk: Check the caulk around windows, doors, and trim for cracks or deterioration, as this may need replacing to ensure a weather-tight finish.
• Repairing the Surface
After identifying any issues on the surface, the next step is to make the necessary repairs:
- Scrape: Remove any loose paint, rust, or other debris using a scraper or putty knife. Be cautious not to cause any damage to the surface.
- Patch: Fill any cracks, dents, or holes with an appropriate filler, such as wood filler for wooden surfaces or spackle for drywall. Follow the manufacturer’s instructions and allow the filler to dry before proceeding.
- Eliminate mold or mildew: If mold or mildew is present, treat the area with a solution of bleach and water or a commercial mold remover. Follow the product’s instructions and ensure proper ventilation during the process.
- Replace damaged materials: In cases where there is extensive damage to the old surface, consider replacing the damaged material for the best outcome. For example, replace rotted wood or crumbling brickwork before repainting.
• Sanding the Surface
After making repairs to the surface, it’s essential to sand the area to create a smooth and even base for the new paint:
- Sand repaired areas: To blend in any patching or filler materials with the surrounding surface, sand the repaired areas using medium-grit sandpaper.
- Smooth out rough patches: Sand any remaining rough or uneven areas on the surface, ensuring that the new paint will adhere effectively.
- Clean up dust: Once finished sanding, vacuum or use a tack cloth to remove any dust and debris. This will prevent the dust from being trapped under the new paint layer.
• Priming the Surface
Priming is a critical step in preparing an old painted surface for repainting. It helps seal and protect the surface, provides better adhesion for the new paint, and ensures a uniform appearance.
- Choose the right primer: Select a primer that is suitable for the surface material and the intended topcoat. It may be necessary to use a specialized primer for surfaces like stained wood, metal, or masonry.
- Tint the primer: If the new paint color is significantly different from the existing paint, consider tinting the primer to match the new paint color. This can help provide better coverage and minimize the number of topcoats required.
- Apply the primer: Following the manufacturer’s instructions, apply a coat of primer to the entire surface. Use a brush, roller, or sprayer, depending on the surface size and texture.
- Allow to dry: Wait for the primer to dry as recommended by the manufacturer, typically 24 hours or longer in humid conditions.
By completing these preparatory steps, you increase the likelihood of a successful and long-lasting repaint job.
Techniques for Painting Over Existing Painted Surfaces
• Overview
Painting over an existing paint job may seem like a daunting task, but with the proper preparation, tools, and techniques, it can be done efficiently and effectively.
• Importance of Preparation
The first step in any successful paint job is thorough surface preparation. This will ensure the new paint adheres properly and lasts for years to come. Skipping this step could lead to peeling or bubbling paint.
– Cleaning the Surface
Begin by cleaning the area you plan to paint. Use a mild detergent mixed with water to remove dirt, grease, and grime. If the surface has mold or mildew, add a small amount of bleach to the cleaning solution. Rinse the area with clean water and allow it to dry.
Keep in mind that some paints, like Benjamin Moore’s self-priming paint, can be applied over dirty surfaces, but it’s good practice to clean the surface anyway.
– Checking for Damage and Repairing
Inspect the surface for any damage, such as cracks, holes, or peeling paint. Repair any damage by filling holes and cracks with an appropriate filler or patching material and sanding down any peeling or bubbled paint.
If the existing paint is bubbling or peeling excessively, it’s best to remove all the loose paint using a scraper, followed by sanding or using a chemical paint remover in more severe cases.
– Sanding and Deglossing
Sanding is key to achieving proper adhesion when painting over an already-painted surface. Use fine-grit sandpaper to lightly sand the entire surface, ensuring it’s uniformly dull and smooth.
This process also helps to create a better bond between the old paint and the new paint layers. If the existing paint is a high-gloss type, consider using a deglosser (for example, liquid sandpaper) to help promote better adhesion.
– Priming
Applying a primer is important for several reasons. First, it provides a smooth, uniform surface for the new paint. Second, it improves the adhesion, ensuring the paint sticks to the surface and lasts longer. Third, it helps block stains and prevent peeling.
Choose a primer that’s compatible with your chosen paint type, oil-based or water-based. Carefully follow the manufacturer’s instructions for application.
• Choosing the Right Paint and Tools
Selecting the appropriate type of paint and tools can greatly impact the final result. In general, acrylic (water-based) paint is the best option for most interior applications due to its durability, color retention, and ease of cleanup.
For exterior applications, consider using a paint specifically designed for outdoor usage, such as exterior acrylic paint.
– Sheen
It’s essential to choose the appropriate sheen for your project. Different sheens provide different levels of durability and cleanability. Here are the most common types:
- Flat or matte: Provides a soft, non-reflective finish. Ideal for ceilings and low-traffic areas.
- Eggshell: Provides a soft, low-sheen finish. Suitable for most rooms, including living rooms and bedrooms.
- Satin: Provides a medium sheen with good durability and cleanability. Ideal for kitchens, bathrooms, and higher-traffic areas.
- Semi-gloss and gloss: Provides a high sheen that is exceptionally durable and easy to clean. Best for trim, doors, and high-traffic areas.
– Tools
Invest in high-quality brushes, rollers, and other tools to ensure a professional result. A good-quality brush will provide a smoother finish and fewer brush marks, while a quality roller will help distribute paint quickly and evenly. Choose the right size brush for the surface and a roller with the appropriate nap length for the paint type.
• Proper Painting Technique
Once the surface is prepared, the correct tools and paint are selected, it’s time to paint. Follow these steps for a professional result:
- Apply painter’s tape to any edges and borders that you don’t want to be painted. This will help achieve crisp, clean lines.
- Cut in, or paint the edges and borders with a brush, starting at the top and working your way down.
- Use a roller to apply paint to the larger areas. Work in a W or M pattern, spreading the paint out and blending any brush marks.
- Allow the paint to dry for the recommended time before applying additional coats. Typically, at least two coats are necessary for an even, opaque finish.
- Remove the painter’s tape, being careful not to peel away any freshly applied paint.
- Clean your brushes and rollers, and store your leftover paint in a well-sealed container for future touch-ups.
• Conclusion
Painting over an existing paint job may seem daunting, but with proper preparation, the right paint and tools, and professional techniques, you can achieve a beautiful and long-lasting finish. Remember to clean, repair, and prime the surface before painting, and choose high-quality paint and brushes for the best possible results. Happy painting!
How do you paint already painted surfaces?
Step | Description |
|---|---|
1 | Clean the surface: Remove any dirt, grease, or grime from the surface using a cleaner or degreaser. |
2 | Scrape off loose paint: Use a scraper or a wire brush to remove any loose or flaking paint from the surface. |
3 | Sand the surface: Sand the surface to remove any rough edges or uneven surfaces. Use a medium to fine-grit sandpaper and make sure to sand in the direction of the grain. |
4 | Fill any holes or cracks: Use a filler or wood putty to fill any holes, cracks, or gouges in the surface. Allow the filler to dry completely, and then sand it smooth. |
5 | Prime the surface: Apply a primer to the surface to ensure good adhesion of the new paint and to help prevent any stains or discoloration from bleeding through the new paint. Allow the primer to dry according to the manufacturer’s instructions. |
6 | Apply the new paint: Use high-quality paint that is designed for the specific surface you are painting (e.g., wood, metal, or masonry). Apply the paint in thin, even coats, and allow it to dry completely between coats. It may require more than one coat to achieve full coverage. |
7 | Clean up: Clean brushes, rollers, and any other tools used in the painting process, and properly dispose of any leftover paint and materials. |
Is Sanding Required for Repainting Painted Surfaces?
• Importance of Surface Preparation
Proper surface preparation is paramount to the success of any repainting project, be it a small household touch-up or a major commercial renovation.
The goal is to create a smooth, clean, and firm base for the new paint to adhere to and give a flawless finish. One of the crucial steps in the surface preparation process is sanding. But is sanding always necessary?
• Assessing Paint Condition
Before you decide if you need to sand a painted surface, it is essential to examine the current paint condition. This assessment will determine if the new paint will adhere to the surface without losing its durability and aesthetic appeal.
– Unsound Paint Surface
Peeling, flaking, or blistering paint indicates an unsound surface that is not suitable for repainting without proper treatment. In such cases, you must remove the damaged paint and sand down the surface to ensure proper adhesion of the new paint.
– Glossy or Smooth Surface
When considering repainting a surface with a high-gloss finish, such as semi-gloss or high-gloss paint, sanding is necessary to ensure proper adhesion. The same applies to surfaces that are too smooth, as new paint may not stick well to these surfaces either.
Lightly sanding these surfaces using fine-grit sandpaper will create a slightly ‘rough’ base that boosts adhesion between the old and new paint layers.
– Intact, Chalky Surface
Some older paints, especially oil-based paints that have been weathered, may become chalky, resulting in a powdery surface. You can test for this condition by running your hand on the surface to check for chalky residue.
In this situation, proper surface preparation is needed, including cleaning, sanding, priming, and possibly sealing, before applying a new coat of paint.
• Cases Where Sanding Can Be Skipped
– Clean, Intact Surfaces
Surfaces that are free from defects, dirt, and dust and have an intact and smooth layer of pain may not require sanding. However, cleaning the surface with a suitable solution, such as a mild detergent and water mixture, is still essential for removing any dust, grime, or grease.
This simple cleaning step helps to ensure excellent adhesion of the new paint.
– Same or Similar Paint Types
If you plan to use the same type of paint as the existing one, sanding may not be necessary. For example, applying water-based paint like latex or acrylic paint over a stable water-based painted surface requires minimal or no sanding.
Conversely, if the existing paint is an oil-based one, it is vital to sand the surface to ensure proper adhesion between the two paint layers.
– Using Paints with Primer Included
Today, many paints come with built-in primers that offer excellent adhesion properties, negating the need for sanding. It is advisable to follow the manufacturer’s recommendations for surface preparation when using these types of paints.
• Tips for Successful Sanding
When sanding is required, follow these steps for excellent results:
- Choose the Right Sandpaper: Use fine-grit sandpaper, ideally between 150 and 220 grit, for most repainting projects. Heavily damaged surfaces may require a more aggressive approach, using 80 to 100-grit sandpaper to remove defects and leveling the surface.
- Keep Your Sandpaper Clean: Ensure that the sandpaper remains clean during the sanding process. Clogged sandpapers can cause scratches and uneven finishes. Clean the sandpaper of debris periodically using a brush or a vacuum cleaner.
- Opt for Sanding Sponges for Curved Surfaces: Utilize sanding sponges or folded sandpaper for curved or intricate surfaces, as they can deliver a more consistent finish.
- Wipe Clean: After sanding, remove the sanding dust from the surface. Use a tack cloth or a vacuum cleaner to ensure a clean, dust-free base for the new paint.
• Final Thoughts
In conclusion, sanding painted surfaces before repainting is essential when dealing with unsound surfaces, high-gloss finishes, or chalky surfaces. However, it may not be necessary for clean, intact surfaces or when using the same paint type or paint with built-in primers.
Always assess the surface condition and follow the paint manufacturer’s instructions for optimal results. The preparation process plays a crucial role in the final outcome, so investing time and effort into sanding and cleaning will result in a durable, professional finish.
| Answer |
|---|
| Yes, you should sand a painted surface before repainting to ensure a smooth and even finish, as well as proper adhesion of the new paint. This can be done with either sandpaper, a sanding block, or an electric sander, depending on the size and condition of the surface in question. |
Is Primer Essential for Repainting Pre-Painted Surfaces?
When it comes to repainting a previously painted surface, one common question that arises is whether or not a primer is necessary.
• What is Primer and Why is it Important?
Primer is a preparatory coating applied to surfaces before painting. This unique product has several key functions, including:
- Enhancing paint adhesion
- Providing additional durability to the painted surface
- Sealing porous surfaces
- Hiding unwanted stains or colors
Using a primer ensures a smooth, even, and long-lasting finish, making it an essential component of many painting projects.
To better understand if the primer is necessary for a surface that’s already been painted, let’s consider the various factors that impact this decision.
• Assessing the Condition of the Existing Painted Surface
The condition of the existing paint on a surface plays a critical role in determining if you need to use a primer. Here are some considerations:
– Sound and Stable Paint
If the existing paint is in good condition, meaning there’s no visible damage, such as peeling, chipping, or flaking, then it’s likely that a primer isn’t necessary, as the integrity of the current finish hasn’t been compromised.
According to the United States Environmental Protection Agency (EPA), lead-based paint that’s in good condition doesn’t pose a significant health risk.
In this case, thoroughly cleaning the surface and lightly sanding it to promote adhesion should suffice for preparing the surface for a new paint layer.
– Damaged or Peeling Paint
If there’s damage on the existing painted surface, such as cracks, peeling, or chips, you’ll likely need to apply a primer. These issues can compromise the bond between the new paint and the surface.
Before applying the primer, make sure to properly prepare the surface by carefully removing any loose paint and smoothing out the edges with sandpaper.
Consult a primer specifically designed to address these issues for best results.
• Factors That Influence the Use of Primer
Aside from the condition of the existing paint, there are additional factors to consider when deciding if a primer is required on an already painted surface.
– Color Changes
If you’re planning on making a significant color change, applying a coat of primer can help achieve the desired results more effectively. A tinted primer can provide a neutral base for the new paint color, reducing the number of top coats required and ensuring an even, consistent finish.
– Type of Paint
When switching from oil-based paint to latex or acrylic paint, or vice versa, applying a primer is typically recommended to facilitate adhesion between the two different types of paint.
Using a primer can also help when painting over a glossy surface, as it promotes better adhesion and prevents sheen inconsistency.
– Surface Material
Some specific surface materials, such as wood or masonry, may still require a primer, even if they’ve been previously painted. This is because these porous materials can absorb the paint, leading to an uneven finish.
Plus, a primer designed for wood or masonry can help seal the surface, prolonging the life and durability of the new paint job.
• Final Recommendations
While the aforementioned factors provide a general guideline for when to use primer on an already-painted surface, there are situations in which a professional opinion may be necessary.
In potentially hazardous situations, such as removing lead-based paint, consulting an expert is crucial to ensure safe practices are followed.
In summary, determining whether a primer is needed on a previously painted surface depends on the condition of the existing paint, the type of paint being used, and the material of the surface itself.
Considering these factors will help you make an informed decision and ensure you achieve the best possible results for your paint project.
Scenario | Recommended use of primer |
|---|---|
Painting over a well-prepared and clean surface with the same type of paint | No |
Changing the color significantly, especially from dark to light | Yes |
Painting over a glossy or difficult-to-adhere-to surface | Yes |
Painting over a surface with visible stains or damage | Yes |
Painting over a surface that has been previously painted with a different type of paint | Yes |