Easy Methods To Prep Painted Surfaces For Repaint
Repainting a painted surface might seem like a daunting task to many, but worry no more! With the right approach and some easy methods in your toolkit, you can prep any painted surface for a fresh new coat, giving your space a revitalized look. Stick with me as we walk through some simple yet effective techniques that will make prepping surfaces for repainting a breeze, transforming your project into a satisfying and successful experience.
Easy methods to prep painted surfaces for repaint:
Easy methods to prep painted surfaces for repainting include surface cleaning with a mild detergent or TSP, inspecting and repairing damages, removing loose paint using a scraper or heat gun, sanding the surface with fine-grit sandpaper, cleaning and dust removal, and applying a suitable primer.

Looking to refresh your space with a new coat of paint? Discover simple ways to prep your painted surfaces for a flawless finish. Continue reading for expert tips on ensuring a smooth, long-lasting repaint.
Contents
- 1 Simple Techniques for Preparing Painted Surfaces for Repainting
- 2 Is Sanding Necessary on a Painted Surface Prior to Repainting?
- 3 Essential Preparatory Steps for Repainting an Aged Painted Surface
- 4 How to Clean Painted Surfaces Before Applying a Fresh Coat
Simple Techniques for Preparing Painted Surfaces for Repainting
Prepping painted surfaces for a repaint is essential to ensure proper adhesion of the new paint, prevent peeling, and achieve a smooth finish.
• Surface Cleaning
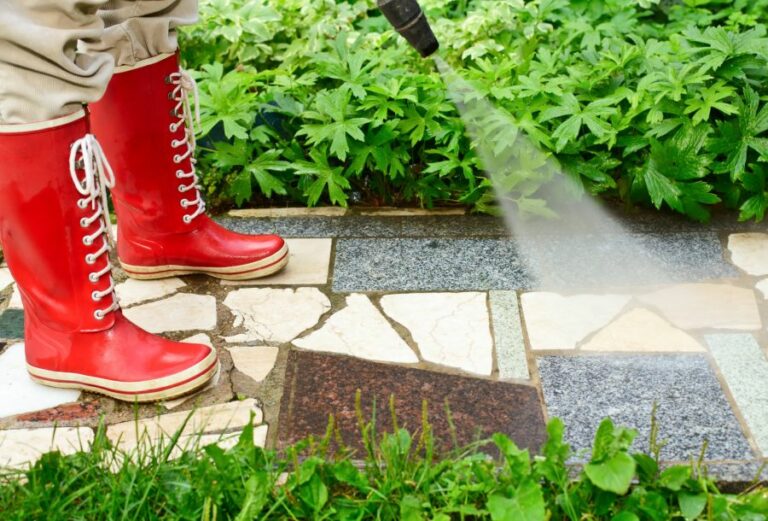
The first step is to clean the surface to remove any dirt, grease, and dust. Use a sponge or cloth soaked in a mild detergent solution and gently wash the surface. For tougher stains, you can use a stronger cleaning agent, such as TSP (trisodium phosphate).
Rinse the surface with clean water and allow it to dry completely before proceeding. Remember to wear gloves and protective gear when using cleaning agents. The Environmental Protection Agency provides information on suitable alternatives to TSP for a more environmentally-friendly cleaning solution.
• Inspection and Repair
Check the surface for any damage, such as cracks, holes, or dents, and repair them as needed. This step is crucial for achieving a smooth, professional finish.
- Fill small holes and dents with spackling compound or wood filler, following the manufacturer’s instructions. Sand the filled areas until they are smooth and flush with the surrounding surface.
- For larger cracks, use a flexible caulking compound or paintable silicone caulk. Smooth the caulk with a putty knife or your finger, and allow it to dry before sanding lightly.
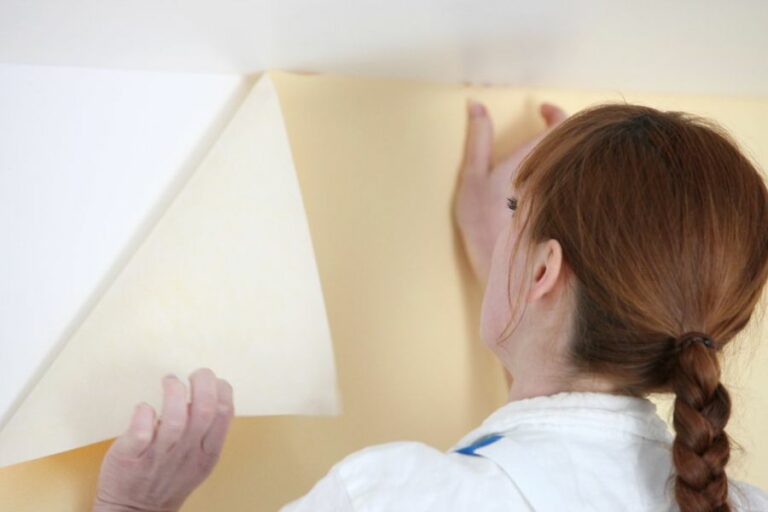
• Removing Loose and Peeling Paint
Peeling and flaking paint must be removed to ensure proper adhesion of the new paint. Use a scraper, wire brush, or paint removal tool to remove any loose paint carefully. Be careful not to gouge or damage the surface.
- For particularly stubborn areas, consider using a heat gun or chemical paint stripper to aid in paint removal. Always follow safety precautions and the manufacturer’s guidelines when using these tools.
- If your painted surface has a rough texture or extensive peeling, consider renting a power sander to expedite the process.
• Sanding the Surface
Sanding is an essential step in preparing painted surfaces for repaint. The main purpose is to provide a smooth surface for the new paint to adhere to and to promote better paint adhesion, preventing future peeling.
- Use fine-grit sandpaper (150-180 grit) for sanding. For larger areas, consider using an orbital or disk sander for efficiency.
- Sand the entire surface lightly, focusing on areas where the old paint is glossy or uneven.
- Be sure to sand gently and evenly, as applying too much pressure can cause uneven surfaces or scratches.
• Cleaning and Dust Removal
After sanding, remove any remaining dust by vacuuming the surface with a brush attachment, dusting with a cloth, or using a tack cloth (a sticky cloth designed for dust removal). This step is crucial to ensure proper paint adhesion and a smooth, professional finish.
• Priming the Surface
Priming is an essential step in the painting process, as it helps the new paint adhere properly to the surface, prevents stains and discoloration, and can enhance the durability and appearance of the paint.
- Choose a primer suitable for the type of paint you will be using (oil-based or water-based) and the surface material (wood, drywall, metal, etc.).
- Before applying the primer, make sure the surface is clean, dry, and free of dust.
- Apply the primer with a brush, roller, or sprayer, following the manufacturer’s guidelines and recommended coverage.
- Allow the primer to dry completely before applying the new paint.
• Final Thoughts
Using these easy methods to prep painted surfaces for a repaint can significantly improve the final result and ensure a professional, long-lasting finish. Preparation is the key to a successful paint job, so take the time to follow these necessary steps for a successful and efficient painting project.
Is Sanding Necessary on a Painted Surface Prior to Repainting?
Sanding a painted surface before repainting is often considered a crucial step to ensure a long-lasting, professional-looking finish. However, the decision to sand before repainting depends on several factors, including the type of surface, the current condition of the paint, and the desired outcome.
• The Importance of Sanding
Sanding is a surface preparation technique used to create a smoother, more uniform surface by removing imperfections and minor defects. It helps to promote better adhesion of new paint, leading to a higher-quality, more durable finish.
– Benefits of Sanding
Sanding a painted surface before repainting offers several benefits, such as:
- Improved Adhesion: Sanding provides a roughened texture for the new paint to adhere to, leading to better paint bond and longevity of the new paint job.
- Smoother Finish: Sanding helps to level out uneven surfaces, resulting in a smoother, more professional-looking finish.
- Removing Old Paint: If the current paint is peeling or chipping, sanding helps to remove the damaged paint and prevent it from affecting the new paint job.
- Better Coverage: A well-prepared surface allows for more even paint coverage, resulting in fewer coats needed and better color consistency.
• When to Sand a Painted Surface Before Repainting
The necessity of sanding before repainting depends on several factors, such as:
– Type of Surface
Different surfaces require different preparation methods before repainting. For instance, wood surfaces typically require sanding to ensure proper adhesion and a smooth finish, whereas metal surfaces may need additional steps such as priming and rust removal.
– Current Paint Condition
If the existing paint is in good condition and does not show any visible signs of deterioration, such as peeling, bubbling, or chalking, sanding may not be necessary. However, if there is visible damage, such as cracks, chips, or flaking paint, sanding becomes crucial to achieve a high-quality finish.
– Type of Paint
The type of paint being applied can also affect the need for sanding. Some paints, such as latex-based paints, can be applied directly over the existing paint without the need for additional sanding.
On the other hand, oil-based paints require sanding before application to ensure proper adhesion and prevent peeling or flaking.
– Desired Finish Quality
If a high-quality, professional-looking finish is desired, sanding is often necessary to provide a smooth, even surface for painting. However, if the repainting project is more for functionality than aesthetics, sanding may be optional.
• Sanding Techniques and Tips
When sanding a painted surface before repainting, the following techniques and tips can help achieve the best results:
- Use the Right Sandpaper: Choose the appropriate grit sandpaper for the surface and current paint condition. Coarse grit sandpaper (60-80 grit) works best for removing old, damaged paint, while medium grit sandpaper (120-150 grit) is ideal for smoothing the surface.
- Sand in the Direction of the Grain: When sanding wood surfaces, always sand in the direction of the wood grain to avoid scratches and damage.
- Use a Sanding Block: A sanding block can help maintain even pressure and help create a more uniform surface.
- Clean the Surface: After sanding, thoroughly clean the surface to remove any dust or debris that could interfere with the new paint’s adhesion.
– Safety Precautions
Sanding a painted surface can produce dust and particles that can be harmful if inhaled. It is essential to wear proper safety equipment, such as a dust mask or respirator, and work in a well-ventilated area.
• Conclusion
Sanding a painted surface before repainting can greatly improve the adhesion, finish, and durability of the new paint job.
By considering factors such as the type of surface, the current paint condition, and the desired finish quality, you can determine whether sanding is necessary for your repainting project.
By following the tips and techniques outlined in this article, you can effectively sand and prepare a painted surface for repainting, achieving a professional, long-lasting result.
For more information on painting preparation and techniques, visit the U.S. General Services Administration website, which provides useful guidance on painting historic interiors and surfaces.
Essential Preparatory Steps for Repainting an Aged Painted Surface
• Introduction
Repainting an old painted surface could be a daunting task, but with proper preparation, the process can be smooth and efficient.
• Assessing the Surface Condition
Before beginning any preparatory work, it is essential to assess the condition of the surface accurately. Look for any damage, such as cracks, holes, or areas of flaking paint. These need to be addressed before repainting can be done.
The U.S. National Center for Preservation Technology & Training provides guidelines for assessing painted surfaces on historic structures, which may be helpful for evaluation.
• Cleaning the Surface
Before any repair work or repainting begins, it is crucial to clean the old painted surface thoroughly. This process involves:
- Removing dust and dirt: Wipe down the walls with a dry cloth or use a vacuum cleaner with a brush attachment.
- Cleaning with a mild detergent: Mix a mild soap with water in a bucket. Using a soft sponge or cloth, gently scrub the surface to remove any dirt, grease, or grime. Rinse with clean water and allow the surface to dry.
I recommend avoiding abrasive cleaners or high-pressure water sprays, as these can damage the old paint and underlying surface.
• Repairing Surface Damage
After the surface is clean and dry, it’s time to address any damage. This process may vary depending on the specific issues, but generally, it includes the following steps:
- Filling cracks and holes: Use a good-quality filler or putty to fill any holes or cracks in the surface. Apply the filler with a putty knife and smooth it evenly across the damaged area. Allow the filler to dry according to the manufacturer’s instructions before sanding it smooth.
- Repairing flaking paint: Use a scraper or putty knife to remove any loose or flaking paint. If the remaining paint is still firmly attached to the surface, sand the edges to create a smooth transition between the old paint and the exposed surface.
- Dealing with mold or mildew: If you find mold or mildew on the old painted surface, it is important to address it before repainting. Clean the affected area with a mixture of one part bleach to four parts water. Rinse with clean water and allow the surface to dry. If mold or mildew persists, consult a professional for further treatment.
• Sanding the Surface
To achieve a smooth finish and ensure proper adhesion of the new paint, it is necessary to sand the entire surface. Use fine-grit sandpaper (150 to 220 grit) and, if possible, an electric orbital sander to save time and effort. Pay special attention to areas where repairs were made.
After sanding, dust the surface to remove any debris and wipe it down with a damp cloth to remove any remaining dust. It is essential to ensure the surface is fully dry before proceeding with any painting work.
• Priming the Surface
Priming is a crucial step in ensuring proper adhesion of the new paint to the old painted surface. A quality primer seals the surface, provides a uniform base for the paint, and helps prevent stains or patches from bleeding through the new paint.
Select a primer appropriate for the type of surface being painted (i.e., wood, drywall, or masonry) and follow the manufacturer’s instructions for application. It is essential to let the primer dry thoroughly (typically 24 hours) before applying the paint.
• Choosing the Right Paint
Selecting the right paint is crucial for the durability and appearance of the repainted surface. Factors to consider in choosing the right paint include:
- Type of paint: There are two main types of paint: oil-based and water-based (latex) paint. Water-based paints are generally easier to work with and dry faster, while oil-based paints are more durable. Check the requirements of the surface and choose the appropriate type of paint.
- Finish: Paints come in a variety of finishes, including flat, eggshell, satin, semi-gloss, and gloss. Choose a finish that matches the desired look and wear resistance of the space being repainted.
- Color: Ultimately, the choice of color will depend on the desired aesthetic and personal preference. However, keep in mind that darker colors can be harder to cover than lighter ones, so additional coats of paint might be necessary.
• Final Recommendations
With proper preparation, repainting an old painted surface can be a rewarding and transformative process. By assessing the surface condition, cleaning, repairing damage, sanding, priming, and choosing the right paint, you can achieve a professional and lasting finish.
Remember to allow sufficient drying time between each step and always follow the manufacturer’s guidelines for any products used.
Step | Task |
|---|---|
1 | Inspect and assess the condition of the old painted surface to determine the extent of preparatory work required. |
2 | Remove any loose, peeling, or flaking paint using a paint scraper, putty knife, or wire brush. |
3 | Repair any surface imperfections such as cracks, holes, or dents using a suitable filler or patching compound. |
4 | Sand the surface to smoothen any rough or uneven areas and to promote better adhesion of the new paint. |
5 | Remove any remaining dust, dirt, or debris from the surface using a vacuum cleaner, brush, or tack cloth. |
6 | Apply a suitable primer or sealer to the surface, especially if there are any stains or if the old paint is glossy. |
7 | Allow the primer or sealer to dry fully according to the manufacturer’s instructions. |
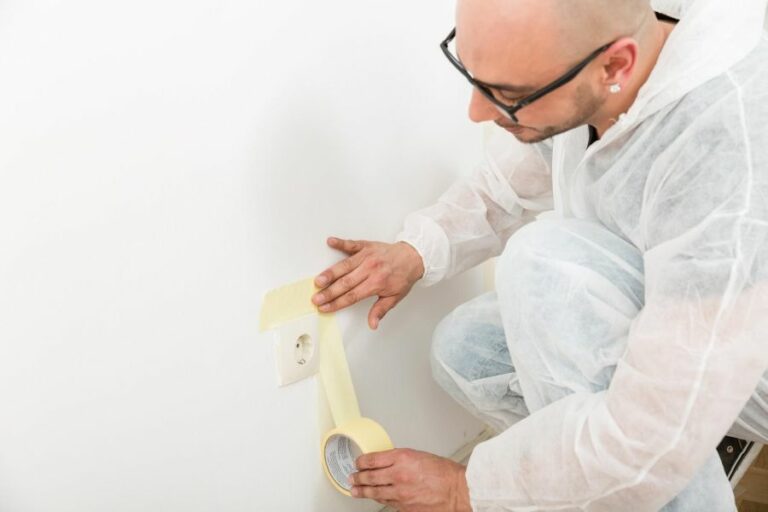
8 | Protect any surrounding surfaces, fixtures, or furnishings using masking tape, drop cloths, or plastic sheeting. |
9 | Ensure proper ventilation and room temperature for optimal drying and curing of the new paint. |
10 | Choose the appropriate type and color of paint, and prepare the necessary application tools such as brushes, rollers, and sprayers. |
How to Clean Painted Surfaces Before Applying a Fresh Coat
Proper surface preparation is crucial to ensure a successful paint job. When it comes to repainting, cleaning the surface beforehand can make a significant difference in the final outcome.
• Identifying the Type of Paint
Before starting the cleaning process, it is vital to identify the type of paint on the surface. There are two main types of paints: water-based (latex) and oil-based (alkyd). A simple test to determine the paint type involves dampening a cotton ball with rubbing alcohol and gently rubbing it onto the surface.
If the paint comes off onto the cotton ball, it is water-based; if not, it is oil-based. This information will help you choose the appropriate cleaning method and materials.
• Initial Cleaning
– Remove Dust and Debris
Begin by removing any loose dust, dirt, and debris from the surface. A vacuum cleaner with a brush attachment or a soft-bristle broom can efficiently remove dust from walls and ceilings, while a microfiber cloth or a soft brush can clean baseboards, moldings, and window sills.
– Wash the Surface
After removing dust and debris, washing the surface is essential to remove any grease, stains, or residue that can interfere with the new paint. For this, a mild dishwashing detergent mixed with warm water can be used for both water-based and oil-based paints.
Apply the mixture using a sponge or a soft cloth, taking care not to over-saturate the surface. Rinse the area with clean water and allow it to dry completely.
Important Note
If you suspect the presence of mold or mildew, it is important to address this issue before repainting. Remove mold and mildew using a mixture of household bleach and water (1 part bleach to 3 parts water).
Apply the solution, let it sit for a few minutes, then scrub the area gently with a soft brush. Rinse thoroughly with water and allow it to dry completely. Wear protective gear, such as gloves and goggles, when handling bleach.
• Additional Steps for Oil-Based Paints
If the existing paint is oil-based, it is necessary to take a few additional steps to prepare the surface.
– Degloss the Surface
Over time, oil-based paints can develop a glossy finish, which can cause the new paint to adhere poorly. To address this issue, use a liquid deglosser or fine-grit sandpaper to scuff the surface gently, reducing the gloss level. Be sure to wipe away any dust created with a clean, damp cloth.
– Clean with TSP
After deglossing, it is recommended to clean the surface with a Trisodium Phosphate (TSP) solution. This heavy-duty cleaner is available in hardware stores and effectively removes grease, grime, and residue from oil-based paint surfaces.
Mix TSP as directed on the product label, apply it with a sponge or cloth, and then rinse with clean water. Allow the surface to dry thoroughly.
Caution
TSP can be a skin and eye irritant, so always wear protective gear, such as rubber gloves and goggles, when handling it. Additionally, TSP is harmful to the environment, so take care to avoid runoff into storm drains or waterways.
• Final Check and Touch-Up
After cleaning, inspect the surface for any remaining dirt or residue. If necessary, repeat the cleaning process to ensure a thoroughly clean surface.
Also, check for any damages, such as cracks or holes, and repair them using a patching compound or lightweight spackling. Sand the repaired areas smooth and wipe away any dust with a damp cloth.
• Allow the Surface to Dry
It is crucial to let the surface dry completely before applying the new paint. Failure to do so might compromise the paint’s adhesion, resulting in an uneven finish or premature peeling. Allow at least 24 hours for the surface to dry properly.
• Paint Selection and Application
When choosing the new paint, it is essential to select the appropriate type (water-based or oil-based) to ensure compatibility with the existing paint. Additionally, investing in high-quality paint can result in a more durable and long-lasting finish.
After selecting the paint, follow the manufacturer’s instructions for application and drying times. For more information on paint application techniques, visit the U.S. Environmental Protection Agency’s website on home painting.
By thoroughly cleaning and preparing the surface before repainting, you can achieve a professional and long-lasting result. Proper surface preparation is a crucial step that should not be overlooked, as it can significantly impact the success of your paint job.
Item to Clean | Cleaning Solution |
|---|---|
Surfaces with mild dirt or dust | Soap and water |
Lightly chalked surfaces | Chalk cleaner or a mild detergent solution |
Heavily chalked or moldy surfaces | Trisodium phosphate (TSP) or household bleach and water solution |
Greasy or oily surfaces | Mineral spirits or degreaser |
Scuffs, marks, or stains | Mild abrasive cleaner |