Stop Moisture Damage Before Surface Prep
It’s time to address the pressing issue of moisture damage before diving into your next surface preparation project. With years of experience and countless satisfied clients, we have the knowledge and expertise to help you stop moisture-related problems in your tracks.
Stop moisture damage before surface prep:
To prevent moisture damage before surface preparation, ensure proper ventilation, repair leaks, use dehumidifiers, apply vapor barriers, and utilize moisture-resistant materials. Identifying and addressing moisture-related issues like peeling paint, mold growth, and efflorescence is crucial for a successful project. Follow manufacturer recommendations and local building codes throughout the process.

Discover the importance of addressing moisture damage before surface prep and the costly consequences of ignoring this crucial step. Uncover expert tips, tools, and guidelines to protect your surfaces from irreversible harm.
Read on to ensure a long-lasting, beautiful result for your projects.
Contents
- 1 Prevent Moisture Damage Prior to Surface Preparation
- 2 Importance of Thorough Surface Prep for Waterproof Coatings
- 3 Essential Steps for Pre-Coating Surface Preparation
- 4 Considerations for Effective Surface Preparation
- 5 Final Stage of Surface Prep Before Applying Coatings
Prevent Moisture Damage Prior to Surface Preparation
Moisture damage is a common issue that needs to be addressed before any surface preparation project. It can lead to several problems, such as peeling paint, mold growth, and structural deterioration, thus requiring immediate attention.
• Understanding Moisture Damage
Moisture damage can be caused by various factors, such as inadequate ventilation, leaks, and high humidity levels. It can affect various surfaces, including wood, concrete, and plaster. When left untreated, it can cause significant damage to the underlying structure of a building.
The Environmental Protection Agency (EPA) recommends keeping indoor humidity levels between 30% and 50% to prevent mold growth and other moisture-related issues.
This can be achieved through proper ventilation, usage of dehumidifiers, or simply maintaining a comfortable room temperature.
• Identifying Moisture Problems
Before starting any surface preparation project, it is crucial to identify any existing moisture-related issues. Some common signs of moisture damage include:
– Peeling or Blistering Paint
Moisture can cause the paint to lose adhesion to the surface, resulting in peeling or blistering. If this is observed, it is essential to resolve the underlying moisture problem before repainting.
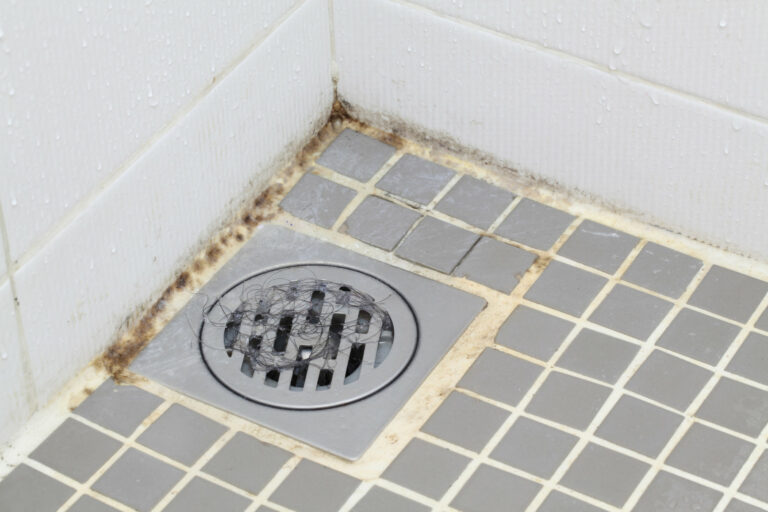
– Mold or Mildew Growth
Mold and mildew thrive in moist environments. If these are visible on surfaces, it is a clear sign of moisture damage. These should be removed and the source of moisture addressed before continuing the surface preparation.
– Efflorescence
Efflorescence is the formation of white, crystalline deposits on the surface of masonry or concrete. It occurs when water-soluble salts within the material dissolve due to moisture and then crystallize on the surface.
This indicates that moisture penetrates the surface and must be addressed before any surface preparation.
– Warped or Buckled Materials
This is a telltale sign of moisture damage, as materials such as wood, drywall, or flooring often warp or buckle when exposed to excessive moisture. In this case, it is necessary to identify the source of moisture and address the issue before proceeding with surface preparation.
• Prevention and Repair of Moisture Damage
To ensure a successful surface preparation project, follow these steps to prevent and repair moisture damage:
– Proper Ventilation
Improving ventilation in the space is crucial to prevent moisture buildup. Make sure to install proper exhaust fans in areas such as bathrooms and kitchens, and check ventilation systems for blockages or damage.
– Repair Leaks
Inspect the area for any leaks or water infiltration. Repair any faulty plumbing, seal gaps in walls or floors, and add weatherstripping to doors and windows to prevent water intrusion.
– Utilize Dehumidifiers
If the area has high humidity levels, consider using dehumidifiers to maintain ideal humidity levels. This will prevent condensation and moisture buildup on surfaces.
– Apply Vapor Barriers
Installing vapor barriers can significantly reduce the amount of moisture that penetrates a surface. These can be applied on floors or walls to prevent moisture from penetrating the surface.
– Consider Using Moisture-Resistant Materials
In areas prone to moisture damage, using moisture-resistant materials, such as treated wood or water-resistant drywall, can help prevent issues in the long run.
• Final Thoughts
Addressing moisture damage before starting any surface preparation project is vital to ensure its success.
By identifying moisture-related problems, implementing prevention and repair strategies, and using proper surface preparation techniques, you can prevent further damage and maintain the integrity of the surface.
Remember to always follow manufacturer recommendations for each specific product, as well as local building codes and regulations. By following these guidelines, you’ll be well on your way to a successful surface preparation project.
Step | Description |
|---|---|
1. Identify moisture problems | Inspect the area to identify any signs of moisture damage or potential sources of moisture. |
2. Address the source of moisture | Fix any leaking pipes, seal cracks, or improve ventilation to address the root cause of moisture. |
3. Dry the area | Use fans, dehumidifiers, or air movers to dry out the area before starting surface preparation. |
4. Remove damaged materials | Remove any damaged or moldy materials like drywall, insulation, and carpet before surface prep. |
5. Clean and disinfect surfaces | Use a disinfectant cleaner to clean surfaces and kill any mold or mildew present. |
6. Choose moisture-resistant materials | When repairing or replacing materials, choose moisture-resistant options like cement board or mold-resistant drywall. |
7. Monitor humidity levels | Regularly check the humidity levels in the area and take steps to maintain a healthy indoor environment. |
Importance of Thorough Surface Prep for Waterproof Coatings
When it comes to waterproofing surfaces, one of the most critical steps is the preparation of the surface before applying any waterproof coating.
Proper surface preparation is essential in ensuring that the waterproofing material adheres well to the surface and performs its intended function of preventing water ingress.
• Key Reasons for Surface Preparation
– Ensuring Adhesion
One of the primary reasons for correct surface preparation is to ensure strong adhesion between the waterproof coating and the surface.
Waterproof coating materials are designed to form a strong bond with the substrate, but this can only be achieved if the surface is clean, dry, and free of contaminants.
Adequate surface preparation removes dirt, oil, grease, and other contaminants that could prevent the waterproof coating from adhering properly, thus ensuring the coating’s effectiveness and longevity.
– Removing Damaged or Weak Substrate
Over time, surfaces can develop cracks, peeling paint, or other defects that can compromise the integrity of the waterproof coating. Proper surface preparation involves removing these weak areas to create a sound, stable substrate for the waterproofing material to adhere to.
This significantly reduces the risk of future problems, such as leaks, blistering, or delamination of the waterproofing membrane.
– Promoting Long-lasting Results
A thorough surface preparation, followed by the correct application of a waterproof coating, promotes a long-lasting and durable waterproofing solution.
By reducing the likelihood of water ingress, cracks, or other weaknesses, properly prepared surfaces require less maintenance and repairs over time, ultimately saving both time and money.
• Common Surface Preparation Methods
– Cleaning
Cleaning is a crucial first step in preparing any surface for waterproofing. Methods such as pressure washing, steam cleaning, and scrubbing with a brush and detergent can be used to remove dirt, grime, mold, and other contaminants from the surface.
These contaminants can interfere with the adhesion of the waterproof coating and reduce its effectiveness.
– Abrasive Blasting
Abrasive blasting is a popular method for preparing surfaces by using high-pressure air to propel abrasive particles, such as sand or steel shot, against the surface.
This process effectively removes loose paint, rust, and other unsound materials, creating a clean, rough surface that promotes good adhesion for the waterproof coating.
– Grinding or Sanding
For smaller areas and finer surface preparation, grinding or sanding can be used to smooth rough surfaces, remove old paint or coatings, and create a suitable profile for the waterproof coating.
Using the appropriate tools and equipment ensures a high-quality and properly prepared surface, ready for the waterproofing material.
– Repairing Defects
Before applying a waterproof coating, any cracks, voids, or other defects must be repaired to create a stable and continuous surface. This may involve filling cracks with a suitable sealant, patching holes or voids, or leveling uneven areas of the surface.
Proper repair of these defects prevents water ingress and promotes better adhesion of the waterproof coating.
• Consequences of Inadequate Surface Preparation
Failing to prepare a surface properly before applying a waterproof coating can lead to various issues that reduce the effectiveness of the waterproof membrane and potentially result in damage to the structure. Some of these consequences include:
– Poor Adhesion
Inadequate surface preparation can lead to poor adhesion between the waterproof coating and the surface. This can cause delamination or blistering of the waterproof material, resulting in leaks and potential damage to both the surface and the structure.
– Reduced Lifespan
A waterproof coating that has not been applied to a properly prepared surface may not provide the intended level of performance and may fail sooner than expected. This can result in the need for more frequent maintenance and repairs, ultimately increasing costs.
– Structural Damage
If water is allowed to penetrate the waterproof membrane due to poor surface preparation and adhesion, it can infiltrate the structure and cause damage to building materials, promote mold growth, and lead to structural issues that pose potential risks to the occupants.
• In Conclusion
Proper surface preparation is not only integral to the successful application of any waterproof coating but also ensures better adhesion, durability, and a long-lasting waterproofing solution.
By paying attention to the necessary cleaning, repair, and preparation methods, you can prevent potential problems and ensure the protection and preservation of your surfaces and structures.
Essential Steps for Pre-Coating Surface Preparation
High-quality surface preparation is crucial for the success and longevity of a coating system.
• Understanding Surface Contaminants and Defects
Before diving into the preparation process, it is essential to understand the potential surface contaminants and defects that need to be addressed. These may include:
- Dirt and debris: Loose particles that can prevent proper adhesion of the coating to the substrate.
- Oil and grease: These substances can lead to loss of adhesion, blistering, or other coating failures.
- Rust and corrosion: The presence of rust or corrosion can lead to a weakened substrate and reduced coating performance.
- Old, loose, or defective paint: This can cause adhesion problems with the new coating system.
• Cleaning the Surface
The first step in preparing a pre-coating surface is to clean it thoroughly. There are several methods for cleaning a surface, and the choice depends on the type and extent of contaminants present.
– Dry Cleaning
Dry cleaning is suitable for removing loose dust, dirt, and debris from the surface. It can be done using compressed air or a simple brush. Be sure to use a brush with soft bristles to avoid damaging the substrate.
– Solvent Cleaning
Solvent cleaning is used to remove oil, grease, and other soluble contaminants from the surface. The appropriate solvent, such as denatured alcohol, should be chosen based on the type of contaminant to be removed.
Apply the solvent to a clean cloth or sponge and scrub the surface thoroughly. Repeat the process until the surface is free from oily residue.
– Detergent Cleaning
For surfaces contaminated with dirt and grime, a detergent cleaning may be necessary. Dilute a mild detergent in water and apply it to the surface using a cloth or sponge. After scrubbing, rinse the surface thoroughly with clean water to remove any residue.
– Power Washing
Power washing, also known as high-pressure water cleaning, is useful for removing stubborn dirt and debris, as well as helping to remove loose paint and rust.
Be cautious when using this method, as excessive pressure can damage the surface or force water into unwanted areas. It is recommended to test a small area before proceeding with the entire surface.
• Degreasing the Surface
Even after cleaning the surface, it might still contain traces of oil, grease, or other contaminants. A degreaser is necessary in such cases to ensure the complete removal of residues.
Apply the degreaser to the surface using a cloth or brush, and follow the manufacturer’s instructions for dwell time and rinsing.
• Abrading the Surface
To ensure optimal adhesion, it is often necessary to abrade the surface to create a profile that will allow the coating to bond effectively. This process helps remove stubborn contaminants, as well as old or damaged coatings.
– Hand Tool Cleaning
Hand tools, such as wire brushes, scrapers, or abrasive pads, can be used for light abrasion tasks. While hand tool cleaning is not ideal for large-scale projects, it is practical for small-scale applications or for surface profiling in areas difficult to reach with power tools.
– Mechanical Tool Cleaning
Mechanical tools, such as sanders, grinders, and needle scalers, are more efficient than hand tools and achieve a consistent surface profile. Choose the appropriate tool and abrasive, keeping in mind the substrate material and the desired level of abrasion.
– Abrasive Blasting
Abrasive blasting is one of the most effective methods for surface preparation, as it removes contaminants, creates an ideal surface profile, and can reach difficult areas. Popular abrasive blasting methods include sandblasting, shot blasting, and grit blasting.
It is essential to choose the appropriate abrasive media and equipment for the substrate and specific project requirements.
– Chemical Etching
In some cases, chemical etching can be used for surface preparation. This method utilizes acidic or alkaline solutions to create a controlled, uniform surface profile.
Before using chemical etching, consult the coating manufacturer’s recommendations and conduct a compatibility test with the substrate.
• Repairing Surface Defects
After the surface has been cleaned and abraded, it is crucial to address any defects or irregularities, as these may affect the coating’s adhesion and performance.
Repair methods will depend on the type and extent of the surface defect; they may include filling holes or cracks with an appropriate filler or leveling uneven surfaces using a specialized leveling compound.
• Final Surface Inspection and Verification
Once surface preparation is complete, inspect the surface carefully for any remaining contaminants or defects.
The Society for Protective Coatings (SSPC) provides guidelines and standards for evaluating the cleanliness and profile of prepared surfaces. In addition, consult the coating manufacturer’s recommendations to ensure that the surface meets the required specifications.
All these steps are critical to ensuring a clean, defect-free surface that is ready to receive a coating system. By following these guidelines and by choosing quality materials and equipment, you set your project up for a successful and lasting outcome.
Remember, proper surface preparation is the foundation for a durable and long-lasting coating system.
| How do you prepare a pre-coating surface? | |
|---|---|
| 1. Clean the surface | Remove dirt, dust, grease, and any other contaminants from the surface using a suitable cleaning agent. |
| 2. Repair any damages | Fill any cracks, holes, or imperfections with a suitable filler and allow it to dry completely. |
| 3. Sand the surface | Smooth the surface with sandpaper, ensuring that any rough spots are leveled out, and any loose paint is removed. |
| 4. Clean again | After sanding, clean the surface again to remove any dust or particles that may have accumulated. |
| 5. Prime the surface | Apply a suitable primer to the surface, following the manufacturer’s instructions. Allow it to dry completely before proceeding. |
| 6. Tape off any areas | Use masking tape to protect any adjacent surfaces, fixtures or areas that you do not want to be coated. |
| 7. Ventilate the area | Ensure proper ventilation in the space you are working in to avoid inhaling any harmful fumes from the primer or coating. |
Considerations for Effective Surface Preparation
A well-prepared surface is essential for achieving optimal results during any paint job or construction project. To ensure the highest quality finish and longevity of the applied materials, it is crucial to understand the factors that need to be considered when preparing a surface.
• Surface Material Type
Different types of materials require different preparation techniques. The most common types of surfaces that you might encounter include:
- Drywall
- Wood
- Concrete
- Metal
Each material demands specific methods and tools to achieve the desired finish. For instance, a wooden surface may need sanding and priming, while a metal surface may require rust removal and proper surface profiling.
– Drywall Surface Preparation
When dealing with drywall surfaces, you should first ensure that the surface is free of dust, dirt, and grease. You can easily clean the surface with a damp cloth or a vacuum cleaner.
Next, check for any dents, cracks, or holes in the drywall. Repair any imperfections using a patching compound or joint compound. Allow it to dry, and then sand it down until it blends seamlessly with the rest of the wall. Finally, apply an appropriate primer to prepare the surface for painting.
– Wood Surface Preparation
Prepare a wooden surface by cleaning it thoroughly using a soft brush or vacuum cleaner to remove loose particles and dirt. If the wood is stained, you should sand the entire surface using a coarse grit sandpaper, gradually working your way to a finer grit to achieve a smooth finish.
Fill any dents, cracks, or holes with a suitable wood filler and allow it to dry. Sand down the repaired areas and apply a primer or undercoat as needed, depending on the finish you want to achieve.
– Concrete Surface Preparation
Concrete surfaces usually require more attention due to their porous nature. Start by cleaning the surface with a pressure washer or a power scrubber using a non-acidic detergent to remove stubborn dirt, grease, or paint.
Once the surface is clean, repair any cracks or holes with a suitable concrete repair material. For larger cracks or holes, trowel the repair material in layers to avoid sagging or sinking.
Apply an appropriate primer or sealer depending on the purpose of the surface. This step is especially crucial for outdoor surfaces exposed to the elements, such as driveways or sidewalks.
– Metal Surface Preparation
For metal surfaces, it is essential to remove rust or oxidation before applying any coatings. You can achieve this by using a wire brush, sandpaper, or even a sandblaster for larger-scale projects. Make sure to remove any residue or dust after the rust removal process.
Choose an appropriate primer, rust converter, or metal paint, depending on your project’s requirements. Always follow the manufacturer’s instructions regarding proper application and drying times.
• Environmental Conditions and Weather
When working on an outdoor surface, it is essential to consider weather conditions such as temperature, humidity, and the likelihood of precipitation. These factors can affect the adhesion, drying time, and performance of the applied materials.
Ideally, surface preparation and coating application should be done in mild, dry conditions, away from direct sunlight. Make sure to check the forecast before starting your project and plan accordingly.
• Surface Condition
The condition of the surface is an essential factor to consider before starting any preparation work. Assess the surface for any peeling paint, mold, mildew, or other potential problems that may affect the final result.
It might be necessary to invest in specialized cleaning products or techniques to eliminate these issues effectively.
• Health and Safety
Proper safety precautions should be taken during surface preparation, depending on the materials used and the work environment. Some of the safety measures that should be followed include:
- Wearing safety goggles to protect your eyes from debris
- Using gloves to protect your hands from chemicals and harsh cleaning agents
- Wearing a proper respirator if working with hazardous dust or fumes
- Ensuring proper ventilation for indoor spaces when using chemicals or solvents
By understanding and considering these factors, you can ensure that your surface preparation process is both effective and efficient, ultimately leading to a long-lasting, high-quality finish.
Following these guidelines can avoid common pitfalls, save time, and ultimately lead to a successful project.
Final Stage of Surface Prep Before Applying Coatings
Surface preparation is a crucial step in ensuring the longevity and effectiveness of protective coatings.
The last stage of surface preparation before coating application is known as the final cleaning step, which includes removing any remaining contaminants and ensuring the surface is adequately roughened for optimal coating adhesion.
• Understanding Surface Preparation Methods
There are three primary surface preparation methods used before coating application:
- Mechanical Surface Preparation: This method includes techniques such as abrasive blasting, grinding, and sanding, which create the appropriate surface profile while simultaneously removing contaminants and residues. Mechanical methods are commonly used for metal surfaces and are ideal for creating the necessary anchor pattern for a long-lasting bond with the coating.
- Chemical Surface Preparation: Chemical techniques involve the use of solvents, detergents, and various acidic or alkaline compounds to clean the surface and remove contaminants. Chemical surface preparation is often used in conjunction with mechanical methods, especially when dealing with surfaces that have heavy soiling or contamination, such as rust, grease, or oils.
- Thermal Surface Preparation: This method involves the use of heat to remove contaminants from the surface. Examples of thermal surface preparation include flame cleaning, induction stripping, and high-temperature baking. This method is commonly used for heavily contaminated steel surfaces where other methods may not be effective.
• The Final Cleaning Step in Surface Preparation
After the chosen surface preparation method has been completed, the final cleaning step is essential for ensuring optimal coating adhesion. This step usually involves the following tasks:
– Surface Contaminant Removal
Contaminants left on the surface may hinder adhesion between the coating material and the substrate, leading to premature failure of the protective coating. Common surface contaminants include dust, dirt, grease, oils, and residues from the previous surface preparation method.
To remove remaining contaminants from the surface, an appropriate solvent or detergent should be used.
The choice of solvent will depend on the contaminants present and the coating specifications. Ensure that the solvent used does not leave any residue behind that could potentially weaken the bond between the substrate and the coating.
– Surface Profile Evaluation
For the coating to adhere properly to the substrate, a certain level of surface roughness or anchor pattern is required. The level of roughness depends on the specific coating material being used. The surface profile should be visually inspected and measured to ensure it meets the required standards.
– Surface Dryness Assessment
Ensure the substrate is entirely dry before coating application, as the presence of moisture can weaken the bond between the coating and the substrate. This assessment is especially crucial if the surface preparation method involves water or water-based chemicals.
Moisture meters and other tools specifically designed to measure surface dryness can be used for this purpose.
• Recommendations for Surface Preparation
Based on years of experience in the coatings industry, the following recommendations should be considered to ensure the proper surface preparation before the coating application:
- Always follow the manufacturer’s recommendations: Coating materials come with instructions and guidelines from the manufacturer, which include specific surface preparation steps and requirements. Following these recommendations will help ensure the coating’s longevity and effectiveness.
- Use a combination of surface preparation methods when necessary: In some cases, combining mechanical, chemical, and thermal surface preparation methods may be required to thoroughly clean the substrate and achieve the necessary surface profile.
- Perform a visual inspection and ensure proper documentation: Documenting the entire surface preparation process, including a thorough visual inspection, is essential to ensure all the necessary steps were taken and the final cleaning step was adequately completed.
- Seek professional assistance if needed: If you’re unsure about any aspect of surface preparation or concerned about the effectiveness of your chosen method, seek assistance from a professional who has experience in the coatings industry.
In conclusion, surface preparation is a critical aspect of the coating application process.
The last stage of surface preparation, which includes the final cleaning step, helps ensure the surface is contaminant-free and the appropriate roughness level is achieved, resulting in a long-lasting and effective coating application.
By following the recommended guidelines and paying close attention to the final cleaning step, you can significantly enhance the performance and durability of protective coatings.