Fixing Blemishes On Walls And Floors. What Pros Say
Fixing blemishes on walls and floors can seem like a daunting task, but with the right guidance and tools, it’s a challenge that can be easily tackled! We understand the need for immaculate surfaces, and we’re here to help you achieve that flawlessness with confidence. In this discussion, we’ll go through the steps to identify, repair, and restore the beauty of your walls and floors, turning any imperfections into mere memories. Trust us. You’ll love the transformation!
Fixing blemishes on walls & floors:
To fix blemishes on walls and floors, first identify the type of blemish (cracks, stains, scuffs, or scratches) and its cause. For walls, repair cracks and holes using filler, sanding, and painting, and clean stains with appropriate solutions. For floors, depending on the material, use special cleaners, repair kits, or replacement planks to address scuffs and scratches and clean stains with suitable solutions.

Ready to tackle those stubborn wall and floor blemishes but not sure where to begin? Discover professional techniques to repair, prime, and paint unsightly spots in your home. Read on and bring your surfaces back to life!
Contents
- 1 Repairing Imperfections in Walls and Flooring
- 2 Top Methods for Removing Scuff Marks on Walls
- 3 Does Touch-Up Paint Seamlessly Integrate Over Time?
- 4 Solutions for Restoring Scuffed Wall Paint
- 5 Touching Up Wall Surfaces Without Full Repainting
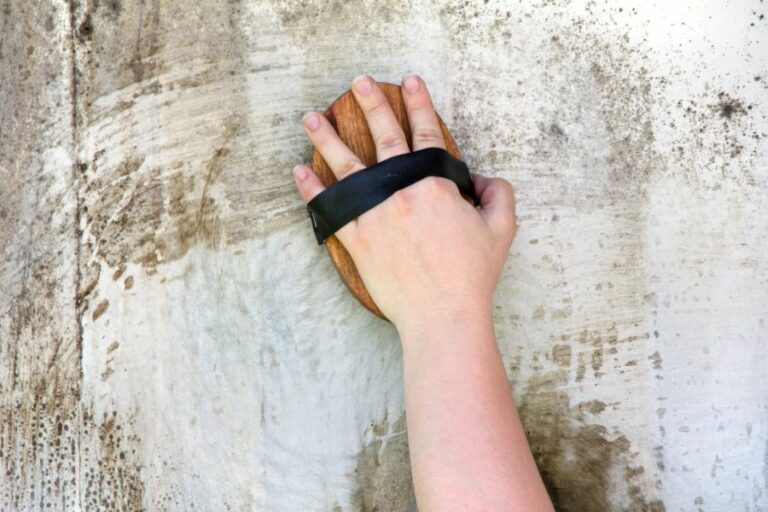
Repairing Imperfections in Walls and Flooring
Blemishes on walls and floors can be unsightly and, if left untreated, can cause long-lasting damage to the underlying surfaces. This article provides a comprehensive guide to repairing various types of blemishes, ensuring that your home stays looking its absolute best.
• Identifying the Type of Blemish
Before addressing the blemish, it is essential to identify its type accurately. Different types of blemishes require different repair and cleaning techniques, so proper identification can save time and effort.
– Cracks and Holes in Walls
Cracks and holes can be caused by a range of factors, including moisture damage, settling, or impact. These imperfections should be repaired promptly to avoid further deterioration.
– Stains on Walls
Stains can be caused by water damage, dirt, or spills. It is essential to identify the cause of the stain before attempting to clean or remove it. This will help prevent the use of ineffective or damaging cleaning methods.
– Scuffs and Scratches on Floors
Scuffs and scratches can be caused by everyday use or heavy impact. Depending on the severity of the damage, different repair methods may be required.
– Stains on Floors
Floor stains can be the result of spills or dirt being tracked into the home. Identifying the type of stain and the flooring material is important to ensure that the appropriate cleaning technique is used.
• Repairing Cracks and Holes in Walls
After identifying a crack or hole in the wall, follow these steps to repair it:
- Clean the Blemish Area: Using a cloth or gentle brush, clean the area around the crack or hole to remove any dirt, dust, or debris that may have accumulated.
- Remove Loose Material: Using a scraper or putty knife, carefully remove any loose paint, wallpaper, or plaster from the damaged area.
- Apply Filler: Select an appropriate filler for the type of wall material (e.g., plaster, drywall) and follow the manufacturer’s instructions for application. Generally, this will involve applying the filler with a putty knife and smoothing it out to level the surface.
- Let Dry: Allow the filler to dry for the specified time according to the manufacturer’s instructions.
- Sand to a Smooth Finish: Once the filler has dried, use fine-grit sandpaper to gently sand the filled area, ensuring a smooth and seamless finish. Wipe away any dust with a damp cloth.
- Prime and Paint: Apply a suitable primer to the repaired area, and then paint it to match the surrounding wall.
To see an excellent visual demonstration of this process, check out this guide from Today’s Homeowner.
• Removing Stains from Walls
To remove stains from walls, follow these steps:
- Test the Cleaning Solution: Before applying any cleaning solution to the wall, test it on an inconspicuous area to ensure it will not damage the paint or wallpaper.
- Gently Clean the Stain: Using the appropriate cleaning solution (e.g., water and mild soap, a baking soda paste, specialized wall cleaner), gently scrub the stain using a soft cloth or sponge, working from the outside of the stain towards the center.
- Rinse and Pat Dry: After cleaning, rinse the area with clean water, and then pat dry with a clean cloth or towel.
- Repaint if Necessary: If the stain is still visible, it may be necessary to apply a new coat of paint or touch-up the damaged area. Be sure to match the existing color and finish.
• Repairing Scuffs and Scratches on Floors
When dealing with scuffs and scratches on the floor, the repair technique will vary depending on the flooring material. Here are some general tips for common flooring types:
- Hardwood: For minor scuffs, try using a wood floor cleaner and a clean, white cloth. For deeper scratches, consider using a wood filler, sanding the area, and refinishing.
- Laminate: To fix minor scuffs, use a laminate floor repair kit, which typically includes a putty or marker to match the color of the flooring. For deeper scratches, consider replacing the affected plank.
- Tile: Scratches on tiles can often be improved by rubbing a dab of toothpaste over the affected area with a damp cloth.
- Vinyl: For minor blemishes, try a vinyl floor cleaner and a soft cloth. For deeper scratches, use a vinyl repair kit that includes a filler and colorant.
• Removing Stains from Floors
Similar to wall stains, the approach to removing stains from floors will vary depending on the flooring material. Here are some general tips for common flooring types:
- Hardwood: Use a non-abrasive cleaning solution specifically designed for hardwood floors. Gently scrub the area with a cloth or sponge, being careful not to damage the wood’s finish. If the stain remains, it may be necessary to sand and refinish the affected area.
- Laminate: Laminate floors are often stain-resistant but may benefit from a gentle cleaning with a damp (not wet) cloth and a mild cleaning solution. Avoid using excessive water, as it can damage the floor’s core.
- Tile: For most tile floors, a mild cleaning solution (e.g., water and dish soap) and a cloth or sponge should suffice. For particularly stubborn stains, consider using a paste made from water and baking soda.
- Vinyl: Use a gentle cleaning solution specifically formulated for vinyl floors, and scrub the area with a soft cloth or sponge. Rinse with clean water and pat dry.
In conclusion, properly identifying the type of blemish and using the appropriate repair or cleaning technique can help maintain the appearance and longevity of walls and floors. Regularly inspect these surfaces and address any blemishes promptly to keep your home looking its best.
Step | Description |
|---|---|
1 | Assess the blemishes and determine the cause. |
2 | Clean the affected area with soap and water. |
3 | Use a scraper or putty knife to remove loose or damaged material. |
4 | Fill small holes and cracks with spackling compound or wood filler. |
5 | Sand the filled area until it is smooth and flush with the surrounding surface. |
6 | For larger holes, use a patching compound and follow the manufacturer’s instructions. |
7 | Prime and paint the repaired area to match the surrounding wall or floor. |
8 | For floors, apply a protective finish or sealant if necessary. |
Top Methods for Removing Scuff Marks on Walls
• Assess the Damage
Before starting the touch-up process, it’s important to assess the damage to your walls. Scuff marks can range from minor blemishes that only require simple cleaning to deeper scuffs that might need more attention.
Scrutinize the walls and gather information on the type of paint used, its sheen (flat, eggshell, satin, or gloss), and the age of the paint job.
• Gather Materials
Once the extent of the scuff marks is assessed, gather the necessary materials for the job. Typically, you will need the following:
- Mild detergent or wall cleaner
- Soft sponge or microfiber cloth
- Water
- Soft, clean towels or rags
- Matching paint (if needed)
- Paintbrush or small foam roller (if needed)
- Painter’s tape (if needed)
- Sandpaper (if needed)
• Clean the Scuff Marks
In most cases, minor scuff marks can be removed by simply cleaning the walls. This process often involves using a mild detergent or wall cleaner.
- Dilute the detergent or cleaner with water, as recommended by the manufacturer.
- Dampen a soft sponge or microfiber cloth in the solution, wring out excess water, and gently rub the scuff mark with the sponge or cloth.
- Wipe the cleaned area with a clean, damp cloth and then pat it dry with a soft towel.
Expert tip: Before using any cleaner on your walls, test it on a small, inconspicuous section of the wall to ensure that it does not damage the paint finish.
• Assess if the Paint Requires Touch-Up
If the scuff marks are still visible after cleaning, you may need to touch up the paint on the walls. In this case, make sure you have the correct color of paint that matches the existing walls.
Expert tip: If you do not have the original paint can, take a small chip of the paint to your local paint store. They can match the color and help you choose the appropriate sheen level.
• Prepare the Area
Before applying paint, prepare the area by using painter’s tape to protect any adjoining surfaces, such as baseboards, trim, or other walls. If the scuffed area has any rough or uneven surfaces, lightly sand it with fine-grit sandpaper to ensure a smooth surface for the paint.
Wipe the wall clean of any sanding dust afterward.
• Mix the Paint
To ensure uniform color and sheen, mix the paint thoroughly, especially if you’re using an old can of paint. This helps in redistributing any settled pigments or other components.
• Apply the Paint
When touching up the paint, use a paintbrush or a small foam roller, depending on the size of the area and the texture of the original paint application.
- Apply a thin coat of paint on the scuffed area, feathering the edges to blend it with the surrounding paint.
- Allow the paint to dry completely. This drying time can vary depending on the paint type and environmental conditions, so it’s best to consult the paint manufacturer’s recommendations.
- If the touched-up area remains visible after the first coat has dried, apply additional thin coats until the new paint blends seamlessly with the existing paint job.
Expert tip: Be patient and avoid applying too much paint in one coat. This might cause the touched-up area to become more visible instead of blending in.
• Remove the Painter’s Tape and Clean Up
Once you have complete confidence that the touch-up paint is dry and matches the surrounding area, carefully remove the painter’s tape to unveil your newly restored wall. Clean and store any tools or equipment used during the process.
• Final Thoughts
Touching up scuff marks on walls may seem daunting at first, but with the right materials and techniques, it can be done effectively and efficiently. By following these steps, you can restore your walls to their original glory and maintain a clean and polished home interior.
Method | Description |
|---|---|
Eraser Sponge | Use a dampened eraser sponge, like Magic Eraser, to gently scrub away the scuff marks. |
Soapy Water | Mix a few drops of dishwashing liquid in warm water and use a soft cloth to scrub the marks away. |
Baking Soda | Make a paste of baking soda and water, and gently scrub the scuff marks with a soft cloth. |
Toothpaste | Apply non-gel toothpaste to the scuff marks and gently scrub with a soft cloth or sponge. |
Vinegar Solution | Mix equal parts water and white vinegar, and use a soft cloth to gently scrub away the scuff marks. |
Touch-Up Paint | Lightly sand the scuff marks, and then carefully apply a small amount of matching paint to cover them. |
Does Touch-Up Paint Seamlessly Integrate Over Time?
When it comes to maintaining the appearance of your car or any other object with a painted surface, touch-up paint is a popular solution. The million-dollar question is: will touch-up paint eventually blend in with the original paint?
• Factors Affecting Touch Up Paint Blending
– Age of the Original Paint
The original paint’s age plays a significant role in determining the extent to which touch-up paint will blend. Over time, exposure to the sun, dirt, and other elements can cause the original paint to fade or lose its luster.
This will ultimately affect the appearance of touch-up paint as it may not be an exact match due to this fading.
– Color and Type of Paint
Choosing the right type and color of touch-up paint is crucial to achieving a seamless blend. Matching the exact shade and type of paint (e.g., metallic, gloss, or matte) is essential to ensure that the touch-up paint blends with the original surface.
– Application Technique
Applying touch-up paint in the right manner is vital for ensuring it blends well. The key is to achieve a smooth, even layer that matches the surrounding area.
Ideally, use a small brush or a fine applicator while applying the paint, ensuring that the painted area is adequately prepared by cleaning and lightly sanding the surface.
– Drying and Curing Process
The drying and curing process is a crucial factor in achieving proper touch-up paint blending. It’s essential to follow the paint manufacturer’s instructions for drying and curing time.
The paint should be given sufficient time to dry, and it’s recommended to avoid exposing the painted area to sunlight or other elements during this period to achieve the best results.
• Tips for Achieving the Best Touch Up Paint Blend
– Proper Surface Preparation
Make sure the surface you intend to touch up is clean and dry before applying the paint. Use a degreaser or a mild detergent to remove any dirt or grease, and consider lightly sanding the area if needed. This ensures that the touch-up paint adheres to the surface properly.
– Selecting High-Quality Paint
Investing in high-quality touch-up paint is essential to achieve seamless blending. Low-quality paints may not give the desired finish and could potentially further damage the original paint.
Consider consulting with a professional or researching online for paint recommendations specific to your needs.
– Applying Clear Coat
After applying the touch-up paint and allowing it to dry, it’s a good idea to apply a clear coat. Clear coats not only protect the touch-up paint but also help blend the fresh paint with the old, providing a more seamless appearance.
Ensure that you’ve selected a clear coat that’s compatible with your touch-up paint for the best results.
– Consider a Professional Touch Up
If you’re not confident in your ability to achieve a seamless blend with touch-up paint, consider enlisting the help of a professional. They have the necessary experience and tools to handle the job and ensure that the touch-up paint blends as close as possible to the original surface.
• Things to Remember for Long-Term Success
Touch-up paint blending may not always be perfect; there is a possibility that the touch-up paint may not blend entirely with the original paint. To ensure the best possible results,
- Make sure to follow the manufacturer’s guidelines for paint application, drying, and curing.
- Be patient, as the blending can vary over time. Touch-up paint may initially appear more noticeable; however, as it settles and adapts to the original paint, it may become less obvious.
- Regularly maintain the painted surface and avoid exposing it to harsh environments for extended periods.
In conclusion, while touch-up paint may not always blend in perfectly, with the correct techniques and considerations, it’s possible to achieve a satisfactory result that keeps your car or painted surface looking its best.
Solutions for Restoring Scuffed Wall Paint
Scuffed paint on walls is a common issue in many homes, especially in high-traffic areas. This problem can negatively impact the overall aesthetic of your home, but fortunately, it can be repaired with relative ease. In this article, we will provide a step-by-step guide on how to fix scuffed paint on walls.
• Gathering Essential Tools and Materials
Before getting started, you’ll need to gather some essential tools and materials. These include:
- Clean microfiber cloth
- Warm water
- Dish soap
- Sponge
- Sandpaper (fine-grit and medium-grit)
- Primer
- Paint matching the wall color
- Paintbrush
- Paint roller (optional)
- Drop cloth
To find the correct paint color, you can visit a local paint store and request a paint chip to match your wall. If you already have leftover paint from the original wall color or if you know the specific color, you’re ahead of the game!
• Cleaning the Scuffed Area
First, prepare the area by removing any furniture, decor, or other items from the wall. Lay a drop cloth or old sheet on the floor to protect it from dust and paint.
Next, clean the scuffed area using a clean microfiber cloth, warm water, and dish soap. Gently scrub the area, removing any dirt or debris. This step is crucial, as it ensures proper paint adhesion during later steps. After cleaning, allow the wall to air dry completely.
• Sanding the Surface
Lightly sand the scuffed area using fine-grit sandpaper, moving in a circular motion. Be gentle, as excessive pressure can cause further damage to the wall. The goal is to smooth out the surface, not remove the paint entirely. After sanding, use a damp cloth to wipe away any dust.
If the scuff is deep, you may need to use medium-grit sandpaper before switching to fine-grit sandpaper. Remember to wipe away dust with a damp cloth after each round of sanding.
• Priming the Area
Apply a thin layer of primer over the sanded area using a paintbrush. Priming is essential for providing a smooth and uniform surface for the new paint to adhere to. Be sure to extend the primer slightly beyond the sanded area to ensure proper blending during the painting process.
Allow the primer to dry completely according to the manufacturer’s instructions. This step may take several hours but is crucial to achieving a professional finish.
• Painting the Wall
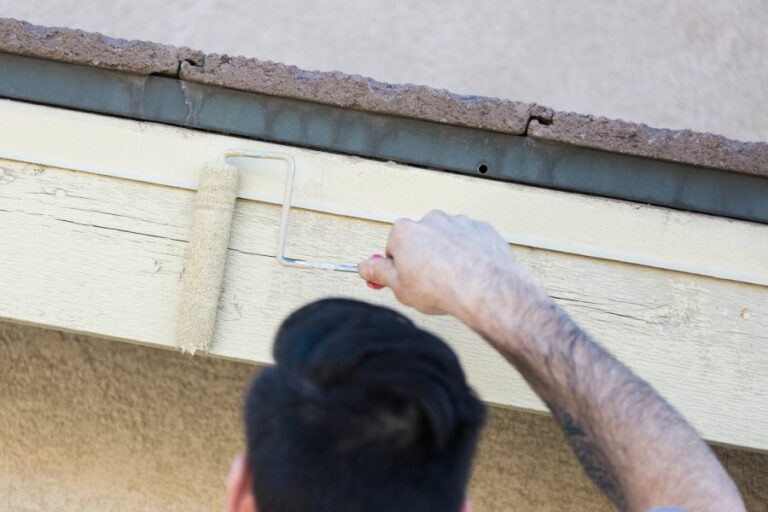
After the primer has completely dried, it’s time to paint the wall. Using a paintbrush, apply a thin layer of paint that matches the wall color onto the primed area. Feather the edges of the new paint into the surrounding wall area for a seamless finish.
If covering a large area, you may find it helpful to use a paint roller instead of a brush for this step. Ensure the paint is applied evenly, and avoid overloading the roller to prevent drips and uneven texture.
Allow the first coat of paint to dry according to the manufacturer’s instructions. Depending on the color and type of paint, you may need to apply a second or even third coat to achieve a perfect match. Be sure to allow each coat to dry completely before applying the next one.
• Post-Painting Cleanup
Once the final coat of paint is dry, carefully inspect the repaired area to ensure it blends seamlessly with the rest of the wall. If you’re satisfied with the results, remove the drop cloth and return any furniture or decor to its original position.
Following these steps, you’ll be able to fix scuffed paint on walls with professional, long-lasting results. Remember that proper preparation, patience, and attention to detail are the keys to achieving a seamless repair. Your home will look as good as new in no time!
| How do you fix scuffed paint on walls? | |
|---|---|
| 1. | Clean the scuffed area with a damp cloth to remove dirt and debris. |
| 2. | Gently sand the scuffed area with fine-grit sandpaper until the surface is smooth. |
| 3. | Wipe away any dust from sanding with a damp cloth and allow the area to dry. |
| 4. | Apply a thin layer of primer to the scuffed area using a paintbrush or small roller. Allow it to dry according to the manufacturer’s instructions. |
| 5. | Paint over the primed area with a paint that matches the original color of the wall. Use multiple thin layers, allowing each layer to dry before applying the next one. |
| 6. | Once the final layer of paint is dry, gently sand the edges of the painted area to blend it into the surrounding wall. |
| 7. | Clean the area with a damp cloth to remove any remaining dust or debris. |
Touching Up Wall Surfaces Without Full Repainting
Touching up a wall without painting the whole thing is a common request from many homeowners, especially when dealing with small scratches, chips, or scuff marks. The good news is that, in most cases, this can be done.
However, it’s crucial to take the right steps and consider various factors that can affect the final result.
• Assessing the Damage
The first thing to do when considering a touch-up is to assess the damage. For minor blemishes, such as small scuffs, scratches, or dings, a touch-up is generally sufficient.
However, for larger issues like peeling paint, water damage, or stains, it may be more suitable to repaint the entire wall to achieve a consistent and seamless finish.
• Matching the Paint Color
One of the most critical steps in touching up a wall is to match the paint color as closely as possible. It is important to note that even if you have the original paint can, the color on the wall may have faded or changed over time due to factors like sunlight exposure, humidity, or simple aging.
To ensure you get the closest match, take a small paint chip from the wall to your local paint store, where they can use a color-matching machine to recreate the shade.
If possible, purchase the touch-up paint in the same finish, be it flat, eggshell, satin, semi-gloss, or gloss, and from the same brand as the original paint.
I recommend: Before you begin touching up the wall, test a small amount of the new paint on an inconspicuous area, like behind a piece of furniture or inside a closet, to ensure it matches as closely as possible.
Allow the paint to dry completely before evaluating the match, as the color can change slightly as it dries.
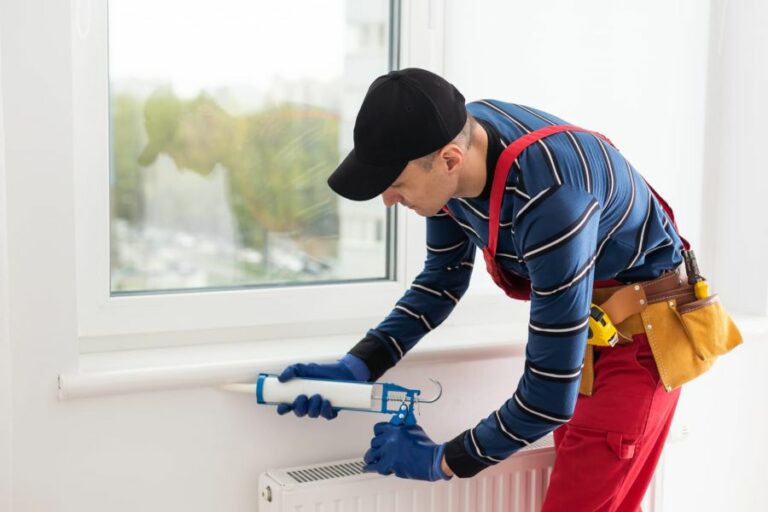
• Preparing the Wall Surface
Before starting the touch-up process, ensure that the area you will be working on is clean and free of dirt, dust, or grease.
Use a mild detergent and water solution to remove any grime that may have accumulated. Rinse the area thoroughly with clean water and allow it to dry completely before proceeding.
If there are cracks, dents, or holes in the area that you will be painting, it’s essential to repair them. For small imperfections, apply a spackling compound with a putty knife, smoothing the surface and allowing it to dry according to the product’s instructions.
For larger holes, you may need to use a mesh patch and joint compound. Once the repair compound is dry, sand the area until it is smooth and blends seamlessly with the rest of the wall.
• The Right Tools and Techniques for Touch-Ups
Choice of tools and technique also plays a critical role in the success of your touch-up job:
- Paintbrush: If possible, use a high-quality, angled brush that is clean and in good condition. This helps ensure a smoother finish and better paint adhesion.
- Roller: For larger touch-up areas, consider using a small foam roller. Be sure to use a roller with a similar nap (the thickness of the roller’s fibers) as the original application. Roller naps vary in thickness and provide different textures on the wall.
- Feathering: To blend the touched-up area with the surrounding paint, feather the edges by lightly brushing or rolling the paint outwards. This helps to create a more seamless transition between the new paint and the existing finish.
- Diluting the paint: Sometimes, thinning the paint with a small amount of water (no more than 5-10%) can help the touch-up blend in more seamlessly with the rest of the wall.
• Let it Dry and Evaluate
After touching up the wall, allow the paint to dry completely. Drying times may vary based on factors like temperature and humidity, but it’s generally a good idea to wait at least 24 hours before evaluating the results.
If the touch-up is still noticeable after drying, you may need to consider painting the entire wall for a more consistent result.
In conclusion, touching up walls without painting the whole surface is possible with the right preparation, color matching, tools, and technique. By following these guidelines, you can avoid the time and expense of repainting an entire wall and maintain the beautiful appearance of your home.
Task | Description |
|---|---|
Inspect the wall | Check the wall for any damage, dirt, or grime that may affect the touch-up job. |
Clean the area | Use a damp cloth to clean the wall and remove any dirt, grime, or dust before painting. |
Match the paint | Find the right shade of paint for the wall and ensure it matches to avoid obvious touch-ups. |
Prepare the paint | Stir the paint, ensuring even consistency and color throughout |
Start painting | Use a brush or roller to apply the paint in smooth, even coats, focusing only on the area that needs touch-up. |
Blend the edges | Feather the edges of the painted area gently with a dry brush or roller to blend it seamlessly into the surrounding area. |
Inspect your work | Step back and evaluate the touch-up work to ensure it matches and blends well with the rest of the wall. |