How To Patch Cracks And Holes In Walls, What Pros Say
Nobody likes the sight of unsightly cracks and holes in walls, but the good news is you’ve come to the right place to learn how to fix them. We understand the importance of making your walls look flawless again, and we’re here to guide you through the process. Rest assured, with our helpful tips and techniques, you’ll be on your way to having perfectly smooth and attractive walls in no time.
How to patch cracks and holes in walls:
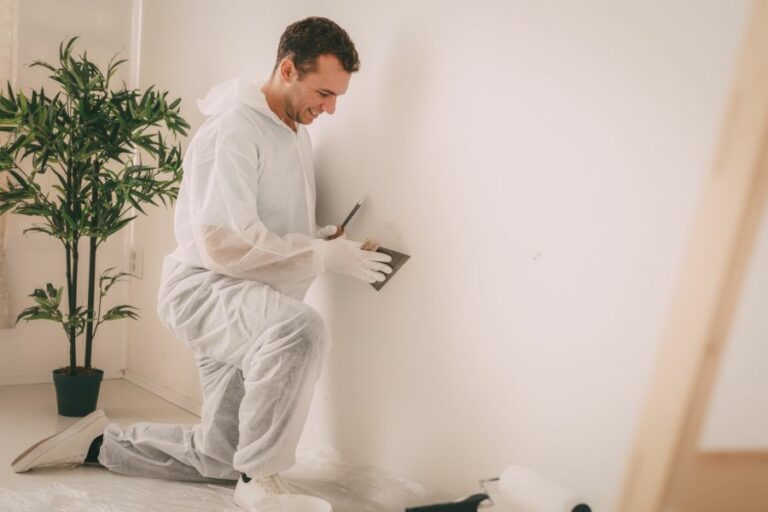
To patch cracks and holes in walls, first assess the damage, then gather necessary tools and materials such as a putty knife, sandpaper, filling compound, primer, paint, and a damp cloth. Remove debris and apply filling compound, sand, and paint for small cracks or holes. Cut out the damaged area for larger holes, attach a backing patch, patch with drywall, tape seams, and apply joint compound, sand, and paint.

Tired of unsightly cracks and holes diminishing your walls’ appeal? Our comprehensive guide on patching them up will give your space a fresh, polished look!
Read on to learn expert techniques, materials to use, and tips on achieving a smooth finish. Don’t let these imperfections ruin your decor; reclaim your pristine walls now!
Contents
- 1 Guide to Repairing Wall Cracks and Holes Effectively
- 2 Techniques for Filling Holes and Cracks in Walls
- 3 Materials to Seal Cracks and Holes in Walls
- 4 Simple Method for Patching Wall Holes and Imperfections
- 5 Pre-Paint Wall Surface Preparation: Filling Cracks and Holes
Guide to Repairing Wall Cracks and Holes Effectively
Repairing cracks and holes in walls is essential for proper home maintenance. Whether you want to improve your home’s appearance or address damage, this guide will help you achieve a flawless finish.
Here’s everything you need to know about patching up your walls, step-by-step.
• Assessing the Damage
Before starting the repair process, examine the extent of the damage. Small cracks or holes caused by picture hooks can be easily filled, while larger holes or water damage will require more effort. For significant damage, consider consulting a professional.
The National Institute of Building Sciences provides guidance and resources for addressing extensive wall damage.
• Tools and Materials
Before you begin, gather the necessary tools and materials:
- Putty knife
- Sandpaper (medium-grit and fine-grit)
- Filling compound (pre-mixed or powder form)
- Primer
- Paintbrush or roller
- Paint
- Damp cloth for cleaning
• Repairing Small Cracks or Holes
– Step 1: Remove Loose Debris
Use your putty knife to scrape away any loose paint or debris surrounding the crack or hole. This will ensure a clean base for applying the filling compound.
– Step 2: Apply Filling Compound
Select a suitable filling compound such as spackle, joint compound, or patching plaster. Read the manufacturer’s instructions carefully, as mixing ratios and drying times may vary.
Use a putty knife to apply the filling compound directly to the damaged area. Press the compound firmly into the crack or hole, ensuring complete coverage. Smooth out the compound using the flat side of your putty knife, leaving a slightly raised mound that will sink as it dries.
Allow the compound to dry according to the manufacturer’s recommended time. This can range from a few hours to overnight.
– Step 3: Sand the Surface
Once the compound is completely dry, use medium-grit sandpaper to sand down any rough or raised areas. Finish with fine-grit sandpaper to achieve a smooth surface.
Wipe away any dust with a damp cloth and let the area dry.
– Step 4: Prime and Paint
To ensure a seamless finish, apply a layer of primer to the repaired area. Allow the primer to dry per the manufacturer’s recommended time.
Finally, paint over the primed area with your chosen paint color, using a brush or roller for even coverage. Depending on your paint, you may need to apply multiple coats for a consistent finish. Allow the paint to dry between each coat.
• Repairing Larger Holes
– Step 1: Cut Out the Damaged Area
For holes larger than 1/2 inch in diameter, remove the damaged drywall by cutting a square or rectangular shape around the hole with a utility knife.
– Step 2: Attach a Backing Patch
Cut a piece of wood, such as a piece of 1×3 lumber, slightly longer than the hole. Insert the wood through the hole and hold it in place with a temporary screw. Use a drill to secure the wood to the drywall with a screw on each end.
– Step 3: Patch with Drywall
Cut a piece of drywall to match the hole’s dimensions. Place the new drywall piece over the hole and attach it to the wood backing using drywall screws.
– Step 4: Tape the Seams
Apply joint compound to the seams between the existing wall and your patch. Place joint tape over the compound, and use a drywall knife to smooth out the tape and remove any air bubbles.
– Step 5: Apply Joint Compound
Cover the joint tape and drywall screws with a layer of joint compound. Spread the compound evenly, feathering the edges for a seamless appearance. Allow the compound to dry according to the manufacturer’s instructions.
– Step 6: Sand and Finish
Once the joint compound is dry, use medium-grit and then fine-grit sandpaper to sand the area into a smooth, even surface.
Wipe away any dust with a damp cloth and allow the area to dry before priming and painting, as described in the “Repairing Small Cracks or Holes” section above.
• Summary
Knowing how to patch cracks and holes in walls is a valuable skill for any homeowner. With the right tools, materials, and technique, you can easily achieve a smooth, seamless finish.
Remember to follow manufacturer guidelines for drying times and apply multiple layers of paint as needed for the most professional results.
Step | Description |
|---|---|
1 | Inspect the wall for cracks and holes, and make sure to clean the area before proceeding. |
2 | Choose the appropriate patching material for the type of wall (e.g., plaster or drywall). |
3 | Apply a patching compound to the crack or hole, using a putty knife or a similar tool. |
4 | Smooth out the compound, ensuring that it perfectly blends with the surrounding area. |
5 | Allow the patching compound to dry completely, following the manufacturer’s instructions. |
6 | Once the compound is dry, lightly sand the patched area to create a smooth and even surface. |
7 | Prime and paint the patched area to match the rest of the wall. |
Techniques for Filling Holes and Cracks in Walls
Whether you’re preparing your walls for a fresh coat of paint or fixing damage caused by everyday wear and tear, filling holes and cracks in your walls is an essential step in maintaining the appearance and structural integrity of your home.
• Patching Small Holes: Lightweight Spackling Compound
For small holes, such as those left behind by nails or screws, a lightweight spackling compound is your best bet. This premixed compound is easy to work with, dries quickly, and is sandable to provide a smooth finish.
I recommend using fine-grit sandpaper to gently sand the area around the hole before applying the spackling compound.
This will ensure a better bond between the wall and the compound. You can either apply the compound with a putty knife or your fingertip for smaller holes.
Once the spackling compound has dried, use fine-grit sandpaper to gently sand the patch, blending it with the surrounding wall surface. You can then paint over the repaired area for a seamless finish.
– Pros and Cons of Lightweight Spackling Compound
Pros:
- Easy to work with and apply
- Quick-drying
- Sandable for a smooth finish
Cons:
- Not suitable for larger holes or cracks
• Repairing Cracks: Pre-Mixed Joint Compound
For hairline cracks or slightly larger ones, I recommend using a pre-mixed joint compound. This type of compound offers excellent adhesion to the wall surface and is relatively easy to work with.
Start by using a utility knife to carefully widen the crack, removing any loose debris in the process.
Next, apply a thin layer of the joint compound into the crack with a putty knife, making sure to work the compound into the crack for good coverage. Smooth out the compound until it is flush with the surrounding wall surface.
Once the joint compound has dried, sand the area until smooth and blend with the surrounding wall. Finish by applying a coat of primer and paint to create a seamless repair.
– Pros and Cons of Pre-Mixed Joint Compound
Pros:
- Good adhesion to the wall surface
- Easy to work with and apply
- Provides a smooth finish when sanded
Cons:
- Longer drying time compared to lightweight spackling compound
• Fixing Larger Holes: Patching with Drywall and Joint Compound
For larger holes, you will need to use a combination of drywall and joint compound to create a stable repair.
This method involves cutting a piece of drywall to fit the hole and securing it in place with construction adhesive or screws. The joint compound is then used to cover any seams and create a smooth surface.
Begin by cutting a piece of drywall slightly larger than the hole, making sure it will fit snugly inside. Next, apply construction adhesive or use screws to secure the patch to the wall. Once the patch is secure, apply a layer of joint compound to cover any gaps or seams.
Allow the joint compound to dry, and then sand the area until smooth. Finally, apply a coat of primer and paint to complete the repair.
– Pros and Cons of Patching with Drywall and Joint Compound
Pros:
- Ideal for larger holes and surface repairs
- Provides a stable, long-lasting repair
Cons:
- More time-consuming and labor-intensive process
• Final Thoughts
Filling holes and cracks in your walls doesn’t have to be a daunting task. With the right materials and techniques, you can achieve professional results that will enhance the appearance and longevity of your walls.
Remember to always start with a clean, sanded surface for optimal adhesion, and be patient throughout the drying and sanding process to ensure a smooth, seamless finish.
Materials to Seal Cracks and Holes in Walls
Cracks in walls not only mar the aesthetics of your home or office but could also become a potential safety hazard. Repairing these cracks is an essential part of regular building maintenance.
• Why Do Wall Cracks Need Filling?
Effective use of the right filling material can prolong the life of your building. It is essential to seal and strengthen the structure, preventing moisture penetration and damage from harsh weather conditions. Moreover, filling cracks can improve your home’s energy efficiency, resulting in lower energy bills.
• Types of Cracks
Before delving into the materials used to fill cracks in walls, it is important to understand the different types of wall cracks to apply the right material for repair. There are three main types of wall cracks:
- Hairline Cracks: These are thin, fine cracks usually found in the plaster or the outer layer of wall paint.
- Shrinkage Cracks: These cracks are generally seen in newly-built structures and happen as a result of moisture evaporation, causing the walls to shrink.
- Structural Cracks: These are more extensive and deeper cracks resulting from issues in the building’s structure or foundation, and they usually require professional assistance.
• Best Materials for Filling Cracks in Walls
– Plaster of Paris
One of the most common materials used for filling hairline cracks is Plaster of Paris. It easily mixes with water to form a thick, smooth paste. Its relatively quick drying time and easy sanding capabilities make it a popular choice for small, non-structural repairs.
However, Plaster of Paris may not be suitable for larger cracks, as it tends to be brittle and can crack again under pressure. Additionally, even though it has a quick drying time, it is important to let it completely cure for 24 hours before sanding or painting.
– Ready-Mix Crack Fillers
Ready-mix crack fillers are premixed, easy to use, and specifically designed to repair different types of cracks. They are usually available in tubes or containers and can be applied directly to the crack with a putty knife.
These fillers often consist of a combination of acrylic latex and sand particles, which allows them to be flexible and durable.
They are perfect for filling in both small and large cracks and can be painted over after curing. Make sure to follow the manufacturer’s instructions for curing time before painting.
– Expanding Foam Fillers
Expanding foam fillers, also known as polyurethane foam fillers, are excellent for filling larger cracks, especially in brick or concrete walls. These fillers expand after application, ensuring that the crack is effectively filled and sealed.
They have a strong adhesive quality and provide excellent insulation, making them an ideal choice to fill gaps in walls, doors, and windows. Expanding foam fillers are not suitable for small cracks and should be used with caution, as overuse can lead to deformation.
– Epoxy Resin
For more severe structural cracks, epoxy resin is often the best option. Epoxy resins provide strong reinforcement and can effectively seal and bond cracks in concrete and masonry walls.
They have excellent chemical resistance and can even be used for underwater repairs. Epoxy resins can be challenging to work with, and application should only be done by professionals or experienced homeowners.
– Grout
Cement-based grout is often used in repairing cracks in the mortar joints of brick or concrete walls. It has excellent bonding and filling properties, making it an apt choice for masonry work; however, grout sets hard, and using it on plaster walls might cause further cracking.
• Final Recommendations
Selecting the right material to fill cracks in walls depends on the type and severity of the crack for small hairline cracks. Plaster of Paris or ready-mix fillers are recommended. For larger cracks, expanding foam fillers or epoxy resins could be more suitable.
When dealing with structural cracks or those in concrete or brick walls, a professional should be consulted for the best remedy.
For more comprehensive information, the Building Research Institute provides valuable insights and resources on wall crack repair and other building-related issues.
Simple Method for Patching Wall Holes and Imperfections
Repairing a hole in the wall can seem like a daunting task, but with the right tools and techniques, it’s an easy DIY project that anyone can tackle.
• Assessing the Damage
The first step in patching a hole is to determine the size and type of damage you’re dealing with. Whether it’s a small nail hole or a larger drywall repair, understanding the damage will help you choose the right tools and materials for the job.
– Small Holes
Small holes, such as those left behind by picture hooks and nails, are relatively easy to repair. In most cases, you’ll need a filler compound (like spackling or joint compound) and a putty knife to get the job done.
– Medium Holes
Medium holes, typically caused by doorknobs or accidents, typically measure between 1 to 5 inches in diameter. These holes require additional support to secure the patch, which can be achieved using a patch kit or a piece of scrap drywall.
– Large Holes
Large holes, measuring over 5 inches in diameter, require a more extensive repair process. For these situations, you’ll need to gather additional materials such as a drywall saw, a piece of replacement drywall, and joint tape.
• Repairing Small Holes: A Step-by-Step Guide
This method is perfect for repairing nail holes or small imperfections in drywall or plaster walls. Here’s what you’ll need:
- Putty knife
- Spackling compound or joint compound
- Fine-grit sandpaper
- Paintbrush (optional)
- Matching paint (optional)
– Step 1: Prep the Hole
Before you begin, ensure the hole is free of any debris or loose material. Use your fingers to remove any larger pieces, and then blow into the hole to clear out dust.
– Step 2: Apply the Filler
Scoop a small amount of filler onto your putty knife, and spread it over the hole. Press the filler firmly into the hole, ensuring it fills the entire space.
– Step 3: Smooth the Surface
Carefully spread the filler across the surface to create a smooth, even patch. Remove any excess filler by running the putty knife along the wall at a slight angle.
– Step 4: Allow the Filler to Dry
Let the patch dry completely, as per the manufacturer’s instructions. Depending on the size of the hole and the type of filler used, this could take anywhere from a few hours to a full day.
– Step 5: Sand the Patch
Once the filler has dried, use fine-grit sandpaper to lightly sand the area until it’s flush with the surrounding wall. Be cautious not to damage the surrounding surface.
– Step 6: Paint (Optional)
If necessary, finish the repair by painting the patched area with matching paint. This will ensure the patch blends seamlessly with the rest of the wall.
• Final Thoughts
Patching a hole in the wall doesn’t have to be a complicated process. With a little patience and the right tools, you can quickly and easily repair small holes and imperfections in your walls.
For more in-depth information about repairing walls and other DIY projects, check out This Old House, a reputable source for home improvement tips and advice.
Remember, practice makes perfect, so don’t be discouraged if your first attempt isn’t flawless; with a bit of experience, you’ll be patching holes like a pro in no time.
Pre-Paint Wall Surface Preparation: Filling Cracks and Holes
Filling cracks and holes in walls is a critical step in your painting project. This process ensures an even and smooth finish, proper adhesion of paint, and, ultimately, a professional result.
• Necessary Tools and Materials for Repairing Walls
Before diving into the step-by-step process of fixing cracks and holes, gather the necessary tools and materials for the task at hand:
- Putty knife: Available in various widths, used for applying and smoothing filler
- Sandpaper: Medium-grit and fine-grit sandpaper will both be needed
- Fillers choose between premixed or powdered options; specific ones for holes or cracks may be available
- Damp cloth: For cleaning dust and dirt from your work area
- Primer: Aids in proper adhesion of the paint and hiding filler repairs
With all the necessary tools and materials in place, you’re now ready to fix those imperfections in your wall.
• Repairing Small Cracks in Walls
Small cracks are relatively simple to fix. Follow these steps to effectively repair any small crack in your wall:
– Step 1: Cleaning the Cracked Area
Use a damp cloth to clean the cracked area, ensuring it is free of dust and dirt. Allow it to dry completely before moving on to the next step.
– Step 2: Applying Filler to the Crack
With a putty knife, apply a suitable filler to the crack. Smooth the filler using the putty knife, ensuring it is flush with the wall. Allow the filler to dry according to the manufacturer’s instructions. Some products may require additional applications if the crack remains visible.
– Step 3: Sanding the Filled Crack
Begin with medium-grit sandpaper to sand down the dried filler until it is even with the surrounding wall. Finish with fine-grit sandpaper for a smooth result. Carefully brush away the resulting dust.
– Step 4: Priming the Repaired Area
Apply a primer to the repaired area, blending it into the surrounding wall. Allow it to dry according to the manufacturer’s instructions before moving on to painting.
• Repairing Holes and Larger Cracks in Walls
The process for repairing holes and larger cracks generally follows the same steps as small cracks, with a few additional considerations.
– Step 1: Assessing the Hole or Crack
Larger cracks and holes may require additional reinforcement in the form of mesh tape or a patch. Decide whether your repair will need this extra support.
– Step 2: Cleaning the Surrounding Area
As with smaller cracks, use a damp cloth to clean the damaged area and let it dry completely.
– Step 3: Applying Reinforcement
If your repair requires mesh tape or a patch, apply this reinforcement to the hole or crack according to the manufacturer’s instructions.
– Step 4: Filling the Hole or Crack
Apply the appropriate filler to the damaged area, following the manufacturer’s guidelines. Smooth the filler with a putty knife, and allow it to dry as instructed. Repeat this step if needed to ensure the filler is even with the wall.
– Step 5: Sanding the Filled Area
Sand the dried filler with medium-grit sandpaper, followed by fine-grit sandpaper for a smooth finish.
– Step 6: Priming the Repaired Area
Apply a primer to the repaired surface before painting, giving it adequate time to dry as per the manufacturer’s instructions.
• Additional Tips and Recommendations
- Always follow the instructions provided by the filler, mesh tape, or patch manufacturer for optimal results.
- Practice patience when waiting for filler and primer to dry; attempting to move too fast can lead to unsatisfactory results.
- Select high-quality filler products for a more durable finish.
• Conclusion
Fixing cracks and holes in your wall before painting is a vital step which will elevate the final look of your project. By following this guide and using the right tools and techniques, you can achieve a polished, professional result.
Step | Instructions |
|---|---|
1 | Inspect the wall for any cracks, holes, or other defects that need filling. |
2 | Clean the area around the cracks or holes with a damp cloth to remove any dust, dirt, or loose debris. |
3 | Choose an appropriate filler. For small cracks and holes, use a pre-mixed spackling compound or lightweight joint compound. For larger gaps or damaged areas, consider using a patching compound or even a piece of drywall cut to size. |
4 | Apply the filler to the crack or hole using a putty knife or similar tool. Press the filler into the crack or hole firmly to ensure a strong bond with the surrounding surface. Add more filler as necessary to fill the entire area. |
5 | Smooth the surface of the filler with the putty knife, making it as even as possible with the surrounding wall. |
6 | Allow the filler to dry according to the manufacturer’s instructions. Drying time may vary depending on the type of filler and the size of the area being filled. |
7 | Once the filler is dry, sand down any rough or uneven spots to create a smooth, even surface. Start with a coarser grit sandpaper (such as 80 or 120 grit) and work your way up to a finer grit (such as 220 grit) to achieve the smoothest finish. |
8 | Wipe down the repaired area with a damp cloth to remove any dust or debris from sanding. |
9 | Apply a primer to the filled area to seal the filler and prepare the surface for painting. Allow the primer to dry according to the manufacturer’s instructions. |
10 | Once the primer is dry, you’re ready to paint your wall! |