Ensuring Proper Adhesion On Textured Surfaces. What Pros Say
Achieving strong and lasting adhesion on textured surfaces can be a challenge, especially when it comes to various materials and applications. But rest assured, with the right approach and techniques. It is possible to ensure proper bonding, resulting in a professional and durable finish.
Ensuring proper adhesion on textured surfaces:
To ensure proper adhesion on textured surfaces, comprehensive surface preparation is crucial, including cleaning, degreasing, and smoothening or profiling the surface. Adhering to the manufacturer’s recommendations, following industry standards, and conducting adhesion testing contribute to achieving successful, long-lasting application on textured surfaces.

Ready to tackle the challenge of achieving proper adhesion on textured surfaces? This article has got you covered! Delve in to explore various techniques, insightful tips, and expert advice to help ensure a flawless bond. Keep reading to nail your next project!
Contents
- 1 Achieving Effective Adhesion on Textured Surfaces
- 2 Top Vinyl Picks for Textured Surface Applications
- 3 Prepping a Surface for Adhesive Application
- 4 Vinyl Compatibility with Rough Surface Materials
- 5 Vinyl Wrapping Techniques for Textured Surfaces
- 6 Defining Common Textured Surface Types
Achieving Effective Adhesion on Textured Surfaces
• Importance of Surface Preparation
Proper adhesion is vital when applying any coating or adhesive material on a textured surface. Poorly prepared surfaces can lead to insufficient coverage, uneven application, and, eventually, premature failure of the coating.
The key to achieving optimum adhesion lies in thorough surface preparation. This includes cleaning, degreasing, and smoothening the surface to provide a suitable profile for the coating or adhesive material to bond with the substrate.
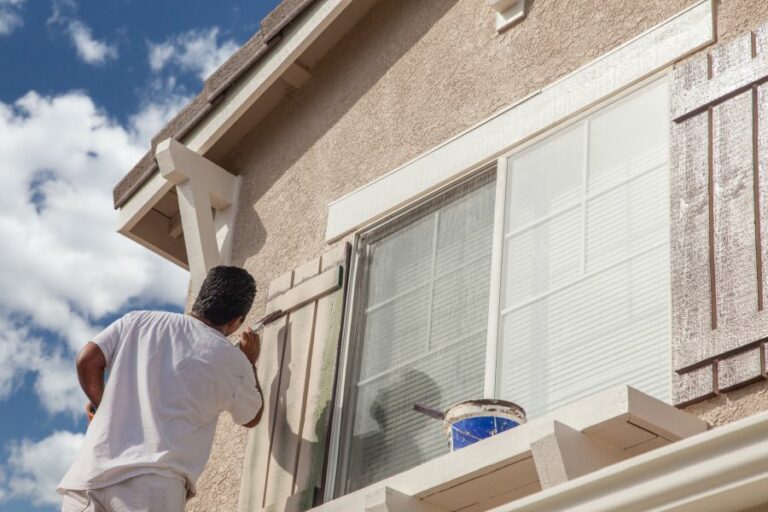
• Cleaning and Degreasing the Surface
Before applying any material on a textured surface, it is essential to clean it thoroughly to remove dirt, dust, grease, and other contaminants. These impurities can significantly affect the adhesion of the coating or adhesive and potentially lead to premature failure.
Use a mild detergent solution and a brush, sponge, or cloth to clean the surface, ensuring that you rinse it thoroughly with clean water afterward.
For more stubborn contaminants such as oil and grease, consider using a degreasing agent. Always allow the surface to dry completely before moving on to the next stage of surface preparation.
It is important to follow the manufacturer’s instructions for the specific material you are using. Some materials may have specific cleaning and degreasing requirements that need to be strictly followed.
I recommend consulting the technical data sheet of the product, which can provide valuable information on surface preparation steps and recommended cleaners or degreasers.
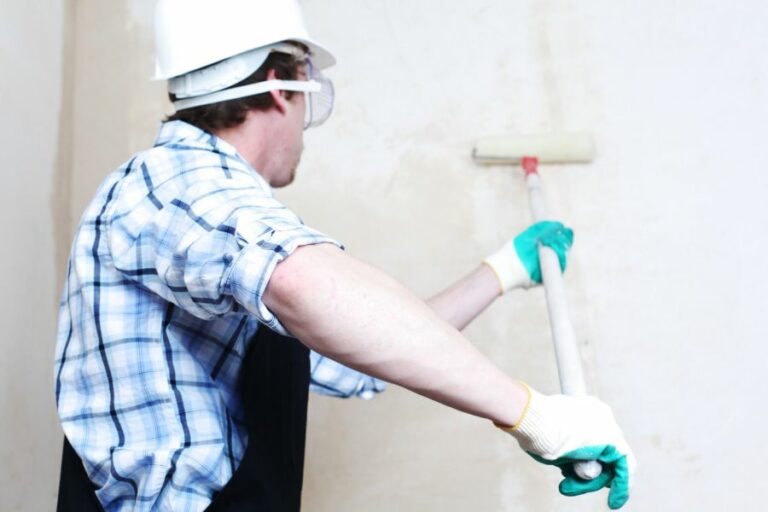
• Smoothening the Textured Surface
Textured surfaces may require smoothening to ensure proper adhesion of the coating or adhesive material.
This may involve using sandpaper, abrasive pads, or power tools such as sanders or grinders to remove high spots, irregularities, and roughness from the surface. Smoothening the surface increases the contact area between the substrate and the material, ensuring a strong bond.
When selecting the appropriate abrasive material for sanding or smoothing, consider the specific requirements of the coating or adhesive. Some materials may require a specific surface profile or roughness that will help ensure a good bond.
The manufacturer’s product data sheet usually provides this information. Keep in mind that overly aggressive abrasion could damage the surface or create excessive surface roughness, which could hinder proper adhesion.
Always follow the manufacturer’s recommendations for surface roughness and smoothing techniques.
• Role of Surface Profile
The surface profile is a key factor in ensuring successful adhesion of coatings or adhesives to textured surfaces. This refers to the overall roughness or texture of the surface, measured in terms of the distance between the peaks and valleys of the surface profile.
A suitable surface profile ensures mechanical interlocking between the coating or adhesive material and the substrate.
Determining the proper surface profile required for a specific application depends on various factors, such as the type of coating or adhesive, the application process, environmental conditions, and performance requirements.
Refer to the manufacturer’s technical data sheet for the specific surface profile requirements for your application. Deviating from the recommended surface profile can lead to poor adhesion or other issues during the material’s application and service life.
In some cases, specialized equipment such as surface profile gauges, surface comparators, or replica tape may be necessary to accurately measure the surface profile.
These tools help ensure that the surface has been prepared correctly and conforms to the required specifications for the coating or adhesive material.
• Adhesion Testing
Once the surface has been thoroughly prepared, it is important to verify that the desired adhesion has been achieved. This can be done through various adhesion testing methods such as the pull-off test, tape test, or knife test.
These tests provide a quantitative or qualitative assessment of the adhesion between the substrate and the applied material, helping identify any potential issues or areas of concern.
Whichever testing method you choose, make sure to follow the appropriate standard procedures and guidelines such as the ASTM D4541 for pull-off adhesion testing or the ASTM D3359 for tape adhesion testing. Proper testing ensures that the adhesion is reliable and consistent with the manufacturer’s recommendations and industry standards.
• Conclusion
Ensuring proper adhesion on textured surfaces is critical for the successful application and performance of coatings and adhesives. It involves comprehensive surface preparation, including cleaning, degreasing, and smoothening or profiling the surface.
Furthermore, adherence to the manufacturer’s recommended practices and guidelines, as well as performing adhesion testing, is crucial for achieving optimum results.
By following these steps, you can significantly increase the chances of a successful and long-lasting application on textured surfaces.
Top Vinyl Picks for Textured Surface Applications
When it comes to applying vinyl to textured surfaces, choosing the right type of vinyl is crucial for a successful project.
• Types of Vinyl for Textured Surfaces
There are several types of vinyl available in the market that can adhere well to textured surfaces. These include:
– Cast Vinyl
This type of vinyl is highly durable and has excellent conformability, which allows it to effortlessly adapt to the contours of a textured surface.
Cast vinyl is created by casting the vinyl material onto a release liner in a liquid state. This process ensures minimal material shrinkage, making it a perfect choice for long-term projects.
– High-Tack Vinyl
High-tack vinyl is specifically designed to adhere to surfaces with high surface energy, like plastic, metals, or low-energy materials like powder-coated paints and polyethylene. This type of vinyl has an aggressive adhesive which is ideal for applications on rough or uneven surfaces.
– Calendered Vinyl
Calendered vinyl is a more cost-effective option compared to cast vinyl, but it has limited conformability and less durability. This type of vinyl is ideal for short-term projects or when a lower cost is essential.
However, it may not yield the best results on highly textured surfaces due to its limited conformability.
• Factors to Consider When Choosing Vinyl for Textured Surfaces
To ensure successful adhesion on a textured surface, consider the following factors before choosing a vinyl type:
– Surface Type
The type of surface will play a significant role in determining the right type of vinyl to use. For example, cast vinyl would be the top choice for highly textured surfaces, while high-tack vinyl may be more suitable for surfaces with high surface energy that is difficult to adhere to, like metals and plastics.
– Project Duration
If it’s a long-term project, choosing a highly durable vinyl like cast vinyl is a good option. On the other hand, calendered vinyl might be a more suitable option if the project is short-term or budget is a primary concern.
– Temperature Variations
Certain types of vinyl are better suited for extreme temperature variations. If the vinyl is going to be applied in an outdoor setting or a climate with significant temperature fluctuations, opt for a vinyl specifically designed to withstand these conditions.
– Vinyl Finish
Vinyl comes with either a matte or glossy finish. Determine the kind of finish that complements your design and project objectives before selecting a vinyl type.
• Expert Recommendations
Based on extensive experience working with vinyl for textured surfaces, here are some expert recommendations:
– Cast Vinyl
3M’s Controltac Graphic Film Series 180mC is a popular choice for cast vinyl. It offers excellent conformability, durability, and a wide range of colors and finishes. Oracal’s 970RA Premium Wrapping Cast Vinyl also stands out for its exceptional flexibility and adaptability to textured surfaces.
– High-Tack Vinyl
Avery Dennison’s MP (Multi Purpose) Series 100 High Tack series offers a strong adhesion that works well on textured surfaces. 3M’s IJ39 Scotchcal High Tack Graphic Film is another excellent option due to its aggressive adhesive and exceptional durability.
– Calendered Vinyl
Oracal’s 641 Economy Cal series is a cost-effective option with decent conformability for short-term projects on textured surfaces. Likewise, 3M’s Scotchcal Graphic Film Series 50 offers good value for short-term applications and is available in a variety of color options.
• Conclusion
To achieve effective and long-lasting vinyl application on textured surfaces, it is essential to choose the right type of vinyl suited for the specific surface, project duration, and desired finish.
Consider options like cast vinyl for high conformability and durability, high-tack vinyl for challenging surfaces, and calendered vinyl for budget-conscious projects. These expert-recommended products can ensure a successful outcome for your textured surface vinyl application projects.
Vinyl Type | Features | Best For |
|---|---|---|
Cast Vinyl | Highly flexible, conformable, and durable | Complex curves and textured surfaces like vehicle wraps and walls |
Calendered Vinyl | Thicker and less flexible than cast vinyl, more affordable | Flat or moderately curved surfaces, not ideal for textured surfaces |
Etched Glass Vinyl | Mimics the appearance of etched glass, suitable for outdoor use | Glass surfaces with texture, such as window panes and glass doors |
Heat Transfer Vinyl (HTV) | Adheres to fabric using heat and pressure | Textured fabrics like T-shirts, bags, hats, and more |
Prepping a Surface for Adhesive Application
Proper surface preparation is a critical step in ensuring the success of any adhesive bonding process. Without the right preparation, even the most powerful adhesives may fail or not provide the desired performance.
• Understanding Surface Properties
Before we delve into the actual preparation process, it is essential to understand the properties of the surface to which the adhesive will be applied. These properties include:
- Material: The surface’s material (e.g., metal, plastic, wood, or glass) will dictate which adhesive and surface preparation method will be most effective.
- Surface Energy: Different materials have varying surface energies, affecting how well an adhesive wets and spreads across the surface. High-energy surfaces (e.g., metals and glass) are usually more straightforward to bond, while low-energy surfaces (e.g., plastics) can pose challenges.
- Smoothness: A rough surface provides more surface area for an adhesive to bond, potentially leading to a stronger bond.
With these properties in mind, let’s explore the steps involved in preparing a surface for adhesive bonding.
• Cleaning the Surface
The first step in surface preparation is ensuring the surface is clean and free of contaminants, like oils, grease, dirt, or dust. Contaminants can hinder the adhesive’s ability to bond, leading to weak or unpredictable bonds. Depending on the surface material and type of contamination, there are various cleaning methods to choose from:
- Solvent cleaning: Ideal for removing oils, grease, and other non-polar contaminants, solvent cleaning can be performed using a suitable solvent (e.g., isopropyl alcohol, acetone, or methyl ethyl ketone) and a clean, lint-free cloth.
- Soap and water cleaning: A mild detergent and water solution can effectively remove water-soluble contaminants from a surface. Rinse the surface with clean water afterward to remove any soap residue.
- Ultrasonic cleaning: This method uses high-frequency sound waves to create micro-bubbles in a cleaning solution, effectively removing contaminants from a surface. This method is particularly useful for delicate or intricate surfaces where manual cleaning may not be possible.
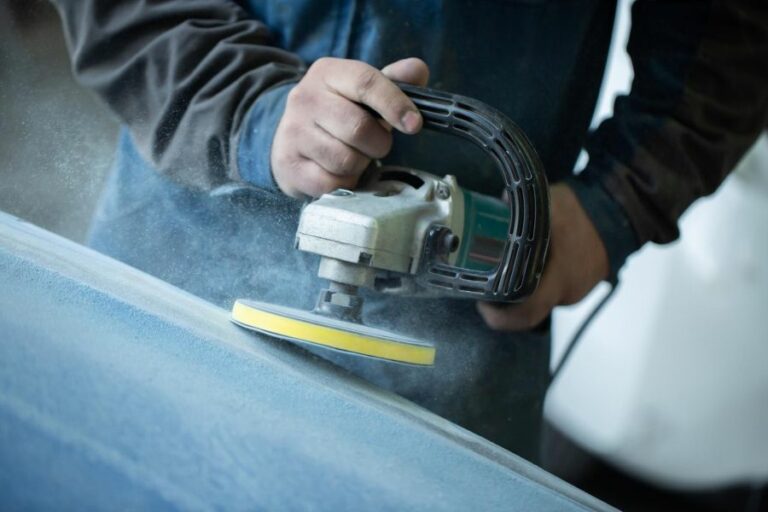
• Surface Roughening
Once the surface is clean, the next step is to roughen the surface to increase surface area and create more “micro-anchors” for the adhesive to grasp onto.
Surface roughening improves adhesive mechanical interlocking and is especially beneficial for low-energy surfaces like plastics. Various surface roughening methods include:
- Abrasion: Abrading a surface using sandpaper, abrasive pads, or grinding wheels can create a rough surface ideal for bonding. The coarseness of the abrasive material should be selected based on the surface material and desired roughness.
- Etching: Chemical etching involves applying an etching solution to the surface to remove a thin layer of material, creating a rougher surface. While effective, etching can pose hazards to the environment and operator if not performed correctly.
- Blasting: Bead blasting or sandblasting uses pressurized gas (typically air) to propel abrasive particles at the surface, effectively roughening it.
It is essential to clean the surface again after roughening to remove any residual debris that could negatively impact bonding.
• Surface Treatment
For some materials, especially low-energy surfaces, further surface treatment may be necessary after cleaning and roughening for optimal adhesive bonding. Some common surface treatments include:
- Chemical primers: Applying a chemical primer or adhesion promoter to the surface can enhance adhesion by reacting with the base material and the adhesive, creating stronger chemical bonds.
- Plasma treatment: Plasma treatment, particularly atmospheric plasma treatment, can modify a surface by introducing functional groups that improve adhesion. This method is especially beneficial for plastics and other low-energy surfaces.
- Heat treatment: For some materials, like glass, heat treatment can increase surface energy and improve bonding.
As with other preparation steps, consult the adhesive manufacturer’s guidelines and the material’s datasheet for recommendations on specific surface treatments.
• Applying the Adhesive
With the surface properly cleaned, roughened, and treated, it is now ready for adhesive application. Be sure to follow the adhesive manufacturer’s guidelines regarding application methods, curing times, and temperature requirements.
Take care not to contaminate the prepared surface while applying the adhesive, as this can compromise the bond’s strength and performance.
In conclusion, proper surface preparation is a critical factor in achieving successful adhesive bonding. By understanding the surface properties, ensuring a clean surface, roughening the surface, and applying appropriate surface treatments, you can optimize your adhesive application’s bond strength and performance.
Additionally, always consult the adhesive manufacturer’s guidelines and the material’s datasheet for specific recommendations.
Step | Description |
|---|---|
1 | Clean the surface with soap and water to remove dirt and debris. |
2 | Dry the surface completely using a clean, lint-free cloth or towel. |
3 | Remove any oil or grease from the surface using a suitable solvent or degreaser. |
4 | For smooth surfaces, roughen the surface using sandpaper or a wire brush to help the adhesive bond better. |
5 | Wipe away any dust or particles left behind from sanding or roughening the surface with a clean, lint-free cloth. |
6 | Apply a primer if necessary to promote better adhesion between the materials. |
Vinyl Compatibility with Rough Surface Materials
When it comes to applying vinyl to a surface, the texture and material of the surface play a significant role in determining the durability and effectiveness of vinyl adhesion.
For those wondering whether vinyl will stick to rough surfaces, the answer is both yes and no.
• The Impact of Surface Texture on Vinyl Adhesion
The texture of a surface has a direct correlation with vinyl’s ability to adhere. Generally speaking, vinyl prefers smooth, non-porous surfaces on which it can form a strong bond.
On rough or textured surfaces, vinyl may struggle to adhere uniformly, leading to bubbles, wrinkles, or premature failure of adhesion.
3M, a leading manufacturer of vinyl products, explains that surface energy plays a crucial role in the success of vinyl adhesion.
High surface energy materials, such as glass or metal, facilitate better adhesion, while low surface energy surfaces, like plastics or porous materials, can create challenges for successful vinyl application.
• Rough Surfaces That May Support Vinyl
Despite the challenges involved in applying vinyl to rough surfaces, some materials and textures may still support vinyl adhesion. These include:
– Lightly Textured Walls
Walls with a slight texture, such as orange peel or knockdown texture, can still potentially support the vinyl application. However, the success of the adhesion will depend on the quality of the vinyl, the installation technique, and additional surface preparation.
– Wood Surfaces
Certain wood surfaces, like smooth plywood or sanded wood, may support vinyl adhesion. However, rougher woods, such as raw lumber or heavily textured wood, can pose challenges for successful vinyl application.
– Concrete and Brick
Vinyl can sometimes adhere to smooth concrete or brick surfaces, particularly if the vinyl is specifically designed for outdoor applications. However, rough or highly textured concrete may present difficulties for vinyl adhesion.
• Enhancing Vinyl Adhesion on Rough Surfaces
While applying vinyl to rough surfaces may seem challenging, there are several steps that individuals can take to improve the chances of successful vinyl application. Some recommendations include the following:
– Surface Preparation
Taking the time to thoroughly clean and prepare the surface can greatly increase the likelihood of successful vinyl adhesion.
Remove any dirt, dust, or debris from the surface, and ensure the area is dry before attempting to apply the vinyl. Sanding the surface or applying a primer or sealer may also be beneficial, as it can create a smoother, more adhesive-friendly surface for the vinyl to bond to.
– Use High-Quality Vinyl
Not all vinyl is created equal, and the quality of the product can significantly impact its ability to adhere to rough surfaces. Opt for vinyl products from reputable manufacturers, and consider choosing vinyl that is designed for outdoor or textured surface use.
– Employ the Correct Installation Technique
Proper installation of the vinyl is essential for a successful, long-lasting bond. Use a high-quality transfer tape for application, and be sure to press down firmly on the vinyl to ensure full contact with the surface.
A squeegee or other application tool may be helpful in smoothing out the vinyl and removing any bubbles or wrinkles.
– Consider Professional Installation
If in doubt, consider consulting with a professional for your vinyl application needs. An experienced installer will have the knowledge and tools to properly apply vinyl to rough or difficult surfaces without risking damage or failure of the adhesive bond.
• In Conclusion
While vinyl may not be the ideal option for all rough surfaces, in certain cases, and with the right preparation and application techniques, it is possible to achieve a successful vinyl application.
For those considering applying vinyl to a rough surface, it is essential to carefully evaluate the material and texture, as well as the quality of the vinyl product itself.
With proper surface preparation, utilizing high-quality materials, and employing the correct installation techniques, individuals can improve the likelihood of durable and effective vinyl adhesion on rough surfaces.
Vinyl Wrapping Techniques for Textured Surfaces
Vinyl wrap is a popular and efficient solution for transforming the appearance of cars, boats, and even household items. It not only provides protection for the surface underneath but can also give your possessions a customized, stylish makeover.
However, applying vinyl wrap on textured surfaces can be challenging.
• Vinyl Wrap and Textured Surfaces
Textured surfaces come in a wide range of materials and patterns, from rough concrete to more subtle effects like leather. Vinyl wraps are thin, adhesive-backed films designed to adhere to smooth surfaces.
The question arises: Can you vinyl wrap textured surfaces? The short answer is yes, it is possible, but with some caveats.
– Types of Surfaces Suitable for Vinyl Wrap
While some textured surfaces may be compatible with vinyl wrap, it is essential to consider the type of surface and its degree of texture before proceeding. Some textured surfaces that can be vinyl-wrapped include:
- Lightly textured car paint
- Plastic surfaces with mild texture
- Metal surfaces with a slight texture, such as brushed aluminum
- Walls with a slight texture or with brick patterns
It is crucial to note that the smoother the surface, the better the vinyl wrap will adhere and conform. Deeper and more complex textures may not be suitable for wrapping, as they can lead to poor adhesion, air bubbles, and premature wrap failure.
– Application Techniques for Textured Surfaces
When applying a vinyl wrap to a textured surface, proper techniques and materials are essential for achieving a successful result. Some helpful tips include:
- Surface Preparation: Thoroughly clean the surface with soap and water, followed by an isopropyl alcohol blend, to remove any remaining contaminants. This ensures that the adhesive has the best possible bonding surface.
- Choose the Right Material: Some vinyl wrap materials are more conformable than others, making them better suited for textured surfaces. Cast vinyl and products with air-release technology, such as the 3M Controltac Graphic Film series, can be ideal choices for wraps on textured surfaces.
- Heat Application: Applying heat using a heat gun or propane torch helps the vinyl conform to the surface texture. Be cautious not to overheat the vinyl, as this can compromise its integrity.
- Use of Application Tools: Using tools like squeegees and applicator needles can help to press the vinyl into the texture, ensuring better adhesion. Squeegees with a channel-lined edge or buffer can be particularly useful in conforming the vinyl to textured surfaces.
- Working With Seams: In cases where the texture is too deep for the vinyl to conform, it may be necessary to make relief cuts and use seams to accommodate the surface texture. This requires careful planning and precise cutting techniques to ensure a professional appearance.
• Challenges and Solutions
Applying vinyl wrap on textured surfaces can be complicated due to several factors. Some challenges and their practical solutions are:
- Limited Adhesion: Textured surfaces can reduce the contact area between the vinyl and the surface, leading to decreased adhesion. Using aggressive adhesive vinyl or adhesion promoters can help improve adhesion.
- Air Bubbles: Trapped air can cause bubbles and wrinkles in the wrap. Using a pin or needle to release the trapped air and smoothing the vinyl out with a squeegee can minimize this issue.
- Limited Durability: Due to reduced adhesion, vinyl wraps on textured surfaces may have a shorter lifespan. Regular maintenance and inspections can help detect any potential issues early on and prevent premature wrap failure.
• Recommendations Based on Experience
As an experienced vinyl wrap installer, I recommend the following:
- Consulting with a vinyl wrap professional before attempting to wrap textured surfaces to ensure the best results.
- For highly textured surfaces or surfaces with deep pores, consider other alternatives, such as paint or specialized coatings designed for that specific surface.
- Regularly check and maintain the wrap, as textured surfaces may require additional care to maintain the vinyl’s appearance and integrity.
By understanding the challenges and limitations of applying vinyl wraps to textured surfaces, you can better determine if it’s the right choice for your project. Proper planning, materials, and techniques can help ensure a successful result that showcases your custom style.
Textured Surface | Can Vinyl Be Wrapped? |
|---|---|
Wood | Yes, but the texture might show through the wrap |
Brick | Yes, but it may not adhere well to rough surfaces |
Stucco | Not recommended due to the rough texture |
Concrete | Yes, but the surface needs to be smooth and clean before application |
Textured Paint | Yes, but it may not provide a smooth finish |
Defining Common Textured Surface Types
Textured surfaces refer to any material or object that has a noticeable variation in its physical structure, generally by creating raised or indented patterns or irregularities on its surface.
Such surfaces can be both natural and man-made, and they serve different purposes, ranging from providing grip and traction to enhancing the aesthetic appeal of a space or an object.
• The Importance of Textured Surfaces in Everyday Life
Textured surfaces provide several practical benefits that make them present in a wide range of applications, such as:
- Safety: Textured surfaces like anti-slip mats and non-skid stair treads help to prevent falls and accidents by providing a better grip. This can be especially useful in wet or slippery conditions.
- Durability: Texturing certain surfaces, like floors or countertops, can provide added durability and make them better suited to withstand daily wear and tear.
- Aesthetics: Textured surfaces can add visual interest and depth to a space. They can effectively break up large monotonous areas, bringing more excitement and character to the environment.
- Tactile Feedback: Textured surfaces provide tactile stimulation, which can be useful for people with sensory processing disorders or those who rely more heavily on touch to navigate their surroundings, such as individuals with visual impairments.
• Different Types of Textured Surfaces
There is a wide array of textured surfaces created using various techniques and materials. Some common examples include:
– Rough Surfaces
Rough surfaces feature protrusions or irregularities that provide resistance and grip under different conditions. Examples of rough textured surfaces include:
- Concrete: Roughened or broom-finished concrete can provide extra grip on sidewalks, ramps, and driveways. The American Concrete Institute provides guidelines for creating different types of concrete finishes.
- Stone: Many natural stones, like sandstone or slate, have naturally occurring rough surfaces that provide an attractive and functional option for flooring and outdoor applications.
– Smooth Surfaces
Smooth-textured surfaces are characterized by a consistent and even appearance, which can create a sleek and modern visual effect. Examples of smooth textured surfaces include:
- Polished stone: Marble, granite, and other natural stones can be polished to create a smooth and glossy surface that adds an elegant touch to countertops, walls, and floors.
- Wood: Smooth wood surfaces, like hardwood flooring or furniture, are often treated with finishes to seal the surface, giving it a polished and refined appearance.
– Patterned Surfaces
Patterned surfaces are created by introducing repeating elements that create a design or motif on the surface. Examples of patterned textured surfaces include:
- Tiles: Tiles can be used to create patterned surfaces on walls, floors, and countertops. Patterns can be created both through arrangement and by using tiles with varying textures, colors, and designs.
- Textured wallpaper: Patterned textured wallpapers have raised or indented elements, like relief or embossing, that can add depth and dimension to walls in a room.
– Random Textures
Random textures are created by a combination of irregularities and elements that produce a unique surface appearance. Examples of random textured surfaces include:
- Stucco: Stucco is a popular finish for exterior walls, which is created by applying a mixture of cement, sand, and lime in uneven patterns.
- Paint: Different painting techniques, like rag-rolling, sponge painting, or using a textured roller, can create random patterns and add depth to walls or furniture.
• How to Choose the Right Textured Surface
The right textured surface depends on the specific application, so it’s essential to consider factors like aesthetics, functionality, and durability when making a decision. Some useful tips include:
- Understand the purpose: Identify the main goal of adding texture to the surface. Is it to enhance the visual appeal, provide extra traction, or resist daily wear and tear? This will help guide your choice.
- Consider practicality: When selecting a textured surface, consider maintenance and cleaning requirements, as well as the appropriateness of the material for the specific room or area.
- Think about personal preferences: The texture you choose should be visually appealing and complement the overall style and design of the space.
- Research available options: Familiarize yourself with different types of textured surfaces, their properties, and how they’re produced to better understand which ones would be most appropriate for your project.
In conclusion, textured surfaces provide many practical and aesthetic benefits in various applications. By understanding the different types of textures and considering factors like purpose, practicality, and personal preferences, you can select the appropriate textured surface for your next project.
Textured Surfaces | Description |
|---|---|
Wood | Surfaces made of wood or wood-like materials, with visible grain patterns and a natural texture. |
Stone | Surfaces made from natural stone materials, such as granite, marble, or slate, featuring unique patterns and textures. |
Brick | Surfaces made of brick or brick-like materials, featuring a distinctive pattern and rough texture. |
Stucco | A plaster-based coating applied to walls and ceilings, which creates a textured surface with a variety of patterns and finishes. |
Tiles | Ceramic, porcelain, or natural stone tiles with a textured surface, often featuring patterns or raised designs. |
Fabric | Textile surfaces with a noticeable texture, such as corduroy, velvet, or heavily woven fabrics. |
Wallpaper | Decorative paper applied to walls, which may feature embossed or textured designs to add depth and interest. |
Metal | Surfaces made from metals like steel, copper, or aluminum, which may have a brushed, polished, or hammered texture. |