Take Off Surface Rust And Flaking Paint. What Pros Say
Removing surface rust and flaking paint can seem daunting, but fear not! With the right tools and techniques, you can restore the beauty of any object and prolong its life. In this discussion, we will explore the most efficient and effective ways to tackle surface rust and flaking paint, ensuring a successful outcome for your project. Follow along as we guide you through the necessary steps to achieve a rust-free and freshly painted surface that will look as good as new.
Take off surface rust and flaking paint:>
To effectively eliminate surface rust and flaking paint, assess the extent of damage and use appropriate tools, such as wire brushes, sandpaper, scrapers, and chemical removers. Remove initial layers mechanically, then use chemicals for stubborn residues. Prepare the surface for painting or protective coating and maintain it regularly to prevent recurrence.

Eager to revive your rusty surfaces and breathe new life into flaking paint? We’ve got you covered! Dive into our comprehensive guide on tackling surface rust and peeling paint, and watch your projects transform. Read on to learn expert tips, techniques, and tricks for a smooth finish every time.
Contents
- 1 Eliminate Surface Rust and Flaking Paint Effectively
- 2 Safely Removing Surface Rust without Harming Paint
- 3 Eradicating Rust Flakes from Painted Surfaces
- 3.1 • Identifying the Rust
- 3.2 • Prepare the Area
- 3.3 • 1. Clean the Affected Area
- 3.4 • 2. Protect Surrounding Paint and Components
- 3.5 • 3. Apply Rust Remover Solution
- 3.6 • 4. Sand the Rusted Area
- 3.7 • 5. Applying Primer, Paint, and Clear Coat
- 3.8 • 6. Buff and Polish
- 3.9 • 7. Prevention
- 3.10 • Final Thoughts
- 4 Surface Rust Removal and Paint Preparation Tips
- 5 Effective Surface Rust Removal from Painted Areas
- 6 Consequences of Painting Over Surface Rust
Eliminate Surface Rust and Flaking Paint Effectively
Surface rust and flaking paint are common problems that many people face, particularly with items or surfaces exposed to moisture or harsh weather. It is essential to remove rust and flakes before repainting or restoring the surface to preserve its appearance and ensure it last for many years.
• Identifying the Extent of Rust and Paint Flaking
Before initiating the rust and paint removal process, it’s crucial to first assess the extent of the damage. Rust usually appears in reddish-brown patches on metal surfaces, while paint flaking occurs when the paint begins to crack, peel or fall off.
In mild cases, rust might just be superficial and similarly, flaking paint might be localized in one area. In severe cases, the rust could penetrate deeper into the material, and flaking paint might cover larger surface areas.
• Necessary Tools and Safety Measures
To carry out the rust and paint removal process effectively, you need appropriate tools and safety equipment. Some essential items include:
- Wire brush
- Sandpaper (various grits)
- Chemical rust remover
- Scraper
- Paint stripper
- Gloves
- Safety goggles
- Respirator mask
- Proper clothing
Remember to work in a well-ventilated area to prevent fume accumulation and cover neighboring surfaces and items to protect them from damage.
• Mechanical Techniques for Rust and Paint Removal
Begin with a wire brush, scraper, or sandpaper to remove the initial layers of rust and flaking paint. It’s essential to use proper techniques depending on the surface and severity of the problem.
– Wire Brushing
A wire brush is ideal for removing surface rust and loose paint flakes. Apply firm pressure and brush in one direction for consistency. Use a smaller wire brush for detailed or tight areas. Brush repeatedly until the surface appears clean and any loose materials are removed.
– Sanding
Sanding is another effective method to remove rust and flaking paint. Start with a lower grit sandpaper (60-80 grit) to remove the major patches, and then gradually work your way to higher grits (100-220 grit) to smooth the surface. Sand using circular motions, frequently inspecting the surface and wiping it clean to assess progress.
Remember to wear a dust mask to avoid inhaling dust from paint and rust.
• Chemical Techniques for Rust and Paint Removal
For stubborn rust and paint that cannot be removed through mechanical methods alone, chemical removers can provide excellent results.
– Rust Removers
There are numerous rust removers available in the market, usually containing phosphoric acid, oxalic acid, or other similar compounds. Follow the manufacturer’s instructions when using these products.
This often involves applying the rust remover to the affected area, waiting for it to react (usually for a few minutes to an hour), and then rinsing it off. Some rust removers may require agitation using a brush or steel wool.
– Paint Strippers
Paint strippers contain powerful compounds that dissolve paint, making it easy to remove. Apply the paint stripper according to the manufacturer’s instructions, typically allowing it to sit for a specific amount of time, and then use a scraper to gently lift away the loosened paint.
Use caution when working with chemical strippers, as they can cause skin and eye irritation if handled improperly.
• Proper Surface Preparation and Maintenance
After the rust and flaking paint have been removed, prepare the surface for its subsequent treatment, whether it is painting or applying a protective coating, such as primer or rust inhibitor.
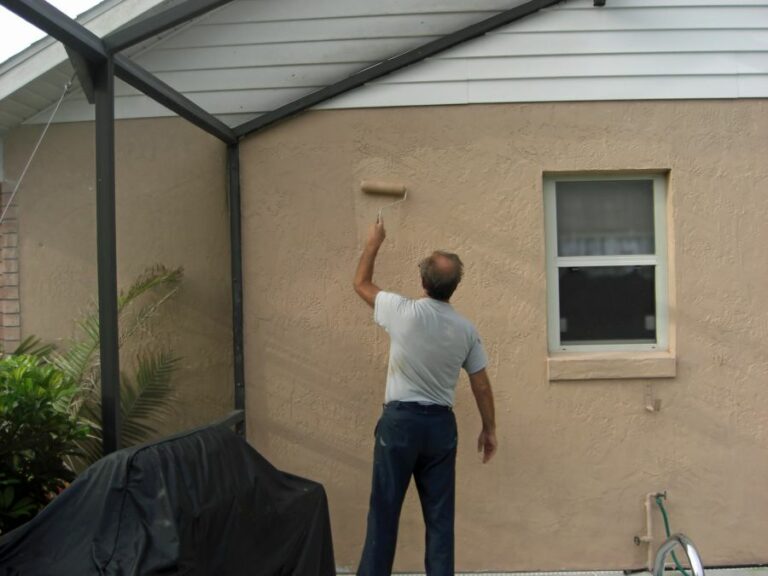
For painting, make sure the surface is free of any debris or residue, and apply an appropriate primer before applying the paint.
Regular inspection and maintenance can keep future rust and flaking paint under control. Use a rust inhibitor on metal surfaces, and reapply paint or other protective finishes when needed.
In conclusion, understanding the extent of rust and paint flaking helps determine the appropriate tools and techniques to tackle the problem effectively. Mechanical and chemical processes used either individually or combined, can aid in the efficient removal of rust and flaking paint.
Finally, prepare the surface correctly and follow preventive maintenance measures to protect it from future damage.
For additional information and guidance, consult a step-by-step rust removal guide provided by Pennsylvania State University.
Safely Removing Surface Rust without Harming Paint
Surface rust is a common issue with vehicles, metal structures, and other painted surfaces. Removing it without causing harm to the paint is crucial for maintaining the surface’s appearance and preventing further corrosion.
• Preparing the Surface
Before starting the rust removal process, it is important to prepare the surface by cleaning it thoroughly. This can be done using soap, water, and a sponge or microfiber cloth to remove any dirt or debris. Once cleaned, allow the surface to dry completely before proceeding.
Note: Always wear gloves and protective gear when working with chemicals or abrasives. It is also a good idea to work in a well-ventilated area to ensure proper safety precautions.
• Removing Light Surface Rust
– Method 1: Using a Clay Bar
A clay bar is an effective tool for removing light surface rust without damaging the paint. Most automotive stores carry clay bars and their accompanying lubricants.
- Lubricate the area with a clay bar lubricant or a mixture of water and automotive soap.
- Gently rub the clay bar over the rusted area until the rust is lifted.
- Wipe the surface clean with a microfiber cloth and reapply the lubricant if needed. Continue rubbing the surface with the clay bar until all rust is removed.
- Finish by thoroughly cleaning the area with soap and water, and dry the surface with a microfiber cloth.
– Method 2: Using a Chemical Rust Remover
Chemical rust removers are readily available at automotive stores and can be used to remove light surface rust without harming the paint.
- Apply the chemical rust remover according to the manufacturer’s instructions. Typically, this involves applying the product to a cloth or sponge and gently rubbing it on the rusted surface.
- Allow the rust remover to work for the recommended amount of time, typically between 10-30 minutes.
- Rinse the surface with water and dry it thoroughly with a clean cloth or towel. If any rust remains, repeat the process.
• Removing Moderate to Severe Surface Rust
– Method 1: Using a Rust Converter
Rust converters are effective at removing moderate to severe rust without damaging the paint. They work by converting the rust into an inert substance, preventing further corrosion. Rust converters are available at most automotive and hardware stores.
- Clean and dry the surface as described in the preparation steps.
- Apply the rust converter according to the manufacturer’s instructions. Typically, this involves brushing the product on the rusted area.
- Allow the rust converter to cure for the recommended amount of time, generally 24-48 hours.
- Once the rust converter has cured, clean the surface with soap and water and dry it completely.
– Method 2: Using a Mechanical Abrasion Technique
For moderate to severe rust, using a mechanical abrasion technique, such as sanding or grinding, may be necessary. It is essential to be cautious when using these techniques to avoid damaging the painted surface.
- Clean and dry the surface as described in the preparation steps.
- Select a suitable abrasive, such as fine-grit sandpaper (around 800-1000 grit) or a fine wire brush.
- Gently sand or brush the rusted area, taking care not to apply too much pressure or damage the surrounding paint.
- Once the rust has been removed, clean the surface with soap and water and dry it thoroughly.
Note: After using a mechanical abrasion technique, some touch-up painting may be required to restore the surface’s appearance.
• Preventing Future Rust
The best way to prevent rust from returning is to regularly clean and maintain the painted surface. Additionally, applying a high-quality wax or paint sealant can help protect the paint and prevent moisture from penetrating, reducing the likelihood of rust formation.
Regular inspections of the surface will help identify and address any signs of rust before they become more severe.
For more information on rust prevention and maintenance, consider consulting reputable sources like the National Association of Corrosion Engineers and local automotive or paint experts.
In conclusion, removing surface rust without damaging paint is possible with the right techniques and products. By following the methods outlined above, you can safely restore the appearance of your painted surface and protect it from future corrosion.
How to remove surface rust without damaging paint
Step | Instruction |
|---|---|
1 | Wash the affected area with soap and water to remove any dirt and debris. |
2 | Dry the surface thoroughly with a clean, lint-free cloth. |
3 | Apply a rust converter or rust remover solution to the surface rust, following the manufacturer’s instructions. You can use a product specifically designed for automotive paint or a household product like vinegar or lemon juice. |
4 | Allow the rust converter or rust remover to sit on the surface for a specified amount of time. |
5 | Gently scrub the rust away with a non-abrasive cloth or sponge. Be careful not to scrub too hard, as this can damage the paint. |
6 | Rinse the area with clean water to remove any remaining rust converter or rust remover residue. |
7 | Dry the surface again with a clean, lint-free cloth. |
8 | Apply a high-quality car wax or paint sealant to the cleaned area to help protect the paint from future rust damage. |
Eradicating Rust Flakes from Painted Surfaces
• Identifying the Rust
To effectively remove rust flakes from paint, it is crucial to identify the extent of the rust problem. There are three main stages of rust, which include surface rust, scale rust, and penetration rust. Surface rust is the simplest form of rust that affects the top layer of paint.
Scale rust occurs when the rust extends beyond the paint and corrodes the metal substrate. Penetration rust is when rust has significantly affected the metal and caused structural damage.
• Prepare the Area
Before attempting to remove rust flakes, it is essential to prepare the area appropriately. Park the vehicle in a well-ventilated area and gather all tools and materials needed for the rust removal process.
– Tools and Materials Required:
- Automotive soap
- Water and hose
- Clean cloths or microfiber towels
- Rust remover solution or converter
- Sandpaper (80 and 220-grit)
- Primer and paint (matching your vehicle’s color)
- Clear coat
- Protective equipment (gloves, goggles, and mask)
- Painter’s tape and newspaper
• 1. Clean the Affected Area
To remove dirt, grime, and oils from the affected area, wash the car with automotive soap and water. Rinse the area thoroughly with water using a hose and dry it with clean cloths or microfiber towels.
• 2. Protect Surrounding Paint and Components
Use painter’s tape and newspaper to protect the paint and other areas surrounding the rusted area. This will help ensure that only the rusted area gets treated during the rust removal process.
• 3. Apply Rust Remover Solution
Apply a rust remover solution or converter, such as Naval Jelly, onto the rust flakes following the manufacturer’s instructions. Always wear protective equipment, such as gloves, goggles, and a mask, when handling chemicals.
Let the rust remover solution sit for the recommended amount of time, usually around 15-30 minutes. Afterward, rinse the area thoroughly and let it dry.
• 4. Sand the Rusted Area
Using 80-grit sandpaper, sand the affected area to remove any remaining rust flakes or loose paint. This will create a smooth surface that will allow the primer and paint to adhere correctly.
Once the rust flakes are removed, switch to a 220-grit sandpaper and continue to sand the area until it is smooth and blends with the surrounding paint.
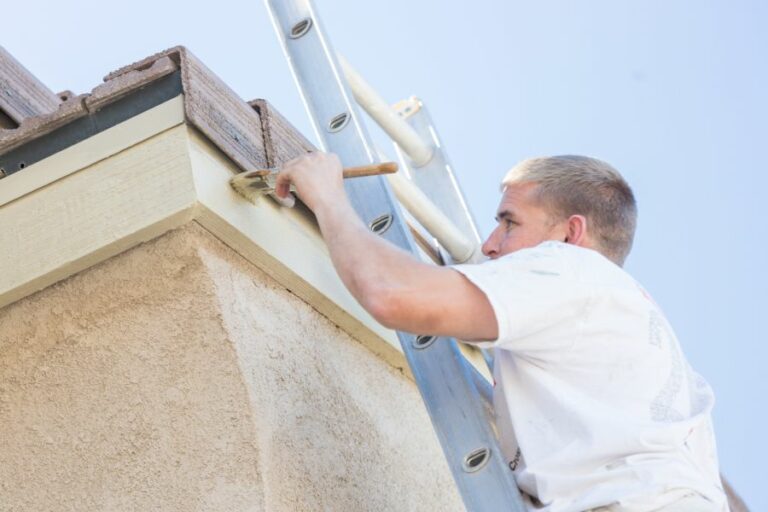
• 5. Applying Primer, Paint, and Clear Coat
Once the area is sanded and cleaned, apply a primer to promote paint adhesion and prevent rust from forming in the future. Allow the primer to dry according to the manufacturer’s instructions.
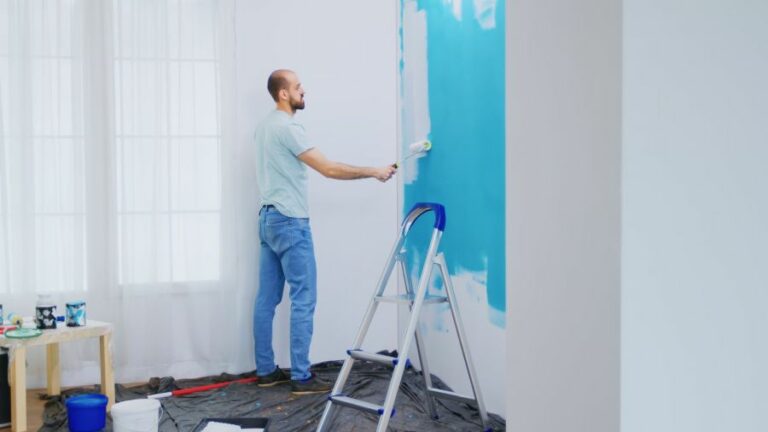
Next, apply a paint coat that matches your vehicle’s color. Be sure to use light, even strokes to avoid drips or runs in the paint. Once the paint is dry, apply a clear coat to protect the new paint.
• 6. Buff and Polish
After the clear coat is dry, use fine-grit sandpaper (around 2000-grit) to lightly blend the clear coat with the surrounding paint. Then, use a rubbing compound on the area to restore its shine.
• 7. Prevention
To prevent future rust formation, wash your car regularly, and use wax or sealants to protect the paint. Rustproofing treatments can also be applied during routine maintenance, which helps to prevent rust from forming.
• Final Thoughts
Removing rust flakes from paint can be a time-consuming process, but essential to maintain your vehicle’s appearance and prevent further damage. With the right tools, materials, and techniques, you can effectively remove rust flakes and restore your vehicle’s paint to its original condition.
Remember to always prioritize safety and follow the instructions given by product manufacturers.
Steps | Instructions |
|---|---|
1. Gather materials | Collect the following items: a soft brush, soft cloth or sponge, white vinegar, water, a spray bottle, baking soda, and a plastic scraper or your fingernail. |
2. Clean the area | Use the soft brush to gently remove loose rust particles and any dirt or debris from the paint surface. Be careful not to scratch the paint. |
3. Mix vinegar solution | In a spray bottle, mix a solution of equal parts white vinegar and water. |
4. Apply vinegar solution | Spray the vinegar solution onto the affected area, making sure to cover all the rust spots. Allow the solution to sit for 5-10 minutes. |
5. Wipe off rust | Use a soft cloth or sponge to gently wipe away the rust flakes. The vinegar should have loosened them, making them easy to remove. If necessary, use a plastic scraper or your fingernail to gently scrape off any stubborn rust flakes. |
6. Apply baking soda paste (optional) | If rust still remains, mix a small amount of baking soda with water to create a thick paste. Apply the paste to the remaining rust spots and let it sit for a few minutes. Then, gently scrub the area with a soft cloth or sponge and then rinse with water. |
7. Rinse and dry | After removing all rust flakes, rinse the area with water to clear away any remaining vinegar or baking soda residue. Dry the surface with a clean, soft cloth. |
Surface Rust Removal and Paint Preparation Tips
• Identifying Surface Rust
Surface rust is the first stage of corrosion, and it can appear as a coating of orange-brown discoloration on the metal’s surface. It is crucial to remove and treat surface rust at the early stages to prevent it from penetrating deeper into the metal and causing structural damage. Identifying and addressing surface rust early on will save you time and money in repairs.
For more information on identifying and understanding rust, check this source from Corrosionpedia.
• Necessary Tools and Materials
When removing surface rust and prepping for paint, it’s essential to have the following tools and materials on hand:
- Wire brush or metal scraper
- Sandpaper (80-220 grit)
- Electric sander (optional)
- Rust converter
- Clean rags
- Degreaser or rubbing alcohol
- Primer
- Paint
- Clear coat
- Painters tape and masking paper
- Safety gear (gloves, goggles, and a mask)
• Removing Surface Rust
– Step 1: Scraping and Brushing
Begin by using a wire brush or metal scraper to remove as much surface rust as possible. This will make it easier to sand and clean the affected area before applying a rust converter and paint.
– Step 2: Sanding
Next, sand the affected area using sandpaper with grit between 80 and 220, depending on the severity of the rust. The goal is to remove all rust and create a smooth surface for the rust converter and paint to adhere to.
It is recommended to start with a lower grit sandpaper and work your way up to a higher grit for a smoother finish.
If the affected area is large or you want to speed up the process, you can use an electric sander instead of manual sanding.
– Step 3: Cleaning
Once the rust has been removed, thoroughly clean the area using a degreaser or rubbing alcohol to remove any remaining dirt, oils, and contaminants. This will ensure proper adhesion of the rust converter and paint, preventing future rust development or paint failure.
• Prepping for Paint
– Step 4: Applying Rust Converter
After cleaning the sanded area, apply a rust converter according to its manufacturer’s instructions. Rust converters work by chemically bonding with the rusted metal, turning it into a stable compound that is resistant to further corrosion. This step is crucial in preventing rust from reoccurring under the new paint.
– Step 5: Priming
Once the rust converter has completely dried, apply a coat of primer to the affected area. The primer will serve as a base for the paint to adhere to and provide additional protection against future rust development.
Be sure to follow the drying time guidelines on the primer packaging before applying paint.
– Step 6: Masking
Before applying paint, use painter’s tape and masking paper to protect adjacent areas from accidental overspray or paint drips. This will ensure a clean and professional-looking finish.
• Painting and Finishing
– Step 7: Applying Paint
Select a paint that is compatible with the primer and specially formulated for use on metal surfaces. Apply the paint in thin, even coats, allowing each layer to dry according to the manufacturer’s instructions before applying the next one.
Multiple coats may be necessary for optimal coverage and protection.
– Step 8: Applying Clear Coat
After the paint has dried, it is recommended to apply a clear coat to provide added protection and a glossy finish. Clear coats work by sealing the paint, preventing exposure to moisture and other environmental factors that could lead to corrosion.
– Step 9: Removing Masking Materials
Once the clear coat is completely dry, carefully remove the painter’s tape and masking paper, revealing your freshly painted and rust-free surface.
• Final Thoughts
Consistently inspecting and addressing surface rust is essential for maintaining the integrity of metal surfaces, eliminating the need for costly repairs, and ensuring the longevity of your paint job.
By following these steps and using high-quality materials, you can successfully remove surface rust and prep for paint, protecting your metal surfaces from future corrosion.
For more information on rust prevention and metal maintenance, check out this source from the National Association of Corrosion Engineers.
Step | Description |
|---|---|
1. Clean the surface | Wash the rusty surface with soap and water to remove dirt, debris, and grease. |
2. Remove the rust | Use a wire brush, sandpaper, or abrasive pad to scrub away the rust. You can also use a chemical rust remover according to the manufacturer’s instructions. |
3. Sand the surface | Sand the entire surface with fine-grit sandpaper to create a smooth and even surface for the paint to adhere to. |
4. Clean the surface again | Wipe down the surface with a tack cloth or damp rag to remove dust and debris from sanding. |
5. Apply a rust-inhibiting primer | Apply a coat of rust-inhibiting primer to the surface according to the manufacturer’s instructions. This will help protect the surface from future rusting. |
6. Paint the surface | Once the primer is dry, paint the surface using a paint that is designed for use on metal surfaces. Apply multiple thin coats, allowing each coat to dry before applying the next. Follow the manufacturer’s instructions for drying times and finish types. |
Effective Surface Rust Removal from Painted Areas
Surface rust can be an annoying problem, but it doesn’t have to ruin your painted items. In this article, we will discuss several methods you can use to remove surface rust from a painted surface. Additionally, we’ll discuss some preventative measures to help keep rust from coming back.
• Identifying Surface Rust
Before you can proceed with any rust removal, it’s important to identify the problem. Surface rust is typically characterized by small, reddish-brown spots on the paint. You might see “bubbling,” where the rust has lifted the paint from the surface, or small fragments of rust on the paint.
Be careful not to confuse surface rust with deeper rust that has penetrated the metal, as this will require more extensive repairs.
• Method 1: Using a Rust Remover Solution
One popular method for removing surface rust from painted surfaces is using a rust remover solution. These solutions are commercially available and can be found at your local hardware store. Make sure to choose one that is safe for use on painted surfaces.
– Steps:
- Clean the surface: Before applying any rust remover, clean the painted surface with soap and water to remove any dirt, grime, or grease. Rinse thoroughly and allow the surface to dry completely.
- Apply the rust remover: Follow the manufacturer’s instructions on how to apply the rust remover to the affected area. This might involve spraying or brushing the solution onto the rust. Be sure to use proper personal protective equipment, such as gloves and eye protection.
- Scrub gently: Using a soft brush or cloth, gently scrub the rusted area. Be careful not to scrub too vigorously, as this may damage the paint.
- Rinse and dry: After the rust has been removed, rinse the area thoroughly with water and dry it completely. If any stubborn rust remains, repeat the rust remover application process.
• Method 2: Using a Mild Abrasive
Another common method for removing surface rust from painted surfaces is using a mild abrasive. Some options include toothpaste, baking soda, or Bar Keepers Friend.
– Steps:
- Clean the surface: As with the rust remover method, start by cleaning the surface with soap and water. Rinse thoroughly and allow the surface to dry completely.
- Create a paste: Mix your chosen mild abrasive with water to create a thick paste. You can find the appropriate ratio on the product’s packaging or experiment until you find a consistency that works for you.
- Apply the paste: Use a soft brush or cloth to gently apply the paste to the rusted area.
- Scrub gently: Gently scrub the rusted area using a soft brush, cloth, or sponge. Remember to be cautious not to scrub too harshly, which may cause damage to the paint.
- Rinse and dry: Rinse the area thoroughly with water and dry it completely. If necessary, repeat the abrasive application process until the rust is removed.
• Method 3: Using a Clay Bar
The third method for removing surface rust from painted surfaces is using a detailing clay bar. These can be found at automotive supply stores or online.
– Steps:
- Clean the surface: As with the other methods, begin by cleaning the painted surface with soap and water. Rinse thoroughly and allow the surface to dry completely.
- Lubricate the surface: Apply clay lubricant or a mixture of water and car wash soap to the affected area.
- Use the clay bar: Gently rub the clay bar over the rust spots on the paint, using back-and-forth motions. The clay will capture and lift the rust particles away from the surface.
- Inspect the area: Check to see if the rust has been removed, and if necessary, repeat the clay bar treatment.
- Clean and dry: Once the surface rust has been removed, clean the area with soap and water, rinse, and dry thoroughly.
• Preventing Future Rust
After removing the surface rust from your painted items, it’s essential to take steps to prevent the rust from returning. Some tips for prevention include:
- Avoid exposing the painted surface to excessive moisture or humidity.
- Regularly inspect and clean the painted surface to remove any debris that may contribute to rust formation.
- Protect the paint with a high-quality wax or sealant.
- Repair any paint chips, scratches, or cracks that may expose the metal beneath the paint.
For more information on preventing rust, the U.S. General Services Administration (GSA) offers helpful resources and tips. By following these recommendations, you can keep your painted surfaces looking like new and rust-free.
| How do you remove surface rust from a painted surface? |
|---|
| 1. Clean the area with a damp cloth to remove dirt and debris. |
| 2. Use a mild detergent or soap and water to clean the surface more thoroughly if necessary. |
| 3. Dry the surface completely using a clean, dry cloth or towel. |
| 4. Lightly sand the rusted area using fine-grit sandpaper or a sanding sponge to remove the visible rust. |
| 5. Wipe the area clean with a damp cloth to remove any dust or dirt from sanding. |
| 6. Apply a rust converter or rust inhibitor to the affected area according to the product’s instructions. This will create a protective barrier to prevent further rusting. |
| 7. Allow the rust converter or inhibitor to dry according to the product’s instructions. |
| 8. Once dry, prime the area with a high-quality, rust-inhibiting primer. Allow the primer to dry according to the product’s instructions. |
| 9. Apply a matching topcoat of paint over the primer. Allow to dry according to the product’s instructions. |
| 10. If necessary, apply a second coat of paint for complete coverage. |
| 11. Allow the paint to dry completely before using the surface as normal. |
Consequences of Painting Over Surface Rust
Rust is a common issue that affects metal surfaces, especially those exposed to moisture and elements. Painting over surface rust may seem like a convenient solution, but doing so can cause further problems if not addressed properly.
• Risks of Painting Over Surface Rust
While painting over rust can temporarily improve a metal object’s appearance, doing so can create long-term issues:
– Ongoing Corrosion
Painting over rust does not stop the corrosion process it merely seals the surface temporarily. Over time, rust will continue to eat away at the metal beneath the paint, undermining its integrity and creating a more significant problem.
– Paint Adhesion Problems
Rust can adversely affect paint adhesion, potentially leading to early paint chipping or peeling. This scenario may result in frequent repaints to maintain the appearance and protection of the metal surface. For a more lasting paint job, proper rust removal is crucial.
– Structural Weakness
In severe cases, rust can compromise the strength of the metal, creating a structural hazard. Painting over rust can mask this issue, making it difficult to assess the material’s condition and risk potential accidents.
• Effective Rust Removal Methods
To address rust concerns properly, one must first remove it from the metal surface. Several methods can effectively tackle rust, depending on the severity of the problem and the tools available.
– Sanding
Sanding is a basic method for rust removal. Use sandpaper, a sanding block, or a power sander to remove surface rust effectively. Start with coarse-grit sandpaper and progress to finer grits for a smoother finish. Sanding is best suited for mild to moderate rust and smaller surfaces.
– Wire Brushing
A wire brush or a wire brush attachment on a power drill can remove stubborn or heavy rust. This method is ideal for larger surfaces, reaching tight spaces, or getting rid of rust without removing too much metal.
– Chemical Rust Removers
A wide range of commercial rust removers are available on the market. These typically contain chemicals such as phosphoric acid or oxalic acid to dissolve rust, leaving behind a clean metal surface. Always follow the manufacturer’s instructions for proper application and safety precautions.
– Electrolysis
Electrolysis is an advanced method of rust removal involving an electrically charged solution and a sacrificial metal. The rust transfers from the affected metal to the sacrificial metal, leaving behind a clean surface.
While highly effective, this method requires more setup time and equipment compared to other techniques.
• Expert-Recommended Strategies for Painting Over Rust
Once the rust is removed, it’s time to prepare and paint the metal surface. Follow these recommended steps for the best results:
– Step 1: Clean and Dry the Metal Surface
After rust removal, clean the surface with a degreaser or a mild detergent to remove any remaining dirt and debris. Rinse thoroughly and allow the metal to dry completely.
– Step 2: Apply a Rust Inhibitor or Converter
Applying a rust inhibitor or converter can prevent future rust formation. These products typically contain phosphoric acid or other chemicals that react with rust to create a stable, corrosion-resistant coating. Follow the manufacturer’s instructions and allow the product to dry for the recommended time.
– Step 3: Prime the Surface
Use a high-quality, rust-inhibiting primer on the cleaned surface. An appropriate primer will help to prevent further rust and ensure better paint adhesion. Allow the primer to dry according to the recommended time.
– Step 4: Paint the Surface
Choose a high-quality paint formulated for metal surfaces, preferably with rust-resistant properties. Apply multiple thin coats, allowing each coat to dry before applying another. Follow the paint manufacturer’s instructions for optimal drying times and conditions.
– Step 5: Apply a Protective Topcoat
To protect the paint and add an extra layer of defense against rust, apply a clear coat or protective topcoat formulated for metal surfaces. This step is especially crucial for outdoor items exposed to weather elements.
In conclusion, painting over rust may seem like a quick fix, but it can lead to ongoing corrosion and adhesion issues. Proper rust removal, priming, and painting techniques are essential for long-term protection and for preserving the integrity of metal surfaces.
Following the expert-recommended strategies outlined in this article can ensure a durable and lasting paint job that effectively combats rust.
Result | Description |
|---|---|
Short-term coverage | The rust might be temporarily covered, but the paint will not adhere properly to the rusted surface. |
Further corrosion | Despite the paint, the rust can continue to spread underneath, causing further corrosion and damage. |
Paint flaking and peeling | Rust will cause the paint to lose adhesion, resulting in flaking and peeling over time. |
Aesthetics | The finish will likely be uneven or bumpy, which will be visible on the painted surface. |