How To Prepare Surfaces For Painting Indoors
Do you find yourself feeling anxious about tackling a painting project indoors? We’ve got your back! Preparing surfaces for painting is crucial to achieving professional results, and we’re here to guide you through it. With these helpful tips and tricks, you’ll be well on your way to transforming your indoor living space into a stunning new masterpiece.
How to prepare surfaces for painting indoors:
To prepare surfaces for indoor painting, first assess the surface’s condition, material, and existing paint quality. Then, clean the surface by removing dust, dirt, grease, and mold. Repair any imperfections, like holes or cracks, and remove peeling or flaking paint. Sand the surface for a smooth finish, and apply a suitable primer. Finally, ensure the primed surface is clean and smooth before painting.

Ready to give your interior a fresh coat of paint? Before grabbing a brush, learn the essential steps of surface preparation to ensure a flawless finish. Read on for expert tips, techniques, and more!
Contents
- 1 Preparing Indoor Surfaces for a Flawless Paint Job
- 2 Cleaning Techniques for Surfaces Before Painting
- 3 Prepping Interior Surfaces: Cleaning Before Painting
- 4 The Importance of Washing Walls Prior to Painting
- 5 Do Professional Painters Clean Walls Before the Job?
Preparing Indoor Surfaces for a Flawless Paint Job
Preparing surfaces is an essential step when painting indoors, as it helps ensure a smooth, even finish and a long-lasting result. In this comprehensive guide, we will discuss the necessary steps to take in order to adequately prepare different surfaces for painting.
• Assessing the Surface
Before starting any preparation work, it is important to take the time to assess the surface that you will be painting. This will help you determine the appropriate method and materials for your specific project.
- Examine the existing paint: Check if the current paint is in good condition or if it has issues, such as peeling or flaking. If the paint is in poor condition, it will require more extensive preparation.
- Identify the surface material: Common materials include drywall, plaster, and wood. Different surfaces may require different preparation techniques and products.
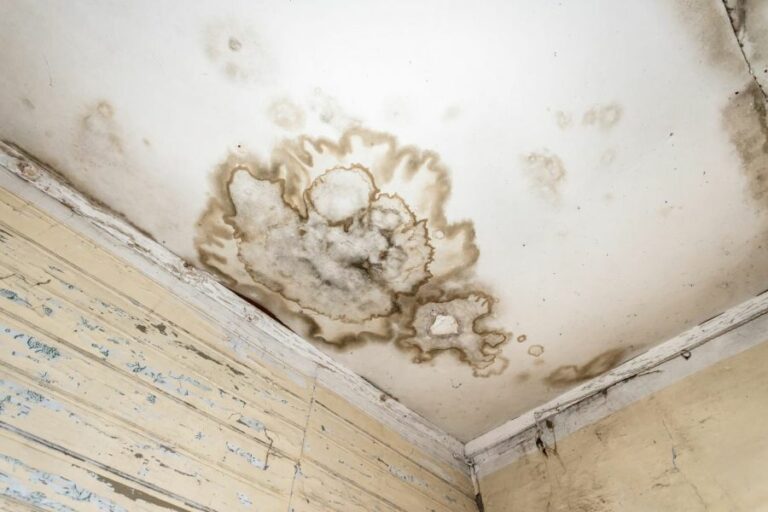
- Determine the surface’s condition: Look for any damage, such as holes, cracks, or mold, that may need to be addressed before painting.
• Cleaning the Surface
A clean surface is crucial for proper paint adhesion, so thorough cleaning should be the first step in your preparation process.
– Dust and Dirt Removal
Start by removing any loose dust, dirt, and cobwebs from the surface using a duster or vacuum with a brush attachment.
For stubborn dirt, use a microfiber cloth or sponge dampened with warm water and mild detergent.
– Degreasing
Grease and oil residues can affect paint adhesion, especially in kitchens and bathrooms. To degrease your surfaces, use a cleaner specifically designed for degreasing, such as trisodium phosphate (TSP), which can be found at most hardware stores.
Follow the manufacturer’s instructions for use, and rinse the surface with water afterward to remove any residue.
– Mold and Mildew Removal
If you come across any mold or mildew, it is crucial to remove it before painting. You can use a solution of one part bleach to four parts water or a commercial mold and mildew remover.
Apply the solution to the affected area, let it sit for a few minutes, then scrub with a brush or cloth. Rinse the surface with water and let it dry thoroughly before proceeding.
• Repairing Surface Imperfections
Next, you will need to address any damage, such as holes, cracks, or dents, that you identified during your initial surface assessment.
– Filling Holes and Cracks
For minor holes and cracks in drywall or plaster, use a pre-mixed joint compound or spackling paste, applying it with a putty knife.
If the damage is more extensive, you may need to apply mesh tape and multiple layers of joint compound. When the compound is dry, sand it smoothly using fine-grit sandpaper.
For wood surfaces, use a wood filler that matches the material, and follow the manufacturer’s instructions for drying times and sanding.
– Addressing Peeling or Flaking Paint
If the existing paint is peeling or flaking, use a scraper or putty knife to carefully remove the loose paint. For extensive peeling, you may need to use a paint stripper to remove the old paint layers completely, following the manufacturer’s instructions for safety and application.
Once the loose paint is removed, sand the edges and any remaining paint to create a smooth transition. This will help prevent the new paint from peeling and create an even finish.
• Sanding the Surface
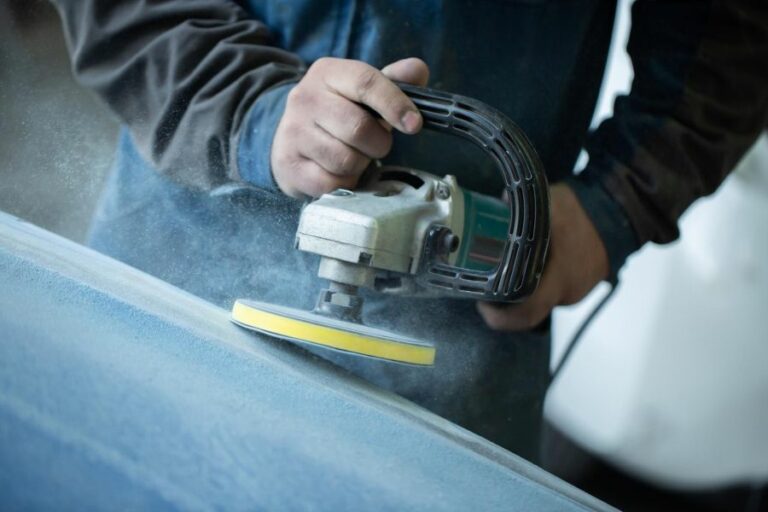
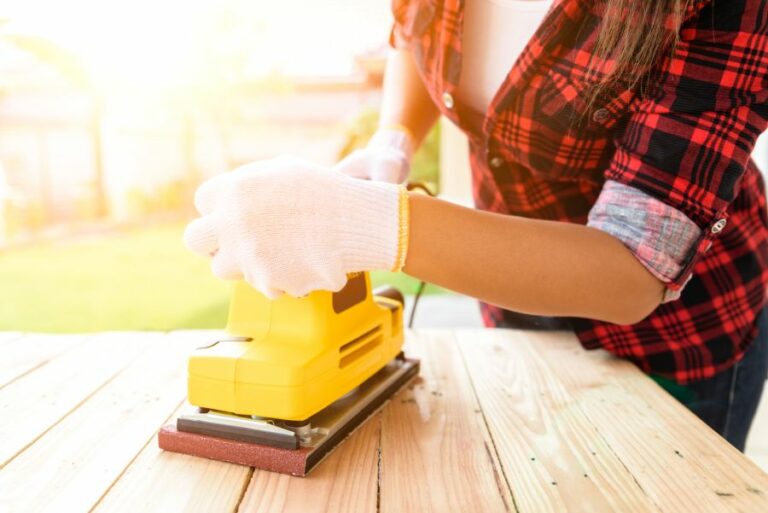
Sanding is an important step in creating a smooth surface that allows for better paint adhesion. Start with medium-grit sandpaper (around 80 grit) to smooth any imperfections, then follow with fine-grit sandpaper (around 120 grit) to create an even, smooth finish.
When sanding drywall or plaster, be careful not to sand too aggressively, as this can damage the surface. When sanding wood, always sand in the direction of the wood grain to avoid scratches.
After sanding, wipe the surface with a damp cloth or tack cloth to remove any dust and debris.
• Priming the Surface
Primer is an essential step in the painting process, as it provides a base for the paint to adhere to and can help prevent issues such as bleeding or peeling.
Choose a primer that is appropriate for your specific surface and paint type. For example, use a drywall primer for drywall surfaces, and choose either a water-based or oil-based primer to match your paint.
Apply the primer using a brush, roller, or sprayer, following the manufacturer’s instructions for coverage and drying time. Be sure to cover the entire surface, paying special attention to any repaired areas or spots where paint has been removed.
• Final Preparations
Allow the primer to dry completely, as recommended by the manufacturer. Once the primer is dry, give the surface a final inspection to ensure that it is clean, smooth, and free of imperfections. If necessary, make any final repairs and sand again.
• Conclusion
By following these steps, you can ensure that your surfaces are properly prepared for painting, allowing for a smooth, even finish that lasts. Remember that taking the time to adequately prepare surfaces for painting is an investment in the longevity and appearance of your paint job.
For more information on surface preparation and painting techniques, visit the United States Environmental Protection Agency website.
Step | Description |
|---|---|
1 | Remove all furniture, decorations, or obstacles from the room or cover them with protective sheets. |
2 | Inspect the surface for any visible damage, such as cracks, holes, or protruding nails, and repair accordingly. |
3 | Remove any existing wallpaper or loose paint using a scraper or wallpaper remover solution. |
4 | Use a sponge and mild soapy water to clean the surface of dust, dirt, and grease. Rinse with clean water and let it dry completely. |
5 | Sand the surface using fine-grit sandpaper to remove any remaining imperfections, create a smooth finish, and improve paint adhesion. Be sure to wear a dust mask and safety goggles for protection. |
6 | Use a vacuum cleaner or damp cloth to remove any sanding dust from the surface. |
7 | Apply painter’s tape to the edges of the surface and around any furniture, fixtures or trim that should remain unpainted. |
8 | Apply a coat of primer to the surface, following the manufacturer’s instructions, to improve paint adhesion and create a uniform finish. |
Cleaning Techniques for Surfaces Before Painting
A crucial step in any painting project is preparing the surface for the application of paint. Properly cleaning surfaces beforehand ensures a smooth, professional finish and long-lasting results.
• General Surface Cleaning
For general cleaning of surfaces before painting, it’s important to consider the type of dirt, debris, and stains present. Here are some common techniques to tackle various cleaning challenges.
– Dust and Loose Debris removal
Before applying any cleaner, it’s essential to remove dust and loose debris. This can easily be achieved with a vacuum cleaner or a soft brush. For hard-to-reach areas, consider using an extension pole with a brush attachment.
– Washing with soapy water
Most surfaces, such as walls, ceilings, and trim, can be cleaned by simply using warm soapy water and a sponge or soft cloth.
To make this solution, mix a few drops of dishwashing liquid into a bucket of warm water. Work in small sections, scrubbing lightly and rinsing thoroughly with clean water. Make sure to allow the surface to dry completely before proceeding to paint.
– Using TSP (Trisodium Phosphate) solutions
TSP is a versatile and powerful cleaning solution, ideal for surfaces with heavier grime, grease, or stains. Mix TSP powder with warm water, following the manufacturer’s instructions for the correct ratio. Wear gloves and eye protection when using TSP, as it can cause irritation.
Apply the solution with a sponge, scrubbing gently to avoid damage and rinsing with clean water. Allow the surface to dry before painting.
TSP alternatives
In some areas, TSP is not allowed due to environmental concerns. In these cases, TSP-substitute solutions are available, providing similar cleaning results without harmful phosphates. Follow the instructions on the product label for proper usage.
• Dealing with Mold and Mildew
Mold and mildew can be hazardous to your health and pose a challenge when preparing surfaces for painting. Follow these steps to clean and treat affected areas properly.
– Use a bleach solution
A bleach solution is effective at killing mold and mildew, ensuring these problems don’t recur after painting. Mix one part bleach with three parts water in a bucket.
Apply the solution to the affected area with a sponge or cloth, allowing it to sit for a few minutes. Rinse thoroughly with clean water and let the surface dry.
– Consider using a mold-killing primer
After cleaning the mold and mildew, using a mold-killing primer before applying the final paint can help prevent future growth. Many paint manufacturers offer these products designed specifically for this purpose.
• Preparing Wood Surfaces
Wood surfaces may require additional preparation before painting, including the removal of dirt, mildew, and loose or peeling paint. Follow these steps for the best results.
– Sanding
Sanding is an essential step in preparing wood surfaces. It helps remove old paint, smooth rough areas, and open the grain for better paint adhesion. Start with coarse sandpaper and progress to finer grits, always sanding in the direction of the wood grain.
– Cleaning
After sanding, use a tack cloth to remove dust and debris from the surface. If the wood is contaminated with mildew or stains, use the methods discussed earlier in this article.
– Priming
Priming is especially important on wood surfaces to ensure the paint bonds properly and provides a smooth, long-lasting finish. Choose a primer that is compatible with the paint you plan to use and follow the manufacturer’s instructions for application.
• Safety Tips
When using cleaning solutions or chemical products, always follow these safety guidelines:
- Wear gloves, eye protection, and appropriate clothing.
- Be sure to work in a well-ventilated area.
- Read and follow the manufacturer’s instructions and warnings on the product label.
- Keep children and pets away from the work area.
- Dispose of used supplies and waste responsibly according to local regulations.
• Conclusion
Properly cleaning surfaces before painting is critical for a successful and enduring result. By following the methods and recommendations outlined in this article, you can ensure a professionally finished paint job that will last for years to come.
For additional information on surface preparation, the Environmental Protection Agency (EPA) provides resources on painting and surface preparation that can be helpful.
Step | Method |
|---|---|
1 | Remove any dust, dirt, or debris with a soft brush or cloth. |
2 | Use a gentle soap and warm water mixture to clean grease, grime, or any other substances. |
3 | Rinse the surface with clean water and allow it to dry completely before painting. |
4 | For stubborn stains or mildew, you may use a solution of water and bleach or a specified cleaning agent. |
5 | Consider using a TSP (trisodium phosphate) solution to clean heavy grease or soot from surfaces. |
Prepping Interior Surfaces: Cleaning Before Painting
A well-prepared and clean surface is essential for a smooth and flawless paint job. In this article, we will discuss the steps and best practices for cleaning before painting the interior of a house.
• Preparing the Room
Before starting the cleaning process, it’s important to prepare the room. Here are the steps to follow:
- Remove furniture and personal items: Clear out the room as much as possible. Remove any furniture, decorative items, and personal belongings.
- Cover the floor: Use drop cloths or plastic sheeting to protect the floor from any debris or paint splatters.
- Mask off fixtures and openings: Use painter’s tape to mask off windows, doors, switches, outlets, and other areas that you don’t want to paint.
- Inspect surfaces: Make sure to address any major cracks, dents, or holes in the walls. Apply a patching compound or putty, then sand it smooth.
• Cleaning Solutions and Tools
There are various cleaning solutions and tools available to help you effectively clean before painting. Here are some recommendations:
- Cleaning solution: A mixture of warm water with some dish soap or a specialized wall cleaning solution like TSP (trisodium phosphate) will be effective in removing dirt, grime, and stains.
- Tools: A sponge, microfiber cloth, or soft-bristle brush is ideal for cleaning walls. You may also need a sturdy ladder or step stool to reach high areas and a bucket to mix your cleaning solution.
• Step 1: Dusting and Vacuuming
To begin the cleaning process, use a dry microfiber cloth or duster to remove any dust and cobwebs from walls and baseboards. A vacuum cleaner with a soft brush attachment can also be used to clear dust from hard-to-reach areas.
• Step 2: Cleaning Surfaces
Once the initial dusting and vacuuming are complete, it’s time to clean the walls thoroughly to remove any remaining dirt, grease, and grime. Follow these steps:
- Prepare your cleaning solution: Fill a bucket with warm water and add a few drops of dish soap or the suggested amount of TSP. Mix well.
- Soak your sponge or cloth: Soak your cleaning tool in the solution, then wring it out to avoid dripping water onto the floor.
- Clean the walls: Start at the top of the wall and work your way down, using a gentle scrubbing motion to remove dirt and stains. Make sure to periodically rinse your sponge or cloth in the cleaning solution.
- Rinse with clean water: Fill a separate bucket with plain water and use a clean sponge or cloth to rinse each section of the wall after cleaning to remove any residue.
- Dry the walls: Use a clean, dry microfiber cloth to dry each section of the wall after rinsing.
• Step 3: Cleaning Doors and Trim
In addition to walls, it’s important to clean doors, trim, and baseboards before painting. Use the same cleaning solution and tools to gently scrub these areas, paying special attention to any grooves or intricate details.
• Step 4: Allowing Surfaces to Dry
It’s crucial to allow surfaces to completely dry before painting. If the paint is applied to a damp surface, it can cause peeling, bubbling, or uneven coverage. Depending on the humidity and ventilation in the room, it may take several hours for the walls to fully dry.
If possible, use fans or open windows to speed up the drying process.
• Step 5: Final Inspection and Touch-Ups
Inspect the walls, doors, and trim for any remaining stains, grease, or dust. If necessary, repeat the cleaning and rinsing process to ensure a clean surface for painting.
Once all surfaces are clean and dry, you’re ready to begin the painting process. By following these steps, you can ensure that your paint job is smooth, even, and long-lasting.
Step | Description |
|---|---|
1. Remove furnishings and wall hangings | Clear the room of all furniture, decorations, and wall hangings to make cleaning and painting easier. |
2. Dust and vacuum the room | Clean the room by dusting surfaces, vacuuming floors, and removing cobwebs from corners and ceilings. |
3. Clean walls with a damp cloth | Wipe down the walls with a damp cloth to remove any dust, dirt, or grease that could prevent paint from adhering properly. |
4. Use a mild detergent for stubborn stains | If there are any stubborn grease, stains, or marks on the walls, use a mild detergent to help remove them. |
5. Wipe down trim and baseboards | Clean the trim, baseboards, and other surfaces that will be painted using a damp cloth and mild detergent if needed. |
6. Fill holes and cracks with spackling | Inspect the walls for any holes or cracks, and fill them with spackling compounds to create a smooth surface for painting. |
7. Sand and wipe down surfaces | After the spackling has dried, sand the surfaces to create an even, smooth finish, and then wipe them down with a damp cloth to remove any dust or debris. |
8. Allow surfaces to dry completely | Give the walls and surfaces plenty of time to dry completely before attempting to paint them to ensure proper adhesion of the paint. |
9. Tape off edges and protect non-painted surfaces | Apply painter’s tape around door frames, window frames, and other edges to protect non-painted surfaces and create clean paint lines. |
The Importance of Washing Walls Prior to Painting
When preparing to paint a room, one important question that often arises is whether or not you need to wash the walls before you begin painting. The short answer is yes. Washing the walls before painting is an essential step to ensure a smooth and lasting finish.
• The Importance of Washing Walls Before Painting
There are several reasons why it’s essential to wash walls before painting. Some of the main factors include:
– Removing Dirt and Grease
Over time, walls accumulate dirt, dust, and grease, which can affect the adhesion of the paint to the surface. Failing to remove these contaminants can result in an uneven and poorly bonded paint job.
– Improving Paint Adhesion
A clean, smooth surface more readily allows the paint to adhere to it, ensuring a more durable and longer-lasting finish. By washing the walls before painting, you can ensure a uniform and professional-looking result.
– Uncovering Hidden Issues
Washing the walls can reveal issues such as mildew, mold, or stains that might otherwise go unnoticed. Addressing these problems before painting will prevent any potential complications or compromises in paint quality.
• How to Properly Wash Walls Before Painting
Follow these steps to ensure that your walls are properly prepared for painting:
1. Gather the Necessary Supplies
To wash walls before painting, you’ll need the following items:
- A sponge or cloth
- Warm water
- Mild detergent (such as dish soap or a TSP substitute)
- A bucket
- Rubber gloves
- Protective goggles
- A ladder or step stool (if needed)
2. Mix the Cleaning Solution
Fill the bucket with warm water and add a small amount of mild detergent. The water should be soapy but not overly sudsy. Avoid using harsh chemicals, as they can damage the walls and make painting more challenging.
3. Remove Furniture and Protect the Floors
Before you start washing the walls, it’s essential to remove any furniture or objects that may get in your way or be damaged by water. Additionally, lay down a drop cloth or plastic sheeting to protect the floors from any spills or splatters.
4. Begin Washing the Walls
Using a sponge or cloth dampened with the cleaning solution, start at the top of the wall and work your way down using gentle, circular motions. Pay special attention to corners, light switches, and any areas with visible dirt or grime. For higher areas, use a ladder or step stool to reach them safely.
5. Rinse the Walls
Using a separate bucket of clean water or a hose, rinse the walls thoroughly to remove any soap residue. Failing to do so can leave a film that will affect the paint’s adhesion.
6. Allow the Walls to Dry
Before you begin painting, the walls must be completely dry. This process can take anywhere from a few hours to a full day, depending on factors such as air circulation and humidity. Painting on damp walls can lead to peeling paint, mold or mildew growth, and an uneven finish.
• Tips and Tricks for Washing Walls Before Painting
Here are some expert recommendations to make the task of washing walls before painting easier and more efficient:
- Use a long-handled sponge mop to reach high places without the need for a ladder.
- To minimize streaking, change the water in the rinse bucket frequently.
- If you discover mold or mildew, consider consulting a professional or using a specifically designed cleaner to address the issue thoroughly.
- Always wear protective goggles and rubber gloves to protect yourself from any potential hazards while washing the walls.
• Conclusion
Washing walls before painting is a critical step in ensuring a smooth, uniform, and long-lasting paint job. By following the steps and tips outlined above, you’ll be well on your way to achieving a professional and impressive result.
Do Professional Painters Clean Walls Before the Job?
• The Importance of Cleaning Walls Before Painting
If you are considering repainting your home, it is critical to ensure that your walls are clean prior to applying new paint. Similar to how you wouldn’t apply makeup on a dirty face, the same concept applies to walls.
Painting over dirt, dust, and grime will not only affect the paint’s ability to adhere properly but also decrease its overall durability, leading to chipping, peeling, and an unattractive finish.
As a professional house painter with extensive experience, I can attest to the importance of cleaning walls before painting. This crucial step not only ensures a smooth application and better paint adherence but also increases the likelihood of achieving a longer-lasting and visually appealing paint job.
• Different Methods for Cleaning Walls
There are several techniques that can be employed by professional painters to clean walls before painting, depending on factors such as the wall’s material, the level of grime and dirt present, and any specific requirements or concerns the homeowner may have. The most commonly used methods include:
1. Dry Cleaning
This method involves the use of a soft bristle brush, a microfiber duster, or a vacuum cleaner with a brush attachment to remove loose dirt and dust from the wall. This is particularly important for walls with a textured finish, as they tend to accumulate more dirt and debris than smooth ones.
The Environmental Protection Agency recommends regular dry cleaning of your walls if you have allergies or asthma, as dust can exacerbate these conditions.
2. Wet Cleaning
For walls with more stubborn dirt and grime, a wet cleaning method may be necessary. This entails the use of a sponge or cloth dampened with warm water and a mild detergent, such as dish soap or laundry detergent.
Gently scrub the walls in a circular motion, being cautious not to oversaturate them. Wet cleaning should be performed with care, as excessive moisture can cause damage to certain wall materials, such as drywall, and may lead to issues such as mold or mildew.
3. Chemical Cleaning
In some cases, the use of specialized cleaning agents or chemicals may be required to remove hard-to-tackle stains or residue left behind by old paint.
These products should be used following the manufacturer’s instructions, and appropriate safety precautions should be taken, including the use of gloves and proper ventilation.
It is wise to consult with a professional painter before using any chemicals to ensure that they are suitable for your particular wall type and will not cause any adverse reactions.
• Additional Pre-Painting Preparations
Beyond cleaning the walls, house painters also perform a variety of other preparatory tasks to create the ideal surface for painting. These include:
1. Repairing Damaged Walls
Any cracks, nail holes, or other imperfections in the wall must be addressed before painting. This may involve the use of spackling paste or a similar compound to fill in the damages and provide a smooth surface to work with.
2. Sanding and Deglossing
Walls that have a glossy finish, or those that have been patched, may require sanding to remove any bumps or unevenness. This can be achieved using fine-grit sandpaper, and it helps to ensure that the new paint adheres properly.
Deglossing agents can also be used to remove any remaining gloss from the previous paint job, providing a better surface for the new paint to adhere to.
3. Priming
A critical step in any professional painting job, priming involves the application of a base coat, or primer, to the wall before the paint is applied. This serves several purposes, including promoting paint adhesion, providing a uniform color and appearance, and increasing durability.
• The Cost-Effectiveness of Hiring a Professional Painter
While it may be tempting to skip the cleaning process and attempt to paint your walls yourself without the necessary preparations, doing so can lead to disappointing and, in some cases, costly results.
A poorly executed paint job is likely to require more frequent touch-ups or repainting, and without the correct cleaning and preparatory steps, your wall’s lifespan may be significantly shortened.
Hiring a professional painter ensures that your walls will be thoroughly cleaned and properly prepared for painting, providing you with a high-quality and long-lasting paint job.
Additionally, by employing a professional, you can save considerable time and effort, as they will have the knowledge, experience, and tools necessary to complete the job efficiently and effectively.
In conclusion, professional house painters understand the importance of cleaning walls before painting, as this fundamental process greatly impacts the overall outcome and longevity of the paint job.
By hiring an experienced and knowledgeable painter, you can have peace of mind knowing that your walls will be expertly cleaned, prepped, and painted, providing your home with a beautiful and durable new look.

