Combating Mildew In Surface Prep Process. What Pros Say
Dealing with mildew during the surface prep process can be a pesky issue, but fear not. We have the perfect approach to combat this common problem. Our tested and proven method will set you up for success, ensuring a clean and healthy surface, free from mildew.
Combating mildew in the surface prep process:
To combat mildew in the surface preparation process, first identify its presence through signs like discoloration, staining, or a musty odor. Remove mildew using cleaning solutions like bleach, fungicides, or vinegar. Scrub, rinse and dry the surface thoroughly. Prepare the surface by repairing damage and applying mildew-resistant primer and paint. Prevent future growth with proper ventilation, humidity control, regular inspections, and cleaning routines.

Discover expert strategies for effectively combating mildew during the surface preparation process. Learn essential techniques to prevent future mildew growth and ensure a flawless, long-lasting finish. Read on to arm yourself with the knowledge you need for mold-free success!
Contents
- 1 Battling Mildew in the Surface Preparation Process
- 2 Eliminating Mildew from Paint Preparation
- 2.1 • Identify and Deal with the Source of Moisture
- 2.2 • Gather Essential Tools and Protective Gear
- 2.3 • Prepare the Mildew-Killing Solution
- 2.4 • Apply the Mildew-Killing Solution
- 2.5 • Assess the Surface
- 2.6 • Dry the Surface
- 2.7 • Apply a Mildew-Resistant Primer
- 2.8 • Paint the Surface
- 2.9 • Maintain Proper Ventilation and Humidity Control
- 3 Preventing Mildew Formation on Surfaces
- 4 Eradicating Mildew on Porous Materials
- 4.1 • Prevention: The First Line of Defense
- 4.2 • Vinegar: A Natural and Affordable Solution
- 4.3 • Baking Soda: A Gentle and Effective Approach
- 4.4 • Hydrogen Peroxide: A Powerful and Versatile Mildew Killer
- 4.5 • Professional-Grade Products: Specialized Solutions for Stubborn Mildew Problems
- 4.6 • Seek Expert Help for Extensive Mildew Problems
Battling Mildew in the Surface Preparation Process
• Introduction
Mildew is a surface fungus that is typically caused by dampness and poor ventilation. This unwelcome guest can cause discoloration and damage to various surfaces like walls, ceilings, and furniture.
Moreover, mildew can also have negative effects on human health, leading to respiratory issues, allergies, and other medical problems. Therefore, it is crucial to combat mildew during the surface prep process to ensure a clean, healthy, and aesthetically pleasing result.
• Identifying Mildew
Before starting the surface prep process, it is necessary to correctly identify the presence of mildew on the surface. Some common signs of mildew include:
- Black, gray, or green spots with a powdery or fuzzy appearance.
- Musty or earthy odor.
- Surface discoloration or staining.
If you suspect the presence of mildew on a surface, you can visit the Environmental Protection Agency (EPA) website to find guidelines on mold and mildew identification and control.
• Mildew Removal Techniques
Once mildew has been identified, the next step is to proceed with its removal. Here are some proven techniques to efficiently remove mildew from surfaces:
– Cleaning Solutions
Various cleaning solutions can effectively eliminate mildew from surfaces. Ensure that you are using a solution specifically designed for mildew removal. Some popular options include:
- A mixture of water and bleach (1 part bleach to 3 parts water)
- Commercial mildewcide or fungicide products
- A vinegar solution (dilute white vinegar with an equal amount of water)
It is important to follow the manufacturer’s instructions when using these cleaning solutions and ensure proper ventilation in the area to prevent inhalation of harmful fumes.
– Scrubbing
Once the cleaning solution is applied, use a suitable scrubbing tool like a brush or sponge to scrub the affected surface thoroughly. This action will help to loosen and remove the mildew from the surface.
– Rinsing
After scrubbing, thoroughly rinse the surface with clean water to wash away any remaining residue. This step is crucial to ensure that no traces of the cleaning solution or mildew are left behind.
– Drying
Allow the surface to dry completely before proceeding with the next steps of your surface prep process. This will help to prevent the regrowth of mildew and ensure a clean surface for further treatment.
• Surface Preparation
With the mildew successfully removed, the next step is to prepare the surface for painting, or other desired finishing work. Some essential steps to consider include the following:
– Repairing Surface Damage
Inspect the surface for any damage caused by the mildew, like cracks, peeling paint, or weakened materials. Repair any damage accordingly to ensure a secure and even surface for future work.
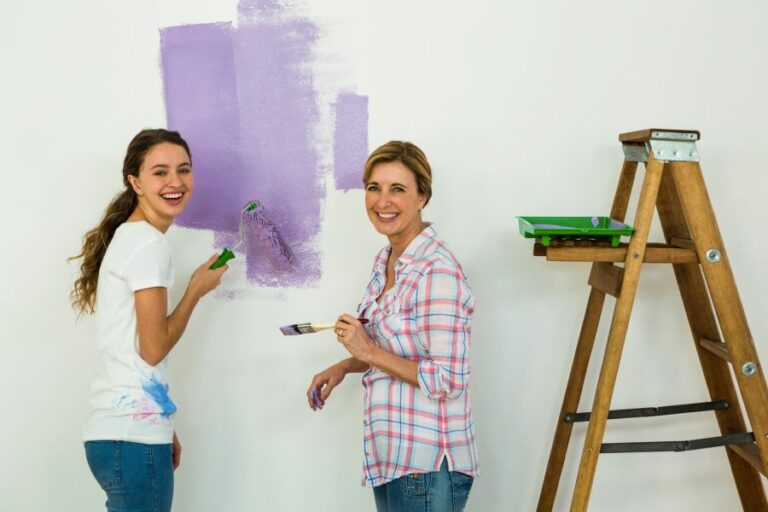
– Priming
Applying a quality primer can serve as an effective barrier against mildew growth, especially those primers that contain mildew-resistant additives. Be sure to choose a primer that is suitable for the type of surface you are working on.
– Painting
Use a high-quality, mildew-resistant paint to provide an additional layer of protection against mildew. These specialized paints can help to inhibit mildew growth and keep your surface looking clean and fresh for a longer period.
• Prevention Measures
The best way to combat mildew is to prevent it from forming in the first place. Here are some essential prevention measures to consider during and after your surface prep process:
- Ensure proper ventilation and air circulation in the areas prone to mildew growth.
- Control the humidity levels in the space with appliances like dehumidifiers or air conditioning units.
- Regularly inspect surfaces for early signs of mildew and address them promptly.
- Maintain a regular cleaning routine to remove mildew spores and prevent accumulation.
In conclusion, combating mildew in the surface prep process is crucial to achieving a clean, healthy, and visually appealing result.
By adopting the techniques and prevention measures discussed in this article, you can effectively eliminate mildew from your surfaces and protect them from future growth.
Eliminating Mildew from Paint Preparation
Mildew is a type of fungus that grows in damp environments, particularly on surfaces like painted walls, wood, and other materials. Most people find mildew unsightly, and it can even cause health problems for those with allergies or asthma.
It is, therefore, essential to deal with mildew before applying paint to any surface, as it will eventually bleed through the newly painted walls.
• Identify and Deal with the Source of Moisture
The first step in tackling mildew is to identify and address the source of moisture. Check for leaks in the roof, plumbing, or poorly sealed windows. Ensure proper ventilation in high-humidity areas, such as kitchens and bathrooms.
By dealing with the root cause of mildew growth, you can prevent its recurrence in the future.
• Gather Essential Tools and Protective Gear
It is crucial to have the right tools and materials to effectively remove mildew. These can include:
- Soft-bristle brush or sponge
- Bucket
- Mildew-killing solution (diluted bleach or commercial mildew remover)
- Rubber gloves
- Protective eyewear
- Ventilation mask (recommended when using bleach)
• Prepare the Mildew-Killing Solution
A common and effective mildew-killing solution is a mixture of one-part bleach and three parts water. Alternatively, commercial mildew removers can also be used according to their label instructions. Ensure proper ventilation while using these solutions, as the fumes can be harmful.
• Apply the Mildew-Killing Solution
- Put on your rubber gloves, protective eyewear, and a ventilation mask.
- Thoroughly wet the mildew-affected area with the solution.
- Allow the solution to sit for a few minutes to break down the mildew.
- Using the soft-bristle brush or sponge, scrub the affected area lightly to dislodge the mildew. Avoid scrubbing too hard, as it may damage the underlying surface.
- Rinse the area with clean water to remove any residue of the solution and mildew.
• Assess the Surface
After cleaning the mildew, check the surface for any damage, such as peeling paint, water stains, or severe discoloration. Address these issues before moving on to the painting process.
• Dry the Surface
Allow the cleaned surface to dry completely before proceeding with paint preparation. It is imperative to ensure that the area is dry, as the presence of moisture can lead to the continuation of mildew growth even after painting.
• Apply a Mildew-Resistant Primer
To further prevent mildew growth and ensure proper paint adhesion, apply a mildew-resistant primer to the cleaned and dried surface. Follow the manufacturer’s instructions for proper application, coverage, and drying times.
• Paint the Surface
Once the primer is dry, proceed with painting the surface using high-quality, mildew-resistant paint. Make sure to follow the paint manufacturer’s instructions for proper application and drying times.
• Maintain Proper Ventilation and Humidity Control
After painting, it is essential to maintain proper ventilation and humidity control in the room, particularly in areas such as kitchens and bathrooms. This will help prevent future mildew growth and ensure that your painted surfaces remain clean and pristine.
In conclusion, removing mildew from paint prep is a crucial step in maintaining the appearance and health of your painted surfaces.
By identifying and addressing moisture sources, cleaning the affected areas thoroughly, and using mildew-resistant products, you can successfully rid your surfaces of mildew and enjoy a fresh, clean paint job.
Step | Description |
|---|---|
1 | Inspect the area for mildew growth. Look for black, brown, or other dark-colored spots on the surface. |
2 | Put on protective gear, such as gloves, mask, and goggles, to prevent contact with mildew and cleaning agents. |
3 | Create a cleaning solution by mixing one cup of bleach with one gallon of warm water. |
4 | Apply the cleaning solution to the affected area using a sponge or brush, scrubbing gently to remove the mildew. |
5 | Rinse the cleaned area with clean water to remove any residue from the cleaning solution. |
6 | Allow the area to dry completely before proceeding with the paint preparation process. |
7 | Apply a mildew-resistant primer (stain blocking) to the cleaned surface before painting to prevent future mildew growth. |
Preventing Mildew Formation on Surfaces
Mildew, a common and unwanted household guest, can lead to various issues ranging from unpleasant odors to potential health risks.
• Understanding Mildew and its Causes
Before delving into preventive measures, it is essential to understand what mildew is and its primary causes. Mildew is a type of fungus that thrives in moist, warm environments and can quickly grow on various surfaces such as walls, ceilings, fabric, and furniture.
Common causes of mildew growth include high humidity levels, inadequate ventilation, and water leaks or damage. By addressing these issues, you can effectively prevent and stop mildew from forming.
• Maintain Low Humidity Levels
One of the most effective ways to curb mildew growth is to maintain low levels of humidity within your home. The Environmental Protection Agency (EPA) recommends keeping indoor humidity levels below 60%, ideally between 30% and 50%. There are several ways to achieve this, including:
- Using a dehumidifier to remove excess moisture from the air
- Utilizing air conditioners, fans, or open windows to promote air circulation
- Avoiding activities that produce excessive moisture, such as steamy showers and boiling water, or ensuring proper ventilation during these activities
• Ensure Adequate Ventilation
Good ventilation is crucial for preventing mildew growth, as it helps circulate air and removes moisture from your living space. To ensure your home is adequately ventilated, consider the following:
- Installing exhaust fans in high-moisture areas such as bathrooms and kitchens and ensure they are vented outside
- Keeping doors and windows open whenever possible to enable air circulation
- Regularly checking and cleaning ventilation ducts for dust and debris to ensure optimal airflow
- Using an energy recovery ventilator (ERV) to introduce fresh air while keeping energy costs low
• Fix Water Leaks and Prevent Water Damage
Fixing water leaks and preventing water damage is critical in eliminating the risk of mildew formation. It is essential to regularly inspect your home for signs of leaks or water damage and act promptly to address these issues. Some common tips include:
- Repairing leaks from roofs, walls, plumbing fixtures, and appliances as soon as they are detected
- Regularly cleaning and maintaining gutters and downspouts to ensure proper water flow
- Keeping exterior surfaces such as siding, roof, and foundation free of cracks and gaps that can allow moisture to seep in
- Directing water away from your home’s foundation using gradient landscaping, French drains, or sump pumps
• Regular Cleaning and Maintenance
Keeping your home clean and well-maintained plays a crucial role in deterring mildew growth. By adopting routine cleaning practices, you hinder the development of mildew and keep your living space pristine. Some practical cleaning tips include:
- Regularly cleaning and drying surfaces, fabrics, and carpets that are prone to moisture or mold growth
- Disinfecting commonly used items to eliminate mold spores, such as toothbrushes, sponges, or laundromats
- Routinely inspecting and cleaning mildew-prone areas, including basements, attics, and storage closets
- Using protective moisture-resistant covers on outdoor furniture and upholstery to prevent mildew growth
• Use Mildew-Resistant Products and Materials
In addition to keeping your home clean and dry, using mildew-resistant products and materials can provide further protection against mildew growth. Some options to consider include:
- Painting walls and furniture with mold-resistant paint or applying mold-resistant primers
- Installing moisture-resistant drywall or cement boards in high-moisture areas, such as bathrooms or basements
- Using moisture-resistant materials, such as tile or vinyl, for flooring and wall finishes in damp areas
- Selecting mold-resistant fabrics, such as synthetic fibers or treated natural fibers, for upholstery, curtains, and other textiles
In conclusion, preventing mildew formation requires consistent effort and attention to detail. By implementing the strategies and recommendations outlined in this article, you can effectively stop mildew formation and promote a healthy, mold-free living environment.
Method | Description |
|---|---|
Control humidity levels | Keep indoor humidity levels below 60% to discourage mildew growth. Use a dehumidifier or air conditioner if necessary. |
Improve ventilation | Ensure proper airflow in rooms prone to moisture, such as bathrooms and kitchens. Use exhaust fans or open windows when cooking or showering. |
Fix leaks and moisture issues | Address any leaks or standing water in your home as soon as possible to prevent mildew growth. |
Clean and maintain surfaces | Regularly clean surfaces and fabrics with mildew-resistant cleaning products. Store items in a dry and well-ventilated area. |
Use mildew-resistant products | Opt for mildew-resistant paint, grout, and other materials when constructing or renovating your home. |
Eradicating Mildew on Porous Materials
Mildew, a type of fungus, grows on various porous surfaces, including wood, fabrics, grout, carpets, and drywall. Mildew not only causes an unpleasant odor and an unsightly appearance but can also damage materials and pose health risks.
• Prevention: The First Line of Defense
Before discussing the various methods of eliminating mildew, it’s crucial to emphasize the importance of prevention. Preventing mildew growth on porous surfaces is easier and more cost-effective than removing it. Some basic preventative measures include:
- Ensuring proper air circulation in damp and humid areas such as basements or bathrooms
- Utilizing dehumidifiers or air conditioners to maintain a relative humidity lower than 60%
- Fixing water leaks and addressing moisture issues promptly
- Cleaning and drying moisture-prone surfaces regularly
By taking these steps, you reduce the risk of mildew growth and maintain a healthier living environment.
• Vinegar: A Natural and Affordable Solution
Vinegar is a highly effective, non-toxic, and affordable solution for removing mildew from porous surfaces. Its acidic nature makes it an excellent mildew killer. To use vinegar for mildew removal, follow these steps:
- Mix equal parts of white distilled vinegar and water in a spray bottle.
- Spray the solution generously onto the affected surface.
- Let it sit for at least an hour. For heavily infested areas, you can leave it overnight.
- Scrub the surface gently with a brush or cloth, focusing on the mildew spots.
- Rinse the area with clean water and dry it thoroughly.
For more persistent or extensive mildew growth, it may be necessary to reapply the vinegar solution and repeat the process. Note that vinegar may have a bleaching effect on some materials, so it’s essential to test it on an inconspicuous area first.
• Baking Soda: A Gentle and Effective Approach
Baking soda, a natural deodorizer, is another mildew removal agent suitable for porous surfaces. Its gentle, abrasive quality effectively cleans without damaging the material. To use baking soda, follow these steps:
- Add a quarter tablespoon of baking soda to a spray bottle filled with water.
- Shake the bottle until the baking soda dissolves.
- Spray the solution onto the mildew-stained area.
- Scrub the surface gently using a sponge or soft brush.
- Rinse the surface with clean water and dry it thoroughly.
For larger or more stubborn mildew stains, consider making a thick paste by combining baking soda and water. Apply the paste to the affected areas, let it sit for at least an hour, then scrub and rinse thoroughly.
• Hydrogen Peroxide: A Powerful and Versatile Mildew Killer
Hydrogen peroxide, an antifungal and antibacterial substance, is a powerful, eco-friendly solution for removing mildew on porous surfaces. Here’s how to use hydrogen peroxide:
- Pour 3% hydrogen peroxide into a spray bottle. Do not dilute it with water.
- Spray the hydrogen peroxide onto the mildew-covered surface.
- Allow it to sit for at least 10 minutes.
- Scrub the surface gently using a soft brush.
- Rinse the surface with clean water and dry it completely.
It’s important to test hydrogen peroxide on a small, inconspicuous area before applying it to the entire surface, as it may discolor or bleach some materials.
• Professional-Grade Products: Specialized Solutions for Stubborn Mildew Problems
In cases where mildew growth is extensive, persistent, or has caused severe damage to the material, it’s advisable to use professional-grade products designed for mildew removal on porous surfaces.
Several products on the market are specifically formulated to eliminate mildew on a range of materials, such as wood, drywall, grout, and fabrics.
Always follow the manufacturer’s instructions for proper application, and be sure to wear appropriate personal protective equipment.
For more information on selecting the right professional-grade product for your mildew problem, consult the Environmental Protection Agency’s guide on mold and mildew.
• Seek Expert Help for Extensive Mildew Problems
When mildew growth is extensive or has caused severe structural damage, it’s recommended to consult a professional mold and mildew remediation service.
These experts are equipped with the necessary tools, knowledge, and experience to safely eliminate mildew and restore your property to its original state.