Applying Paintable Water-Repellent Preservative On Wood Surfaces
Are you looking to protect and preserve your wooden surfaces from harsh weather conditions, decay, and fungi without compromising the natural look? We will guide you on effectively applying paintable water-repellent preservatives (PWRP) to your wood surfaces, ensuring durability and longevity.
Applying paintable water-repellent preservative (PWRP) on wood surfaces:
To apply paintable water repellent preservative (PWRP) on wooden surfaces, choose the right PWRP product, clean and prepare the wood surface, sand and repair if needed, and dry before application. Apply the PWRP using brushing, spraying, or rolling techniques, and allow it to dry as per the manufacturer’s instructions. This helps protect the wood from moisture, decay, and other damages while maintaining its appearance.

Maximize the durability of your wood surfaces with paintable water-repellent preservative (PWRP)! Discover the proper application techniques, benefits, and recommended products to prolong the life of your wooden structures. Read on to unveil the secret to protecting your wood against rot and decay.
Contents
- 1 Apply Paintable Water Repellent Preservative (PWRP) on Wooden Surfaces
- 2 Wood Preserver Application: Before or After Painting?
- 3 Discover the Most Efficient Method to Apply Wood Preservative
- 4 Is It Possible to Paint Over the Wood Preserver?
- 5 A Step-by-Step Guide to Applying Wood Preservative
Apply Paintable Water Repellent Preservative (PWRP) on Wooden Surfaces
Protecting wooden surfaces from moisture, decay, and other damaging elements can extend their life and maintain their appearance. One effective method of doing so is through the application of paintable water-repellent preservatives (PWRPs).
These products offer long-lasting protection to various wooden surfaces, including decks, fences, outdoor furniture, and more.
• Choosing the Appropriate PWRP
Before diving into the application process, it is crucial to select an appropriate PWRP product for your specific project.
While many PWRP products are suitable for multiple applications, consider factors such as the type of wood, the desired finish, and the environmental conditions of the project site. Options include water-based, oil-based, or hybrid products.
• Preparing the Wood Surface
– Cleaning
Proper preparation of the wood surface is essential for the successful application of PWRP. The first step in this process is thoroughly cleaning the surface to remove dirt, residues, or previous finishes.
In most cases, a mixture of mild soap and water is sufficient. Avoid using harsh detergents or abrasive tools, as these may damage the wood fibers.
If the surface has existing mold or mildew growth, consider using a dedicated wood cleaner or a homemade solution of bleach and water. Be sure to rinse the surface thoroughly after cleaning to remove any residual cleaner or bleach.
– Sanding
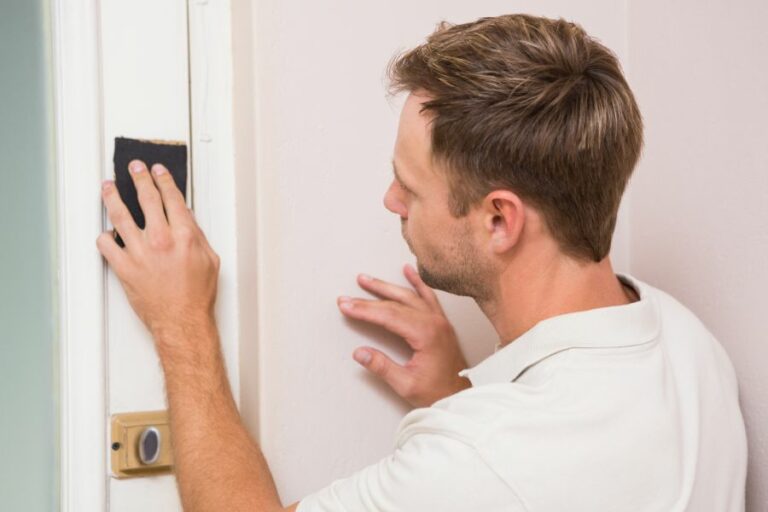
Once the surface is clean, ensure that it is smooth by sanding away any rough spots, splinters, or uneven areas. Using 120 to 150-grit sandpaper is recommended. Be sure to sand in the direction of the wood grain to minimize the risk of scratches or other surface imperfections.
– Repairing
Inspect the wood surface for any damage, such as cracks, holes, or loose boards. Repair or replace damaged components as necessary. Fill smaller holes and cracks with wood filler, allowing sufficient time for the filler to dry and cure before proceeding.
– Drying
After cleaning, sanding, and repairing the wood surface, allow it to dry completely. Ensure that the wood has reached its equilibrium moisture content – this can usually be achieved by letting it dry for at least 48 hours, depending on the climate and surface location.
A moisture meter can be helpful in determining when the wood is adequately dried.
• Applying PWRP
– Stirring
To ensure even distribution of the preservative components, thoroughly stir the PWRP before application. Avoid shaking or vigorous stirring, as this may introduce air bubbles, which can impact the quality and appearance of the final finish.
– Application Techniques
There are several methods for applying PWRP to wood surfaces, including brushing, spraying, and rolling. The choice depends on the size and intricacy of the project, as well as personal preferences:
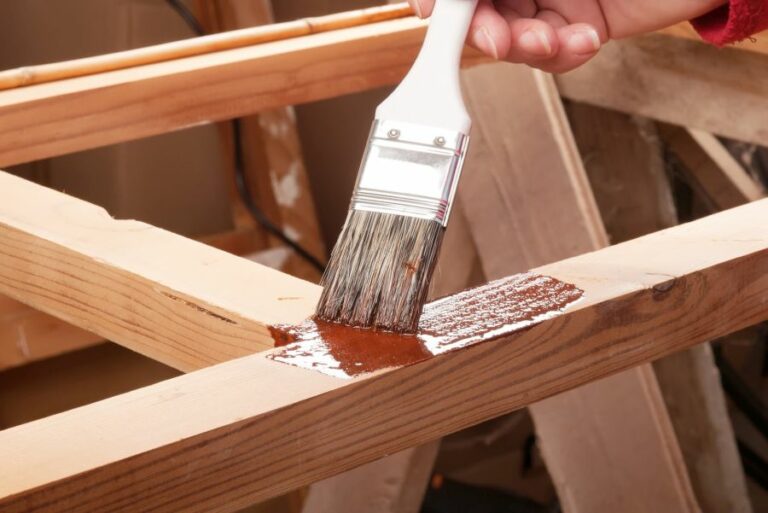
- Brushing: Using a high-quality, natural-bristle brush is recommended for applying PWRP, as this technique provides precise control and excellent penetration into the wood surface. Work in small sections, following the wood grain as you apply the product.
- Spraying: For larger surfaces, using a pump or airless sprayer can be efficient and time-saving. Be sure to use a low-pressure setting and a fan tip to avoid overspray and achieve an even coating. Following up with a brush or roller to eliminate drips and ensure adequate penetration is recommended.
- Rolling: A long-handled roller with a medium-nap cover can also be used to apply PWRP, particularly for projects with larger, flat surfaces. Work in small sections, rolling the product evenly across the surface.
– Drying Time
Allow the PWRP product to dry according to the manufacturer’s instructions, typically for 24 to 48 hours, before subjecting the surface to foot traffic or before applying paint or stain.
• Additional Tips and Best Practices
- Apply PWRP to wood surfaces during optimal weather conditions (temperatures between 50ºF and 90ºF, with low humidity) to ensure proper drying and product performance.
- Maintain a consistent coating thickness throughout the application by loading the applicator with the same amount of product each time.
- Apply multiple coats if necessary or if recommended by the PWRP product, allowing adequate drying time between coats.
- Follow the manufacturer’s instructions and recommendations for individual products to achieve the best results.
- Periodically inspect the treated wood surface and reapply PWRP as needed to maintain its protective properties.
By following the steps outlined in this article, you can effectively apply paintable water-repellent preservatives to wood surfaces, ensuring their longevity, beauty, and protection against the elements.
Wood Preserver Application: Before or After Painting?
Before diving into whether the wood preserver must be applied before or after painting, it is essential to grasp the importance of using a wood preserver. Wood is a versatile and timeless material, finding its way not only into furniture and decor but also into structural elements of homes and buildings.
However, its susceptibility to moisture, insects, and decay makes it crucial to understand how to protect and prolong its lifespan.
Wood preservers provide long-term protection against decay, fungi, and wood-boring insects, ensuring that the wood remains strong, durable, and visually appealing for years to come. It is a must-have for anyone looking to preserve the integrity and appearance of their wooden surfaces.
• Wood Preserver Application: Before or After Paint?
After establishing the relevance of wood preservers, the question remains: should it be applied before or after the paint? To preserve and maintain the wood’s structural integrity and aesthetics, wood preservers should be applied before painting.
– Primer: A Crucial Step Between Preserver and Paint
It is worth noting that applying just the wood preserver and then the paint is not enough. To achieve an even and long-lasting finish, it is vital to use a primer between the two layers. A primer helps to bind the paint to the wood surface, ensuring a smooth and uniform appearance.
The process generally involves three steps: wood preserver application, primer application, and then painting. This ensures that the wood is adequately protected and retains its aesthetic appeal for an extended period.
– Benefits of Applying Wood Preserver Before Paint
There are numerous benefits to using a wood preserver before applying paint. Here are some compelling reasons why this order of application is essential:
- Enhanced Protection: Applying the wood preserver before paint ensures thorough penetration of the protective chemicals into the wood surface. This, in turn, helps the wood to resist moisture, insect damage, and decay more effectively.
- Paint Adhesion: Wood preservers can help to seal the wood’s pores, promoting a stable and consistent surface for the paint to adhere to. This results in a smoother finish with fewer imperfections and a more vibrant and even coloring.
- Prolonged Lifespan: By applying the wood preserver first, you are laying a strong foundation for the paint, ensuring it will last longer and withstand the elements. This subsequently prevents the need for frequent repainting and maintenance, saving time and money in the long run.
- Prevents Discoloration: Some wood preservers, especially those containing water-repellent ingredients, can help prevent discoloration and staining of the wood. This is particularly useful in maintaining the wood’s original appearance and preventing any unsightly patches from developing underneath the paint.
– How to Apply Wood Preserver Correctly
Following the recommended steps in applying a wood preserver will guarantee optimal results. Here is a simple, step-by-step guide to help achieve the perfect finish:
- Clean the Surface: Before applying the wood preserver, ensure the wood surface is clean and free from any dust, dirt, or grease. This can be achieved using a brush and a mild detergent solution.
- Choose the Right Preserver: Select a wood preserver that is suitable for your specific type of wood and project. Pay close attention to the instructions on the product label to ensure compatibility between the preserver, primer, and paint.
- Application: Apply the wood preserver according to the manufacturer’s instructions. This may entail using a brush, roller, or sprayer, depending on your preference and the product type. Remember to work in a well-ventilated area and wear appropriate protective gear, such as gloves and goggles, for safety purposes.
- Drying Time: Allow the wood preserver to dry thoroughly before proceeding with the primer application. The drying time may vary according to the product and environmental factors, such as temperature and humidity.
– Final Thoughts
Applying a wood preserver before paint is a crucial step in ensuring the longevity and protection of wooden surfaces.
By correctly applying the wood preserver followed by a primer, you will create a solid foundation for the paint to adhere to, resulting in a durable and visually appealing finish. So, always remember the golden rule: wood preserver comes first, ensuring your wood remains in tip-top condition for years to come.
| Do you use a wood preserver before or after paint? | |
|---|---|
| Wood Preserver | Before paint |
| Paint | After wood preserver |
Discover the Most Efficient Method to Apply Wood Preservative
Wood preservative application is essential in ensuring the longevity of wood materials used in construction, furniture, and decking.
• Importance of Proper Wood Preparation
Before commencing with the application of wood preservatives, it is crucial to prepare the wood surface. This involves cleaning the wood, removing any dust or debris, and ensuring the surface is dry.
Proper wood preparation helps the preservative to bind and penetrate the wood, ensuring its effectiveness for years to come.
– Techniques for Cleaning Wood
Wood surfaces should be thoroughly cleaned prior to applying the preservative. This can be achieved by:
- Using a stiff brush to remove dirt and debris
- Pressure washing the wood with low-pressure settings to avoid damaging the surface
- Applying a wood cleaner appropriate for the type of wood
Allow the wood to dry completely before applying the preservative. This may take anywhere from a few hours to a couple of days, depending on the weather conditions.
• Types of Wood Preservatives
Before discussing the application process, it’s important to understand the different types of wood preservatives available:
- Water-based preservatives: These are typically easier to work with and have lower levels of volatility. They are preferred for indoor use.
- Oil-based preservatives: These penetrate deeper into the wood, providing a more durable treatment. However, they contain more volatile organic compounds (VOCs) and are more challenging to clean up.
- Solvent-based preservatives: These are similar to oil-based preservatives, offering deep penetration but with the drawback of increased VOC concentration.
It’s essential to choose the right type of preservative based on the specific wood material and the intended application.
• Application Methods
There are several methods available for applying wood preservative:
– Brush Application
Using a brush is an effective, tried-and-true method for applying wood preservative. It offers the benefits of control and precision, allowing you to apply an even coat to the wood surface. When selecting a brush, choose one with high-quality bristles to minimize streaking and shedding.
Recommendation: Based on personal experience, a 4-inch wide brush with synthetic bristles works well for most applications.
– Spray Application
Spraying is a faster method for applying wood preservative, especially for larger wood surfaces. It is best suited for outdoor applications where overspray can be easily managed. Using a pump or airless sprayer allows for quick, even coverage.
Recommendation: Choose a sprayer with adjustable pressure to control the flow of preservative and avoid overspray.
– Dipping
Dipping wood in a container filled with preservative saturates the wood, ensuring that the treatment penetrates deep into the material. This method is best suited for small wood items or when treating large numbers of wood pieces before installation in a project.
• Optimal Conditions for Applying Preservative
Ambient conditions play a significant role in the effectiveness of wood preservative application:
- The temperature should be between 50ºF (10ºC) and 95ºF (35ºC) during application and drying.
- Avoid applying preservative in direct sunlight, as this may cause the treatment to dry too quickly and reduce its effectiveness.
- Do not apply preservative during rainy or highly humid conditions, as moisture can prevent proper adhesion and penetration.
• Tips and Recommendations for Best Results
The following are some practical recommendations based on personal experience:
- Always read and follow the manufacturer’s instructions on the wood preservative product.
- Choose the optimal application method based on the size and complexity of your project.
- Ensure adequate ventilation when working with wood preservative, particularly when using oil- or solvent-based treatments.
- Apply multiple coats for optimal protection, allowing each coat to dry fully before applying the next.
- Regularly inspect and maintain treated wood surfaces to ensure ongoing protection and longevity.
In conclusion, proper application of wood preservative is essential for ensuring the protection and longevity of wood materials.
By following best practice guidelines for wood preparation, selecting the right type of preservative, applying the treatment using an appropriate method, and closely monitoring ambient conditions, you can achieve optimal results and keep wood surfaces looking their best for years to come.
Is It Possible to Paint Over the Wood Preserver?
Wood preservation is essential for protecting wooden structures and prolonging their life. While wood preservers offer the required protection, many homeowners and professionals wonder if they can paint over a wood preserver.
• Understanding Wood Preservers
Wood preservatives are chemical solutions that are applied to wood surfaces to protect them from rot, decay, and insect infestations.
These treatments penetrate the wood fibers, making them more resistant to environmental and biological factors affecting the wood. There are different types of wood preservatives available in the market, and their compatibility with paint varies.
– Water-Based Wood Preservers
Water-based wood preservers are environment-friendly and widely used because they offer effective preservation without altering the wood’s appearance. These preservatives are compatible with most paint types and can be painted over after the recommended drying period.
– Oil-Based Wood Preservers
Oil-based wood preservers provide deep penetration into the wood fibers, offering long-lasting protection. However, they are less compatible with most paint types and can cause adhesion problems. They often require primers before applying paint.
– Solvent-Based Wood Preservers
Solvent-based wood preservers consist of chemicals dissolved in a solvent carrier. These wood preservatives tend to have long drying times and require more caution during application. Like oil-based wood preservers, solvent-based wood preservers may also require primers before painting.
• Key Factors to Consider When Painting Over Wood Preserver
Before painting over a wood preserver, there are essential factors to consider, including drying time, primer usage, and paint choice.
– Drying Time
The drying time of wood preservers varies, but it is crucial to allow the wood preserver to dry completely before applying paint. Failing to do so may lead to poor adhesion and paint peeling. Always refer to the wood preserver’s instructions to determine the drying time.
– Primer Usage
Using a wood primer after the wood preserver has dried is essential for ensuring better adhesion and a smoother finish. This step is particularly crucial when dealing with oil-based and solvent-based wood preservers.
Choosing the right type of primer should also be compatible with the wood preservative and the selected finish paint.
– Paint Choice
Selecting the right paint is crucial when painting over a wood preserver. Compatible paint types include water-based acrylic and latex paints, which are ideal for most wood preservatives.
Oil-based paints can have adhesion issues when applied directly over wood preservatives, especially if they are not properly primed.
• Steps to Paint Over Wood Preserver
Following these steps will ensure a smooth and lasting paint finish over a wood preserver.
- Prepare the Wood Surface: Clean the wood surface to remove dirt, dust, and any loose wood fibers. Light sanding may be necessary to smoothen the surface.
- Apply the Wood Preserver: Choose the appropriate wood preserver for your specific wood type and project. Ensure proper application and coverage following the manufacturer’s instructions.
- Allow the Wood Preserver to Dry: Give the wood preserver ample time to penetrate the wood and dry thoroughly before applying any paint.
- Apply Primer: Choose a compatible primer for your wood preserver and finish paint. Apply the primer according to the manufacturer’s recommendations and allow it to dry thoroughly.
- Apply Finish Paint: Using the chosen paint type, apply even layers of paint to the wood surface, allowing each coat to dry before applying the next.
• Wood Preserver and Paint Compatibility
It is essential to recognize that not all wood preservatives and paint combinations will work ideally. Check the compatibility of the wood preserver with the prospective finish paint to avoid any paint adhesion or deterioration issues.
When in doubt, testing a small, inconspicuous area can provide vital information about how the paint adheres to the wood preserver.
• Conclusion
Painting over a wood preserver is possible, but it requires careful consideration of the wood preserver type, drying times, and paint compatibility. Thorough surface preparation, adequate drying times, and proper application techniques ensure a lasting and aesthetically pleasing result.
By understanding these factors and selecting the right combination of wood preserver and paint, homeowners and professionals can protect their wooden structures while maintaining their desired appearance.
A Step-by-Step Guide to Applying Wood Preservative
Wood preservatives are essential for protecting wooden surfaces from rot, decay, and insect damage. These treatments are specially designed to penetrate deep into the wood fibers, preventing moisture from seeping in and providing a long-lasting barrier against environmental damage.
• Identifying the Right Wood Preservative
Before you can apply a wood preservative, it’s crucial to choose the right product for your specific needs. The most common types of wood preservatives include:
- Water-based preservatives: These are typically low-odor, environmentally friendly, and easy to clean up. They’re ideal for indoor and outdoor applications.
- Oil-based preservatives: These offer superior penetration and durability but may have a stronger odor and longer drying times. They’re better suited for outdoor applications where the wood is exposed to severe weather conditions.
- Solvent-based preservatives: These also provide excellent penetration and protection but are generally less eco-friendly than water-based options. They’re often used for heavy-duty applications or treating wood in damp or humid environments.
When choosing a wood preservative, consider the type of wood you’re working with, the location of the project, and any specific concerns like insects or mold damage.
• Preparing the Wood Surface
Proper surface preparation ensures that your wood preservative will adhere well and provide lasting protection. Follow these steps for optimal preparation:
- Clean the wood: Remove any dirt, dust, or debris from the wooden surface with a brush or a vacuum cleaner. If the wood is stained, painted, or has a previous finish applied to it, you’ll need to remove this layer so the preservative can penetrate the wood fibers. Sanding or using a paint stripper can help accomplish this.
- Treat any existing damage: If your wood surface has signs of rot or insect damage, treat these areas with a wood preservative designed specifically for this purpose. Follow the manufacturer’s instructions for the best results.
- Smooth the wood: Sand the wood surface with progressively finer grits of sandpaper. This will help to open up the wood fibers, making it easier for the preservative to penetrate and create a smooth, even finish. Wipe away the dust with a tack cloth when finished.
- Allow the wood to dry: Ensure that the wood is completely dry before applying any wood preservative. This is particularly important for outdoor projects, as moisture can become trapped under the preservative and lead to rot or mildew.
• Applying the Wood Preservative
Once your wood surface is prepped and ready, you can begin applying the wood preservative. Follow these steps for a consistent, professional-looking finish:
- Stir the preservative: Thoroughly mix the wood preservative, ensuring all the ingredients are blended and distributed evenly.
- Choose your applicator: Depending on the type of preservative you’ve chosen, you may need a brush, roller, or sprayer for application. Check the product’s label for any specific recommendations.
- Apply the preservative: Apply a thin, even coat of wood preservative onto the wooden surface. Use long, even strokes to create a consistent finish, being careful to avoid drips or pooling. For horizontal surfaces, work your way from one side to the other, allowing any excess to run off the edge.
- Allow the preservative to dry: Consult the product’s label for the recommended drying time. This can range from a few hours to overnight, depending on the type of preservative and the environmental conditions.
• Additional Tips and Best Practices
- Apply wood preservative when the weather is mild, with a temperature above 50F (10C) and low humidity. This will help the preservative to dry properly and provide the best protection.
- Ventilate the area well when working with wood preservatives, particularly solvent-based options. This will help to reduce fumes and decrease the risk of respiratory irritation.
- Always wear protective equipment, including gloves, goggles, and a mask, when handling wood preservatives. This will help to protect your skin, eyes, and lungs from potential irritation.
- If applying wood preservative to a large project, consider breaking the project up into smaller sections. This will make it easier to apply the preservative evenly and monitor your progress.
- Typically, one coat of wood preservative is sufficient, but for greater protection, you can add a second coat following the manufacturer’s recommendations.
• Conclusion
Applying wood preservative is a relatively straightforward process that can significantly extend the lifespan and appeal of your wooden surfaces.
By following the steps outlined in this guide and using the right products for your specific needs, you can provide lasting protection against decay, moisture, and insect damage.
Remember to take care when handling these chemicals and always follow the manufacturer’s instructions for the best results.

