Guide To Using Paintable Wood Preservatives. What Pros Say
When protecting and preserving wooden surfaces indoors and outdoors, one of the best options available is using paintable wood preservatives. No need to worry; our comprehensive guide to using paintable wood preservatives has covered you. We will help you understand how to choose the right product, apply it correctly, and maintain your wood’s longevity and aesthetic appeal.
Guide to using paintable wood preservatives:
Paintable wood preservatives protect wood surfaces from decay, insects, fungus, and UV damage while allowing customization with paint or stain. To use, prepare the wood surface by cleaning, sanding, repairing, and inspecting. Apply the chosen preservative in thin, even coats, following the manufacturer’s instructions for drying time. Regular maintenance, including inspections and cleaning, will ensure lasting protection and durability.

Discover the perfect way to protect and enhance your wooden surfaces! Dive into our comprehensive guide on paintable wood preservatives, covering types, application methods, and expert tips. Uncover the secrets of long-lasting, eye-catching woodwork. Read on!
Contents
- 1 Comprehensive Guide on Paintable Wood Preservatives
- 2 Applying Wood Preserver: Before or After Painting?
- 3 Best Technique for Wood Preservative Application
- 4 Time to Wait Between Wood Preservative Coats
- 5 Top 3 Methods for Wood Preservative Application
Comprehensive Guide on Paintable Wood Preservatives
Wood is a popular choice for various purposes, such as construction, furniture, ornamentation, and others. However, wood is prone to decay, insect damage, and weathering. Using paintable wood preservatives can help protect the wood and extend its lifespan.
• A Brief Overview of Paintable Wood Preservatives
Paintable wood preservatives are products that contain chemicals that help protect wood surfaces from issues like decay, insects, fungus, and ultraviolet (UV) rays.
These preservatives are distinctive because they can be painted or stained, allowing for a customized appearance to match various aesthetics. It is important to differentiate paintable wood preservatives from sealants and stains that only offer a color change without any added protection.
– Types of Paintable Wood Preservatives
Generally, paintable wood preservatives can be categorized into two types water-based and oil-based.
- Water-based preservatives contain water as a solvent and are more environmentally friendly. They are easy to clean up with soap and water, dry quickly, and usually have low levels of volatile organic compounds (VOCs). However, water-based preservatives tend to be less durable and may need more frequent applications.
- Oil-based preservatives use oil or similar substances as a solvent. These preservatives are highly resistant to weathering and provide better protection and durability than their water-based counterparts. However, oil-based preservatives commonly contain higher VOCs, have a longer drying time, and require cleanup with solvents like mineral spirits or turpentine.
• Preparing Wood Surfaces for Application
Proper preparation of the wood surface is essential for the successful application of a paintable wood preservative. Here are some general steps to follow:
- Cleaning: Clean the wood surface of any dirt, debris, and existing paint or stain. Use mild soap and water, or an appropriate wood cleaner, to ensure a thorough cleaning. Let the surface dry completely before proceeding.
- Sanding: Remove any rough spots, splinters, or ridges on the wood surface with sandpaper. Start with medium-grit sandpaper (around 80-100 grit) and then switch to fine-grit sandpaper (150-180 grit) to achieve a smooth surface.
- Repairing: Fill any holes or cracks in the wood surface with a suitable wood filler or putty. Let the filler or putty dry, then sand the repaired areas smoothly.
- Inspecting: Check the wood surface for any signs of decay, fungus, or insect damage. Treat the affected areas accordingly to help ensure the best protection from future issues.
• Applying the Paintable Wood Preservative
Once the wood surface is prepared, it’s time to apply the preservative. Follow these guidelines for a successful application:
- Stirring: Stir the preservative well to ensure all the ingredients are fully mixed. Do not shake the container, as this could create air bubbles in the product.
- Testing: Conduct a small test patch on an inconspicuous area of the wood surface to ensure you are satisfied with the product’s appearance and compatibility with the wood.
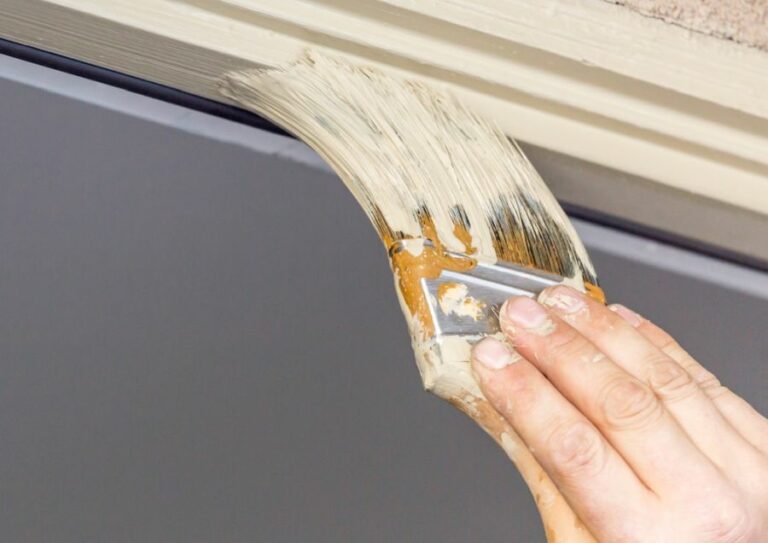
- Brushing: Apply the preservative using a high-quality brush in a thin, even coat. Avoid overloading the brush, and use long, even strokes in the direction of the wood grain.
- Drying: Allow the wood to dry according to the manufacturer’s instructions, which may range from several hours to overnight. If the product requires a second coat, be sure to let the first coat dry completely before applying the second.
- Finalizing: Once the preservative is dry, the wood surface is ready for painting or staining, if desired.
• Tips for Maintaining Treated Wood Surfaces
After applying a paintable wood preservative, regular maintenance is essential to ensure lasting protection. Consider the following tips to keep your wood surfaces in good condition:
- Inspect the wood surfaces regularly for any signs of wear or damage. Address issues as needed by cleaning, repairing, or applying additional preservative coats.
- Use a mild cleaning solution and soft-bristle brush to clean dirt and debris from the wood surfaces every few months.
- If painting or staining, use high-quality products compatible with the wood preservative to maintain the effectiveness of the preservative.
- Keep the wood surfaces free from standing water, snow, or other moisture sources that may cause decay or damage over time.
In conclusion, using paintable wood preservatives can effectively protect wood surfaces while allowing for customization through paint or stain. With proper preparation and application, as well as regular maintenance, your wood surfaces will remain protected and durable for years to come.
Applying Wood Preserver: Before or After Painting?
Maintaining and protecting wood surfaces is crucial for prolonging its life and ensuring it remains in top condition for years to come. One common question many people have is whether to apply a wood preserver before or after paint.
• Understanding Wood Preservers
A wood preserver is a chemical solution that penetrates deep into the wood surface. Its primary purpose is to protect the wood against insect infestation, fungal decay, and other factors that may affect its durability. Some popular wood preservers contain active ingredients such as copper or borate.
Before delving into the application process, it’s essential to distinguish between the types of preservatives available on the market. There are two main categories: water-based and oil-based preservatives.
– Water-Based Wood Preservers
These preservatives are more eco-friendly as they emit fewer odors and have a quicker drying time. They are suitable for both interior and exterior wood surfaces.
The downside is that water-based preservatives are primarily preventive in nature, meaning they are not as effective for treating already infested or decaying wood.
– Oil-Based Wood Preservers
Oil-based preservatives have a higher concentration of active ingredients and are better suited for treating wood already experiencing damage. The high penetration level of oil-based preservers ensures long-lasting protection against insects, fungi, and weather damage.
However, they may take longer to dry and can emit strong odors.
• Applying Wood Preserver Before Paint: The Ideal Scenario
In most cases, it’s recommended to apply a wood preserver before paint. This order of application allows the preservative to penetrate the wood and offer protection from the inside out.
To apply the wood preserver correctly, follow these steps:
- Clean the wood surface: Remove any dirt, dust, or debris from the surface using a brush or vacuum. The cleaner the wood, the better the preserver will be able to penetrate and protect it.
- Apply the wood preserver: Use a brush, roller, or sprayer to apply a generous coating of the preserver to the wood surface, following the instructions on the product label. Ensure the entire surface is covered, including any knots or cracks in the wood.
- Allow it to dry: Depending on the type of preserver used, the drying time may vary. Refer to the manufacturer’s instructions for the specific drying time.
- Apply a second coat (if necessary): Some wood preservers may require a second coat for maximum protection. Check the product label for recommendations.
Once the wood preserver is adequately dried, you can proceed with applying paint.
• Preparing Wood Surface for Painting
Before applying paint, it’s essential to prepare the wood surface. This step ensures a smooth finish and helps the paint adhere properly to the wood.
- Sand the wood: Smooth any rough areas of the wood using sandpaper, starting with a coarse grit (80-100 grit) and working your way to a finer grit (180-220 grit). This process also helps to remove any remaining residue from the wood preserver.
- Apply a primer: Using a brush or roller, apply a wood-compatible primer to the surface. The primer acts as a base for the paint, promoting adhesion and creating a barrier between the wood and the paint. Allow the primer to dry according to the manufacturer’s instructions.
- Paint the Wood: Now, the wood is ready for painting. Choose a high-quality paint suitable for wood surfaces and apply it using a brush, roller, or sprayer. It may take two or more coats to achieve your desired coverage.
• Exceptions: Applying Wood Preserver After Paint
There may be instances where a wood preserver is applied after the paint, although this is not the ideal situation. If you have used a paint specifically designed to allow the penetration of wood preservatives, then you can apply a wood preserver afterward.
However, this will not offer the same level of protection as applying it before paint and may require more frequent maintenance.
In conclusion, it is highly recommended to apply a wood preserver before painting for the most effective protection against insects, decay, and wear.
Always follow the manufacturer’s instructions on your chosen products and invest in high-quality materials to ensure your wood surfaces remain in excellent condition for years.
Before Paint | After Paint |
|---|---|
Using a wood preserver before paint helps in sealing the wood to prevent moisture and decay and ensures better adhesion of the paint. | A wood preserver is usually not applied after paint as it would not penetrate through the paint layer to protect the wood underneath. |
Best Technique for Wood Preservative Application
Wood preservatives are essential in prolonging the lifespan and quality of wood, particularly when exposed to harsh environmental conditions.
When applied correctly, they protect the wood from fungal decay, termites, and beetles, ensuring that your wooden structures, furniture, and other woodwork will stand the test of time.
• Choosing the Right Wood Preservative
Before we dive into the application process, it’s important to choose the appropriate wood preservative for your specific use case. There are three primary types available:
- Water-borne preservatives: These are typically low in toxicity and are suitable for indoor and outdoor use. Some common water-borne preservatives include Copper Azole (CA), Alkaline Copper Quaternary (ACQ), and Borate (SBX).
- Oil-borne preservatives: These have higher toxicity levels and are best used outdoors. Examples of oil-borne preservatives are Creosote and Pentachlorophenol (Penta).
- Light organic solvent preservatives (LOSPs): These are primarily used for industrial applications and can be toxic. Halogenated compounds and organometallic compounds are common LOSPs.
• Preparing the Wood Surface
Before applying wood preservatives, it’s important to properly prepare the wood surface. Follow these steps:
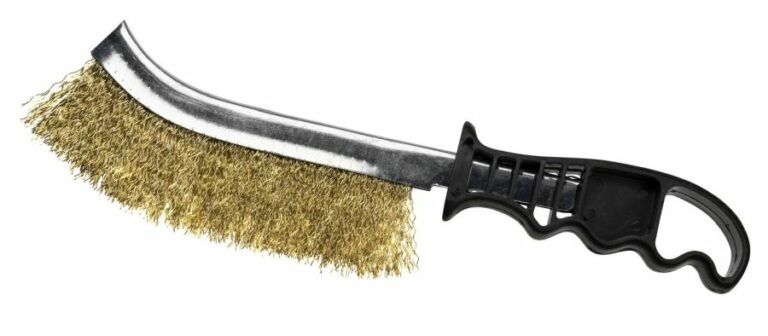
- Clean the wood: Remove any dirt, debris, loose paint, or previous finishes using a bristle brush or power washer. Ensure that the surface is completely dry before proceeding.
- Smooth the surface: If necessary, sand the wood surface to remove any rough spots or splinters. For outdoor projects, opt for a medium-grit sandpaper, while indoor projects may require a finer grit.
- Fill any holes or cracks: Use a wood filler to repair any damage on the surface. Follow the manufacturer’s instructions, and allow the filler to dry completely before proceeding.
• Applying the Wood Preservative
When the wood surface is prepared, it’s time to apply the wood preservative. Keep these guidelines in mind:
- Safety first: Wear protective gear such as gloves, goggles, and a mask when handling wood preservatives, as they may be toxic.
- Choose the right application method: Wood preservatives can be applied using various methods, such as brushing, rolling, dipping, or spraying. Select the method that best suits your specific project.
- Apply in optimal conditions: To ensure effective application, avoid working under direct sunlight, high humidity, or windy conditions. Ideal application temperatures range from 50F to 90F.
- Follow the manufacturer’s instructions: Wood preservatives vary in their application processes, so it’s crucial to read and follow the specific instructions provided by the manufacturer.
- Apply multiple coats: For optimal protection, it’s recommended to apply at least two coats of wood preservative. Allow the first coat to dry completely, following the manufacturer’s drying time, before applying the second coat.
- Maintain even coverage: To achieve a uniform appearance and ensure effective protection, apply the preservative in smooth, even strokes or motions, working from one end of the wood surface to the other.
• Post-Application Tips
Once the wood preservative has been applied, take note of these post-application tips:
- Allow the preservative to dry completely: It’s essential to let the wood preservative dry and cure fully before using or exposing the wood to harsh elements. Follow the drying time specified by the manufacturer.
- Regular maintenance: Periodically inspect the wood for signs of decay or damage and reapply the wood preservative as needed. Consult the manufacturer’s guidelines for recommended maintenance intervals.
- Properly dispose of waste materials: Dispose of any leftover wood preservative and application materials according to local regulations and the manufacturer’s instructions.
By following these guidelines and expert recommendations, you can rest assured that you’re applying wood preservatives in the most effective and efficient manner possible.
The proper application ensures that your wooden structures, furniture, and other wood projects will remain protected and preserved for years to come.
Time to Wait Between Wood Preservative Coats
Wood preservation is an essential step in maintaining and extending the lifespan of wooden structures, furniture, and other items. One of the crucial aspects of wood preservation is the application of multiple coats of wood preservatives.
• Factors Affecting Drying Time Between Coats of Wood Preservative
Several factors can impact drying time between coats of wood preservative. It’s essential to consider these factors when determining how long to wait between applications.
– Type of Wood Preservative
Different wood preservatives have different drying times due to their chemical composition. Some products, such as oil-based preservatives, may require a longer drying time than water-based alternatives.
Make sure to check the manufacturer’s instructions on the product label for specific drying time recommendations.
– Temperature and Humidity
Environmental factors such as temperature and humidity can also influence drying time. High temperatures can accelerate the drying process, while low temperatures and high humidity levels can prolong it.
Ideally, you should apply wood preservatives in a well-ventilated area with a temperature between 50ºF and 75ºF (10ºC and 24ºC).
– Wood Type and Porosity
The type of wood and its porosity play a significant role in determining the drying time. Softwoods such as pine, cedar, and spruce tend to absorb preservatives more quickly than hardwoods like oak, maple, and cherry. Consequently, drying times might vary when dealing with different wood species.
• Recommended Waiting Period Between Coats
As a general guideline, you should wait at least 24 hours between coats of wood preservative.
However, this timeframe can vary depending on the factors mentioned earlier. In some cases, waiting for 48 hours or more might be necessary to ensure proper drying and adhesion of the subsequent coat. Be sure to check the manufacturer’s instructions for specific drying times.
– Oil-Based Preservatives
Oil-based wood preservatives typically require a longer drying time between coats. A 24- to 48-hour waiting period is usually recommended for these types of preservatives.
Keep in mind that temperature and humidity can play a significant role in the drying process, so adjust the waiting time accordingly based on your specific situation.
– Water-Based Preservatives
For water-based wood preservatives, a shorter waiting time might suffice. In most cases, a 12- to 24-hour waiting period is sufficient. However, always check the manufacturer’s instructions for their specific recommendations, as drying times might vary between products.
• Tips for Achieving the Best Results
Following certain best practices can ensure that your wood preservation efforts are effective and long-lasting. Here are some essential tips to achieve excellent results:
– Prepare the Surface Properly
Proper surface preparation is crucial for the preservative to adhere well to the wood. Sand the surface with fine-grit sandpaper and remove any dust or debris with a clean, damp cloth. If the wood is stained or painted, remove any old finish before applying the wood preservative.
– Use the Right Applicator
Depending on the type of wood preservative you’re using, the applicator could be a brush, roller, or even a sprayer. Make sure to use the appropriate applicator for the specific product to ensure a smooth and even application.
– Apply Thin Coats
Applying thin coats of wood preservative can ensure proper drying and better penetration into the wood fibers. Thick coats may take longer to dry and affect the overall performance of the preservative.
– Consult Manufacturer’s Instructions
Always consult the manufacturer’s instructions regarding application methods, drying times, and waiting periods between coats. This information is crucial to ensure proper product application and optimal results.
• In Conclusion
In summary, the waiting time between coats of wood preservative typically ranges from 12 hours to 48 hours, depending on factors such as the type of preservative, environmental conditions, and wood properties.
It’s important to follow the manufacturer’s recommendations, ensure proper surface preparation, and employ suitable application techniques to achieve long-lasting and effective wood preservation results.
How long should you wait between coats of wood preservative?
Wood Preservative Type | Time between coats |
|---|---|
Oil-Based | 24 hours |
Water-Based | 4 to 6 hours |
Solvent-Based | 24 hours |
Epoxy-Based | 48 hours |
Top 3 Methods for Wood Preservative Application
Wood is a versatile and timeless construction material used across industries. However, it is vulnerable to degradation from factors such as insects, fungi, and moisture. To extend the life of wood, it’s essential to apply preservatives that protect it from these damaging elements.
• Surface Treatment Methods
Surface treatments involve applying the preservative directly onto the wood surface using a brush, spray, or roller. These methods provide short-term protection and are suitable for wood that is not exposed to harsh environments.
– Paints, Stains, and Water Repellents
Using paints and stains is the most common surface treatment option. Paints create a barrier that protects the wood from moisture and ultraviolet (UV) light.
While they do not directly provide protection against insects or decay, they create an inhospitable environment for these agents by blocking water penetration into the wood. Stains are similar to paints, but they allow more of the wood’s natural texture and appearance to show through.
Water repellents are used to protect the wood from checking, warping, and swelling caused by moisture absorption.
For the best results, follow these recommendations:
- Use quality paints, stains, and water repellents specifically designed for wood preservation.
- Follow the manufacturer’s instructions for application and reapplication frequencies.
- Prepare the wood surface by cleaning and sanding to ensure proper adhesion.
• Pressure Treatment Methods
Pressure treatment methods involve impregnating the wood with preservatives under high pressure. This results in deep penetration and long-lasting protection.
Pressure-treated wood is suitable for applications where the wood is in contact with the ground, water, or other environments conducive to decay and insect attack.
– Full-Cell Process
The full-cell process, also known as the Bethell process, is the most common pressure treatment method. The wood is placed in a cylindrical chamber, and a vacuum removes air from the wood cells.
The chamber is then filled with preservatives under pressure, forcing the preservative to penetrate deep into the wood. Finally, the excess preservative is removed, and the wood is allowed to dry.
To achieve optimal results when working with pressure-treated wood:
- Choose the appropriate preservative for the intended application, taking note of varying levels of protection and environmental considerations.
- Ensure minimum penetration and retention of the preservative according to relevant standards.
- Be aware that some preservatives may cause corrosion to metal fasteners and require special hardware.
• Non-Pressure Treatment Methods
Non-pressure treatments are methods where the preservative is introduced into the wood without using pressure. These techniques are less effective than pressure treatments but are useful in certain situations where pressure treatment is not feasible.
– Diffusion Treatments
Diffusion treatments involve immersing the wood in preservative solutions and allowing the chemicals to slowly penetrate the wood through osmotic pressure. Examples of diffusion techniques include the Lowry process and the Kyanization process.
To get the most out of diffusion treatments:
- Use freshly cut, green wood, as it is more permeable to the preservative.
- Allow adequate time for the preservative chemical to diffuse into the wood.
- Be aware that diffusion treatments generally result in lower retention levels compared to pressure treatments.
– Vapour Treatments
Vapour treatments involve applying the preservative in a gaseous state. One such technique is fumigation with methyl bromide or other gaseous biocides.
However, methyl bromide is an ozone-depleting substance and is heavily regulated. As such, vapor treatments may not be a practical option in many cases.
To maximize the effectiveness of vapor treatments:
- Properly seal the treatment chamber to ensure the gas does not escape.
- Monitor gas concentrations and exposure times carefully.
- Be aware of environmental regulations and restrict the use of harmful chemicals.
In conclusion, the choice of preservative application method should depend on factors such as the type of wood, the expected exposure conditions, and the desired level of protection.
By understanding the three main methods of applying wood preservativessurface treatments, pressure treatments, and non-pressure treatmentsyou can make informed decisions that protect the wood and extend its life.
Method | Description |
|---|---|
Brushing | Applying the preservative to the wood surface with a brush, following the grain of the wood. This method is suitable for small-scale projects and maintenance of previously treated wood. |
Dipping | Immersing the wood in a container filled with preservative, allowing the chemical to penetrate the surface. Dipping is appropriate for treating small pieces of wood or for providing a basic level of protection. |
Pressure Treatment | Placing the wood in a closed cylinder and applying pressure to force the preservative into the wood. This method offers the best penetration and is ideal for long-lasting protection in outdoor applications, such as decking or fencing. |