Surface Inspections Prior To Prep Work
When it comes to ensuring the success and longevity of any preparation work, conducting thorough surface inspections beforehand is an essential step that cannot be overlooked. With years of experience and a deep understanding of the best practices, we are here to guide you through the process and provide you with valuable insights to achieve exceptional results.
Surface inspections prior to prep work:
Surface inspections are crucial before any prep work, as they help detect defects, determine the best preparation method, and identify contaminants that may affect the project’s quality. A thorough inspection involves a visual examination, using surface inspection tools, and a cleanliness assessment, ultimately saving time, resources, and potential complications.

Discover the importance of conducting surface inspections before embarking on any prep work! Unveil the potential issues that can surface and the best practices to mitigate them. Read on to grasp invaluable techniques that will lead to flawless outcomes and guarantee success.
Contents
- 1 Examining Surfaces Before Preparation Tasks
- 2 Approaches to Inspecting Surfaces Effectively
- 3 Assessing Surface Readiness Before Paint Application
- 4 Evaluation Techniques for Surface Preparation
- 5 Understanding Surface Preparation Guidelines
Examining Surfaces Before Preparation Tasks
• The Importance of Surface Inspections
Before diving into the process of surface inspections, it’s essential to understand the significance of this step in any project.
A proper surface inspection ensures smooth and successful prep work, which is critical to accomplishing high-quality results in various fields, including painting, plating, or construction. Surface inspections allow you to:
- Detect any defects or irregularities on the surface that might cause issues during the prep work or during the application of coatings or finishes.
- Determine the best method for surface preparation or treatment based on the surface’s current condition.
- Identify any contamination that can affect the adherence of coatings and the overall quality of the finished product.
By conducting a thorough surface inspection before starting any prep work, you can save time, and resources, and avoid potential disappointments or damages due to unforeseen complications.
• Visual Inspection: The First Step in Surface Inspection
The first and most basic step in surface inspection is a visual examination. This initial step allows you to quickly identify any obvious imperfections such as cracks, holes, or rust spots. Although a visual inspection might not detect all surface issues, it’s a crucial first step in the process.
When conducting a visual inspection, make sure to:
- Examine the surface under sufficient lighting.
- Look for any inconsistencies, such as discoloration, roughness, or unevenness.
- Pay attention to areas that might be prone to defects, like corners or connections.
Remember, the main goal of a visual inspection is to identify any obvious surface faults that require addressing before proceeding with the prep work.
• The Use of Surface Inspection Tools
After completing a visual inspection, it’s usually necessary to employ various tools to obtain more detailed information on the surface’s integrity and quality. There are several commonly used inspection tools:
– Surface Profile Gauges
A surface profile gauge is an essential tool for measuring the profile of a surface, particularly in areas that require a specific roughness or texture. This tool is particularly useful in applications involving painting or coating, as an uneven surface can cause poor adhesion, affecting the overall finish quality.
– Surface Roughness Testers
Surface roughness testers examine the surface’s topography and provide accurate measurements of its roughness. This information can be used to determine the most appropriate surface preparation technique, ensuring an optimal final result.
– Paint Testers
In situations where a surface already has a coat of paint or another finish, a paint tester can help you determine the paint’s thickness and quality. This tool can provide you with valuable insights into whether the existing paint needs to be removed or if it can be used as a base for further application.
– Defelsko PosiTector Inspection Kit
The Defelsko PosiTector Inspection Kit is a comprehensive toolset for detecting a variety of surface conditions, such as thickness, roughness, and more. This portable and easy-to-use kit is an excellent addition to your collection of surface inspection tools.
• Surface Cleanliness Assessment
An essential aspect of surface inspection is evaluating the cleanliness of the surface. Contamination can severely affect the adherence of coatings and finishes, as well as result in various defects. There are several methods for assessing surface cleanliness:
– Solvent Cleaning
Solvent cleaning involves applying a solvent to the surface and wiping it off with a clean cloth. By examining the cloth for residue or contamination, you can determine the cleanliness of the surface.
– Water Break Test
A water break test involves spraying the surface with water and observing how quickly the water beads up or breaks. If the water breaks rapidly, it indicates that the surface is clean and free of contaminants.
– Surface Contamination Test
Surface contamination tests employ the use of surface contamination kits, which help you assess the presence of substances like salts, sulfates, and other impurities that can affect the performance and durability of applied coatings.
• Final Thoughts
Completing a thorough surface inspection before starting any prep work is essential for achieving optimal results in your projects.
By employing a combination of visual inspection, surface inspection tools, and cleanliness assessment, you can ensure that your surface is in the best possible condition for the upcoming project.
Remember, an adequately done surface inspection can save you time, resources, and frustration down the line. So, invest in the necessary tools and take the time to perform an accurate assessment of the surface before your next project.
Approaches to Inspecting Surfaces Effectively
Surface inspection is a critical process in various industries, including manufacturing, aerospace, automotive, and electronics. It involves the analysis and evaluation of surfaces for defects or anomalies, such as cracks, corrosion, roughness, or contamination.
• Visual Inspection
Visual inspection is the most basic and widely used method of surface inspection. It involves using the naked eye or optical aids, such as magnifying glasses or microscopes, to visually examine surfaces for anomalies or defects.
– Advantages
- Quick and cost-effective
- Non-destructive
- Requires minimal equipment
- Easily identifies visible defects
– Disadvantages
- Limited to surface anomalies
- Prone to human error
- Not suitable for detecting microscopic defects
I recommend visual inspection as the starting point for any surface inspection process. For more accurate results, consider using optical aids and incorporating proper lighting to enhance visibility.
More about visual inspection can be found at this article from the American Society for Nondestructive Testing (ASNT).
• Eddy Current Testing (ECT)
Eddy current testing is an electromagnetic nondestructive testing technique used to detect surface and sub-surface flaws, primarily in conductive materials such as metals.
– Advantages
- Non-destructive
- Fast and accurate
- Can detect sub-surface defects
- Suitable for complex geometries
– Disadvantages
- Limited to conductive materials
- Affected by material properties and geometry
- Requires skilled personnel
I recommend eddy current testing for applications involving conductive materials, particularly in high-stress environments such as aerospace or automotive industries, where the detection of sub-surface flaws is crucial.
• X-ray Radiography
X-ray radiography is a non-destructive testing technique that utilizes X-rays to examine the internal structures of objects and detect defects beneath the surface.
– Advantages
- Non-destructive
- Can detect internal defects
- Provides a permanent record (radiographs)
- Widely applicable across various materials
– Disadvantages
- Requires access to both sides of the object
- Uses ionizing radiation (safety concerns)
- Limited resolution for small defects
I recommend X-ray radiography for detecting internal defects in parts with complex internal structures, such as castings and welds. Proper safety measures must be observed during the operation to mitigate radiation exposure risks.
You can learn more about X-ray radiography from this resource provided by the American Society for Nondestructive Testing (ASNT).
• Ultrasonic Testing (UT)
Ultrasonic testing is a nondestructive testing method that uses high-frequency sound waves to detect surface and subsurface defects in materials.
– Advantages
- Non-destructive
- High sensitivity and accuracy
- Can detect deep sub-surface defects
- Applicable to a wide range of materials
– Disadvantages
- Requires couplant for sound transmission
- Limited in detecting small or thin defects
- Requires skilled personnel
I recommend ultrasonic testing for applications that require deep sub-surface defects detection, such as pipelines, pressure vessels, or structural components.
• Optical 3D Profilometry
Optical 3D profilometry is a non-contact, non-destructive surface inspection method that uses optical techniques, such as structured light or interferometry, to generate a three-dimensional representation of a surface.
– Advantages
- Non-destructive
- High-resolution 3D imaging
- Provides quantitative surface data (roughness, waviness, etc.)
- Suitable for delicate or soft materials
– Disadvantages
- Limited depth of field
- Affected by surface reflectivity
- Requires specialized equipment and software
I recommend optical 3D profilometry for applications that require accurate surface characterization, such as precision manufacturing or surface finishing processes.
In conclusion, multiple techniques are available for surface inspection, each with its own advantages and disadvantages. The choice of the method depends on factors such as the material type, defect type, and application requirements.
It is essential to understand these methods and their limitations to ensure reliable and accurate surface inspection results.
Method | Description |
|---|---|
Visual Inspection | Manual examination of a surface to detect defects or irregularities with the naked eye or using optical tools such as magnifying glasses, borescopes, and endoscopes. |
Liquid Penetrant Inspection (LPI) | A non-destructive testing method that involves the application of a liquid penetrant on the surface to detect flaws such as cracks or porosity. The penetrant seeps into the defect, and after removing the excess liquid, a developer is applied to make the flaws visible. |
Magnetic Particle Inspection (MPI) | A non-destructive testing method for ferromagnetic materials, where a magnetic field is applied to the surface, and magnetic particles are spread over it. The particles accumulate at defects, making them visible either under normal lighting or using ultraviolet light. |
Eddy Current Testing (ECT) | A non-destructive testing technique that uses electromagnetic induction to detect surface and sub-surface flaws in conductive materials. The presence of a defect disturbs the eddy current flow, which is detected by coils and analyzed to determine the location and size of the defect. |
Ultrasonic Testing (UT) | A non-destructive testing method that uses high-frequency sound waves to detect surface and internal defects in materials. An ultrasonic transducer sends and receives the sound waves, and the time it takes for the waves to return indicates the presence and depth of a defect. |
Optical and Laser Profilometry | A non-contact surface inspection method that uses optics and lasers to create a 3D profile of the surface. The acquired data can be used to analyze surface features such as roughness, waviness, and defects. |
Thermographic Inspection | A non-contact method that uses infrared imaging and temperature measurement to identify defects in materials. Thermal anomalies on the surface can indicate the presence of defects such as delaminations, voids, or inclusions. |
X-ray and Radiographic Testing (RT) | A non-destructive testing method that uses X-rays or gamma rays to inspect the internal structure of materials. The radiation penetrates the material and is captured on a detector or film, creating an image that reveals internal defects such as cracks or inclusions. |
Assessing Surface Readiness Before Paint Application
Surface preparation is a crucial step when it comes to painting any structure. It helps ensure proper adhesion of paint, promoting longevity and durability of the painted surface. Thoroughly checking and preparing a surface before painting can save both time and resources in the long run.
• Identifying Surface Issues
Before starting the painting process, it is essential to identify any issues with the surface that may disrupt or prevent proper adhesion of the paint. The most common problems that need attention are:
- Dust and debris
- Grease and oil
- Rust and corrosion
- Old paint and coatings
- Moisture
– Dust and Debris
A dusty, dirty surface will prevent paint from adhering properly. To identify if there is any dust or debris on the surface, simply run a white cloth over the surface. If the cloth picks up dust, the surface should be cleaned before painting.
– Grease and Oil
Grease and oil can impair paint adhesion.
To check if a surface is contaminated with grease or oil, use a solvent, such as rubbing alcohol or mineral spirits, to lightly moisten a cloth and then wipe it over the surface. If the cloth has visible signs of grease or oil, proper cleaning and degreasing are required before painting can begin.
– Rust and Corrosion
When working with metal surfaces, check for signs of rust or corrosion. If present, proper treatment and removal of rust or corrosion are necessary before painting. This may include sanding or using a rust removal solution.
– Old Paint and Coatings
Peeling, chipping, or flaky paint should be removed before applying new paint to ensure proper adhesion. Use a scraper or wire brush to remove any loose or peeling paint.
It is also a good idea to check if there are any incompatible coatings on the surface that can interfere with the adhesion of the new paint. A professional paint specialist can typically provide guidance on compatibility.
– Moisture
Excessive moisture can also prevent paint from adhering properly. You can use a moisture meter to measure the moisture content of the surface. If the moisture level is too high, take appropriate steps to mitigate the issue, such as waiting for a dry day or using a dehumidifier.
• Surface Preparation Techniques
Once you have identified and addressed any surface issues, the next step is to prepare the surface for painting. There are several techniques used for surface preparation, depending on the material and the condition of the surface.
– Cleaning
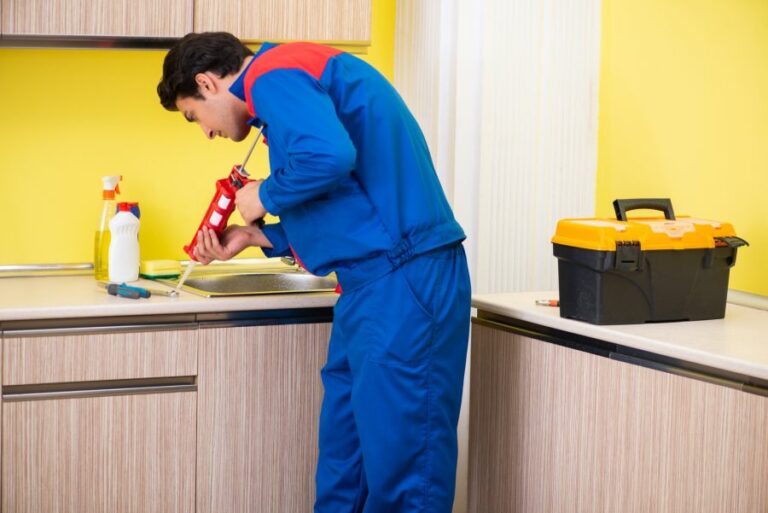
Cleaning the surface is the first step in surface preparation. You can use a pressure washer, vacuum cleaner, or even a simple brush and water to remove dust, dirt, and debris. For removing grease and oil, a degreasing solution is recommended.
Likewise, mold and mildew can be removed using a solution of bleach and water.
– Sanding and Abrasion
Sanding is used to create a smooth and even surface for better paint adhesion. It also helps to remove any loose or peeling paint, as well as provides an adequate profile for the new paint to grip onto. Hand sanding or using a mechanical sander are both effective methods of abrasion.
– Chemical Treatments and Stripping
Chemical treatments, such as the use of paint strippers, can help remove existing paint and coatings from the surface. These products can be particularly useful when dealing with heavily coated surfaces or stubborn paint that is difficult to remove through sanding alone.
– Repairing Surface Imperfections
When preparing a surface for painting, it is essential to address any cracks, dents, or holes present. Use filler, putty, or caulk to fill in these imperfections, ensuring a smooth surface for painting.
• Final Steps and Recommendations
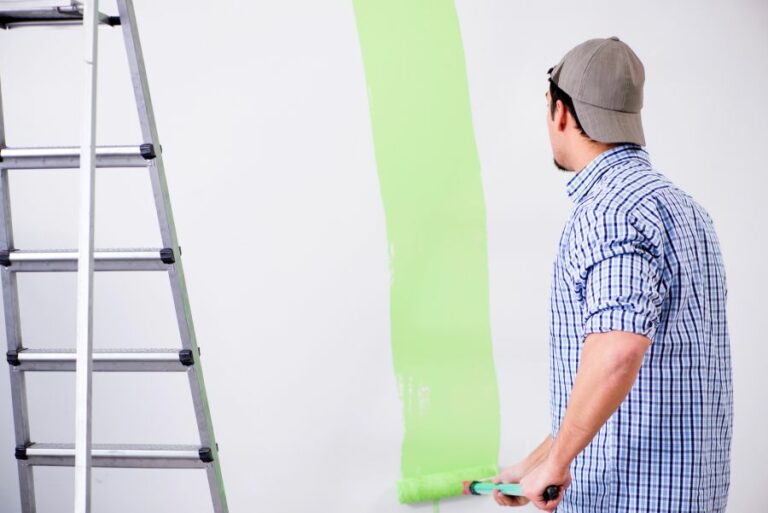
Once the surface preparation is complete, it’s time to apply a high-quality primer to further enhance paint adhesion and protection. Be sure to use a primer that is compatible with both the surface material and the type of paint that will be used.
After priming the surface and allowing it to dry, it is essential to recheck the surface for any remaining imperfections or issues. If found, address them as soon as possible before applying the paint.
Following these guidelines will ensure proper surface preparation before painting, ultimately leading to a long-lasting, high-quality finish.
Step | Procedure |
|---|---|
1 | Inspect for dirt, dust, and debris on the surface. Clean if necessary. |
2 | Look for any existing paint or coating that is peeling, bubbling, or chalking. Remove and repair if needed. |
3 | Check for any visible surface defects such as cracks, holes, or protrusions. Repair as necessary. |
4 | Ensure the surface is dry and free of any moisture, grease, or oil. |
5 | Test the surface’s adhesion by applying a small patch of primer or paint. If it’s not adhering well, you may need to further prepare the surface. |
6 | Ensure the surface is smooth and even by sanding or abrading as needed. |
7 | Ensure the surrounding area is protected from paint splatters, spills, and dust by using drop cloths, painters tape, and masking materials. |
Evaluation Techniques for Surface Preparation
Surface preparation is a critical step in the application of coatings and other treatments to various materials. Proper surface preparation ensures that the coating adheres well to the surface, which results in a uniform, durable, and long-lasting finish.
• Visual Inspection and Surface Cleanliness
The first step in checking surface preparation is conducting a thorough visual inspection. This step involves examining the surface for any contaminants, such as dust, dirt, grease, or oil, that can hinder the adhesion of the coating.
Surface contaminants can lead to coating defects like blistering, delamination, and reduced performance.
– SSPC Surface Cleanliness Standards
The SSPC (Society for Protective Coatings) has released several surface cleanliness standards that can be used as guidelines to ensure adequate surface preparation. These standards include:
- SSPC-SP1: Solvent Cleaning
- SSPC-SP2: Hand Tool Cleaning
- SSPC-SP3: Power Tool Cleaning
- SSPC-SP5: White Metal Blast Cleaning
Referencing these standards while conducting surface preparation can greatly improve the quality and longevity of the coating application.
• Surface Profile Measurement
After ensuring the surface is clean, it is important to measure the surface profile. The surface profile refers to the roughness or texture of the surface, which significantly impacts the adhesion of the coating.
A rougher surface provides more surface area for the coating to bond, resulting in better adhesion and improved performance.
– Test Methods for Surface Profile Measurement
There are multiple test methods for measuring surface profile, including:
- Comparator Method: The comparator method involves using a surface profile comparator, which is a small handheld device with different roughness grades. The comparator is placed on the surface, allowing the user to visually compare the surface profile with the grades on the comparator.
- Replica Tape Method: The replica tape method involves pressing a specially designed tape onto the surface, which creates a replica of the profile. The thickness of the compressed tape is then measured using a micrometer, providing an accurate measurement of the surface profile.
- Stylus Profilometry: Stylus profilometry is a more advanced technique that uses a stylus to trace the surface profile. The stylus provides a detailed profile, which is then analyzed using specialized software.
The chosen method for surface profile measurement should correspond with the requirements of the specific coating application and industry guidelines.
• Adhesion Testing
Once the surface has been cleaned and measured for adequate profile, it is crucial to perform adhesion tests. Adhesion tests confirm that the coating will adhere to the surface as intended, ensuring long-lasting performance.
– Common Adhesion Test Methods
Several test methods can be employed to assess the adhesion of a coating:
- Pull-Off Test: The pull-off test involves applying a small test area of the coating, then attaching a loading fixture with an adhesive. A tensile force is then applied to the loading fixture, attempting to pull the coating from the surface. The force is measured, and the results are compared to industry standards for acceptable adhesion.
- Cross Hatch Test: The cross-hatch test consists of cutting a small grid pattern into the coating using a sharp implement. Adhesive tape is then applied to the grid and quickly removed, with any detached coating indicating a potential issue with adhesion.
- Knife Test: The knife test is a simple assessment of coating adhesion, involving cutting a small X or T pattern into the coating and using a knife to lift the edges. If the coating remains adhered to the surface, adhesion is considered satisfactory.
These testing procedures ensure that the surface has been adequately prepared and that the coating will function effectively.
• Final Thoughts on Surface Preparation and Checking Methods
Surface preparation is a crucial aspect of any coating application. Ensuring the surface is clean, possesses the correct profile, and can support strong adhesion, will lead to a successful, long-lasting coating.
By following industry standards, referencing helpful resources like the SSPC guidelines, and conducting thorough testing, coating professionals can ensure successful surface preparation and ultimately, high-quality coating jobs.
Understanding Surface Preparation Guidelines
The surface preparation standard ensures the longevity, quality, and efficiency of protective coatings and linings applied on various materials and structures. These standards are crucial for maintaining the integrity of materials and promoting cost-effective preservation methods.
• Importance of Surface Preparation in Coating Applications
A critical aspect of coating applications is the proper preparation of the surface to improve adhesion and reduce the risk of coating failure. Failure to adhere to the recommended standards can result in a multitude of issues, such as blistering, rusting, and low durability of the coating.
By following these guidelines, industry professionals can ensure the effectiveness, quality, and reliability of their coating applications.
– International Surface Preparation Standards
Several organizations establish and publish international surface prep standards to regulate the level of cleanliness and quality of surfaces. Among them are:
- NACE International: NACE sets international standards for the corrosion engineering and corrosion control industries.
- SSPC (The Society for Protective Coatings): SSPC aims to advance the technology and promote the use of protective coatings that prevent corrosion and deterioration of industrial structures.
- ISO (International Organization for Standardization): ISO is an international organization that develops global standards for various industries, including surface preparation and coating applications.
NACE and SSPC Joint Standards
The most well-known and widely used surface preparation standards were developed as a collaborative effort between NACE International and the Society for Protective Coatings (SSPC).
These joint standards, designated with the prefix ‘SP,’ include descriptions of surface preparation methods and provide guidance on selecting appropriate processes for preparing different surfaces.
ISO Surface Preparation Standards
ISO establishes international standards for surface preparation and coatings applications in different industries. These standards cover a wide range of surface preparation methods, procedures, and testing techniques to ensure consistency and uniformity in coating applications.
ISO standards are often complementary to NACE and SSPC standards, helping ensure global compatibility and harmonization of best practices.
• Surface Preparation Methods and Best Practices
– Abrasive Blasting
Abrasive blasting is one of the most effective methods for cleaning surfaces and promoting strong adhesion between the surface and the applied coating.
Standards such as NACE No. 1/SSPC-SP 5 (White Metal Blast Cleaning), NACE No. 2/SSPC-SP 10 (Near-White Metal Blast Cleaning), and NACE No. 3/SSPC-SP 6 (Commercial Blast Cleaning) provide guidelines for the level of cleanliness achieved through abrasive blasting.
– Hand Tool Cleaning
Hand tool cleaning involves the use of manual equipment, such as scrapers, brushes, and sandpaper, to remove loosely adhering coatings, paint, rust, and other contaminants from the surface.
Standards such as NACE No. 4/SSPC-SP 3 (Power Tool Cleaning) and NACE No. 6/SSPC-SP 11 (Power Tool Cleaning to Bare Metal) offer guidance for achieving various degrees of surface cleanliness using these methods.
– Solvent Cleaning
Solvent cleaning is commonly used for removing fats, oils, and dirt from surfaces that might affect the adhesion of newly applied coatings. Standard NACE No. 1/SSPC-SP 1 (Solvent Cleaning) provides instructions on how to perform this process properly.
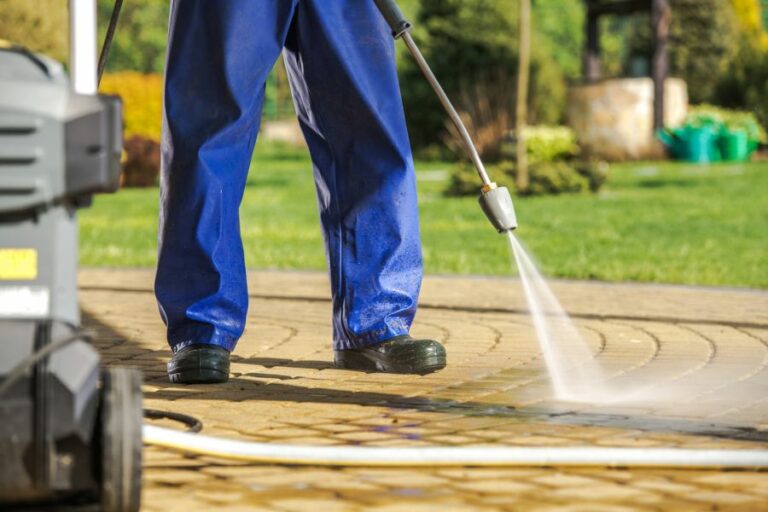
– Water Cleaning and High-Pressure Water Cleaning
Water cleaning and high-pressure water cleaning techniques involve the use of water sprays or jets to remove contaminants from surfaces. NACE No. 5/SSPC-SP12 (Water Cleaning) and NACE No. 25/SSPC-SP 14 (Industrial Water Cleaning) establish standards for these procedures.
• Verifying Surface Cleanliness
To ensure the surface meets the required cleanliness standards, professionals may use various analytical methods, including visual inspection and testing with specialized equipment. The NACE/SSPC Visual Standards Series provides a useful reference with visual comparators for evaluating surface cleanliness levels.
– Adhesion Testing
Adhesion testing, such as pull-off adhesion testing, is an essential aspect of ensuring a secure bond between the surface and the applied coating.
ASTM D4541 (Standard Test Method for Pull-Off Strength of Coatings Using Portable Adhesion Testers) is a widely accepted method for determining the quality of the bond created during the coating application process.
• Conclusion
Adhering to recognized surface preparation standards is crucial for achieving high-quality, durable, and cost-effective coating applications.
By understanding and following standards established by organizations such as NACE, SSPC, and ISO, industry professionals can optimize their practices and contribute to a more consistent and efficient application process.