Best Wire Brush Techniques For Debris
When tackling stubborn debris, knowing the best wire brush techniques is essential for effectiveness and efficiency. As experts in this field, we possess the knowledge and skills to make your cleanup process a breeze. In the following discussion, we will dive into the most efficient and effective methods to ensure your surfaces are debris-free, so you can confidently conquer any task.
Best wire brush techniques for debris:
The best wire brush techniques for debris removal involve selecting the appropriate brush for the task, using suitable methods for cleaning the surface, and following safety precautions. Key steps include finding the right wire brush, employing proper techniques for different surfaces, taking safety measures, and cleaning the brush afterward.

Looking for expert tips to elevate your wire brush game? Our comprehensive guide dives deep into the best techniques for effectively removing debris and getting the perfect clean. Read on and become a wire brush pro in no time!
Contents
- 1 Top Strategies for Debris Removal with Wire Brushes
- 2 Wire Brushes: Can They Eliminate Dirt Efficiently?
- 3 Mastering the Effective Applications of Wire Brushes
- 4 Top-Rated Wire Brushes for Effective Rust Removal
- 5 Achieving the Perfect Wire Brush Finish: A Guide
Top Strategies for Debris Removal with Wire Brushes
• Finding the Right Wire Brush
The first step in employing the best wire brush techniques for debris removal is selecting the appropriate brush for the task at hand. Wire brushes come in various sizes, shapes, and materials.
Some brushes have brass or stainless steel bristles, ideal for tougher tasks, while others have softer bristles, such as nylon, for more delicate surfaces.
Know the material you are working with, and choose a brush that is compatible. For instance, a brass-bristled brush will be suitable for removing debris from metal surfaces without causing any damage.
On the other hand, a wire brush with nylon bristles would be best used for cleaning upholstery or carpeting.
• Using the Right Technique for the Surface
When using a wire brush, the proper technique will depend on the material and type of debris you are working with. Below are some useful techniques for various materials:
– Metal Surfaces
For metallic surfaces, employ a short and even sweeping motion to remove debris. Start with the least abrasive brush and move to a more abrasive brush only if necessary, taking care not to damage the surface. For detailed or large metal surfaces, use a circular scrubbing motion.
– Wood Surfaces
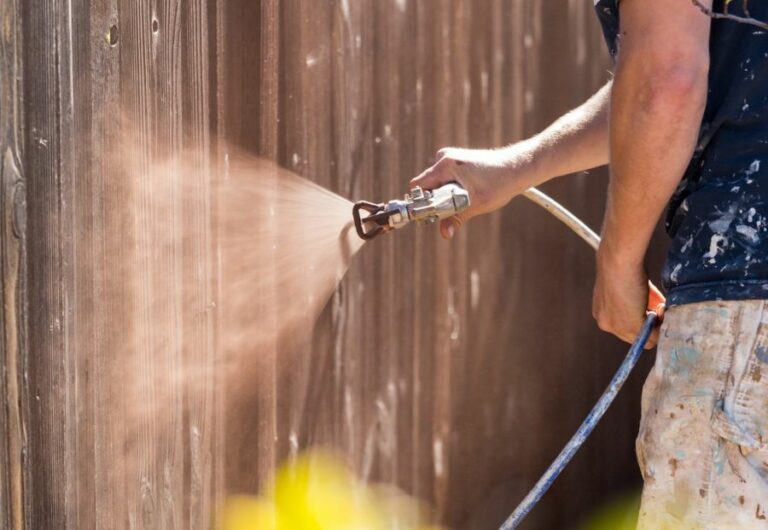
For wood surfaces, always work with the grain, taking care to avoid crossing it or going against it, which could lead to scratches. Start with a softer brush and graduate to a stiffer one as required. Apply consistent pressure and use back-and-forth movements to clean the area thoroughly.
– Concrete and Stone Surfaces
For concrete and stone surfaces, use a stiff brush, starting at the edge of the area and working your way inward. Use short, circular scrubbing motions to remove stubborn debris from the surface.
– Soft Surfaces
For soft surfaces, such as upholstery or carpeting, use a brush with gentle nylon bristles. Employ a vacuum cleaner to extract as much debris as possible before brushing, and then use a light, circular motion to lift the remaining debris out of the fibers.
• Safety Precautions
It is essential to take proper safety precautions when using a wire brush for debris removal. Always wear protective gloves, goggles, and a dust mask to avoid inhaling any debris dislodged during the cleaning process.
• Cleaning the Wire Brush
After removing debris, clean the wire brush to ensure its effectiveness and longevity. Use a mixture of warm water and mild detergent to soak the bristles, gently working the solution through the brush. Rinse with clean water, and hang the brush to air dry.
In conclusion, the best wire brush techniques for debris removal involve selecting the right brush for the specific job, using appropriate methods tailored to the surface being cleaned, and following essential safety precautions.
By employing these techniques, any debris removal task can be completed with efficiency and precision.
Wire Brushes: Can They Eliminate Dirt Efficiently?
A wire brush is a versatile and handy tool for various cleaning tasks. One of its most common uses is removing dirt from various surfaces and objects.
• Types of Wire Brushes
There are several types of wire brushes available, each designed for specific cleaning tasks. Some common types include:
- Handheld wire brushes: These are best for small-scale cleaning jobs. They typically have a wooden or plastic handle and are ideal for tackling dirt on smaller surfaces.
- Wire brush wheels: These brushes are usually attached to power tools, such as drills or angle grinders, for faster and more efficient cleaning of larger surfaces.
- End brushes: These are smaller wire brushes that can be attached to power tools for detailed cleaning in tight spaces.
- Scratch brushes: These are also handheld brushes but have a more aggressive design that is effective in removing heavy dirt and rust.
Understanding the type of wire brush best suited to your cleaning task is essential to remove dirt and other contaminants effectively.
• Factors Affecting Dirt Removal
The effectiveness of a wire brush in removing dirt depends on several factors, such as:
- Type and size of the bristles: Wire brushes come with bristles made of different materials, such as brass, steel, and stainless steel. Brass bristles are softer and ideal for light cleaning tasks, while steel and stainless steel bristles are more aggressive and suitable for heavy dirt removal.
- Pressure applied: The amount of force exerted on the wire brush plays a significant role in its effectiveness in removing dirt. Too little pressure might not dislodge the dirt, while too much pressure can damage the surface being cleaned.
- Cleaning technique: The method of brushing is critical to effectively removing dirt. Using a circular motion, overlapping strokes, or scrubbing in multiple directions can improve the cleaning process.
• Recommendations for Effectively Removing Dirt
Based on personal experience, here are some recommendations for using a wire brush to remove dirt:
- Choose the appropriate wire brush: Select a wire brush with the right bristle type and size, depending on the type and amount of dirt to be removed and the surface you’re working on.
- Apply the optimal amount of pressure: Maintain a steady pressure throughout the cleaning process, adjusting as necessary if the dirt is exceptionally stubborn. Be cautious not to apply excessive force.
- Experiment with different cleaning techniques: Use a combination of brushing motions or experiment with different methods to find the most effective technique.
- Clean the wire brush frequently: Remove dirt and debris from the wire brush as you work, ensuring the bristles are free of contaminants to maintain their effectiveness.
- Use safety gear: Wear protective gloves and eye gear to prevent injury, especially when using wire brushes on power tools.
In conclusion, wire brushes can be highly effective in removing dirt from a wide range of surfaces when used appropriately.
By considering the factors discussed in this article and following the recommendations provided, you can optimize the effectiveness of a wire brush in your cleaning jobs.
For more information on using wire brushes and other cleaning tools, check out The National Institute of Standards and Technology (NIST) for valuable resources on tool usage and safety.
Mastering the Effective Applications of Wire Brushes
• Introduction
A wire brush is a versatile and essential tool in various industries and household activities. Its primary purpose is to clean and remove unwanted materials, such as rust, paint, and dirt, from various surfaces.
• Types of Wire Brushes
To ensure your wire brush is used effectively, it’s important to understand the different types available.
– Handheld Wire Brushes
Handheld wire brushes are designed for manual use and come in various sizes. They typically have wooden or plastic handles with wire bristles. Handheld brushes are suitable for smaller areas and are often used in cleaning and maintenance tasks.
– Power Wire Brushes
Power wire brushes are used with power tools such as angle grinders, drills, or bench grinders. They cover a more extensive surface area in less time than handheld brushes. Power wire brushes are ideal for heavy-duty tasks, such as removing corrosion or paint from large surfaces.
– Materials and Bristle Stiffness
Wire brushes are available with different bristle materials and stiffness. Common materials include stainless steel, brass, and carbon steel.
Stainless steel bristles are ideal for projects involving rust prevention and corrosion resistance, while carbon steel bristles are suited for general-purpose tasks. Brass wires are softer, making them suitable for cleaning delicate surfaces without causing scratches.
• Proper Techniques for Using Wire Brushes
To ensure the effective use of a wire brush, follow these recommendations based on various tasks:
– Cleaning and Removing Rust
When removing rust, use a stainless steel wire brush for light rust stains and carbon steel for heavy-duty rust removal jobs. Apply pressure while scrubbing in a back-and-forth motion, following the natural grain of the surface. This helps to prevent scratches and damage to the material.
– Removing Paint
To strip paint from wood or metal surfaces, use a wire brush with a gentle back-and-forth motion. This ensures that a minimal amount of material is removed during the process. For power wire brushes, adjust the speed setting to a lower level for better control.
– Cleaning Welds
During metalworking or welding, a wire brush is essential for cleaning and preparing the surfaces. Use a stainless steel brush for stainless steel welds, and use a carbon steel wire brush for cleaning non-stainless steel welds.
Brush the weld area thoroughly to remove any contaminants and ensure a clean weld for a stronger bond.
• Safety Measures
Follow these safety guidelines to ensure the proper and safe use of wire brushes:
- Always wear protective eyewear and gloves to prevent injuries from flying debris or sharp wires.
- For power wire brushes, ensure that your equipment is firmly secured and operates within the recommended speed range.
- Inspect your wire brush regularly for any damaged wires or loose bristles. Discard damaged brushes to avoid injuries or accidents.
- Always work in a well-ventilated area to prevent inhalation of harmful dust particles.
• Recommendations
From personal experience, the following tips will help you utilize your wire brush more effectively:
- Match the brush type and material with the task you’re undertaking. Using the wrong brush may damage the surface or produce unsatisfactory results.
- Apply suitable pressure to the wire brush. Excessive force may cause bristles to break or wear out quickly.
- Clean your wire brush after each use to extend its life and maintain its performance. Remove any trapped debris and store it in a dry location to prevent corrosion.
• Conclusion
When used effectively, the wire brush is an indispensable tool for various cleaning and maintenance tasks. Understanding the different types of wire brushes, appropriate techniques, and safety measures can improve the quality of your work and extend the life of your tools.
By following the recommendations mentioned above, you can make the most of your wire brush and achieve the best results.
Top-Rated Wire Brushes for Effective Rust Removal
Rust removal is crucial for maintaining and prolonging the life of metal objects and surfaces. For safe and effective rust removal, wire brushes are the preferred tool of choice. However, with numerous options available, it can be challenging to determine which wire brush is best suited for the job.
• Factors to Consider when Choosing a Wire Brush for Rust Removal
Before selecting a wire brush for rust removal, it is essential to consider a few factors that can affect the brush’s performance, including:
– Material
Wire brushes are generally made from three primary materials: stainless steel, brass, or carbon steel. Each material has its strengths and is suitable for different applications:
- Stainless Steel: Ideal for use on stainless steel and non-ferrous metals, these brushes resist corrosion and are notably durable. However, they can be less malleable and may scratch softer materials.
- Brass: Brass wire brushes are excellent for use on softer metals like copper, brass, and aluminum. Their softer bristles will not scratch the surface, but the brush might wear out faster.
- Carbon Steel: Carbon steel wire brushes are versatile and commonly used for rust removal on various metals. They are more aggressive than brass brushes and do an excellent job of removing rust but they can leave scratches on softer materials.
– Bristle Style
There are two primary bristle styles for wire brushes: crimped and knotted:
- Crimped: Crimped wire brushes have wavy, flexible bristles, ideal for light to moderate rust removal. They can conform to irregular surfaces and are suitable for cleaning smaller, more intricate areas.
- Knotted: Knotted wire brushes feature twisted wire bristles, which create a more rigid and aggressive brush. These brushes are ideal for heavy rust removal and can quickly clean large surfaces.
– Shape and Size
Wire brushes come in various shapes and sizes, making them suitable for different applications:
- Cup Brushes: Cup-shaped wire brushes are perfect for edge cleaning and working on corners.
- Wheel Brushes: Wheel-shaped brushes are ideal for flat surface work and rust removal on larger metal surfaces.
- End Brushes: These brushes feature a small, concentrated bristle area, excellent for detailed work or targeting specific spots.
– Handle Type
- Handheld Wire Brushes: Handheld brushes are suitable for smaller, manual rust removal tasks.
- Power Tool Attachments: For larger projects, wire brush attachments for power tools (drills or angle grinders) can cover more ground and cut down on manual labor.
• Recommended Wire Brushes for Rust Removal
– Best Overall: Lincoln Electric Carbon Steel Wire Brush
The Lincoln Electric Carbon Steel Wire Brush is an excellent all-around option for rust removal. Its carbon steel bristles provide a fine balance between durability and flexibility, making it suitable for various surfaces and materials.
This brush is also reasonably priced, making it accessible for both occasional and more frequent users.
– Best Brass Wire Brush: Hyde Tools Brass Wire Brush
The Hyde Tools Brass Wire Brush is the top pick for cleaning and rust removal on more delicate metals. This brush features crimped brass bristles that offer a gentler approach without compromising on effectiveness.
– Best for Large Surfaces: DEWALT Carbon Steel Knotted Wire Cup Brush
When tackling large surfaces, the DEWALT Carbon Steel Knotted Wire Cup Brush is a reliable choice. Easily attaching to power tools for effortless rust removal, this knotted wire brush will make quick work of even the most extensive rust removal projects.
– Best for Detailed Work: Dremel Carbon Steel End Brush
For more intricate projects, the Dremel Carbon Steel End Brush is highly recommended. With its concentrated bristle layout, this brush can access hard-to-reach areas and provide precise rust removal.
• Final Thoughts
Rust removal is an essential task for preserving and protecting metal objects and surfaces. Choosing the right wire brush for the material, rust severity, and surface shape will ensure an effective and efficient rust removal process.
By considering each factor and following the recommendations provided, you can select the best wire brush for your rust removal needs.
Wire Brush | Material | Recommended Use |
|---|---|---|
Stainless Steel Wire Brush | Stainless Steel | Heavy rust, Metal surfaces |
Brass Wire Brush | Brass | Light to moderate rust, Sensitive surfaces |
Nylon Wire Brush | Nylon | Surface rust, Painted or finished surfaces |
Carbon Steel Wire Brush | Carbon Steel | Heavy rust, Rugged metal surfaces |
Achieving the Perfect Wire Brush Finish: A Guide
A wire brush finish is a popular technique used on various materials, particularly metal and wood, to achieve a textured, roughened surface. This finish can lend a rustic, aged appearance to the material and enhance the natural grain, making it an attractive option for various projects.
• Required Tools and Materials
To get started with a wire brush finish, you will need the following tools and materials:
- Wire brush
- Sanding block or sandpaper (100-120 grit)
- Soft cloth
- Protective gear (gloves, safety goggles, dust mask)
- Material to be finished (wood or metal)
You may also consider using a wire brush attachment for a power drill or an angle grinder with a wire wheel, depending on the size of your project and your experience with power tools. Those tools will be more effective for large areas or thick layers of paint or rust.
• Preparing the Work Area
Before beginning the wire brush finishing process, it is essential to prepare your work area. Make sure you have proper ventilation, as the process can generate dust and particles.
Set up a suitable working surface at a comfortable height and ensure you have proper lighting to see your work clearly. Make sure all necessary tools and materials are within reach.
• Safety Precautions
Wear protective gear such as gloves, safety goggles, and a dust mask throughout the wire brushing process. This will help protect your hands from splinters and your eyes and lungs from dust particles.
Additionally, be cautious when using power tools and follow the manufacturer’s recommendations for safe use.
• Step-by-Step: How to Do a Wire Brush Finish
– Step 1: Clean the Surface
Before applying a wire brush finish, remove any dirt, grease, or debris from the material’s surface. You can use a soft cloth dampened with water or a mild cleaning solution. Allow the surface to dry thoroughly before proceeding.
– Step 2: Sand the Surface
Begin by using a sanding block or sandpaper (100-120 grit) to lightly sand the surface. This step helps to remove any loose fibers, splinters, or rough edges. Sand with the grain of the wood or the natural direction of the metal. Wipe away any dust created from sanding with a soft cloth.
– Step 3: Apply the Wire Brush Technique
Now you can begin applying the wire brush finish. If using a hand-held wire brush, scrub firmly in the direction of the grain or the natural direction of the metal. It is essential to maintain a consistent angle and pressure throughout the process to achieve a uniform finish.
If using a power drill with a wire brush attachment or an angle grinder with a wire wheel, follow the manufacturer’s recommendations for safe use.
Keep a steady hand and work in a straight line, moving from one side to the other. Take your time and move slowly, making sure to give ample attention to each section of the material.
– Step 4: Final Touches
After completing the wire brushing process, use a soft cloth to wipe away any dust or particles created during the process. Inspect the finish and make any necessary adjustments using the wire brush or sanding block.
– Step 5: Protective Finishing (Optional)
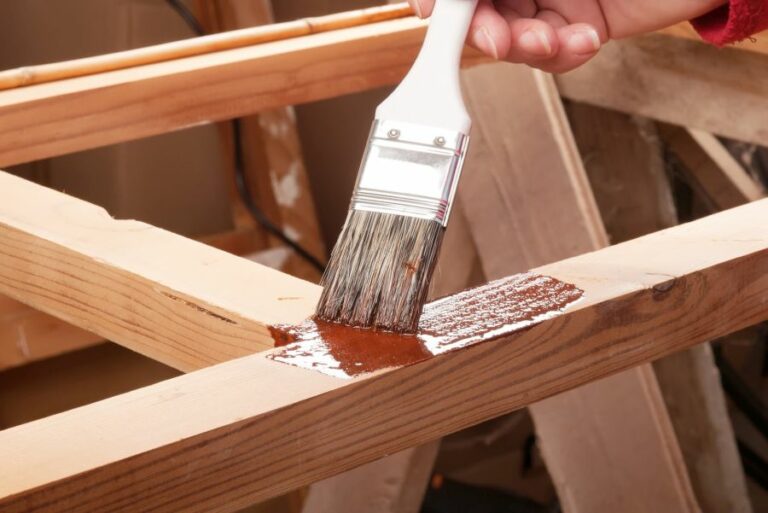
If desired, you can apply a protective finish to your wire-brushed material to help maintain the finish and safeguard it from damage.
Some options for protective finishes include oil-based products, wax finishes, or clear sealers. Follow the manufacturer’s recommendations for proper application techniques.
• Final Recommendations
Achieving a wire brush finish can be a gratifying and effective way to make your materials stand out, whether you’re working with wood or metal.
By following the steps outlined in this article and taking necessary safety precautions, you’ll be well on your way to creating a beautifully textured surface for your project.
Step | Instructions |
|---|---|
1 | Choose the appropriate wire brush for your project. |
2 | Prepare the surface by cleaning and removing any debris or dust. |
3 | Put on safety goggles, gloves, and any other necessary protective equipment. |
4 | Attach the wire brush to the power tool, such as a drill or angle grinder. |
5 | Begin brushing the surface, moving with the grain of the material if applicable. |
6 | Apply even, steady pressure while brushing to ensure a uniform finish. |
7 | Periodically stop to check the progress of the finish and make any necessary adjustments. |
8 | Once the desired finish is achieved, wipe the surface clean with a cloth and apply a finish or protective coating if desired. |