Surface Preparation For Painting Textured Surfaces
Tackling a painting project involving textured surfaces can be quite challenging, but worry not; we have the perfect solution to ensure a flawless finish. Surface preparation is the key element that determines the success and durability of the paint job. By following the guidelines we provide, you can confidently transform those textured surfaces into eye-catching masterpieces.
Surface preparation for painting textured surfaces:
Surface preparation for painting textured surfaces involves a thorough cleaning, repairing defects, and priming. First, clean the surface using a brush, mild detergent, and water, then dry it completely. Repair any cracks, holes, or uneven textures, and apply a primer designed for textured surfaces. Finally, use high-quality paint and appropriate tools to paint the surface, applying multiple coats for even coverage. Proper maintenance prolongs the paint’s lifespan and ensures a professional finish.

Ready to start your journey of painting textured surfaces? Hold up! Before diving in, proper surface preparation is key for the perfect finish. Unlock all the essential techniques and tips by continuing to read on. Let us simplify the process for you.
Contents
- 1 Preparing Textured Surfaces for a Paint Job
- 2 Tips for Painting Over Textured Surfaces
- 3 Getting a Textured Wall Ready for Painting
- 4 Is Direct Painting Over Texture Possible?
- 5 The Art of Painting Textured Surfaces
Preparing Textured Surfaces for a Paint Job
Proper surface preparation is crucial when it comes to painting textured surfaces. The final outcome of your paint job hugely depends on the effort and time invested in preparing the surface. Inadequate or improper surface preparation leads to paint peeling, flaking, and other issues that result in a poor finish.
• Importance of Surface Preparation
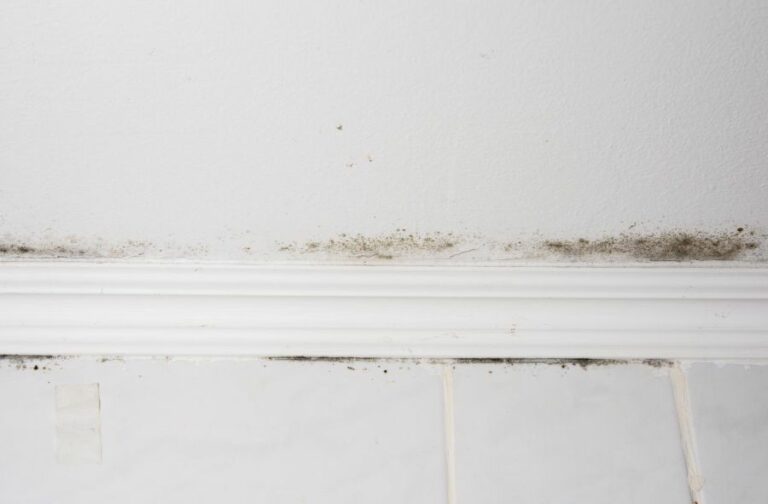
Before diving into the process, it is essential to understand why surface preparation is so crucial for textured surfaces. Textured surfaces have irregular patterns and uneven ridges, which often lead to paint pooling and an uneven finish.
Adequate surface preparation is necessary to ensure that the paint adheres well and looks uniform, minimizing issues such as patchiness or uneven texture.
• Cleaning the Surface
The first step in preparing a textured surface is cleaning it thoroughly. Dirt, dust, or grease on the surface can hinder paint adhesion, leading to a poor finish. Follow the steps below to clean the surface effectively:
– Remove Loose Debris
Using a soft bristle brush or vacuum with a brush attachment, remove all loose dust and debris from the textured surface.
– Clean with Mild Detergent
Mix mild detergent in warm water, dip a soft sponge or cloth in the solution and gently clean the surface. Cleaning with detergent helps remove any residual dirt or grease, ensuring a clean surface for painting.
– Rinse with Water
After cleaning with detergent, rinse the surface using clean water and a sponge or cloth. This step helps remove any residual detergent from the surface, which might cause adhesion issues if left behind.
– Allow the Surface to Dry
Before you proceed to the next step, ensure the surface is entirely dry. Damp surfaces can interfere with proper paint adhesion and can cause paint peeling or blistering.
• Repairing Surface Defects
After the surface is clean and dry, inspect it for any defects such as cracks, holes, or damaged texture. Repairing these defects is necessary to ensure a smooth and consistent painted finish. Here’s how to repair common surface defects:
– Repair Cracks and Holes
Use a premixed patching compound or a mixture of powdered compound and water to fill cracks and holes. Apply the compound with a putty knife, pressing it firmly into the defects. Smoothen the surface and allow the compound to dry as per the manufacturer’s instructions.
– Smoothen Uneven Textures
For areas with uneven textures, sand them lightly using medium-grit sandpaper. Sanding helps create a level surface, providing a better base for the paint to adhere to. Be careful not to over-sand, as this can damage the texture.
– Use a Primer
Applying a primer before painting the textured surface is highly recommended, especially for surfaces that have undergone repair work. A primer creates a uniform and sealed surface, ensuring better paint adhesion and a smooth finish.
Choose a primer specifically designed for textured surfaces and follow the manufacturer’s instructions for application.
• Painting the Textured Surface
Once the surface is clean, repaired, and primed, it’s time to paint. Keep in mind that painting a textured surface can be challenging due to the uneven surface and ridges. Here are some tips to achieve a uniform and smooth paint finish on textured surfaces:
– Choose the Right Paint
Opt for high-quality paints designed for use on textured surfaces. These paints are formulated to cover uneven surfaces effectively, providing a uniform finish. Low-quality paints may result in an uneven and patchy appearance.
– Select the Proper Tools
Textured surfaces require specific painting tools to achieve a consistent finish. Use a thick nap roller (3/4-inch or more) to ensure proper paint coverage on the uneven surface. A paintbrush can be used for cutting in and painting small, intricate areas.
– Apply Multiple Coats
Textured surfaces may require more coats than flat surfaces to achieve full and even coverage. Allow each coat to dry as per the manufacturer’s instructions before applying the next one. Don’t be tempted to apply thick coats, as this may result in paint pooling or an uneven finish.
• Proper Maintenance for Long-lasting Results
After the painting process is complete, ensure you maintain your newly painted textured surface well. Regularly dust, clean, and inspect the surface to keep it looking fresh and prolong the paint’s lifespan. When repainting, follow the steps mentioned earlier to achieve a consistent and smooth finish.
In conclusion, surface preparation is a critical aspect of painting textured surfaces. Following the steps discussed above, from cleaning and repair to priming and painting, ensures a professional, long-lasting, and uniform finish.
Tips for Painting Over Textured Surfaces
A textured surface can bring a unique appearance to walls, ceilings, and other parts of your home or workspace.
However, these surfaces also present a particular challenge when it comes to repainting. This guide will provide you with practical tips on how to paint over textured surfaces, ensuring a smooth and even finish.
• Choose the Right Tools
Using the right tools is crucial for achieving professional results when painting textured surfaces. Here are some recommended tools to consider:
– Paint Roller
A thick-nap paint roller is best suited for textured surfaces, as it can reach into the crevices and provide better coverage. Aim for at least a 3/4-inch nap roller, though a 1-inch nap is ideal.
– Paintbrush
For smaller areas or cutting in around edges, use a high-quality angled paintbrush. Look for one with synthetic bristles to work better with water-based paints.
– Extension Pole
A telescoping extension pole will allow you to reach higher areas comfortably and improve efficiency when painting ceilings or tall walls.
• Choose the Right Paint
Selecting the right type of paint is crucial in achieving a smooth and even finish. High-quality latex paint with a flat or low-sheen finish will conceal imperfections and provide excellent coverage. In some cases, using paint and primer in one product may be suitable, thereby saving you time and effort.
• Prepare the Surface
Before painting, take the necessary steps to prepare your textured surface for a smoother painting process.
– Clean the Surface
Textured surfaces can harbor dirt, dust, and cobwebs. Use a vacuum with a brush attachment to remove loose debris. Follow up with a damp cloth or sponge to clean the surface further. Allow the wall to dry thoroughly before painting.
– Repair Damaged Areas
Inspect the textured surface for any damaged areas, and make any necessary repairs. Depending on the type of texture, you may need to use a putty knife or trowel to apply a patching compound, or you may need to replicate the original texture using a specialized texture tool or roller.
– Mask and Protect Adjacent Surfaces
Use painter’s tape to mask off any areas not to be painted, such as baseboards, outlet covers, and trim. Cover floors and furniture with drop cloths to protect them from paint splatter.
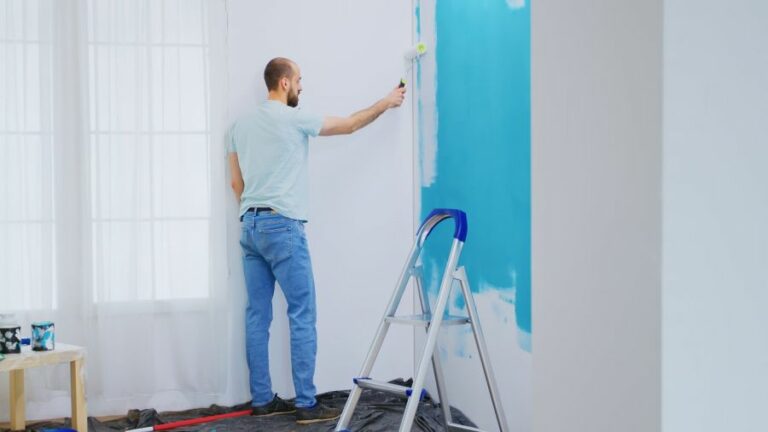
• Apply the Paint
When painting over a textured surface, follow these steps to ensure a smooth and even finish:
– Cut in the Edges
Using your angled paintbrush, carefully paint along the edges of the wall or ceiling where it meets other surfaces. This will ensure a crisp and clean edge when you paint the rest of the surface.
– Roll on the Paint
Begin painting the surface using your thick-nap roller. Work in small sections (approximately four feet wide).
Start by rolling the paint onto the textured surface in an “M” or “W” pattern, followed by filling in the rest of the section with paint. This method ensures consistent coverage and reduces the likelihood of paint lines.
– Apply Multiple Coats
One coat of paint may not be sufficient for covering a textured surface. It is crucial to apply at least two coats. To ensure the best results, wait for the first coat to dry completely, which typically takes 2-4 hours, before applying the second coat.
– Feather the Edges
When moving from one section to another, lightly overlap the painted areas to feather the edges. This technique will help to prevent visible paint lines and achieve a more uniform finish.
– Inspect and Touch Up
Once the final coat of paint has dried, carefully examine the surface for any missed spots or uneven areas. Use a paintbrush to touch up any imperfections as needed.
• Additional Tips
Here are a few additional tips that can lead to better results when painting over textured surfaces:
- Practice your painting technique on a scrap piece of drywall or cardboard with a similar texture to your desired surface. This will help you hone your skills and paint with confidence.
- For a more in-depth guide on painting techniques, consider visiting the U.S. Department of Energy’s website, which offers valuable resources on painting and home improvement projects.
- Keep a wet edge when painting, meaning you should avoid letting the paint dry before you finish painting the entire section. This will help prevent lap marks and create a smoother finish.
- Always allow adequate drying time between coats, as specified by the paint manufacturer. Rushing through the process can lead to an uneven or streaky finish.
By following these tips and techniques, you can successfully paint over a textured surface with confidence and achieve professional results, adding a fresh appearance to your walls and ceilings.
Step | Description |
|---|---|
1 | Clean the surface to remove any dust, dirt, or grease. |
2 | Fix any damage on the surface by filling holes or cracks with putty or spackling compound. Sand the repaired areas until smooth and wipe off any dust residue. |
3 | Prime the surface with a high-quality primer. Use a thick-nap roller to ensure coverage on the textured surface, allowing the primer to dry according to the manufacturer’s instructions. |
4 | Select a suitable paint. For textured surfaces, choose a paint with a flat or matte finish. |
5 | Using a thick-nap roller, apply the first coat of paint in a uniform manner, working in small sections. Allow the paint to dry according to the manufacturer’s instructions. |
6 | Apply a second coat of paint as needed for full coverage. Allow it to dry completely before reattaching fixtures or moving furniture back into the space. |
Getting a Textured Wall Ready for Painting
• Assessing the Texture
Before you start preparing your textured wall for painting, it is essential to assess the texture of your wall. It will help you to determine the necessary steps to take in the preparation process. Textures can be light, medium, or heavy.
Light textures include orange peel and knockdown textures, medium textures include crow’s feet and brush stomp, while heavy textures include popcorn and spray sand ceiling textures. The wall’s texture will determine the painting method and tools required to achieve an excellent finish.
• Gathering Necessary Materials
Gather all the materials and tools you would need to prepare your textured wall for painting. Some of the essential materials and tools to have on hand may include:
- Paint scraper
- Sandpaper or sanding pole
- Dust masks
- Safety goggles
- Clean cloth or damp cloth
- Paintbrush
- Roller
- Primer
- Paint
By having all the necessary materials at your disposal, you can work efficiently and spend less time searching for tools while you work.
• Protecting Surfaces and Yourself
Before you start working on your textured wall, it is crucial to protect surfaces and furniture in the room. You can do this by laying down a drop cloth or plastic sheeting. I recommend using painter’s tape to secure the edges of the cloth or plastic to maintain a tight seal around the work area.
Additionally, make sure you protect yourself by wearing proper safety gear, such as dust masks, safety goggles, and gloves. This will help prevent inhaling dust particles or getting harsh chemicals on your skin.
• Cleaning the Surface
Before applying any paint to your textured wall, it is essential to thoroughly clean the surface. This will help ensure that the paint adheres to the wall correctly.
Use a clean cloth or damp cloth to wipe down the wall to remove any dirt, dust, or other debris present on the surface. After wiping, give the wall some time to dry out before moving on to the next step.
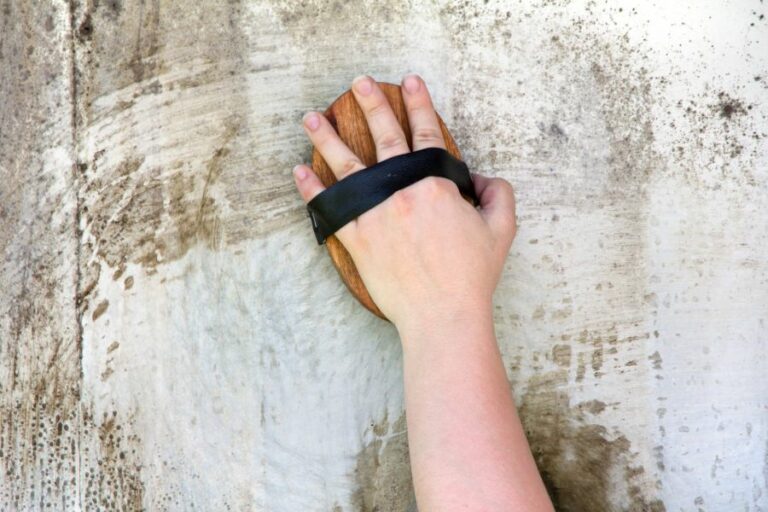
• Smoothing Outwards and Filling in Cracks
Depending on the texture and overall condition of the wall, you may need to scrape away some areas of the texture or fill in cracks. To do this, use a paint scraper to gently remove any loose or scaled parts of the texture. Be gentle, as applying too much pressure can damage the wall’s surface.
Next, use fine-grit sandpaper or a sanding pole to smooth the wall, paying close attention to any areas where there are cracks, dents, or other imperfections. After sanding, use a joint compound to fill in any cracks or holes, and then sand those areas once the compound has dried.
• Applying Primer
Before applying paint, you must apply a primer to your textured wall. Priming the wall is essential because it provides a solid base for the paint to adhere to, ensuring a smooth and even paint job.
Use a paintbrush to apply the primer to any edges or corners of the wall, and then use a roller with an extension pole to cover the rest of the wall. Make sure that the primer has dried before moving on to the paint application process.
• Choosing the Right Paint and Tools
When selecting paint for your textured wall, it’s crucial to pick a paint that adheres well to textured surfaces.
You should opt for high-quality latex paint that is designed for textured walls. Additionally, consider using paint with an eggshell or satin finish, as these tend to hide imperfections better than a matte or flat finish.
In choosing the right tools, a thick nap roller cover (3/4-inch or 1-inch nap) is recommended for textured surfaces, as it can efficiently paint uneven surfaces and crevices. Make sure you have a good quality paintbrush for cutting in around the edges and corners of the wall.
• Applying the Paint
Start painting your textured wall by cutting in at the edges and corners using a paintbrush. Paint with long, even strokes while trying not to leave any visible brush marks.
After cutting in, use the roller to apply paint to the rest of the wall. Roll in a W or M pattern, followed by up and down strokes to ensure even coverage. Allow the first coat to dry before proceeding with a second coat, if necessary.
• Conclusion
By following these steps, you can effectively prepare your textured wall for painting and ensure a smooth, professional-looking paint job. Don’t rush the process – take your time to ensure you have properly cleaned, repaired, and primed the surface for the best results.
| How do you prepare a textured wall for painting? | |
|---|---|
| 1. Clean the wall | Remove dirt, dust, and grease by using mild detergent, sponge, and water. Rinse and let the wall dry completely. |
| 2. Repair damages | Fill any cracks, holes, or dents with a patching compound. Once it’s dry, sand it smooth and wipe away the dust. |
| 3. Sand the texture (if needed) | If the texture is too rough for your preference, use sandpaper or a sanding sponge to smoothen it. Be sure to remove any sanding dust afterward. |
| 4. Apply a primer | Choose a primer suitable for your wall texture and paint type. Use a brush, roller, or sprayer to apply an even coat of primer, and let it dry according to the manufacturer’s instructions. |
| 5. Tape off edges and trim | Use painter’s tape to cover any trim, baseboards, outlets, or other areas that you don’t want to get paint on. |
| 6. Paint the wall | Apply your chosen paint following the manufacturer’s instructions. Use a brush or roller designed for textured surfaces, and apply the paint in a consistent pattern. Allow it to dry before adding a second coat, if necessary. |
| 7. Remove tape and clean up | Once the paint has dried, remove the painter’s tape and perform any necessary touch-ups. Clean your brushes, rollers, and any other tools used during the process. |
Is Direct Painting Over Texture Possible?
The decision to paint directly over textured surfaces comes up quite often in interior design projects. Although textured surfaces can add depth and character to a room, many people may want a more polished or clean look.
• Factors to Consider Before Painting Over Texture
– Type of Texture
Knowing the type of texture on your walls or ceiling is essential in deciding whether you can paint directly over it. Popular texture types include:
- Popcorn: Also known as acoustic or cottage cheese texture, this bumpy surface is often found on ceilings.
- Knockdown: This texture has a flattened, splotchy appearance and is common on both walls and ceilings.
- Orange Peel: As the name suggests, this texture resembles the skin of an orange and is found on walls.
If you have a heavy texture, like popcorn or knockdown, painting directly over it may not always result in a smooth finish, and you might need to remove or cover the texture with a skim coat prior to painting. However, with lighter textures like orange peel, you can successfully paint over it.
– Paint Colors and Finish
The color and finish you choose for your paint can make a difference in the final look. Lighter colors tend to show imperfections and texture more than darker colors, making them less suitable for painting directly over the texture. A matte finish can also help to minimize the appearance of texture on surfaces.
– DIY vs. Professional
Consider whether you want to tackle the project yourself or hire a professional. While painting over texture can be a DIY project, removing or smoothing out the texture may require the expertise of a professional painter or drywall contractor.
• Preparing for the Paint Job
– Cleaning the Surface
Before you begin painting, make sure to clean the textured surface thoroughly. Use a vacuum with a brush attachment or a long-handled duster to remove dust, dirt, and cobwebs. For greasy or stained areas, use a soapy solution and a sponge or cloth to clean the surface.
– Repairing Damages
Inspect the textured surface for any damages, such as cracks, holes, or peeling. These imperfections should be repaired before painting to ensure a smooth and even finish. For minor damages, use a premixed joint compound, and apply with a putty knife. Allow it to dry, then sand it smooth.
– Priming Your Surface
Priming is an essential step in achieving a successful paint job over textured surfaces. A high-quality primer will help to create a uniform surface and improve the adhesion of the paint. Choose an oil-based or acrylic primer, as these tend to work best on textured surfaces.
When applying the primer, use a thick-nap roller or a paintbrush to evenly cover the surface, making sure to get into all the crevices of the texture. Allow the primer to dry completely before moving on to painting.
• Painting Over the Texture
– Choosing the Right Tools
Selecting the right tools for applying paint to textured surfaces is crucial. A thick-nap roller or a long-bristle paintbrush is recommended. These tools allow the paint to reach into the textured crevices, ensuring full coverage.
– Applying the Paint
Begin by loading your roller or brush with an adequate amount of paint. Apply the paint to the surface using overlapping “W” or “M” patterns to maintain even coverage. Be sure to work in small sections to avoid any paint drying before you can smooth it out properly.
– Additional Tips
- Multiple coats of paint may be required to achieve the desired finish and color.
- When working with a roller or paint brush, practice a light touch to avoid pushing the paint too deeply into the texture, which can create pooling or uneven coverage.
- If you find that the final look is not what you expected, consider hiring a professional to address the issue and provide a smoother finish.
• Conclusion
In many cases, painting directly over texture is possible and can provide your space with an updated appearance. Consider factors like the type of texture, paint colors and finish, and your level of expertise when deciding whether or not to take on this project.
With proper preparation and the right tools, you can achieve a successful new look for your textured surfaces.
Option | Explanation |
|---|---|
Yes | You can paint directly over textured surfaces, but it might require additional coats of paint or a primer to ensure proper adhesion and coverage. |
No | If the texture is too rough or uneven, painting directly over it might not provide a smooth finish. In such cases, it’s better to remove or smooth out the texture before painting. |
The Art of Painting Textured Surfaces
A successful paint job on a textured surface requires proper preparation, appropriate tools, and precise technique.
By following several best practices and guidelines, you will be able to transform your textured surface into an appealing and well-finished masterpiece.
• Assessing the Surface
Before you start painting, examine the surface thoroughly. Look for any dirt, debris, or loose particles that may affect the quality of the paint job. Check for holes, cracks, or other damages that need repair prior to painting.
In some cases, you may need to clean the surface with a vacuum, brush, or cloth before proceeding.
• Choosing the Right Paint
Next, decide on the type of paint that is most suitable for the textured surface you are working with. Generally, flat or matte paints work best on textured surfaces as they minimize the appearance of surface imperfections.
For exterior surfaces, exterior paint with a slightly glossy finish might be a better choice to provide weather protection.
• Priming the Surface
After evaluating the surface and choosing your paint, prepare your workspace by spreading drop cloths to protect your floors and furniture. Then, apply a high-quality primer to the surface. This step is especially important when working with heavily textured surfaces.
Priming ensures better adhesion, less paint absorption, and a consistent finish. Allow the primer to dry completely before applying the paint.
• Picking the Right Tools
To paint your textured surface effectively, you need the right tools for the job. I recommend using:
- A roller with a 3/4-inch to 1 1/4-inch nap. A thicker nap helps the roller hold more paint and cover the textured surface evenly.
- A paintbrush with stiff bristles. Angled brushes work well when cutting in.
- A paint tray or bucket with a pouring spout.
- An extension pole, if needed, to reach high areas.
- Ladders or scaffolding, depending on the project.
• Applying the Paint
Once your tools are ready, it’s time to apply the paint. Follow these steps for a smooth and professional-looking paint job:
– Mixing the Paint
Start by stirring the paint well. This helps to ensure an even distribution of color and makes it easier to work with. Pour the stirred paint into your paint tray or bucket carefully.
– Cutting In
Begin by using your angled paintbrush to “cut in” along the surface’s edges, such as corners, baseboards, and moldings.
This method helps provide a neat and clean border before rolling paint onto the wider sections of the textured surface. Make sure to load your brush with enough paint to cover the brush’s width without overloading it.
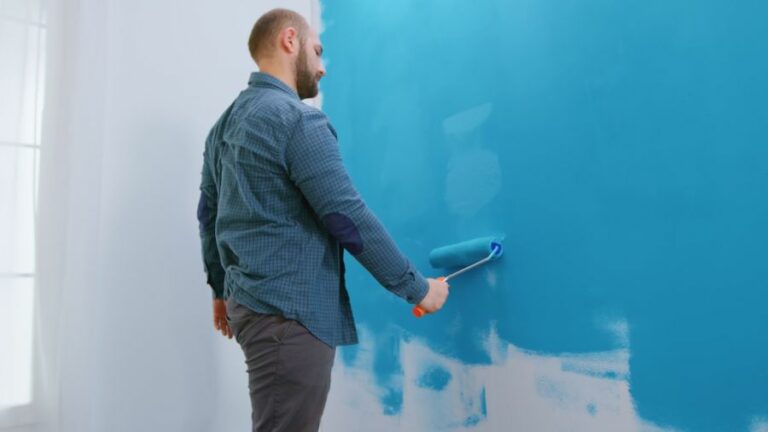
– Rolling the Paint
Now that the edges are cut in, it’s time to use your roller to cover the larger surface areas. Dip the roller into the paint tray or bucket and roll it back and forth to ensure even coverage on the roller nap.
Apply the paint using an “M” or “W” pattern and then fill in the gaps using parallel, overlapping strokes. Avoid applying too much pressure, which can cause the paint to squeeze out from under the roller.
– Multiple Coats
For optimum coverage and an even finish, apply multiple coats of paint. Allow the first coat to dry completely before applying the next one. Textured surfaces may require additional coats compared to smooth surfaces, so plan accordingly.
• Drying and Curing
While your paint may feel dry to the touch within a few hours, it takes longer for the paint to fully cure. Depending on the paint used and the environmental conditions, curing can take anywhere from a few days to over a month.
To ensure long-lasting results, avoid touching, cleaning, or placing heavy objects on the painted surface until it’s fully cured.
• Final Thoughts
Painting textured surfaces can be a challenging but rewarding process. By following this comprehensive guide and implementing best practices, you can achieve a professional and visually appealing paint job. Remember, proper preparation, the right tools, and patience are key to a successful textured surface paint project.
How do you paint texture?
Step | Description |
|---|---|
1 | Choose the right type of paint: Use high-quality latex or acrylic paint to ensure proper adhesion and coverage on textured surfaces. |
2 | Clean the surface: Before painting, ensure the textured surface is clean and free of dust, dirt, or grease. You may need to use a brush or vacuum to remove any loose debris. |
3 | Repair any damage: If there are any holes, cracks, or damaged areas on the textured surface, repair them with a patching compound and allow it to dry before painting. |
4 | Prepare the area: Cover any nearby surfaces with drop cloths, and use painter’s tape to protect areas where you don’t want paint. |
5 | Prime the surface (optional): If needed, apply a primer to the textured surface to help achieve better adhesion, coverage, and durability of the paint. |
6 | Use a suitable applicator: A thick nap roller is recommended for painting textured surfaces, as it can reach into grooves and crevices to ensure proper coverage. |
7 | Apply the paint: Start by painting the edges, corners, and difficult-to-reach areas with a brush, then switch to a thick nap roller for the larger surfaces. Apply multiple even coats of paint to achieve the desired coverage. |
8 | Allow to dry and inspect: After each coat, allow the paint to dry and inspect for any missed areas or imperfections. Apply additional coats as needed. |
9 | Clean up: Once the paint is completely dry, carefully remove the painter’s tape and clean brushes, rollers, and other tools with soap and water if using latex or acrylic paint. |