Surface Prep For Long-Lasting Paint Results. What Pros Say
Are you tired of watching your paint job peel or fade after only a short amount of time? Look no further because we have the solution for you! With our expert knowledge of surface prep, you can achieve long-lasting paint results that completely transform the look and feel of your space.
Surface prep for long-lasting paint results:
Proper surface preparation is crucial for a durable and long-lasting paint job. This involves assessing the surface for issues, thorough cleaning, repairing defects, sanding, priming, taping, and masking before painting. By following these steps, one can achieve a professional-quality finish that lasts for years.

Want to ensure your paint job stands the test of time? Don’t underestimate the importance of surface prep! Read on as we dive into crucial steps, tips, and tricks for long-lasting, professional-looking results because every masterpiece deserves a strong foundation.
Contents
- 1 Effective Surface Preparation for Durable Paint Outcomes
- 2 Optimal Surface Preparation Techniques for Painting
- 3 Strategies for Surface Preparation Prior to Painting
- 4 Tips to Prolong the Lifespan of Your Paint Job
- 5 Consequences of Skipping Surface Preparation in Painting
Effective Surface Preparation for Durable Paint Outcomes
A vital yet often overlooked aspect of any painting project is surface preparation. Properly preparing the surface can significantly impact the durability and appearance of the final paint job.
• Understanding the Importance of Surface Preparation
Before diving into the actual surface preparation process, it is essential to understand why proper surface preparation is so critical.
According to the Painting and Decorating Contractors of America (PDCA), up to 80% of all paint failures can be attributed to improper surface preparation, leading to peeling, chipping, and premature wear of the painted surface.
• Assessing the Surface
The first step in the surface preparation process is a thorough assessment of the surface to identify any existing problems. This assessment will help determine the specific preparation steps required for each surface type. Here are some common surface issues to consider:
- Peeling, cracking, or blistering paint
- Mold and mildew growth
- Grease, oil, or dirt buildup
- Rust or corrosion
• Cleaning the Surface
A clean surface is crucial for paint adhesion, and removing any dirt, grease, or other contaminants is the first step in the surface preparation process. Here are some suitable cleaning methods for different surface types:
– Wood
For wooden surfaces, a mild detergent solution and a soft-bristle brush can effectively remove dirt and mildew. Remember to rinse the surface thoroughly with clean water after washing, and allow it to dry completely before moving on to the next step.
– Metal
For metal surfaces, use a wire brush or sandpaper to remove rust and corrosion, followed by a solvent such as mineral spirits to remove any surface contaminants. Make sure to wear gloves and eye protection when working with solvents.
– Concrete
For concrete surfaces, a pressure washer or a stiff-bristle broom and a trisodium phosphate (TSP) solution can be effective in removing dirt, grease, and mildew. Be sure to rinse the surface thoroughly after cleaning, and allow ample time for it to dry before painting.
• Repairing Surface Defects
Once the surface is clean, repair any visible defects such as cracks, holes, or uneven areas. For large cracks or holes, a filler like epoxy or silicone caulk may be required. For smaller defects, sanding or scraping may suffice.
Always follow the manufacturer’s instructions for any repair materials used, and allow ample time for them to dry and cure before continuing with the surface preparation process.
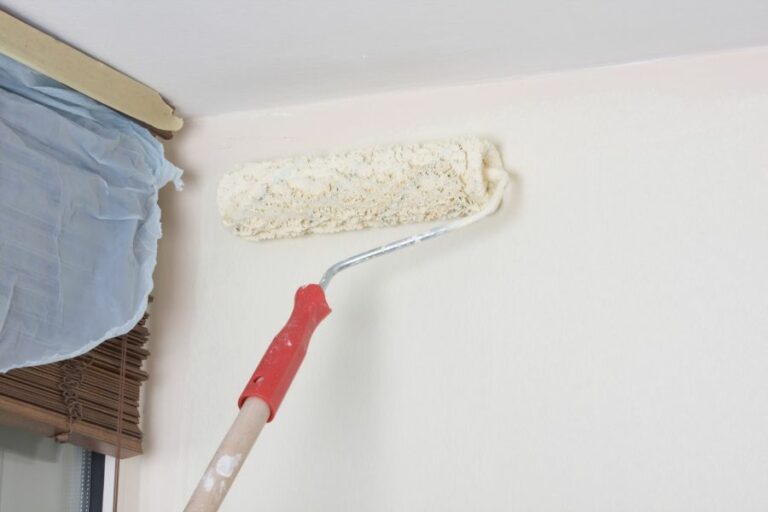
• Sanding and Priming
Smooth surfaces ensure better paint adhesion and a professional-quality finish. Sanding the surface with fine-grit sandpaper (150 to 220 grit) helps create an even and smooth base for the paint to adhere.
Following sanding, applying a primer can significantly improve the durability and appearance of the final paint job. Primers provide a uniform base for paint, increasing adhesion and promoting a consistent color and sheen.
Specific primers are suited for different surface types, so consult the paint store or the manufacturer’s instructions for the best primer option for your project.
• Taping and Masking
Before starting the painting process, take the time to mask and protect any areas that should remain paint-free. Proper masking is vital to ensuring clean, crisp edges and preventing damage to adjacent surfaces.
Use painter’s tape designed for masking specific surfaces (such as glass, wood, or metal) and take the time to press it firmly in place to prevent paint from seeping under the tape. For larger areas, plastic sheeting or drop cloths can provide additional protection against paint drips and splatters.
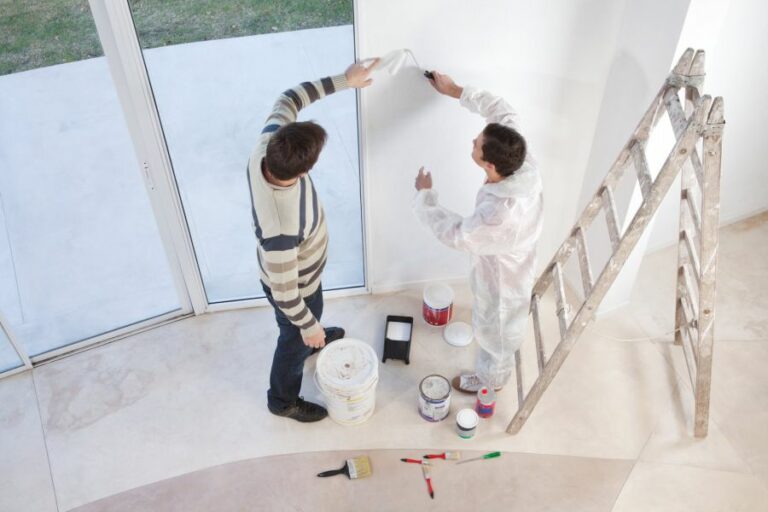
• Final Preparations and Painting
Before beginning the painting process, ensure that the surface is clean, dry, and defect-free. Maintain a clean work environment, with fresh air circulation and proper lighting. Using high-quality paint, brushes, and rollers will also contribute to a better overall result.
Carefully follow the paint manufacturer’s instructions for the proper application process, including the recommended number of coats and drying times. Depending on the surface type and the conditions in which the paint is applied, some paints may require additional drying time to ensure long-lasting results.
Allow ample time for the paint to dry and cure fully before exposing the surface to any potential damage or wear, such as reattaching hardware or placing furniture onto the painted surface.
In conclusion, proper surface preparation is essential for achieving a long-lasting and durable paint job. By following the steps outlined above, you can help ensure the success of your painting project and enjoy the results for years to come.
Optimal Surface Preparation Techniques for Painting
• The Importance of Surface Preparation
Proper surface preparation is a critical step in achieving a successful and long-lasting paint job. It helps to create a smooth and uniform surface, ensuring better adhesion of the paint and ultimately resulting in a beautiful and durable finish.
• Preparing Wood Surfaces for Painting
Wood is a porous and uneven material, making it essential to follow proper preparation steps to get a smooth and lasting finish.
– Cleaning and Sanding
- Start by cleaning the wood surface to remove dirt, dust, oil, and grease. You can use a mild detergent or a wood cleaner specially formulated for this purpose, such as TSP (trisodium phosphate).
- Once the surface is clean and dry, sand it using medium-grit sandpaper (around 120-grit) to remove any rough or uneven spots. Be sure to sand in the direction of the wood grain to avoid scratching the surface.
- Wipe the surface with a tack cloth to remove sanding dust before proceeding with priming or painting.
– Priming and Sealing
To achieve the best results, apply a wood primer before painting. Primers help to seal the wood, provide a protective barrier, and promote better adhesion of the paint.
- For bare wood or wood with knots, use a wood-specific primer like oil-based primer or shellac-based primer.
- For previously painted wood, a latex-based or acrylic primer is recommended.
• Preparing Metal Surfaces for Painting
Proper surface preparation is equally important for metal surfaces, as it helps to prevent rust and ensures the paint adheres appropriately.
– Cleaning and Degreasing
- Remove dirt, grease, and oil from the metal surface using a suitable cleaning solution, such as a mild detergent or a metal cleaner/degreaser.
- Rinse the surface thoroughly with clean water, and allow it to dry completely.
– Sanding and Priming
- Sand the metal surface lightly using medium-grit sandpaper (approximately 120-grit) to create a rough texture for the paint to adhere to. If the metal is rusty, use a wire brush or steel wool to remove rust before sanding.
- Apply a metal-specific primer, such as a rust-inhibiting primer or galvanized metal primer, to protect the surface and ensure proper paint adhesion.
• Preparing Concrete Surfaces for Painting
Concrete surfaces require unique preparation techniques due to their porous and uneven nature.
– Cleaning and Degreasing
- Clean the concrete surface using a concrete cleaner or degreaser to remove oil, grease, and other contaminants.
- Rinse the surface thoroughly with clean water, and allow it to dry fully.
– Etching and Priming
- Concrete surfaces often require etching before painting to create a rough texture for better paint adhesion. Use a commercial etching solution or a mix of water and muriatic acid for this purpose, following the manufacturer’s instructions carefully.
- Apply a concrete-specific primer or sealer to protect the surface and promote better adhesion of the paint.
• Preparing Drywall Surfaces for Painting
Drywall surfaces are relatively easy to prepare for painting, but it’s essential to ensure proper adhesion and a smooth final result.
– Cleaning and Repairing
- Begin by cleaning the drywall surface to remove dust and dirt. You can use a dry cloth or a drywall-specific cleaner for this step.
- If there are any visible dents, holes, or cracks in the drywall, repair them using a joint compound or a spackling paste. Allow the repairs to dry, then sand them smooth with medium-grit sandpaper and wipe away any dust with a tack cloth.
– Priming
For a uniform and even finish on drywall surfaces, apply a drywall-specific primer before painting. This will seal the surface, hide any repairs, and provide a consistent base for the paint.
• In Conclusion
Preparing various surfaces for painting requires different techniques, but it is a crucial step in achieving a successful and long-lasting paint job.
By following the expert recommendations provided in this article and using the appropriate products and tools, you will be well on your way to creating a beautiful and durable painted surface.
Surface Type | Prep Steps |
|---|---|
Wood | Clean surface, sand, remove dust, apply primer |
Metal | Remove rust, clean, apply rust-inhibiting primer |
Concrete | Clean, repair cracks, etch, apply masonry primer |
Plaster | Remove loose paint, clean, sand, apply primer |
Drywall | Remove dust, repair imperfections, apply primer |
Strategies for Surface Preparation Prior to Painting
Preparing a surface for paint coating is a crucial step to ensure a flawless and long-lasting paint job.
• Assessing the Surface and Choosing the Right Paint
Before you begin preparing the surface for paint, you first need to determine the type of surface you will be working with, such as wood, metal, or plaster. This is important because different surfaces require different preparation methods and painting techniques.
Once you have identified the surface type, choose a paint that will adhere well and provide the desired finish. Research different paints and their appropriate application methods to ensure the best results. You can find helpful information on this topic on the Environmental Protection Agency’s website.
• Cleaning the Surface
Thoroughly clean the surface to remove any dirt, grease, or mildew. Any contaminants on the surface could interfere with the paint’s ability to adhere and may cause peeling or chipping later on.
– For Wood, Metal, and Plaster Surfaces
Use a mild detergent and warm water to clean the surface, scrubbing with a sponge or cloth to remove any dirt or debris. Rinse the surface thoroughly with clean water and let it dry completely before moving on to the next step.
– For Concrete and Masonry Surfaces
Concrete and masonry surfaces require special attention due to their porous nature. Use a commercial cleaner specifically designed for these surfaces to remove any efflorescence, dirt, or grease. Follow the manufacturer’s recommendations for application and rinsing to achieve the best results.
• Removing Loose or Peeling Paint
If the surface has existing paint that is loose or peeling, you must remove it before applying a new coat. Failure to do so may result in the new paint not adhering properly, leading to further peeling and chipping.
– For Wood, Metal, and Plaster Surfaces
Use a paint scraper or putty knife to carefully scrape away any loose or peeling paint. If the paint is more stubborn, consider using a heat gun or an infrared paint removal tool to soften the paint, making it easier to remove.
Be sure to follow safety precautions when using these tools, as they can become hot and pose a burn risk. Another option is using a chemical paint remover, but be sure to follow the manufacturer’s instructions and use proper safety gear.
– For Concrete and Masonry Surfaces
Peeling paint on concrete surfaces can be removed using a wire brush or a power washer. Be careful not to damage the surface when using a power washer by adjusting the pressure accordingly.
• Sanding the Surface
Sanding the surface helps to smooth out any rough spots or imperfections and provides a better surface for the paint to adhere to.
– For Wood Surfaces
Use medium-grit sandpaper to sand the entire surface, moving in the direction of the wood grain. Be sure to remove any dust or debris created by sanding before moving on to the next step.
– For Metal Surfaces
Metal surfaces should be sanded using a medium-grit sanding sponge or sandpaper specifically designed for metal. Be sure to remove any dust or debris created by sanding before proceeding.
– For Plaster and Concrete Surfaces
Plaster and concrete surfaces may only require light sanding to smooth out any rough spots or imperfections. Use a fine-grit sanding sponge or sandpaper to achieve the desired smoothness.
• Filling Holes and Cracks
Holes, cracks, or other imperfections in the surface should be filled prior to painting to ensure a uniform, professional-looking finish.
– For Wood Surfaces
For small holes, dents, or shallow cracks in wood surfaces, use a wood filler or putty to fill in the imperfections. Sand the filled areas smoothly and remove any dust or debris before proceeding.
– For Metal Surfaces
For small holes, dents, or shallow cracks in metal surfaces, use an appropriate metal filler or putty. Sand the filled areas smooth and remove any dust or debris prior to painting.
– For Plaster and Concrete Surfaces
For cracks in plaster and concrete surfaces, use a patching compound specifically designed for these types of surfaces. Apply the compound according to the manufacturer’s instructions and allow it to dry completely before sanding the patched areas smooth.
• Applying a Primer
Priming the surface is essential for promoting proper paint adhesion and achieving a smooth, even finish. Choose a primer that is compatible with the chosen paint and apply it according to the manufacturer’s guidelines. Allow the primer to dry completely before moving on to the paint application.
Now that your surface is thoroughly prepared, you are ready to apply your paint coating. By following these steps and using the appropriate materials for your surface type, you can achieve a professional, long-lasting paint job that enhances the beauty and functionality of your space.
Step | Description |
|---|---|
1. Cleaning | Remove dirt, dust, and other debris from the surface using a cloth, sponge or vacuum cleaner. |
2. Repairing | Fill any cracks, holes, or imperfections on the surface with a suitable filler, and allow it to dry. Sand the filled areas smooth once dry. |
3. Sanding | Sand the entire surface using fine-grit sandpaper to ensure even paint coverage and adhesion. This also removes any glossy or rough surface areas. |
4. Wiping | Wipe down the surface with a damp cloth to remove any sanding dust, and allow it to dry completely. |
5. Applying primer | Apply a coat of primer to the surface, if necessary, to improve the adhesion of the paint to the surface and to create a uniform base for the paint. Allow the primer to dry before painting. |
Tips to Prolong the Lifespan of Your Paint Job
We will discuss various tips and techniques on how to make your paint last longer. Properly maintaining and preserving your paint can greatly extend its lifespan, providing you with beautiful, vibrant colors for years to come.
• Use Quality Paint and Materials
Starting with high-quality paint and materials is an essential factor in ensuring the longevity of your paint job. It is advisable to purchase paint from reputable manufacturers, as this will ensure that the paint is made from durable materials and is resistant to fading, cracking, and peeling.
Check for a Paint and Coatings Industry (PCI) certification to ensure you are using quality paint.
Moreover, investing in good-quality brushes and rollers, which are designed to apply the paint evenly and smoothly, can further enhance your paint job’s lifespan.
• Proper Surface Preparation
Preparing the surface you plan on painting is crucial, as this will help the paint adhere properly and last longer. Here are some steps to follow for proper surface preparation:
- Clean the surface: Remove any dirt, dust, or grime using a mild detergent and water. Do not use harsh chemicals, as these can damage the surface and interfere with paint adhesion.
- Remove any loose or peeling paint: Use a scraper, wire brush, or sandpaper to remove any loose or peeling paint from the surface.
- Repair any damage: Fill any holes, cracks, or imperfections on the surface with an appropriate filler or patching compound. After the filler has dried, sand the surface smooth.
- Priming: Applying a quality primer can help provide a uniform surface and improve paint adhesion.
• Choosing the Right Weather Conditions
Weather conditions can greatly affect the drying and curing process of paint. It’s advisable to avoid painting during extreme temperatures or high humidity since these factors can lead to poor paint adhesion and other issues.
Ideal conditions for painting outdoors are when the temperature is between 50F – 90F (10C – 32C), with low humidity. For indoor paint jobs, ensure proper ventilation to help with the drying process.
• Apply the Paint Correctly
The way you apply the paint plays a crucial role in its longevity. Here are some tips on how to ensure proper paint application:
- Use the right tools: Use brushes and rollers of the appropriate size and material for the type of paint and surface you are working with.
- Paint in a systematic manner: Start at the top of the surface and work your way down, using a combination of horizontal and vertical strokes to achieve an even finish.
- Apply multiple coats: Applying multiple coats of paint can provide a more durable and longer-lasting finish. Allow each coat to dry thoroughly before applying the next.
- Use the right amount of paint: Do not overload your brush or roller with too much paint, as this can lead to drips and uneven coverage. Instead, apply a thin and even coat and gradually build up the layers as needed.
• Ongoing Maintenance
Regularly inspecting and maintaining your painted surfaces can greatly extend their lifespan. Follow these tips for ongoing paint maintenance:
- Clean surfaces regularly: Wipe down painted surfaces with a damp cloth to remove dust and dirt buildup.
- Touch up any imperfections: Address small chips, peels, or cracks as soon as they are noticed. Clean the affected area, sand if necessary, and apply a fresh coat of paint.
- Protect from sunlight and moisture: Too much exposure to sunlight and moisture can lead to paint fading or peeling. If possible, use window treatments to block direct sunlight and ensure proper ventilation to minimize moisture buildup.
- Use appropriate cleaning products: Use mild, non-abrasive cleaning products designed for use on painted surfaces to avoid damaging the paint or surface.
By following these expert tips and techniques, you can ensure that your paint lasts longer and looks fresh and vibrant for years to come. Proper care and maintenance will not only enhance the beauty of your painted surfaces but also save time and money in the long run.
Consequences of Skipping Surface Preparation in Painting
Proper surface preparation is a crucial step in ensuring a successful and long-lasting paint job. Failing to apply adequate surface preparation can lead to numerous issues and ultimately compromise the quality of the finished product.
• The Consequences of Skipping Surface Preparation
Neglecting the essential step of surface preparation can lead to a variety of problems, some of which include:
– Poor Adhesion
When a surface is not adequately prepared, it can be difficult for the paint to bond and create a strong adhesion. This can result in peeling, flaking, or bubbling paint shortly after application, which not only looks unsightly but could also require costly and time-consuming repairs.
– Uneven Paint Coverage
A lack of surface preparation can result in an uneven appearance, as the paint is absorbed differently across the surface. This can lead to visible patches or streaks in the final paint job, which is hardly a desirable outcome.
– Increased Paint Consumption
An improperly prepared surface may absorb more paint than necessary, leading to uneven coverage and increased paint consumption. This not only wastes resources but also adds unnecessary expenses to the project.
– Shortened Lifespan
Without proper preparation, a paint job is more likely to experience premature failure, which means more frequent repainting and added expenses for maintenance.
– Additional Repairs
Failing to address underlying issues on a surface, such as mold, mildew, or structural damage, can cause further damage over time. This can lead to the need for costly repairs and additional preparatory work before repainting can be carried out.
• Key Steps in Surface Preparation
To avoid the aforementioned issues, thorough surface preparation is essential. The following steps are recommended for achieving a successful paint job:
– Cleaning the Surface
Remove dirt, dust, grease, and other contaminants through power washing or using a mild detergent and water solution. Pay particular attention to areas with mold or mildew growth, which may require a special cleaning product or bleach solution.
– Scraping and Sanding
Remove any loose or flaking paint by scraping, sanding, or using a wire brush. This ensures that the new paint will bond adequately to the surface, preventing future issues with adhesion. Be sure to wear a dust mask and safety goggles during this process to avoid inhaling dust particles or debris.
– Repairing Damaged Areas
Fill any cracks, holes, or other imperfections with a suitable filler, such as wood filler or exterior-grade spackle. Allow the filler to dry, then sand it down to create a smooth, even surface.
– Applying Primer
A high-quality primer is essential for ensuring optimal adhesion and a smooth, even finish. Choose a primer that is appropriate for the surface material and the type of paint being used.
Apply the primer according to the manufacturer’s instructions and allow it to dry thoroughly before proceeding with the paint application.
– Taping and Covering
Protect adjacent surfaces, such as wood trim, windows, and door frames, by applying painter’s tape or masking tape to create clean, sharp lines. Additionally, cover any nearby items or areas that need protection from paint, such as furniture or landscaping.
• Final Thoughts on Surface Preparation
In conclusion, skipping surface preparation before painting can lead to numerous issues, including poor adhesion, uneven paint coverage, increased paint consumption, a shortened lifespan of the paint job, and the need for additional repairs.
By following the recommended steps for proper surface preparation, you can significantly improve the quality and longevity of your paint job, saving both time and money in the long run.