Get Rid Of Rusty Surfaces And Loose Paint. What Pros Say
Tired of unsightly rusty surfaces and dealing with pesky loose paint around your home or workspace? You’ve come to the right place. Armed with proven methods and practical advice, we’ll guide you through the process of transforming those eyesores into aesthetically pleasing and functionally sound surfaces.
Get rid of rusty surfaces and loose paint:
To eliminate rust and loose paint, first, identify affected areas and choose the right tools and materials, such as a wire brush, paint scraper, sandpaper, and protective gear. Clean the surface, then remove rust and paint using manual methods or power tools, and sand the area smooth. Clean up debris and consider priming, painting, or sealing the surface as needed. Always prioritize safety during the process.

Tired of unsightly rust and peeling paint ruining the aesthetics of your surfaces? Don’t worry. We have the perfect solutions for you! Continue reading as we unveil effective methods to remove rust, loose paint, and rejuvenate your surfaces like never before.
Contents
- 1 Eliminate Rusty Surfaces and Loose Paint
- 2 Removing Surface Rust Safely Without Harming Paint
- 3 Remove Rust from Metal before Painting
- 4 Dissolving Surface Rust: What’s Effective?
- 5 Consequences of Painting Over Surface Rust
Eliminate Rusty Surfaces and Loose Paint
Rust and loose paint on surfaces can be eye sores while also posing potential risks for your home’s structural integrity. To prevent further damage and improve the appearance of your space, follow these steps to effectively eliminate rust and loose paint.
• Identify the Affected Areas
First, inspect your property, both indoors and outdoors, to identify the areas affected by rust and loose paint. Be sure to check corners, door and window frames, plumbing fixtures, and outdoor furniture.
Take note of the affected areas, as this will help you prioritize and plan your cleaning process more efficiently.
• Choose the Right Tools and Materials
Once you have identified the rusty and loose paint areas, it’s time to gather the right tools and materials to remove them successfully. Some essential tools and materials you may need include:
- Wire brush or bristle brush
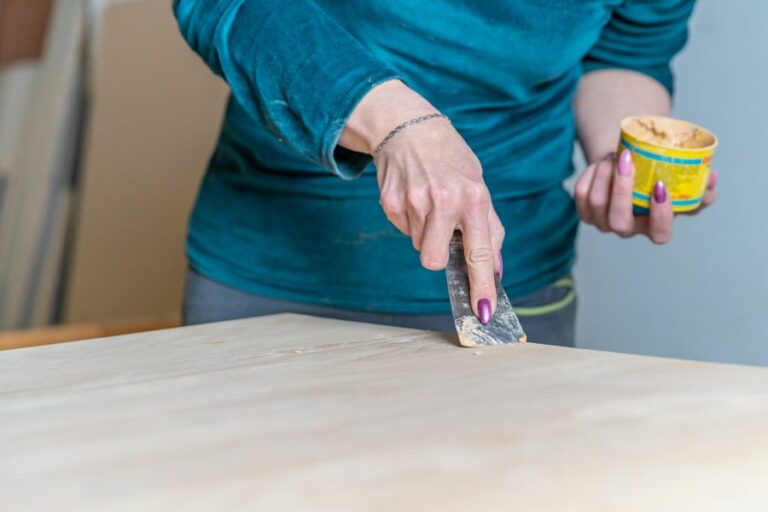
- Paint scraper or putty knife
- Sandpaper or sanding block (medium to coarse grit)
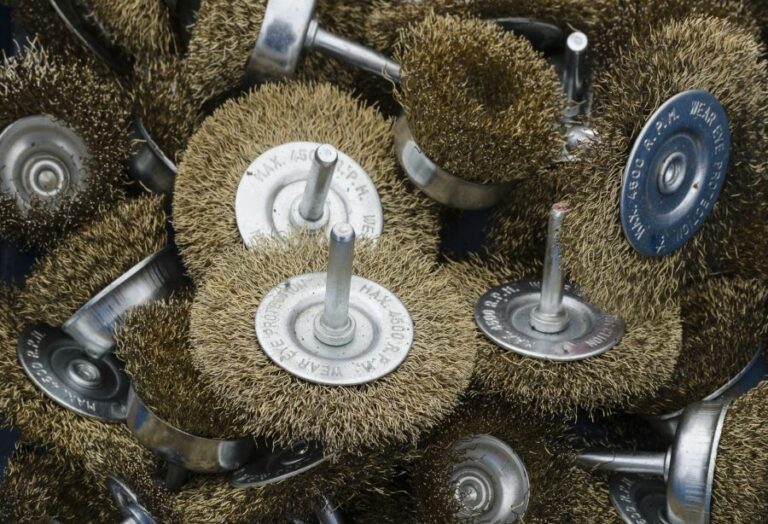
- Power sander or drill with wire brush attachment (optional)
- Chemical rust remover or paint stripper (optional)
- Protective gloves and eyewear
- Drop cloths or plastic sheeting
I recommend using power tools only when dealing with large or severely affected areas. Also, be cautious when using chemical rust removers or paint strippers, as they can be harmful to your skin and the environment if not properly handled.
• Prepare the Surface
Before starting the rust and paint removal process, it’s important to prepare the surface by cleaning it. Use a rag or soft brush to remove dirt, dust, and debris from the affected area. After this, lay out drop cloths or plastic sheeting to protect the surrounding area from any falling debris.
• Begin the Rust and Paint Removal Process
– Manual Removal
For small and moderately affected areas, use a wire brush, bristle brush, or paint scraper to remove rust and loose paint. Begin by applying moderate pressure and using back-and-forth motions.
This method may require more time and effort, but it provides precise control over the removal process.
– Sanding
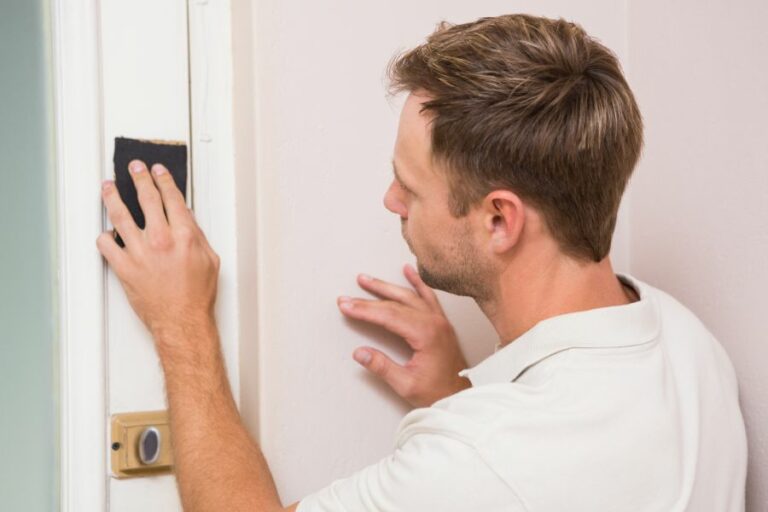
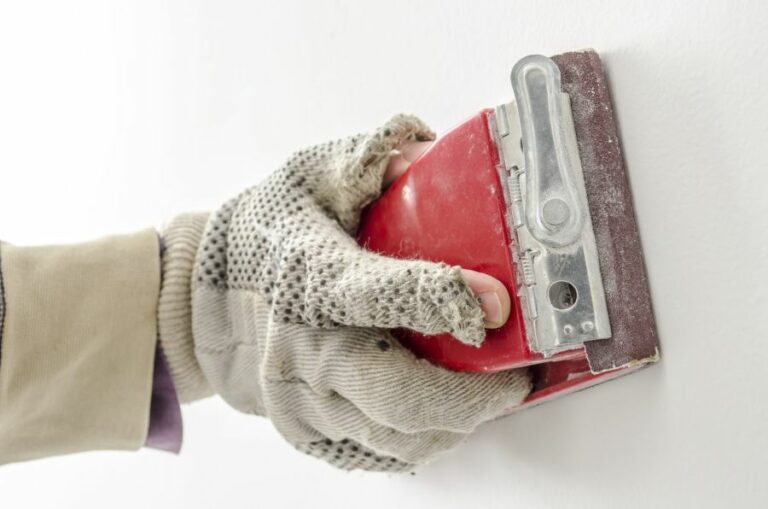
Once the majority of the rust and loose paint have been removed, smooth the surface with sandpaper or a sanding block. Start with medium-grit sandpaper and work your way to a finer grit if necessary. Be sure to sand following the grain or direction of the surface material.
– Power Tools
For larger or more severely affected areas, a power sander or drill with a wire brush attachment can be more efficient. Use the power tool in a controlled and slow manner, being careful not to apply too much pressure that could damage the underlying surface.
Remember to wear protective gear when using power tools.
– Using Chemicals
In some cases, using a chemical rust remover or paint stripper can be the most effective method. Always follow the manufacturer’s instructions, and be sure to protect yourself with appropriate safety gear.
Allow the chemical to work for the recommended time before using a wire brush, scraper, or power tool to remove the loosened rust and paint.
• Clean Up and Final Touches
After you have successfully removed the rust and loose paint, it’s important to clean the area. Use a vacuum or a rag to remove any remaining debris, then wipe the surface clean with a damp cloth. Allow the area to dry before considering to prime, paint, or seal the surface if necessary.
In conclusion, successfully removing rust and loose paint from surfaces may require a combination of manual sanding, power tools, and chemical processes. While this task may be labor-intensive, the results can significantly improve the appearance and longevity of your property.
Always remember to prioritize safety and protect yourself and the surrounding areas as you work.
Removing Surface Rust Safely Without Harming Paint
Surface rust on painted surfaces is a common issue faced by many car owners and homeowners. It not only makes the surface look unattractive but can also cause long-term damage if not dealt with promptly.
• Identifying Surface Rust
Surface rust is the initial stage of rust development, usually characterized by a brownish, flaky texture. It forms due to the oxidization of iron when exposed to air and moisture. If left untreated, it can spread and penetrate deeper, eventually causing structural damage.
Identifying surface rust early on is vital to containing it before it causes further damage.
• Gathering the Necessary Supplies
To remove surface rust effectively without harming the paint, the following supplies are recommended:
- Mild soap or automotive cleaning solution
- Bucket of water
- Microfiber cloth or sponge
- Soft bristle brush (optional)
- Rust remover (non-abrasive, pH-balanced)
- Paint-safe polishing compound
- Wax or sealant
Before starting, make sure to read the instructions on the rust remover and other chemicals to ensure safe and correct usage.
• Cleaning the Affected Surface
The first step in removing surface rust is cleaning the area around the rust. This step will ensure that no dirt or debris interferes with the rust removal process.
- Mix soap or the automotive cleaning solution with water in a bucket.
- Soak the microfiber cloth or sponge in soapy water and gently clean the surface rust and surrounding area.
- Rinse the cloth or sponge and repeat the process, ensuring that all traces of dirt and soap are removed.
- Pat the area dry using a clean microfiber cloth or let it air dry.
• Applying Rust Remover
Applying a non-abrasive, pH-balanced rust remover to the area ensures that the rust is neutralized without causing damage to the paint.
- Dampen a clean microfiber cloth with a rust remover, making sure not to oversaturate the cloth.
- Gently rub the rust remover onto the surface rust using a circular motion, applying moderate pressure.
- Allow the rust remover to sit on the surface for the recommended time, usually 5 to 15 minutes.
- Rinse the area thoroughly with water, removing all traces of rust remover.
- Use a soft bristle brush to remove any stubborn rust spots, being careful not to scratch the paint.
Note: Always follow the manufacturer’s instructions for the rust remover, as some products need to be diluted before use.
• Using a Paint-Safe Polishing Compound
A paint-safe polishing compound will help restore the paint’s shine and blend the affected area with the surrounding paint.
- Apply a small amount of the polishing compound to a clean microfiber cloth or polishing pad.
- Gently rub the polishing compound onto the painted surface using overlapping, circular motions.
- Allow the compound to dry to a haze, as indicated by the manufacturer’s instructions.
- Buff the hazy residue using a clean microfiber cloth, revealing a polished surface beneath.
Note: Always follow the manufacturer’s instructions for the polishing compound to achieve the best results.
• Applying Wax or Sealant
After the rust has been removed and the paint polished, it is important to protect the surface using wax or sealant to avoid further damage.
- Apply the wax or sealant to a clean applicator pad or microfiber cloth.
- Spread the wax or sealant onto the treated area using a crosshatch pattern, ensuring full coverage.
- Allow the wax or sealant to dry to a haze, as indicated by the manufacturer’s instructions.
- Buff the surface with a clean microfiber cloth, removing the haze and leaving a protective finish.
– Additional Resources
For further information on rust prevention and removal, consult reliable resources like this guide from The National Association of Corrosion Engineers (NACE), which provides comprehensive information on rust and corrosion mechanisms.
• Conclusion
Removing surface rust without damaging the paint is a straightforward process when using the correct supplies and following the steps outlined above.
Regular maintenance and prompt treatment of rust spots will help preserve the paint’s appearance and prolong the lifespan of your car’s body or other metal surfaces.
Step | Description |
|---|---|
1. Clean the area | Use a cloth and some soapy water to clean the rusty surface to remove any dirt or debris. |
2. Apply a rust remover | Apply a rust remover specifically designed for automotive paint. Follow the instructions on the rust remover product for the best results. |
3. Use a fine abrasive pad | Gently rub the rusty area with a very fine abrasive pad to help remove the surface rust. Be careful not to apply too much pressure, which could damage the paint. |
4. Wipe away the rust | Use a clean cloth or microfiber towel to wipe away the rust as it is removed from the surface. |
5. Rinse and dry | Rinse the area with clean water and dry it off completely with a clean, dry cloth. |
6. Apply wax or sealant | Apply wax or sealant to the treated area to protect the paint from future rust formation. |
Remove Rust from Metal before Painting
Rust is a common problem faced by metal objects due to oxidation caused by exposure to moisture, air, and chemicals. It is essential to remove rust before applying paint to maintain the integrity of the metal and the quality of its appearance.
• Required Tools and Safety Precautions
Before diving into the rust removal process, gather the necessary tools and ensure proper safety measures are followed. Here is a list of basic tools required for rust removal and painting:
- Wire brush
- Sandpaper (varying grit sizes)
- Power sander (optional)
- Electric drill with wire brush attachment (optional)
- Rust removal chemical solutions (optional)
- Paint primer
- Rust-resistant paint
- Paintbrush or paint sprayer
- Protective gloves
- Safety goggles
- Face mask
Safety precautions:
- Always wear protective gloves, safety goggles, and a face mask when working with chemicals and handling abrasive materials like sandpaper.
- Always follow the manufacturer’s instructions when using rust removal chemicals or power tools.
• Step 1: Mechanical Rust Removal
The first step to remove rust from metal is called mechanical rust removal. This method involves using physical force to scrape away the rust. With the help of a wire brush, start scrubbing the rusted area to remove the loose rust particles.
For stubborn rust, use sandpaper with varying grit sizes to effectively remove the rust. Start with coarse-grit sandpaper (80-120 grit) and gradually move to finer-grit sandpaper (180-240 grit) to achieve a smooth surface.
An alternative method is using an electric drill with a wire brush attachment or a power sander to remove the rust efficiently.
The goal is to remove all visible rust and to achieve a smooth surface to prepare for the next step: chemical rust removal.
• Step 2: Chemical Rust Removal
Mechanical rust removal may not be sufficient to remove rust from areas that are hard to reach or have deep rust penetrations.
In such cases, a chemical rust removal solution is applied to dissolve the rust. Consider using a commercial rust remover that has phosphoric or oxalic acid for the best results.
Follow the instructions on the product packaging, which usually involve applying the solution on the rusted area, leaving it to react for a specified amount of time, and rinsing it with water. Be sure to wear protective gloves and goggles while working with chemicals.
• Step 3: Cleaning and Drying the Metal Surface
After removing the rust, it’s essential to clean the metal surface to remove any residue left behind. Use water and mild soap to clean the surface thoroughly.
After cleaning, ensure the surface is completely dry by using a clean cloth or air drying. Any moisture remaining on the surface may encourage new rust formation.
• Step 4: Applying Primer
Primer is a crucial step that serves as a base for the paint, ensuring better adhesion and protection against rust.
Choose a rust-inhibiting primer to create a protective barrier between the metal and the paint. Apply the primer evenly on the metal surface using a paintbrush or a paint sprayer, following the manufacturer’s instructions. Wait for the primer to dry completely before proceeding to the next step.
• Step 5: Painting the Metal Surface
Now that the metal surface is free of rust, clean, and primed, it’s time to apply rust-resistant paint. Choose a high-quality, rust-resistant paint that is specifically formulated for metal surfaces. The paint can be applied using a paintbrush or a paint sprayer, depending on your preference.
Follow the manufacturer’s instructions for the proper application techniques, number of coats, and drying time.
Aim for a smooth, even coat without any visible brush strokes or uneven surfaces. Allow the paint to dry completely between coats and after the final coat to ensure long-lasting, durable results.
• Conclusion
Removing rust from metal and preparing it for painting is a multistep process that requires time, effort, and the right tools. By following these detailed steps, you can successfully remove rust and restore the metal surface for a fresh, durable finish.
Always prioritize safety when working with chemicals and power tools to maintain a safe work environment.
Step | Description |
|---|---|
1 | Put on safety gear (gloves, safety goggles, and a mask) before starting the rust removal process. |
2 | Use a wire brush to scrape off large rust deposits. Alternatively, you can use a chemical rust remover or a vinegar solution to dissolve the rust. |
3 | For smaller rust spots, use sandpaper or a sanding sponge to remove the remaining rust. |
4 | Wipe off the surface with a damp cloth to remove dust and debris, then let it dry completely. |
5 | Apply a primer designed for use on metal. This will help prevent rust from reoccurring and will also help the paint to adhere to the surface. Let the primer dry according to the manufacturer’s instructions. |
6 | Apply rust-inhibiting metal paint in thin, even coats. Allow each coat to dry before applying the next coat, as per the manufacturer’s instructions. Typically, two to three coats are needed for complete coverage and durability. |
7 | Let the final coat of paint dry thoroughly, then seal the painted surface with a clear coat or a rust-inhibiting spray, if desired, for added protection. |
Dissolving Surface Rust: What’s Effective?
Every metal object, from the smallest tools to large machinery, can become a victim to the damaging effects of rust. Surface rust, as the name suggests, appears on the surface of metal objects, giving them a reddish-brown appearance.
• What Causes Surface Rust?
Surface rust is the result of the metal reacting with moisture and oxygen in the environment. This chemical reaction forms iron oxide, which is commonly known as rust.
Factors such as humidity, temperature, and the presence of salt can accelerate this process, causing more severe rusting.
• Methods to Dissolve Surface Rust
There are various methods and solutions that can be used to dissolve and remove surface rust effectively. Here, we will discuss the most commonly used and effective ways to remove rust from metal items.
– Vinegar: A Natural Solution for Surface Rust Removal
Vinegar is an excellent household item that can be used to dissolve surface rust. Its acetic acid content penetrates and reacts with iron oxide, loosening the rust from the metal surface.
How to use vinegar for rust removal:
- Pour white vinegar into a container large enough to accommodate the rusted object.
- Submerge the rusted object in the vinegar and let it soak for several hours or overnight. The duration will depend on the severity of the rust.
- Remove the object from the vinegar solution and scrub off the loosened rust using a brush, steel wool, or a scouring pad.
- Rinse the object with water and dry it thoroughly to prevent the formation of new rust.
– Baking Soda: A Gentle and Effective Rust Remover
Baking soda, also known as sodium bicarbonate, is a gentle yet effective rust remover. This commonly found kitchen ingredient can help to break down and dissolve surface rust on your metal items.
How to use baking soda for rust removal:
- Mix baking soda with water to create a thick paste.
- Apply the paste to the rusted area and let it sit for an hour.
- Use a brush, steel wool, or a scouring pad to scrub the rust away.
- Rinse the object with water and dry it thoroughly to prevent the formation of new rust.
– Citric Acid: A Powerful Rust-Dissolving Agent
Citric acid, found in lemon juice and other citrus fruits, is a powerful rust-dissolving agent. It is potent enough to remove stubborn rust yet gentle enough not to damage the metal surface.
How to use citric acid for rust removal:
- Mix a solution of citric acid and warm water in a container large enough to accommodate the rusted object.
- Submerge the rusted object in the citric acid solution and let it soak for several hours or overnight, depending on the severity of the rust.
- Remove the object from the solution and scrub off the loosened rust using a brush, steel wool, or a scouring pad.
- Rinse the object with water and dry it thoroughly to prevent the formation of new rust.
– Commercial Rust Removers: Effective Solutions for Stubborn Rust
Commercial rust removers, such as Evapo-Rust, Rust-Oleum Rust Dissolver, and WD-40 Specialist Rust Remover Soak, are designed to tackle rust specifically and can be highly effective in dissolving surface rust. They can be found at your local hardware store or online.
How to use commercial rust removers:
- Follow the instructions on the product label, as the application process may vary depending on the specific rust remover.
- Typically, you will need to submerge the rusted object in the rust remover solution for a specified period of time.
- Remove the object from the solution and scrub off any remaining rust using a brush, steel wool, or a scouring pad.
- Rinse the object with water and dry it thoroughly to prevent the formation of new rust.
• Preventing Surface Rust
Prevention is better than cure, and this saying holds true when it comes to rust. To avoid rust formation on your metal items, follow these simple tips:
- Keep your metal objects dry and store them in a low-humidity environment.
- Use silica gel packets or dehumidifiers to control humidity levels in storage areas.
- Apply rust-resistant coatings, such as paint or wax, to protect metal surfaces.
- Perform regular inspections and clean your metal objects to remove dust, dirt, and moisture that can make them susceptible to rust.
• Conclusion
Surface rust can damage metal objects and reduce their functionality and aesthetic appeal. By using natural solutions like vinegar, baking soda, and citric acid or commercial rust removers, you can effectively dissolve surface rust and prolong the life of your metal items.
Additionally, taking preventive measures and regularly cleaning your metal objects will help to maintain their appearance and functionality.
For more information on rust prevention and removal, visit the National Association of Corrosion Engineers (NACE) website.
Consequences of Painting Over Surface Rust
Surface rust is a common issue faced by many people, especially when dealing with metal structures or objects exposed to moisture and air. Often, people consider painting over the rust as a solution to improve the appearance and protect the metal. But is this the right approach?
• Consequences of Painting Over Surface Rust
– Trapped Rust Continues to Spread
When you paint over surface rust, you are essentially trapping the rust underneath the paint layer. This means that the rust will continue to spread, even if it’s not visible. As a result, this can compromise the integrity of the metal structure or object and ultimately lead to complete corrosion.
Research from the University of Akron has shown that the presence of rust can also cause weaknesses and gaps when the paint is applied. This means that while the painted surface may look good initially, the paint will eventually peel or flake, leading to further rusting issues.
– Paint Adhesion and Longevity Issues
Painting over rust can also lead to poor adhesion of paint. The reason behind this is that rust is typically porous and can contain moisture, oils, and salts. These substances can prevent the paint from properly adhering to the surface, leading to peeling, cracking, or chipping in the future.
Moreover, even if the paint does manage to adhere initially, the constant expansion and contraction of rust underneath the paint layer can cause the paint to lose its bond with the metal.
This will eventually lead to paint failure and expose the metal surface to the elements again, further perpetuating the rusting process.
• How to Properly Prepare and Paint Rusty Surfaces
To ensure the most effective and long-lasting protection against rust for your metal surfaces, it is essential to follow the correct preparation and painting techniques.
– Remove Loose Rust and Scaling
Before any painting, it is important to remove any loose rust or scaling from the metal surface. This can be achieved through the use of wire brushes, scrapers, or sandpaper.
A power tool, such as an angle grinder with a wire brush attachment, can provide a more efficient removal process for larger areas.
– Clean the Surface
Once the loose rust and scaling have been removed, it’s crucial to clean the surface thoroughly. This can be done with a rag and a mixture of water and mild detergent. Be sure to remove any dirt, grease, or oils from the surface to improve paint adhesion.
If possible, I recommend using a phosphoric acid-based rust remover or converter to dissolve any remaining rust and create a stable surface for painting.
These products can be found at most local hardware stores or online. Please ensure to follow the instructions carefully provided by the manufacturer.
– Prime the Surface
To further protect the surface and enhance paint adhesion, it is essential to apply a quality rust-inhibiting primer. These primers are specifically designed to chemically react with any remaining rust particles and provide a tight bond to the metal surface.
Allow the primer to dry as per the manufacturer’s instructions before proceeding to paint.
– Apply the Paint
Now that your surface is prepped and primed, it is time to apply the paint. Choose a paint specifically designed for metal surfaces and, if possible, one that contains rust-inhibiting properties.
Apply the paint according to the manufacturer’s instructions, typically in multiple thin layers, allowing for proper drying time between each layer.
• Conclusion
In conclusion, painting over surface rust without proper preparation can lead to a range of problems, including continued rust spreading, poor paint adhesion, and reduced paint longevity.
To protect your metal structures or objects against rust and improve their appearance, it is crucial to follow the recommended preparation and painting techniques outlined above.
Step | Description |
|---|---|
1. Painting over rust | If you paint over surface rust without removing it, the rust will continue to spread beneath the paint layer. |
2. Rust expands | As rust spreads, it expands and can cause the paint to chip, crack, or peel away. |
3. Compromised protection | The protective qualities of the paint will be compromised, and the surface beneath becomes more vulnerable to further rusting and degradation. |
4. Further damage | Over time, the surface will become weakened and may require more extensive repairs or replacement (depending on the material and application). |
Recommended solution | To avoid these issues, it is essential to remove rust and treat the surface with a rust converter or primer before applying paint. |

