Achieving Strong Paint Adhesion With Profiling. What Pros Say
Are you struggling with achieving strong paint adhesion on a variety of surfaces? Look no further because we’ve got the solution for you. Profiling is the key to ensuring that your paint bonds exceptionally well, providing the durability and longevity you need for your project. The following article will explore how profiling improves paint adhesion and guide the best techniques to achieve the desired results.
Achieving strong paint adhesion with profiling:
Achieving strong paint adhesion requires proper surface profiling, which involves cleaning the surface, creating a suitable texture, and removing weak or damaged layers. Various techniques, such as abrasive blasting, mechanical and chemical profiling, can be used depending on the substrate material, paint type, and project environment. To ensure optimal adhesion, measuring the surface profile and following specific recommendations, such as using appropriate tools, training operators, and adhering to safety guidelines is essential.

Unlock the secrets to achieving impeccable paint adhesion through profiling techniques. Learn about various methods and factors that lead to strong bonds and flawless finishes. Read on to become an expert on attaining outstanding paint adhesion for any project!
Contents
- 1 Enhancing Paint Adhesion through Profiling Techniques
- 2 Boosting Paint Adhesion: Effective Methods & Strategies
- 3 Identifying Factors for Paint Adhesion Test Failures
- 4 Exploring Factors that Promote Better Adhesion
- 5 Conducting Tests for Optimal Paint Adhesion Performance
Enhancing Paint Adhesion through Profiling Techniques
• Importance of Surface Profiling
Strong paint adhesion is crucial in ensuring a long-lasting, high-quality paint finish. Surface profiling, also known as surface preparation, is an essential step to achieving proper adhesion between paint and the substrate. Surface profiling serves three primary functions:
- Cleaning the surface by removing dirt, grease, oils, and other contaminants that can interfere with the bonding process.
- Creating a suitable texture or roughness (profile) to provide the necessary surface area and mechanical bonding points for the paint to adhere properly.
- Removing weak or damaged layers of the substrate, like rust or oxidization, to uncover a solid foundation for the paint to bond with.
• Proper Techniques for Surface Profiling
There are numerous methods and tools available for achieving the desired surface profile. The choice of technique depends on various factors, such as the substrate material, paint type, and project environment.
The following section discusses some widely used profiling methods, along with their benefits and limitations.
– Abrasive Blasting
Abrasive blasting, also known as sandblasting, is a powerful surface profiling technique. It employs high-pressure air to propel abrasive media against the substrate, removing contaminants while creating a rough, textured surface.
Abrasive blasting can be conducted using various media types, such as silica sand, steel shot, or even crushed walnut shells.
Pros:
- Effective for heavy rust, scale, or paint removal.
- Produces a uniform surface profile, ideal for strong adhesion.
- Capable of profiling large areas quickly and efficiently.
Cons:
- Can generate significant amounts of dust, posing environmental and worker health concerns.
- May require specialized equipment and trained operators.
- Can potentially damage delicate substrates or etch the surface excessively.
– Mechanical Profiling
Mechanical methods, like grinding, wire brushing, or scarifying, use power tools to remove contaminants or roughen the surface. These methods utilize abrasive discs, wire brushes, or other attachments specifically designed for surface profiling.
Pros:
- Economical and widely available equipment, ranging from handheld to large-scale machines.
- Effective for removing old coatings or other surface contaminants, as needed.
- Precise control over the depth and pattern of the surface profile.
Cons:
- May not be the most efficient method for large-scale projects.
- Can produce heat, potentially affecting the substrate or operator.
- The quality of the profile may depend on the operator’s skill and experience.
– Chemical Profiling
Chemical etching or profiling employs chemical reactions to clean the substrate and create an anchor pattern on the surface. Acid or alkaline solutions are applied to the surface, which interacts with the substrate and dissolves contaminants while also roughening the surface.
Pros:
- Can be executed with readily available, low-cost consumables.
- Generates minimal dust or debris, reducing environmental concerns.
- Capable of achieving consistent and controlled surface roughness.
Cons:
- Potentially hazardous to the operator and the environment, requiring proper handling and disposal.
- May be slower and less effective for heavily contaminated substrates.
- Not universally compatible with all substrate materials and conditions.
• The Importance of Measuring Surface Profile
To ensure that the chosen profiling method produces the proper anchor pattern for strong paint adhesion, it is essential to measure the surface profile.
International paint and coating organizations, such as SSPC and NACE, have established standards for measuring surface profiles based on the anticipated method of profiling and the desired profile range. Measurement tools typically include replica tapes, stylus profilometers, or visual comparators.
• Final Recommendations for Achieving Strong Paint Adhesion
Based on personal experience, the following recommendations are provided to achieve strong paint adhesion through proper surface profiling:
- Conduct thorough research on the chosen profiling method to ensure compatibility with your substrate material, paint type, and project environment.
- Utilize the appropriate tools and equipment for the chosen profiling method and always follow the manufacturer’s guidelines.
- Train operators adequately to execute the profiling process effectively and safely.
- Regularly monitor surface profile during the profiling process and make necessary adjustments to achieve optimal adhesion between paint and substrate.
- Always follow proper safety and environmental guidelines related to each profiling method, including hazardous waste disposal or the use of personal protective equipment.
By considering these recommendations and embracing the importance of proper surface profiling, you can significantly improve the quality and longevity of your paint projects, ensuring successful outcomes and satisfied clients.
Boosting Paint Adhesion: Effective Methods & Strategies
When it comes to painting, ensuring that the paint adheres properly to the surface is crucial for a long-lasting and durable finish. Let’s explore various methods that can be employed to boost the adhesion of paint.
From surface preparation and choosing the right paint to application techniques and professional recommendations, this comprehensive guide is your go-to resource for improving paint adhesion.
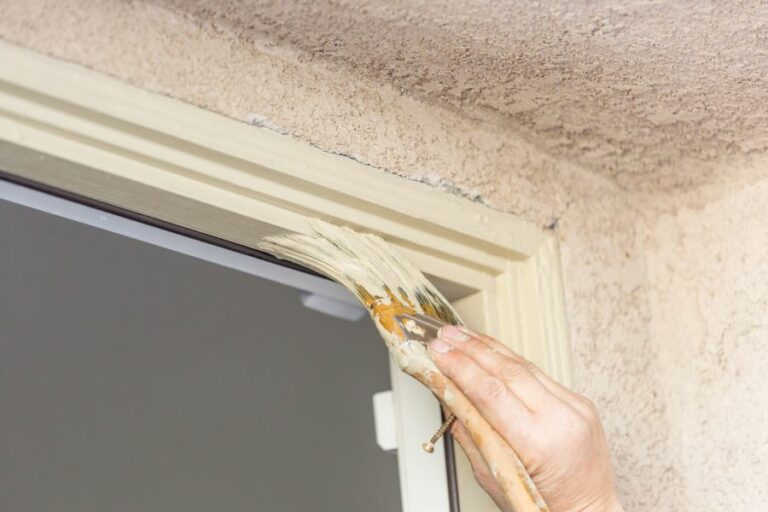
• Surface Preparation: The Foundation of Adhesion
The key to achieving optimal paint adhesion lies in proper surface preparation. Without a clean, well-prepared base, even the best paint will struggle to bond to the surface. Here are several surface preparation techniques that will significantly increase paint adhesion.
– Cleaning the Surface
A clean surface ensures that paint bonds well, as dirt, grease, and dust can all interfere with adhesion. It is important to wash all surfaces thoroughly with mild detergent and water.
For particularly greasy or grimy areas, a degreaser or trisodium phosphate (TSP) solution can be used. Be sure to rinse all detergents away and allow the surface to dry completely before moving on to the next step.
– Sanding and Scuffing
Sanding is crucial for achieving proper adhesion, as it helps the paint to grip the surface more effectively. Using fine-grit sandpaper (usually 120 to 150 grit), lightly sand the surface to create a smooth and even base.
In addition to removing any old, peeling paint, this process will also help to roughen glossy surfaces, allowing the new paint to key into the substrate more effectively.
– Priming
Applying a high-quality primer is another vital step in surface preparation. Primers are specifically designed to adhere to a range of surfaces and create a uniform, sealed base for the topcoat.
They can also help to fill in small imperfections or uneven areas, ensuring a smooth and consistent finish.
• Choosing the Right Paint
Selecting the appropriate paint for your project is crucial for boosting adhesion. There are several factors to consider when making this decision.
– Oil-Based vs. Water-Based Paint
While both oil-based and water-based paints have their advantages, oil-based paints generally provide better adhesion due to their ability to penetrate deeper into the surface.
However, they can also be more difficult to work with, and many people prefer water-based paints for their ease of use and quicker drying times. Ultimately, the choice between these two types of paint will depend on the specific needs of your project.
– Quality
Investing in high-quality paint will often result in improved adhesion. While it may be tempting to opt for the cheaper option, doing so can lead to a less durable and less adherent finish.
Premium paints generally contain more binding agents and fewer fillers, which contributes to better adhesion and a longer-lasting result.
• Application Techniques
The way in which paint is applied to the surface can also impact its ability to adhere properly. Here are some tips for ensuring optimal adhesion during the application process:
– Use the Right Tools
Good-quality brushes and rollers can make a significant difference in achieving a smooth and even coat of paint. Additionally, using a brush or roller specifically designed for the type of paint being applied can further improve the final result.
– Apply Thin, Even Coats
Applying thinner coats of paint ensures that the surface is adequately covered, which contributes to better adhesion. In general, it is better to apply multiple thin coats rather than one or two thick coats, as this helps create a more uniform and smooth finish.
– Use the Proper Rolling Technique
When using a roller to apply paint, make sure to use long, even strokes and maintain a wet edge to avoid any lap marks. Additionally, ensure that the roller is properly loaded with paint, as too much or too little can affect the overall result.
• Professional Recommendations
As a final note, it is always a good idea to consult with a professional before undertaking any significant painting project. Experienced painters have likely encountered a wide range of adhesion issues and can guide you in selecting the appropriate products and techniques for your specific needs.
Investing in professional knowledge can save time, money, and potential headaches down the line.
In conclusion, achieving optimal paint adhesion involves thorough surface preparation, choosing the right paint, and proper application techniques. Following the steps outlined in this article will ensure a long-lasting, durable finish that stands the test of time.
Step | Description |
|---|---|
1 | Clean the surface: Remove dust, grease, dirt, and debris from the surface to be painted for proper adhesion. |
2 | Sand the surface: Lightly sand the surface with fine-grit sandpaper to create a slightly rough surface for the paint to adhere to. |
3 | Use a primer: Apply a suitable primer to the surface before painting. This creates a stable base for the paint to adhere to and can improve coverage and adhesion. |
4 | Choose the right paint: Select a paint that is specifically designed for the material you are painting and the desired finish. This will help ensure proper adhesion and durability. |
5 | Follow the manufacturer’s instructions: Read and follow the directions provided by the paint manufacturer for optimal adhesion, including recommended drying times and environmental conditions for application. |
6 | Apply multiple thin coats: Rather than applying a single thick coat of paint, apply multiple thin coats, allowing each to dry in between, for better adhesion and a more even finish. |
Identifying Factors for Paint Adhesion Test Failures
Paint adhesion tests are essential for ensuring the success of a painting project, as they help to determine the likelihood of paint sticking to a surface over time. There are several factors that can cause a paint adhesion test to fail.
• Insufficient Surface Preparation
One of the main causes of paint adhesion test failure is poor surface preparation. Before applying paint, it is crucial to properly clean and prepare the surface to ensure good adhesion. This includes removing dirt, grease, oil, and other contaminants, as well as any loose or flaking paint.
For best results, use a degreaser or detergent cleaner, followed by a thorough rinse with clean water. For removing loose paint, we recommend scraping or sanding the surface.
In addition to cleaning, proper surface preparation may also involve abrading the surface. This can improve adhesion by providing a better “tooth” for the paint to grip onto. To accomplish this, using sandpaper or another abrasive material to roughen the surface is highly recommended.
Pro Tip: When preparing a surface for painting, always wear appropriate safety gear and follow the manufacturer’s instructions for the cleaning and surface preparation materials.
• Incompatible Paints and Substrates
Another significant cause of paint adhesion test failure is the incompatibility between the paint and the substrate (the surface being painted). Some paint types simply do not adhere well to particular substrates, leading to poor adhesion and eventual failure.
For instance, certain latex paints may not adhere well to glossy surfaces or substrates containing a high level of moisture. Similarly, using oil-based paint on a substrate that already has a layer of latex paint can cause problems with adhesion.
To avoid these issues, it is essential to choose a paint that is specifically designed for the substrate being painted.
Pro Tip: Consult the paint manufacturer’s guidelines or seek advice from a professional to ensure the appropriate paint is chosen for a given substrate.
• Insufficient Drying Time
Applying paint to a still-damp substrate or not allowing enough drying time between coats can lead to adhesion test failure. When the substrate is not adequately dry, moisture becomes trapped between the paint and substrate, preventing the paint film from securely bonding to the surface.
To avoid this issue, it is essential to adhere to the recommended drying times provided by the paint manufacturer. This includes allowing sufficient time for the substrate to dry after cleaning and prior to applying the paint, as well as between subsequent coats of paint.
Pro Tip: Keep in mind that weather conditions, such as temperature and humidity, can affect drying times. If working in extreme weather conditions, additional drying time may be necessary.
• Improper Application Techniques
Using incorrect techniques when applying paint can also contribute to adhesion test failure. For example, applying paint too thinly can lead to weak adhesion, while overbrushing the paint can cause it to lose its ability to adhere properly.
We recommend using a high-quality paintbrush or roller that is appropriate for the paint being used and applying the paint with steady, even pressure. Additionally, adhere to the recommended application guidelines provided by the paint manufacturer to ensure proper coverage and adhesion.
Pro Tip: In some cases, using a primer or bonding agent may be necessary to promote good adhesion, particularly on difficult-to-paint substrates. Consult the paint manufacturer’s guidelines to determine whether a primer or bonding agent is required.
• Environmental Factors
Environmental factors, such as extreme temperatures or high humidity, can cause paint adhesion test failure. These conditions can affect the curing and drying process of the paint, leading to adhesion problems.
To minimize the impact of environmental factors, we recommend painting during optimal weather conditions and adhering to the temperature and humidity recommendations provided by the paint manufacturer.
Taking these precautions can help ensure proper paint adhesion and prevent test failures.
Pro Tip: It is generally best to avoid painting outdoors in very hot or cold temperatures, as well as during periods of high humidity.
In conclusion, several factors can contribute to paint adhesion test failure, including insufficient surface preparation, incompatible paints and substrates, inadequate drying times, improper application techniques, and environmental factors.
By focusing on these aspects and following the recommendations provided, you can improve paint adhesion and minimize the risk of test failures.
For more information on paint adhesion and related topics, the Paint Research Association offers valuable resources and guidance.
Cause | Description |
|---|---|
Improper surface preparation | Surface contamination or improper pre-treatment can cause poor paint adhesion. |
Incompatible paint components | Using incompatible primers, basecoats, or clearcoats can lead to paint adhesion problems. |
Incorrect paint application | Incorrect spray gun settings, insufficient flash-off time, and incorrect paint layer thickness can contribute to adhesion failure. |
Environmental factors | Humidity, temperature, and dust can adversely affect paint adhesion during the application and curing process. |
Substrate issues | Substrate materials such as metal, plastic, or other materials may have properties that affect paint adhesion. |
Exploring Factors that Promote Better Adhesion
• Introduction to Adhesion
Adhesion, in simple terms, refers to the process through which two distinct surfaces stick together. A fundamental force in nature, adhesion can be found in all aspects of daily life, from the way paint sticks to walls and tape adheres to paper to how cells attach within biological organisms.
In order to understand the factors promoting adhesion, it is essential first to delve into the various types of adhesion mechanisms and explore their significance.
• Types of Adhesion Mechanisms
There are four primary mechanisms responsible for promoting adhesion: mechanical, chemical, dispersive, and electrostatic adhesion.
– Mechanical Adhesion
Mechanical adhesion occurs when rough surfaces interlock and come in contact with each other. The more irregular the surface, the likelier it is to achieve a stronger mechanical bond.
One prime example would be Velcro hook-and-loop fasteners, in which the hooks on one piece engage with loops present on the other piece.
– Chemical Adhesion
In chemical adhesion, a chemical bond forms between the molecules, atoms, or ions of two different surfaces when they come in contact.
This type of adhesion primarily depends on the nature of the substances involved and their unique chemistries. For instance, epoxy resins are known for promoting strong chemical bonds when they cure.
– Dispersive Adhesion
Dispersive adhesion, also known as van der Waals adhesion, is the result of attractive forces between molecules or atoms within contacting surfaces. The strength of dispersive adhesion depends on the proximity and frequency of these interactions.
One notable example of this type of adhesion is the attachment of gecko feet to surfaces, attributed to the millions of microscopic hair-like structures called setae.
Researchers at Stanford University have developed a robotic gripper inspired by gecko adhesion to move objects in various industry applications.
– Electrostatic Adhesion
In electrostatic adhesion, the attractive force between two surfaces arises due to the presence of an electrical charge. An everyday example would be the force experienced between a plastic comb charged with static electricity and hair.
• Factors Promoting Adhesion
Now that we have a grasp on the various types of adhesion mechanisms let’s discuss the factors that promote adhesion between materials.
– Surface Preparation
Surface preparation plays a crucial role in promoting adhesion. Properly cleaning, degreasing, and roughening the surface can significantly enhance mechanical and chemical bond strength.
For example, sanding wood before painting not only removes surface debris but also creates a rough texture for improved adhesion.
– Adhesive Selection
The choice of adhesive is essential for successful adhesion. Different materials and applications require adhesives with unique properties and chemistries to ensure effective bonding.
It is crucial to select an adhesive that is compatible with both surfaces and boasts suitable curing times, elasticity, and strength properties for the specific application.
– Environmental Factors
Temperature, humidity, and other environmental factors can significantly impact adhesion. High temperatures can cause some adhesives to break down, while low temperatures may prevent proper curing.
In addition, excessive moisture can also impede adhesion, especially during the curing process. To optimize adhesion, it is vital to consider the effect of environmental factors and select adhesives designed to perform well in specific conditions.
– Surface Energy
Surface energy refers to the energy present at the interface between a material and its surroundings. High surfaces energy materials, such as metals and glass, generally display better adhesion compared to low surface energy materials, such as plastics or Teflon.
In some cases, surface treatments like corona discharge, plasma, or flame treatment can be used to increase a material’s surface energy and enhance adhesion.
• Improving Adhesion in Practice: Recommendations
Based on experience, I recommend adhering to the following guidelines for promoting adhesion:
- Understand the materials: Gain comprehensive knowledge about the substrates and adhesives being used to make informed decisions and optimize adhesion.
- Proper surface preparation: Invest time in preparing the surface by cleaning, degreasing, and roughening as needed for improved adhesion.
- Environment consideration: Consider the environmental factors affecting the adhesion process and choose an adhesive that performs well under such conditions.
- Testing: Conduct thorough testing to ensure the selected adhesive meets the requirements of the specific application.
• Conclusion
Understanding the factors promoting adhesion is essential for achieving successful outcomes in numerous applications across various industries.
By considering the type of adhesion mechanism, materials involved, surface preparation, environmental factors, and adhesive properties, one can enhance the likelihood of optimal adhesion and minimize the risk of bonding failures.
Conducting Tests for Optimal Paint Adhesion Performance
When it comes to painting various surfaces, adhesion of the paint is crucial to ensuring a durable and long-lasting finish. The key to achieving optimal adhesion is through proper surface preparation and employing an appropriate testing method.
• The Importance of Adhesion Testing
Paint adhesion is a critical factor that determines the performance and longevity of the paint finish. Insufficient adhesion can lead to numerous issues, such as peeling, flaking, and cracking of the paint film.
It is essential to check and ensure optimal adhesion during the painting process to avoid these problems and achieve a high-quality finish.
• Cross-Cut Test: A Popular Adhesion Testing Method
The cross-cut test, also known as the crosshatch test, is an affordable and standardized method that helps to evaluate the adhesion of paint films. This test is widely used in various industries and is recommended for its simplicity and effectiveness.
To perform the cross-cut test, a sharp cutting tool is used to score through the paint film, creating a grid pattern of cuts on the surface. The area is then subjected to a specific amount of pressure with the aid of a pressure-sensitive tape.
Upon removal of the tape, the number of cut squares that remain attached to the surface versus the ones that have been detached indicates the level of adhesion.
The cross-cut test can provide valuable insights into the adhesion qualities of the paint, making it easier to identify any potential problems at an early stage.
• Pull-Off Test: Another Reliable Assessment Technique
The pull-off test, also known as the tensile adhesion test, is another prevalent method to assess the adhesion properties of paint. This test involves the use of special equipment that exerts a controlled force on the painted surface, effectively pulling the paint away from the substrate.
The force required to detach the paint film from the surface is measured and expressed in units of pressure, such as psi (pounds per square inch) or MPa (MegaPascals). The result of the pull-off test aids in determining the strength of adhesion in a quantitative manner.
The pull-off test is best suited for heavy-duty coatings and is typically employed in industrial settings where precise measurements are crucial.
• Wet Adhesion Test: A Method Tailored for Water-Resistance
The wet adhesion test is ideal for cases where the painted surface will be subjected to high levels of moisture or water exposure, such as in marine applications or wet areas within a home like bathrooms and kitchens.
This test involves immersing the painted surface in water for a specified duration, followed by executing either a cross-cut test or a pull-off test to evaluate the adhesion properties of the paint under wet conditions.
The wet adhesion test can provide valuable data on the paint’s performance in challenging environments and can aid in the selection of suitable paints or coatings that can withstand specific conditions.
• Personal Recommendations for Achieving Maximum Paint Adhesion
Based on experience, the following steps are recommended to ensure optimal paint adhesion:
- Surface Preparation: Thoroughly clean the surface to be painted, removing any dust, dirt, grease, or other contaminants. In addition, if necessary, remove any existing loose or peeling paint. This will promote a strong bond between the paint and the substrate.
- Primer Application: Applying a suitable primer creates a smooth and uniform surface, further improving the adhesion of the paint. It is essential to select a primer that is compatible with the paint system being used.
- Use High-Quality Paint: Always opt for high-quality paints, as they contain better binders and acquire stronger adhesion to the surface.
- Follow Manufacturer’s Guidelines: Pay attention to the manufacturer’s instructions on the paint can or technical data sheet regarding surface preparation, application methods, and curing times. This will ensure that the paint’s performance is in line with its intended design.
• Conclusion
Achieving maximum adhesion of paint is vital for a long-lasting and durable finish. By performing suitable adhesion tests and following best practices in surface preparation and paint application, it is possible to attain the desired results and avoid any unwanted complications.