Tips For Taking Off Coverings Before Paint. What Pros Say
Are you getting ready for a painting project but dealing with stubborn coverings that must be removed first? Fear not! We have the perfect tips and tricks to help make this process smooth and hassle-free. Let’s dive into these surefire techniques for removing various surface coverings before giving your walls a fresh coat of paint, guaranteeing a long-lasting and professional finish.
Tips for taking off coverings before paint:
Before painting, remove existing coverings like wallpaper, decals, and old paint for a smooth surface. Use a scorer, steamer, hot water spray, putty knife, and clean adhesive residue for wallpaper removal. Remove decals with heat and adhesive remover. Identify the paint type and use the appropriate method for removal. Clean, repair, and prime the surface before applying new paint.
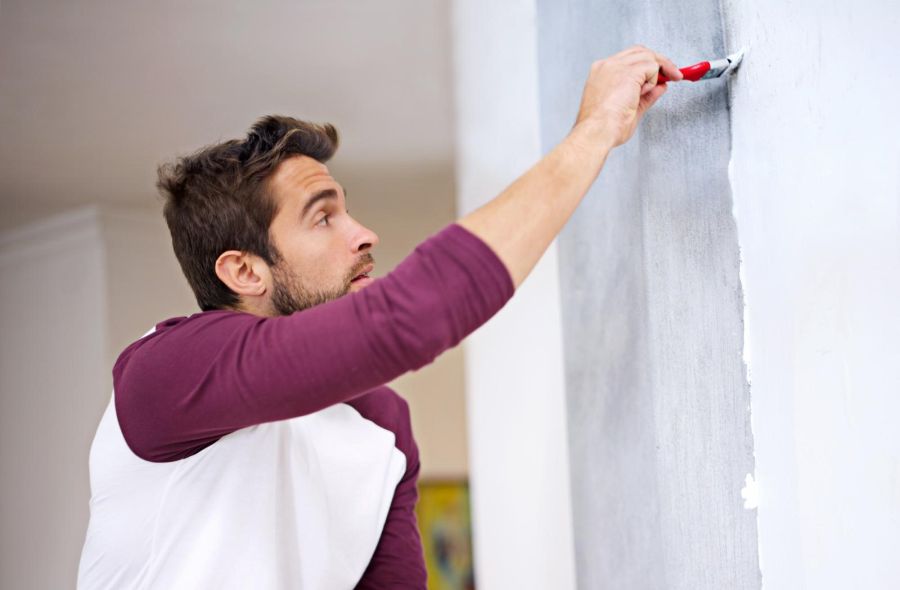
Ready to refresh your space with a new coat of paint? Discover the best techniques for removing old coverings, ensuring a flawless finish for your next DIY project! Keep reading to unveil our expert tips and make your painting experience a smoother one. Don’t miss out!
Contents
- 1 Removing Coverings: Essential Tips Before Painting
- 2 Mastering the Art of Masking Prior to Paint Jobs
- 3 How to Mask Off Before Painting
- 4 To Remove or Not Remove Trim: Painting Best Practices
- 5 Unveiling Freshly Painted Surfaces: When to Remove Masking
- 6 Step-by-Step Guide to Painting a Room: The Right Sequence
Removing Coverings: Essential Tips Before Painting
When preparing a surface for a new paint job, it is essential to remove existing coverings like wallpaper, decals, and old layers of paint to achieve a smooth and even result.
• Wallpaper Removal Tips
1. Gather Necessary Tools
To remove wallpaper, the following tools are recommended:
- Wallpaper scorer or perforation tool
- Wallpaper steamer or hot water spray
- Wide putty knife or scraper
- Drop cloths or old towels
These tools can help make the removal process efficient and prevent damage to the underlying surface.
2. Loosen the Adhesive
Gently score or perforate the wallpaper using the wallpaper scorer or perforation tool without applying too much pressure or damaging the walls.
3. Apply Heat or Moisture
Using a wallpaper steamer or hot water spray, apply heat and moisture evenly over the scored wallpaper.
4. Start from the Edge
After the adhesive begins loosening, use the putty knife or scraper to slowly and carefully peel away the wallpaper. Start from an edge or corner and work your way inward.
5. Clean Residue
Once the wallpaper has been removed, clean any remaining adhesive residue from the wall. This can be accomplished by using a mixture of warm water and mild detergent, thoroughly rinsing the surface, and allowing it to dry completely.
• Decal Removal Tips
1. Use Heat for Easy Removal
For removing decals, a hair dryer or heat gun can be used. The heat helps soften the adhesive and allows the decal to be peeled away more easily.
2. Utilize Adhesive Remover
If necessary, use an adhesive remover on any remaining residue. Goo Gone is a popular choice, but ensure that it is compatible with the surface material.
3. Test the Surface
Before applying new paint, it is recommended to perform adhesion tests on the surface to guarantee that the paint adheres correctly. Adhesion tests can be conducted by applying a small swatch of paint, allowing it to dry, and then attempting to peel or scrape it.
• Removing Old Paint
1. Identify Paint Type
Determining whether the existing paint is water-based or oil-based is crucial, as this will dictate the appropriate method for removal. This can be done by rubbing a cotton swab dipped in rubbing alcohol on the surface. If the paint comes up, it is water-based. If not, it is oil-based.
2. Water-Based Paint Removal
To remove water-based paint, use a mixture of warm water and mild detergent to wet the surface, allowing the paint to soften. A scraper can then be employed to remove the loosened paint gently.
3. Oil-Based Paint Removal
When dealing with oil-based paint, it is advisable to use a paint stripper following the manufacturer’s instructions. Safety precautions, such as wearing gloves and goggles, should be taken, and proper ventilation and disposal methods should be employed.
• General Tips
– Cleaning Before Painting
After all coverings have been removed, the surface must be cleaned thoroughly to ensure proper paint adhesion. Use warm water and mild detergent to remove dirt, grime, and residue. Rinse the surface and allow it to dry completely before painting.
– Repairing Surface Damage
Before painting, repair any damage to the surface, such as holes, cracks, or dents. This can be achieved by using products like joint compound or patching plaster, followed by sanding the area to create a smooth finish.
– Priming the Surface
Once the surface is clean and repaired, applying a primer is highly recommended. Primers create a consistent base for the paint to adhere to and help the paint’s durability and color accuracy.
• Final Thoughts
The key to achieving a professional-looking paint job is proper surface preparation, which entails removing existing coverings like wallpaper, decals, and old paint. By following these tips and techniques, one can guarantee a smooth surface that will result in a beautiful, long-lasting paint finish.
Mastering the Art of Masking Prior to Paint Jobs
Masking off is an essential part of the painting process, as it not only ensures clean lines but also protects certain areas from being exposed to paint.
• Choosing the Right Masking Materials
Before beginning the masking process, it’s important to choose the appropriate materials for the job. Here are a few recommendations along with their specific use cases.
– Masking Tape
Masking tape is a painter’s best friend, and it comes in various widths and adhesion levels. When selecting masking tape for your painting project, consider the following:
- For delicate surfaces, choose a low-adhesion tape such as FrogTape Delicate to prevent damage to the surface being masked.
- For general painting projects, choose a medium-adhesion tape like ScotchBlue Painter’s Tape, which is widely used by professionals.
- For exterior or rough surfaces, choose a high-adhesion tape such as Scotch Exterior Painter’s Tape.
– Painter’s Plastic
Painter’s plastic (also known as painting film or masking film) is a clear, thin plastic sheet used to cover large areas to protect them from paint drips, splatters, and overspray. This material is available in various widths and thicknesses, making it ideal for covering furniture, flooring, or cabinetry.
– Paper
In some cases, paper can be an effective masking material, especially for smaller areas like baseboards or trim. Brown or green masking paper is specifically designed for painting projects and can be found at your local paint supply store.
• Preparing the Surface
To ensure that your masking materials adhere properly and create a clean line, it’s essential to properly prepare the surface before applying tape or other materials. Follow these steps:
- Clean the surface with a damp cloth or sponge, removing dirt, dust, and grease.
- Allow the surface to dry completely before applying masking materials.
- Repair any damage to the surface, such as holes or cracks, with the appropriate filler material if necessary. Allow the filler to dry completely before continuing.
• Masking Techniques
Now that we have discussed the necessary materials and preparation, let’s explore the various techniques used for masking off different surfaces.
– Straight Lines
Achieving a clean, straight line when masking can be challenging, but with practice, it’s possible to create professional-looking results. Here are a few tips for achieving straight lines:
- When applying masking tape, press the edge of the tape down firmly with your finger or a putty knife to ensure proper adhesion.
- For best results, remove the tape immediately after the paint has dried to the touch. This will reduce the risk of paint seeping under the tape or the tape causing damage to the painted surface.
– Corners and Curves
Masking corners and curves can be tricky, but with patience and the right techniques, it’s possible to achieve clean lines. Here are a few tips for masking corners and curves:
- Fold the edge of the tape at a 90-degree angle when masking corners for a crisp, clean line.
- When masking curves, use smaller sections of tape to create a smooth, curved line.
- For tight curves or irregular shapes, consider using painter’s tape designed for curves, like FrogTape Shape Tape.
– Large Areas
When masking off large areas, such as walls, ceilings, or floors, it’s best to use a combination of masking tape and painter’s plastic or paper. Here’s how to create an effective barrier for large areas:
- Apply masking tape to the edge of the surface you wish to protect.
- Attach the edge of the painter’s plastic or paper to the tape, ensuring that it’s properly positioned to cover the area you wish to protect.
- Unroll and secure the remaining plastic or paper to cover the entire area, securing it with additional tape as needed.
• Final Thoughts
Effectively masking off surfaces before painting is an essential step to achieve professional-looking results. By choosing the right materials, preparing the surface, and using the proper techniques, you can ensure that your painting project is a success.
Remember to always take your time, as meticulous masking will save you time and effort in the long run.
How to Mask Off Before Painting
Step | Instructions |
|---|---|
1 | Clear the area and remove any obstacles, such as furniture and wall decorations, which could get in the way. |
2 | Clean the surfaces you plan to paint to ensure proper adhesion of the masking tape and paint. |
3 | Choose the right type of masking tape for the surface and job; for example, choose painter’s tape for delicate surfaces that are prone to damage. |
4 | Apply the masking tape along the edges of the area you want to protect from paint, such as baseboards, window frames, and door frames. Make sure the tape is straight and firmly pressed down for a clean, crisp edge. |
5 | If necessary, cover larger areas with plastic sheeting or drop cloths. Secure with the masking tape along the edges to prevent paint leakage or plastic sheet movement. |
6 | Use a utility knife or scissors to trim the masking tape or plastic sheeting as needed for a precise fit around fixtures, outlets, or other obstacles. |
7 | Inspect the masked area to ensure all necessary surfaces are protected before beginning the painting process. |
8 | After the paint has been applied and is dry to the touch, carefully remove the masking tape by slowly peeling it away at a 45-degree angle. If needed, use a utility knife to score along the edge of the tape for a clean break from the painted surface. |
To Remove or Not Remove Trim: Painting Best Practices
When it comes to painting a room, one common question arises: should the trim be removed before painting? Removing the trim from your walls, doors, and windows may seem like an extra step, but it can actually lead to cleaner and more professional results.
• Benefits of Removing Trim Before Painting
1. Cleaner Lines
By removing the trim, you can create cleaner, straighter lines between the wall color and the trim color. This is especially important if the paint colors are drastically different. The straight lines give your room a sharp, professional look.
2. Simplified Painting Process
When the trim is removed, you can simply paint the walls without worrying about taping off the edges or cutting-in. This can save you time and make the painting process more efficient.
3. Easier Trim Preparation
When trim is removed, it is easier to clean, sand, and prime. This is particularly beneficial if there is damage to the trim that needs repair before painting.
4. Identifying Problems
Removing trim can expose problems like water damage or mold that need to be addressed before painting. By identifying these issues, you can fix them before they grow into larger problems.
• Disadvantages of Removing Trim Before Painting
1. Increased Labor
Taking down the trim requires additional labor, especially if the trim is nailed or glued to the walls. For those without much experience in home renovations, this extra step might be daunting.
2. Potential for Damage
In the process of removing the trim, you run the risk of causing damage to the trim itself or the walls. This could ultimately cost you time and money to repair.
3. Re-Installation
After painting, the trim must be re-installed correctly to maintain the integrity of the room. This might involve cutting, measuring, and nailing the trim back into place, adding time to the overall project.
• Preparing the Room and Trim for Painting
1. Remove Furniture and Protect Floors
Before starting any painting project, it is important to remove all furniture from the room and protect your floors with drop cloths. This ensures the safety of your belongings and reduces cleanup time afterward.
2. Clean the Walls
Clean the walls with a mild soap and water solution to remove any dirt, dust, or grease that may prevent the paint from adhering properly. Let the walls dry completely before moving on to the next step.
3. Repair and Prime
Inspect the walls and trim for any damage, such as holes or cracks, and repair them with the appropriate filler. Once the repairs are complete, prime the walls and trim to provide a smooth, even surface for the paint to adhere to.
4. Remove or Tape the Trim
If you decide to remove the trim, use a flat pry bar and gently work it between the trim and the wall, working your way around the room.
Be careful not to damage the trim or wall in the process. If you choose to leave the trim in place, use painter’s tape to cover the edges of the trim where it meets the wall. This will help create a straight line between the wall color and the trim color.
• Painting Tips for Professional Results
1. Use Quality Brushes and Rollers
Choose high-quality brushes and rollers specifically designed for your type of paint and surface to achieve a smooth, even finish.
2. Start with the Edges
When painting, start by cutting in around the edges of the room with a brush. This creates a clean border for the roller to meet, minimizing streaks and lines.
3. Apply Multiple Coats
To achieve the best coverage and color, apply multiple coats of paint, allowing each coat to dry completely before applying the next.
4. Remove Tape Promptly
If you used painter’s tape, remove it as soon as the final coat is dry to the touch. Waiting too long can cause the paint to peel with the tape.
• Conclusion
Whether you decide to remove the trim or leave it in place ultimately depends on your skill level, time constraints, and desired results. For a professional-looking paint job, we recommend removing the trim before painting.
However, if you feel confident in your ability to create clean lines without removing the trim, painting the room without taking the extra step of removal is a viable option.
Unveiling Freshly Painted Surfaces: When to Remove Masking
Masking is an essential technique that many DIYers and professional painters use to achieve clean, crisp lines and ensure a professional finish. This technique involves applying masking tape to adjoining surfaces to protect them from the paint you’re applying.
It’s crucial to know when to remove the tape after painting to prevent any damage to your newly painted surfaces.
• Drying Time for Different Types of Paint
The ideal time to remove masking tape depends on the type of paint used and the surface painted. Let’s take a look at some common paint types and their respective drying times.
– Latex-Based Paint
Emulsion, also known as water-based or latex-based paint, tends to dry quickly compared to other paint types. Typically, you can remove the masking tape after a couple of hours, but it’s advisable to wait up to 12 hours, especially if multiple coats have been applied.
This allows a sufficient drying period to avoid any potential smudging or damage when removing the masking.
– Oil-Based Paint
Oil-based paints usually take a longer time to dry, sometimes even several days. It is recommended to wait at least 24 hours after the final coat before removing the masking tape. However, this timeframe may vary depending on factors such as temperature, humidity, and the number of coats applied.
– High-Gloss or Semi-Gloss Paints
High-gloss and semi-gloss paints generally take longer to dry due to their thicker texture, whether they are oil-based or water-based. Allow at least 24 hours for semi-gloss paints and up to 48 hours for high-gloss paints before removing the masking.
• Factors Affecting Paint Drying Time
The drying time of paint can be influenced by several factors that should be considered before removing the masking.
– Temperature and Humidity
The drying time of different paints can be affected by the prevailing temperature and humidity conditions where the painting takes place. Low temperatures and high humidity can prolong the drying time, while higher temperatures and low humidity can speed up the drying process.
Always check the paint manufacturer’s recommendations regarding ideal temperature and humidity for painting and drying.
– Surface Material
The surface material you are painting on can also impact the drying time. For example, paint applied on porous surfaces such as wood, plaster, or unprimed drywall may take longer to dry compared to non-porous surfaces like metal or glass.
To avoid any issues, it’s essential to follow the recommendations provided by the paint manufacturer for the specific surface you are working on.
– Thickness of Coats
Applying multiple coats or significantly thick coats of paint can increase the drying time. It’s crucial to let each coat dry fully before applying a new one to prevent issues such as uneven texture or cracks in the paint. Always follow the paint manufacturer’s guidelines for drying time between coats.
• Tips for Removing Masking Tape After Painting
Here are some expert recommendations that will help you successfully remove masking tape, avoiding any damage or issues.
– Gently Peel the Tape
When removing masking tape, always do so gently and at a 45-degree angle. This will help prevent the paint from peeling off with the tape. If you encounter any resistance, stop and let the paint dry a little longer before trying again.
– Use a Sharp Tool
For areas where the paint has started to harden on the masked edges or sealed the tape, use a sharp utility knife or a painter’s tool to carefully score along the edge of the tape without cutting into the paint. This will help separate the paint from the tape, ensuring a clean and sharp line.
– Heat and Moisture
If the masking tape is proving difficult to remove or is tearing, applying a small amount of heat or moisture can help. A hairdryer or a warm, damp cloth can soften the adhesive, making it easier to remove.
• In Conclusion
Determining when to remove masking tape after painting depends on the type of paint, the surface material, and the specific painting conditions.
Generally, allow at least 12 hours for latex-based paint, 24 hours for oil-based paint, and 24-48 hours for high-gloss or semi-gloss paints before attempting to remove the masking tape. Always follow the paint manufacturer’s recommendations for drying time and ideal painting conditions.
Time After Painting | Action |
|---|---|
Immediately after painting | Not recommended, as it may cause smudging or paint bleed |
20-30 minutes | Minimum recommended time to wait before removing masking tape. The paint should be slightly dry to the touch but not fully cured |
1-2 hours | Optimal time to remove masking tape for most latex paints |
24 hours+ | Safe time to wait for oil-based or slow-drying paints before removing masking tape |
Step-by-Step Guide to Painting a Room: The Right Sequence
Painting a room can transform its appearance and create an inviting atmosphere. However, to achieve a professional-looking result, it is essential to follow a systematic approach.
• Preparation is Key
Before even opening a paint can, adequate preparation is essential. This process will avoid potential mishaps and ensure a smooth painting experience.
– Clear the Space
Start by removing all furniture, lighting fixtures, and any other items from the room. If some larger pieces cannot be moved, cover them with drop cloths, plastic sheets, or old bed sheets to protect them from paint splatters.
– Clean the Surfaces
Next, use a soft brush, cloth or vacuum to remove any dust or cobwebs from the walls and ceiling. Should you encounter any stains or greasy spots, use a solution of mild dish soap and water to scrub them clean. This step ensures that the paint adheres well to the walls.
– Repair Imperfections
Inspect the walls and ceiling for any cracks, holes, or dents. Utilize a putty knife to fill these imperfections with joint compound or another appropriate filler. Allow the filler to dry as per the manufacturer’s recommendations before moving onto the next step, sanding.
– Sand the Surfaces
Using a fine-grit sanding sponge or sandpaper, sand the entire surface, focusing on smoothing out any filled areas. This process ensures a consistent texture across the walls and ceiling, helping the paint adhere evenly. After sanding, use a damp cloth or sponge to wipe away any dust or residue.
– Apply Painter’s Tape and Protect the Floor
Adhere painter’s tape to door frames, window frames, baseboards, and any fixtures or hardware that cannot be removed. This step will keep these areas clean and paint-free. Finally, lay down a drop cloth to cover the entire floor, ensuring ample protection from any drips or spills.
• The Painting Process
With the room prepared, it’s time to paint. Following a systematic order will reduce the risk of mistakes and enable a smooth, efficient process.
– Start with the Ceiling
Begin painting the ceiling, using a brush or edger to cut in around the edges where it meets the walls. Once the perimeter is complete, use a roller on an extension pole to paint the remaining open space.
When painting the ceiling, it is best to work in 4-by-4-foot sections, ensuring that you maintain a wet edge to prevent visible lines or overlapping. Apply a second coat if necessary, allowing the paint to dry between coats per the manufacturer’s guidelines.
– Move on to the Walls
After the ceiling is complete and dry, begin by cutting in around any corners, doors, windows, and baseboards. Professional painters highly recommend the W method for painting walls: using a roller, paint a “W” shape on the wall, then fill it in without lifting the roller.
This technique ensures an even distribution of paint and reduces the risk of visible lines. Just like the ceiling, a second coat may be necessary, depending on the color and coverage.
– Tackle Doors and Window Frames
Before addressing the doors and window frames, ensure the surrounding walls are dry. Utilize a brush to paint any doors, making sure to follow the direction of the wood grain for a smooth finish. For window frames, paint from top to bottom, taking care to avoid getting paint on the glass.
– Finish with Baseboards and Trim
The final step is to paint the baseboards and any additional trim. Using a brush, apply the paint in long, steady strokes. This step is crucial in providing a polished and professional appearance to the room.
• Tips for Efficient and Effective Painting
- Avoid overloading the brush or roller with paint: too much paint can lead to drips and an uneven finish; less is more.
- Use a high-quality brush for cutting in and a high-quality roller for the open spaces to ensure a smooth, consistent application of paint.
- Maintain a wet edge while working to minimize visible lines and overlaps.
- Allow sufficient drying time between coats, as recommended by the paint manufacturer.
• Clean Up and Reassemble the Room
Once the painting is complete and the room is dry, carefully remove the painter’s tape, being mindful not to peel away any freshly applied paint.
Collect all painting supplies and clean them according to the recommended guidelines. Finally, move the furniture back into place and enjoy your freshly painted room.
In conclusion, the correct order to paint a room involves thorough preparation, systematic painting of the ceiling, walls, doors, window frames, and trim and proper clean-up.
For additional guidance, the Environmental Protection Agency (EPA) offers resources on painting best practices to help homeowners achieve professional results.

