The Ultimate Guide To Scrape And Paint. What Pros Say
Have you ever felt overwhelmed by the thought of starting a scrape and paint project in your home or office? Worry no more we have got you covered! With our ultimate guide to scrape and paint, we’ll share the top tips and tricks to help you tackle even the most daunting paint jobs with confidence and ease. We’ve done the research and compiled the best practices to ensure your project is a smashing success, so read on and prepare to transform your space like a pro.
The ultimate guide to scrape & paint:
The ultimate guide to scrape and paint involves assessing the surface type and condition, determining paint type, using essential tools like scrapers, sandpaper, brushes, rollers, and safety gear, preparing the surface by removing loose paint, repairing imperfections and sanding, applying primer, painting in thin even coats, allowing each coat to dry, and optionally sanding between coats for a smoother finish. Proper preparation and technique will ensure a long-lasting, visually appealing result.

Ready to give your home a fresh new look? Don’t miss our Ultimate Guide to Scrape & Paint! We have all the tips, tricks, and step-by-step instructions you’ll need to master every aspect of this DIY project. Keep reading and start your own transformation today!
Contents
Comprehensive Guide to Scrape and Paint Techniques
• What You Need to Know Before You Start
Before beginning any scrape and paint project, it’s essential to understand the surface you’re working with and the requirements for a successful outcome. Proper preparation and choosing the right materials are crucial for ensuring a long-lasting and visually appealing result.
In this article, we’ll guide you through the process of scraping and painting various surfaces, as well as the tools and materials needed to get the job done right.
• Assessing Your Surface
Before you begin, it’s essential to evaluate the condition of the surface you’ll be working on. Here are some factors to consider:
- Surface type: Different surfaces require different paint types and techniques. Typical materials include wood, metal, concrete, and drywall.
- Surface condition: Look for any imperfections, such as cracks, holes, or peeling paint. These areas will need special attention during the prep process.
- Paint type: Determine whether the existing paint is oil-based or water-based. You can do this by rubbing the surface with a small amount of denatured alcohol or acetone. If the paint dissolves, it’s likely water-based.
• Essential Tools for Scraping and Painting
Having the right tools on hand will make your scraping and painting project go smoothly. Here’s what you’ll need:
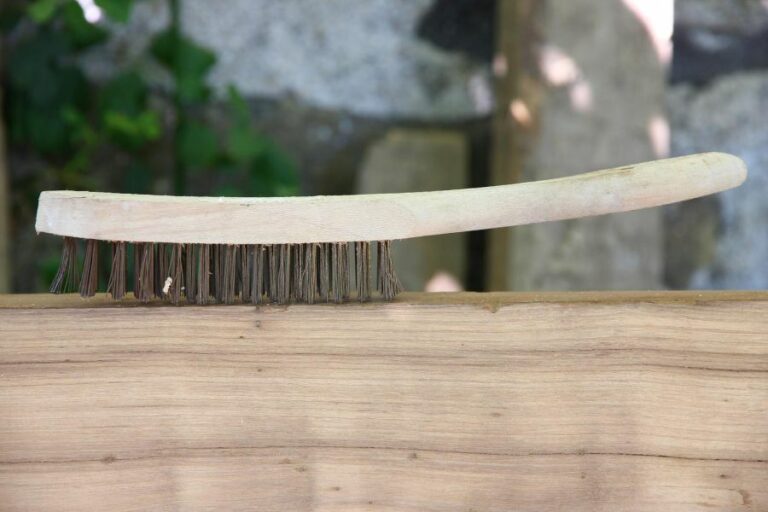
- Scrapers: A variety of sizes and shapes, including a putty knife, paint scraper, and wire brush, is ideal for removing old paint and preparing the surface.
- Sandpaper or a sanding block: Various grits are needed, from coarse (40-60 grit) to medium (80-120 grit) to fine (220-320 grit), for smoothing the surface between coats.
- Brushes and rollers: Choose the right size and type for the surface, taking into consideration the paint type and texture desired.
- Paint tray or bucket: For holding paint and evenly distributing it onto brushes or rollers.
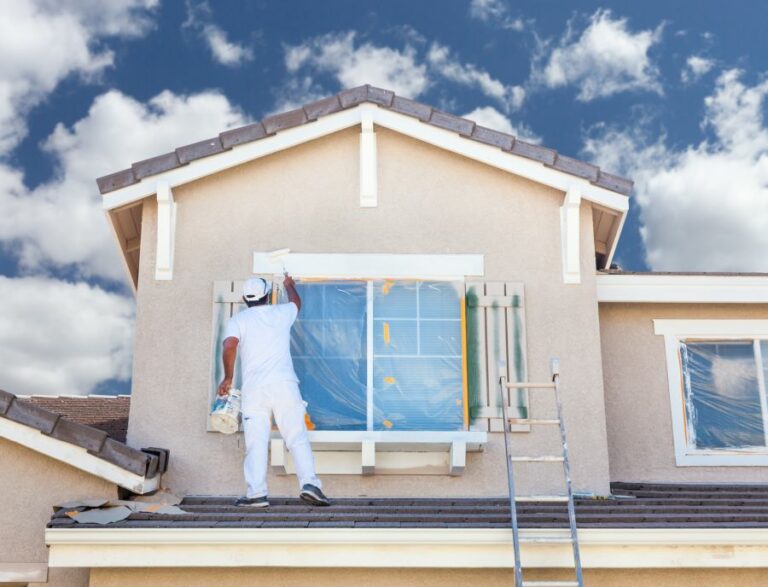
- Ladder or scaffold: Use a sturdy, reliable ladder or scaffold system to ensure safety and accessibility during the painting process.
- Drop cloths and painter’s tape: To protect surrounding surfaces from paint drips, splatters, or overspray.
- Paint primer or sealer: This helps ensure a smooth, well-adhered final paint layer.
- Eye and respiratory protection: To avoid inhaling paint fumes or particles and to prevent irritation from dust or debris during the scraping process.
• Scraping and Preparing the Surface
– Step 1: Remove Loose Paint
Using your scraper, remove any peeling or flaking paint from the surface. Always try to remove as much paint as possible without digging into or damaging the substrate. A wire brush can be helpful for removing stubborn patches, especially on rough surfaces like concrete or brick.
– Step 2: Repair Imperfections
Fill any holes, cracks, or gaps with an appropriate filler for the surface (wood filler, concrete patch, etc.). Allow the filler to dry completely before sanding. For larger repairs, consult a professional.
– Step 3: Sand the Surface
Gently sand the entire surface using the appropriate sandpaper grit. Begin with a coarser grit and progress to finer grits until the surface is smooth and free of imperfections. Remember to wipe down the surface with a damp cloth to remove dust after sanding.
– Step 4: Apply Primer
For surfaces that have never been painted before, have stains or discolorations, or if you’re changing paint types or colors, applying a primer is essential. Consult your paint manufacturer’s guidelines for the proper primer and application methods.
• Painting the Surface
– Step 1: Apply the First Coat
Using either a brush or roller, apply your chosen paint to the surface in thin, even layers. Take your time to avoid drips, streaks, or uneven distribution. It’s best to work in small sections, moving across the surface horizontally or vertically depending on the material and desired outcome.
– Step 2: Allow the Coat to Dry
Before applying additional coats, allow the paint to dry thoroughly. Consult the manufacturer’s guidelines for recommended drying times, as this can vary based on paint type and environmental conditions.
– Step 3: Sanding Between Coats (Optional)
For a smoother finish, you may choose to lightly sand the surface between coats using fine-grit sandpaper. Be gentle to avoid scratching or damaging the paint layer.
– Step 4: Apply Additional Coats
Repeat the process of applying thin, even coats of paint, allowing each to dry before applying the next. Typically, two to three coats will provide full coverage, although some paint colors or types may require more.
• Final Thoughts and Recommendations
Taking the time to prepare your surface correctly, investing in high-quality tools and materials, and carefully applying your paint will ensure a professional-looking result that lasts for years. Don’t be afraid to consult expert advice or hire a professional when necessary.
Remember to follow proper safety precautions and always work in a well-ventilated area to minimize exposure to paint fumes.
By following this ultimate guide to scrape and paint, you’ll be well on your way to a successful project that enhances the beauty and longevity of your chosen surfaces.