Key To A Durable Paint Job: Surface Prep. What Pros Say
You’ve finally selected the perfect color to give your space a fresh new look, but did you know that the key to a long-lasting paint job lies in surface preparation? Worry not. We’re here to help you navigate through the essential steps to ensure a durable, professional-quality paint job. With our guidance, you’ll achieve a flawless finish that not only looks great but also stands the test of time.
Key to a durable paint job: surface prep:
A durable paint job relies on proper surface preparation, including cleaning the surface, removing old paint and loose materials, repairing defects, sanding, applying a primer, protecting adjacent areas, ensuring ventilation and weather considerations, and using the right tools and materials.

Unlock the secrets to a long-lasting paint job by mastering the art of surface preparation! Dive deeper into the essential steps and best practices that will set the foundation for a flawless finish. Read on for our expert tips and techniques to ensure your paintwork is built to last.
Contents
- 1 Durable Painting Secret: Proper Surface Preparation
- 1.1 • Importance of Surface Preparation
- 1.2 • Cleaning the Surface
- 1.3 • Removing Old Paint and Loose Materials
- 1.4 • Repairing Surface Defects
- 1.5 • Sanding the Surface
- 1.6 • Applying a Primer
- 1.7 • Protecting Adjacent Surfaces
- 1.8 • Ventilation and Weather Considerations
- 1.9 • Tools and Materials
- 1.10 • In Conclusion
- 2 Optimal Surface Preparation Techniques for Painting
- 3 Enhancing Paint Durability: Tips and Tricks
- 4 Essential Pre-Painting Preparation Steps
- 5 Paint Job Preparation Guide: What to Know
- 5.1 • Step 1: Choosing the Right Paint
- 5.2 • Step 2: Gathering Supplies
- 5.3 • Step 3: Preparing the Room
- 5.4 • Step 4: Repairing Wall Surfaces
- 5.5 • Step 5: Masking and Taping
- 5.6 • Step 6: Priming the Walls
- 5.7 • Step 7: Mixing the Paint
- 5.8 • Step 8: Applying the Paint
- 5.9 • Step 9: Clean-Up and Touch-Ups
Durable Painting Secret: Proper Surface Preparation
A durable and long-lasting paint job not only enhances the overall appearance of a surface but also protects it from the elements. Proper surface preparation is crucial for a successful paint job that can stand the test of time.
• Importance of Surface Preparation
Surface preparation plays a vital role in ensuring the durability and longevity of a paint job. Properly prepared surfaces allow the paint to bond better and form a stronger grip with the substrate. This prevents the paint from peeling, cracking, or blistering and prolongs its life.
A poorly prepared surface, on the other hand, leads to adhesion problems, paint failures, and an overall unsatisfactory paint job. Therefore, investing time and effort in surface preparation is essential for a long-lasting paint job.
• Cleaning the Surface
The first step in surface preparation is cleaning the surface to remove any dirt, dust, grease, or other contaminants. A clean surface ensures that the paint adheres well and does not form weak spots, which can lead to premature paint failures.
Recommendation: Use a mild detergent or a specialized cleaning agent to clean the surface thoroughly. Rinse with clean water and allow the surface to dry completely before proceeding. If mold or mildew is present, use a specialized cleaner or a bleach solution to remove it.
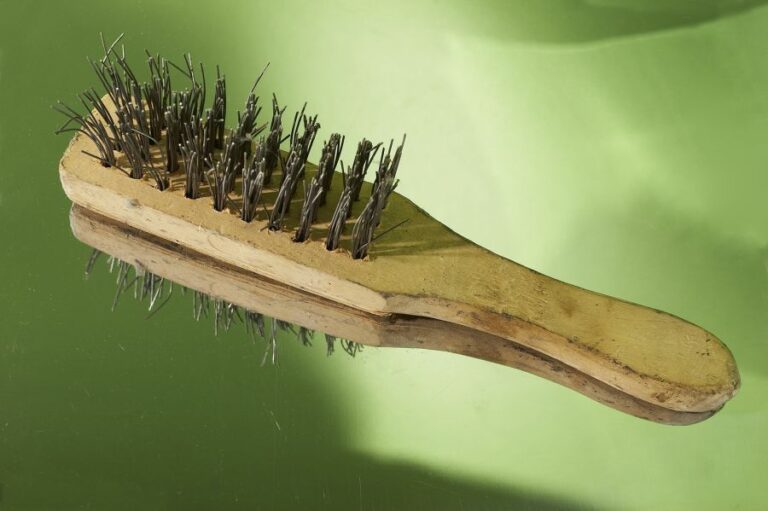
• Removing Old Paint and Loose Materials
If the existing paint on the surface is cracked, peeled, or showing signs of failure, it is essential to remove it entirely to ensure better adhesion to the new paint. Loose materials, such as old caulking, should also be removed for a smooth surface.
Recommendation: Use a paint scraper, wire brush, or pressure washer to remove loose paint and materials. Sand any rough or uneven areas to create an even surface.
• Repairing Surface Defects
Some surfaces may have defects such as cracks, holes, or dents that need to be repaired before painting. This is crucial, as these defects can otherwise compromise the grip and stability of the paint, leading to early failures.
Recommendation: Use a suitable filler or patching compound, following the manufacturer’s instructions, to fill any holes or cracks. Allow the filler to dry, then sand the area smooth.
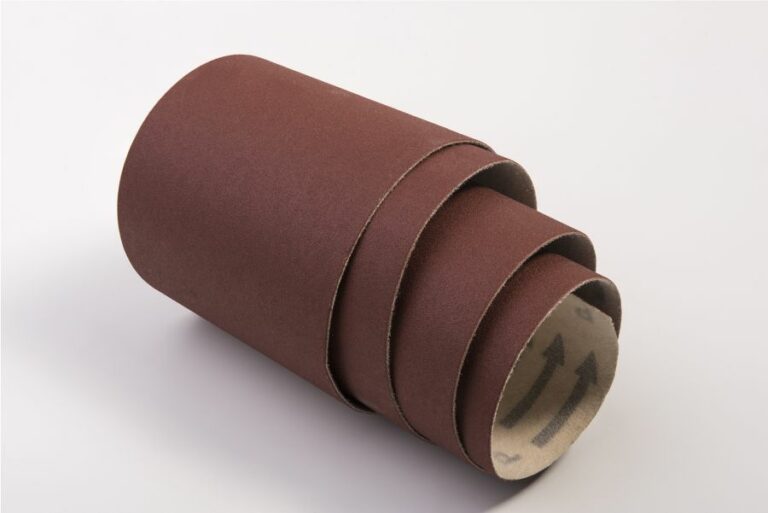
• Sanding the Surface
Sanding is a crucial step in surface preparation, as it helps create a smooth and even surface for the paint to adhere. It also removes any remaining contaminants and contributes to improving the paint’s adhesion.
Recommendation: Use medium-grit sandpaper to sand the entire surface. Be sure to sand in the direction of the grain on wood surfaces. Always wear a dust mask and eye protection when sanding.
• Applying a Primer
Applying a primer is often necessary to achieve a proper bond between the paint and the surface. Primers also help to seal porous surfaces, provide a uniform base for the topcoat, and improve overall paint job results.
Recommendation: Choose a primer appropriate for the type of paint and the surface being painted. Follow the manufacturer’s instructions for application, and allow the primer to dry completely before applying the topcoat.
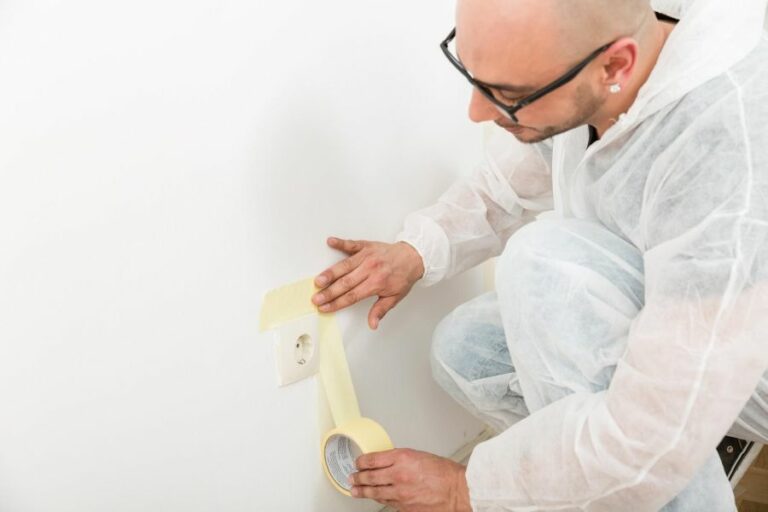
• Protecting Adjacent Surfaces
Before painting, it is essential to protect adjacent surfaces such as trim, windows, and hardware. This aids in achieving clean lines and a professional finish.
Recommendation: Use painter’s tape to mask off areas not to be painted. Lay drop cloths, or plastic sheeting on the floor and cover any furniture or other items that cannot be removed from the area.
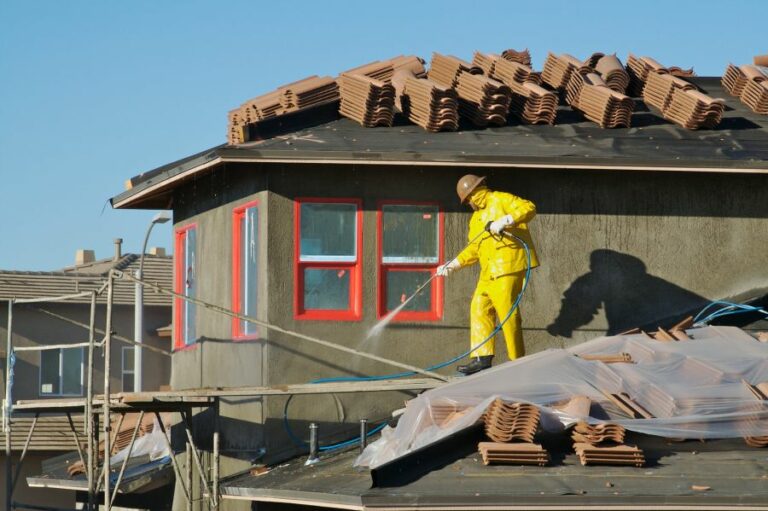
• Ventilation and Weather Considerations
Proper ventilation is necessary when painting indoors to provide adequate air circulation and ensure that the paint dries correctly. Weather conditions should also be taken into account when painting outdoors, such as avoiding rain or excessive humidity.
Recommendation: Open windows and use fans when painting indoors for proper ventilation. Check the weather forecast and follow the paint manufacturer’s recommended temperature and humidity conditions for outdoor painting.
• Tools and Materials
Using the right tools and materials for the job ensures a high-quality paint job. Inferior tools and materials can compromise the overall appearance and durability of the final result.
Recommendation: Use high-quality brushes, rollers, and other application tools explicitly designed for the type of paint being used. This ensures smoother and more consistent paint application.
• In Conclusion
Proper surface preparation is a critical component of a durable and long-lasting paint job. By following the best practices outlined in this article, you can achieve professional-looking results that will stand the test of time.
Optimal Surface Preparation Techniques for Painting
Professional painters know that preparing a surface for painting is as important as applying the paint itself. Proper surface preparation ensures that the paint adheres well, lasts longer, and provides a smoother finish.
• Preparing Different Types of Surfaces
– Prepping Metal Surfaces
- Cleaning the Surface: The first step in preparing metal surfaces for painting is cleaning. Use a mild detergent solution and a soft cloth to remove dirt, oil, and grease. You may also use a sponge or a scrubbing pad for stubborn dirt.
- Removing Rust and Loose Paint: Next, use a wire brush, scraper, or sander to remove any rust, corrosion, and loose or peeling paint from the metal surface. For larger areas or difficult spots, consider using a power sander or a sandblasting machine. Be sure to wear protective gear such as goggles, gloves, and a mask.
Refer to the guidance by the U.S. General Services Administration on surface preparation for more detailed information on removing rust and old paint from metal surfaces.
- Sanding the Surface: Sand the metal surface using medium-grit sandpaper (80 to 120 grit) to create a rough texture that will help the paint bond better. Wipe the surface with a cloth or a tack cloth to remove any dust or debris from the sanding.
- Applying a Primer: Apply a high-quality metal primer to the surface and let it dry thoroughly. Choose the appropriate primer based on the type of metal and paint you plan to use. The primer will protect the metal from further corrosion and help the paint adhere properly.
– Prepping Wood Surfaces
- Cleaning the Surface: Wood surfaces attract dirt and dust easily. Therefore, it is crucial to clean the surface using a soft cloth, a vacuum cleaner, or a brush before applying paint. Be sure to remove any cobwebs, loose dirt, or debris.
- Filling and Repairing Holes or Cracks: Inspect the wood surface for any cracks, holes, or dents. Fill them with a suitable wood filler and sand it down to create a smooth, even surface. For larger damage, such as gouges or rot, repair them with a wood epoxy.
- Sanding the Surface: Sand the wood surface using sandpaper or a power sander, starting with a lower grit (80 to 100 grit) to remove any old paint, stain, or varnish and progressing to finer grit (150 to 180 grit) for a smooth surface.
- Removing Dust: Wipe the surface with a cloth, a tack cloth, or a vacuum cleaner to remove any fine dust or debris from sanding.
- Applying a Primer: Use a high-quality wood primer to seal the surface and help the paint bond better. Oil-based primers are generally better for wood surfaces, as they penetrate deeper and provide a stronger bond.
– Prepping Drywall Surfaces
- Inspecting and Repairing: Check the drywall surface for any cracks, holes, or dents. Fix them using a joint compound and let it dry thoroughly. Sand the repaired areas until they are smooth and even with the surrounding surface.
- Cleaning the Surface: Wipe the drywall surface with a damp cloth to remove any dust or debris. Be careful not to soak the surface, as it can damage the drywall.
- Applying a Primer: Apply a high-quality drywall primer to seal the surface and create a consistent base for the paint. This step is crucial for new drywall, as it helps prevent the paint from soaking into the porous surface.
• A Few Tips for a Better Paint Job
- Always use high-quality materials, such as paint, primer, brushes, and rollers. They ensure better results and a longer-lasting finish.
- Take your time with surface preparation, as it can greatly affect the final outcome of your paint job. Don’t cut corners, and make sure all the steps are done correctly.
- Be patient and give the primer and paint enough time to dry before moving on to the next step or applying additional coats.
- Pay attention to the environmental conditions, such as humidity and temperature, while painting. They can affect the drying time and the overall quality of the paint job.
In conclusion, proper surface preparation is the key to a successful paint job. Following the steps outlined above and using the right tools and materials will ensure a smooth, durable, and professional-looking finish on any surface.
Step | Description |
|---|---|
1. Clean the surface | Remove dust, dirt, and grease by wiping down the surface with a cloth or sponge dampened with water and mild detergent. |
2. Remove old paint or loose material | Use a scraper, wire brush, or sandpaper to remove any loose or peeling paint, and sand any rough or uneven areas for a smooth finish. |
3. Repair surface imperfections | Fill any holes, cracks, or dents with a suitable filler, then sand it smooth once it’s dry. |
4. Sand the surface | Sand the entire surface using medium-grit sandpaper to create a slightly rough texture for the new paint to adhere to. |
5. Dust off and clean again | Wipe off any dust or debris left from sanding and cleaning using a tack cloth or damp cloth. Allow the surface to dry completely before painting. |
6. Apply primer | If needed, apply an appropriate primer for the surface and paint you will be using. Allow the primer to dry according to the manufacturer’s recommendations. |
7. Paint | Apply the paint using a brush, roller, or spray gun, following the manufacturer’s instructions for coverage, drying time, and any necessary multiple coats. |
Enhancing Paint Durability: Tips and Tricks
Painting a surface not only adds aesthetic appeal but also serves as a protective layer against elements such as moisture, dirt, and abrasion. As time passes and the painted surface is subjected to wear and tear, its durability may decline.
• Choosing the Right Paint
Using the right paint for your surface is the first step toward ensuring a durable finish. Different surfaces require different types of paint, and using the wrong paint can cause your surface to deteriorate more quickly than it should.
– Acrylic Paint
Acrylic paint is water-based and highly adaptable, suitable for a wide range of surfaces such as walls, metal, and wood. It dries quickly, providing a long-lasting and durable finish.
– Oil-based Paint
Oil-based paints provide a harder and more resilient finish when compared to acrylic paints. They can be applied on surfaces such as metal, wood, and trim. As durable as they may be, these paints emit higher levels of VOCs, and hence, proper ventilation is essential during their application.
– Exterior Paint
If painting an outdoor surface, ensure that you utilize a paint specifically designed for exterior use. These paints are formulated to withstand weather and UV rays, providing the surface with better durability than their interior counterparts.
• Proper Surface Preparation
For achieving a durable painted surface, thorough preparation of the surface is critical. Here are some steps to ensure the surface is ready for painting:
– Cleaning the Surface
An impeccably clean surface prevents paint adherence issues and ensures a smoother, more lasting finish. Remove dirt, dust, and grease using a mild detergent or cleaning agent designed for your specific surface material. Be sure to rinse thoroughly and allow it to dry.
– Repairing Damages
Inspect the surface for any damage, like cracks, holes, or dents. For damaged walls, use a spackle or joint compound to fill the imperfections and sand them smoothly.
For wood or other materials, choose an appropriate filler and follow the manufacturer’s instructions. This step prevents the paint from chipping or peeling in the long run.
– Primer Application
Applying a primer seals the surface, ensuring that the paint adheres and bonds properly. If your surface is porous or prone to stains, using a primer enhances the overall durability of the painted surface.
• Proper Painting Techniques
The manner in which paint is applied also contributes to the durability of the surface. Here are some techniques to ensure a long-lasting result:
– Using Quality Brushes & Rollers
Investing in good-quality brushes and rollers can significantly impact the durability of your painted surface. High-quality brushes and rollers facilitate smoother, more even paint application, hence reducing the chance of painting defects that may cause premature deterioration of your surface.
– Avoid Overspreading
Overworking the paint or using excess paint can cause issues such as uneven coverage, leading to a less durable finish. Apply a consistent layer of paint with minimal overlapping strokes, and resist the urge to apply extra coats. If necessary, wait for the paint to dry before applying another coat.
– Take Note of Drying Times
Adhering to the paint manufacturer’s recommended drying times prevents the paint from flaking, wrinkling, or blistering. Rushing the drying process or applying an additional coat too soon may cause your surface to be less durable.
• Add a Protective Topcoat
Lastly, applying a protective topcoat over your painted surface can vastly improve its durability. Here are some topcoat options for various surfaces:
– Clear Sealers or Polyurethane
For protecting painted wood surfaces, applying a clear sealer or polyurethane safeguards the finish against scratches, moisture, and UV damage. They come in a range of finishes, including matte, satin, and gloss, to correspond to your desired aesthetic.
– Varnish
Varnish provides a durable, hard finish for surfaces such as furniture, trim, and doors. It can be used on both oil-based and acrylic paints, offering added protection against UV rays, moisture, and abrasions.
– Epoxy Resin
An epoxy resin coating offers unparalleled durability for surfaces such as countertops, floors, and tabletops. It provides resistance to scratches, heat, and chemicals while delivering an attractive, glossy finish.
A durable painted surface is achievable by selecting the proper paint, preparing the surface meticulously, using correct painting techniques, and applying a protective topcoat. By following these steps, your painted surface will not only look great but will maintain its integrity for years to come.
Step | Description |
|---|---|
1. Choose the right type of paint | Select paints with high-quality ingredients, proper adhesion, and durability, such as water-based acrylic or alkyd paints. |
2. Prepare the surface | Thoroughly clean the surface to remove dirt, grease, and other contaminants. Remove any loose or peeling paint and repair cracks or holes before painting. |
3. Apply a primer | Use a high-quality primer to ensure proper adhesion of the paint and to provide a smooth and uniform surface for painting. |
4. Apply multiple coats of paint | Apply at least two coats of paint to the surface, allowing each coat to dry completely before applying another. |
5. Protect the paint | Use a protective clear coat or sealer to add an extra layer of protection to the painted surface. This will prevent UV damage, water damage, and other environmental factors from affecting the paint. |
6. Proper maintenance | Keep the painted surface clean and free from dirt or contaminants, and periodically inspect for signs of wear or damage. Touch up the paint as needed to maintain its durability. |
Essential Pre-Painting Preparation Steps
• Importance of Proper Preparation
Before diving into any painting project, it is essential to do proper preparation to achieve a high-quality and long-lasting finish. Preparation ensures that the paint adheres well to the surface, creating a smooth and consistent result.
• Cleaning the Surface
It is essential to clean the surface thoroughly before applying any paint. This includes removing dirt, dust, and grime, which can prevent the paint from bonding well with the surface. You can use a variety of cleaning methods, depending on the surface material and level of dirtiness:
- Mild detergent and water: For general cleaning, use a mixture of warm water and mild detergent with a sponge or soft cloth. Gently scrub the surface and rinse with water.
- Sugar soap: If the surface has greasier dirt, use a sugar soap solution, which is more effective in breaking down grease and grime. You can find sugar soap at most hardware stores.
- Pressure washing: For exterior surfaces, such as siding or fences, a pressure washer can be an efficient way to remove built-up dirt and debris. Make sure to follow the manufacturer’s guidelines and be cautious not to damage the surface during the process.
• Sanding and Scuffing
Sanding is a crucial step in preparing surfaces for painting. It helps remove any previous paint layers, smoothes out the surface, and promotes better paint adhesion. Here are some tips for proper sanding:
- Choose the right sandpaper: Sandpapers are available in different grit numbers, indicating their coarseness. For initial sanding, use a coarser sandpaper (80 to 100 grit) and follow up with a finer sandpaper (180 to 220 grit) for a smooth finish.
- Apply even pressure: When sanding, use a sanding block or pad and apply even pressure across the surface. This will help prevent any gouges or uneven spots.
- Always sand with the grain: For wood surfaces, sand in the direction of the wood grain to minimize scratches and maintain a consistent texture.
- Scuff smooth surfaces: Glossy or smooth surfaces, such as metal or plastic, require “scuffing” to create texture for better paint adhesion. Use fine-grit sandpaper (220 to 320 grit) and lightly sand the surface in a circular motion.
• Repairing Damages
Take the time to repair any visible damage on the surface before painting. This includes filling holes, cracks, dents, or gouges with an appropriate filler material. Filler types can include:
- Wood filler: For wood surfaces, use a wood filler to fill in any dents or holes. Apply with a putty knife, and once dry, sand the surface smoothly.
- Spackling compound: For drywall or plaster surfaces, use a lightweight spackling compound for small repairs. Apply with a putty knife and sand it smooth after it dries.
- Caulking: For gaps or cracks around windows, doors, and trim, use paintable caulking to seal the area. This helps to prevent moisture penetration and makes the surface ready for painting.
• Priming the Surface
Applying a primer is an essential step before painting. Primer helps seal the surface, ensures better adhesion of the paint, and provides an even and consistent finish. Some considerations when choosing a primer include:
- Select the right primer: Different surfaces require different primers. Make sure to select a primer that is compatible with your surface type and the type of paint you plan to use.
- Tint the primer: If you’re planning to use a dark or bold paint color, consider tinting the primer to a similar shade. This can help reduce the number of paint coats needed for full coverage.
- Apply the primer: Using a brush or roller, apply the primer to the surface in even strokes. Allow the primer to dry according to the manufacturer’s recommendations before applying paint.
• Protecting Surrounding Areas
Before painting, it is essential to protect surrounding areas from paint splatters and spills. This can be achieved by:
- Using painter’s tape: Apply painter’s tape around windows, doors, trim, and other areas where you don’t want paint. Make sure to press the tape firmly to prevent paint from seeping underneath.
- Covering floors and furniture: Lay down drop cloths or plastic sheeting to protect floors, furniture, and other items from paint drips and spills.
By following these steps and properly preparing your surfaces, you’ll be well on your way to achieving a professional-quality paint job that lasts.
Paint Job Preparation Guide: What to Know
• Step 1: Choosing the Right Paint
Before you can start preparing for a paint job, it is essential to choose the right paint for your project. Consider the surface you’re going to paint, the desired finish, and the location of the project.
- For interior walls, choose water-based acrylic or latex paint.
- For exterior surfaces, opt for weather-resistant, water-resistant acrylic paint.
Also, take the time to select the appropriate sheen and color that fits your design goals.
• Step 2: Gathering Supplies
Before starting the paint job, gather the necessary supplies. These include:
- Paint, primer, and any thinner required for your chosen paint.
- Brushes, rollers, and paint trays.
- Ladder or step stool.
- Drop cloths, plastic sheeting, or old newspapers to protect floors and furniture.
- Painter’s tape for masking off areas that should not be painted.
- Sandpaper and a sanding block to smooth out surfaces.
- Spackling compound, caulk, and a putty knife for repairing gaps and cracks.
- Screwdriver, hammer, and pliers for removing hardware.
- Cleaning supplies, such as a vacuum, microfiber cloths, mild soap, and a sponge.
• Step 3: Preparing the Room
Before painting, prepare the room by:
- Removing all furniture or moving it to the center of the room and covering it with drop cloths.
- Removing artwork, curtains, and light fixtures.
- Turning off the electrical power and removing outlet covers and switch plates.
- Covering the floor with drop cloths or plastic sheeting and taping the edges down securely.
- Securing any loose wires or cables.
- Inspecting the walls and ceiling for flaws that need repairing.
• Step 4: Repairing Wall Surfaces
Before you start painting, it is essential to repair any damage to walls or ceilings. This includes filling in any dents, cracks, or holes with a spackling compound or joint compound.
Scrape off any peeling or flaking paint, and sand the area smoothly. I recommend using fine-grit sandpaper to avoid damage to the wall.
After the repairs are complete, be sure to clean the surface with a damp cloth to remove dust and debris.
• Step 5: Masking and Taping
To ensure a clean, professional finish, apply painter’s tape around any trim, baseboards, windows, and door frames. Use long, continuous strips rather than short pieces to achieve a straighter edge. Make sure to press the tape down firmly to prevent paint from seeping under the edges.
• Step 6: Priming the Walls
Priming the walls is an essential step for a flawless paint job. Primer will:
- Provide a consistent base for the paint, ensuring better color coverage.
- Seal porous surfaces, preventing the paint from being absorbed unevenly.
- Hide any stains or discolorations on the wall.
- Improve the durability of the paint, especially in high-traffic areas.
Apply the primer using a roller, starting at the top of the wall and working your way down. Allow the primer to dry completely before moving on to the next step.
• Step 7: Mixing the Paint
Mix the paint thoroughly before beginning to ensure a consistent color throughout the project. Pour the paint into a paint tray, and learn the proper technique for loading your brush or roller to avoid drips and uneven application.
A helpful hint – dip the brush only about half an inch into the paint and tap off the excess.
• Step 8: Applying the Paint
When applying the paint, use a roller for large areas and a brush for trimming and edging. Start at the top of the wall and work your way down.
Be sure to paint in a “W” or “M” pattern to achieve an even distribution of paint across the surface. Allow each coat to dry fully before applying additional coats if necessary.
• Step 9: Clean-Up and Touch-Ups
Once the paint is dry, carefully remove the painter’s tape, being sure not to peel away any paint in the process. If any paint has bled through, use a small brush and carefully touch up the affected areas.
Finally, clean brushes, rollers, and trays and dispose of any used drop cloths or plastic sheeting. Reassemble the room by reinstalling fixtures, hardware, and furniture.
By following these steps, you can effectively prepare for a paint job and achieve a professional-looking result. Remember to take your time, ensure safety measures are in place and be patient throughout the process for the best possible outcome.