Essential Surface Prep For Lasting Paint Jobs. What Pros Say
When it comes to achieving a lasting and professional-looking paint job, surface preparation is a crucial starting point. With the right techniques and tips in your arsenal, you can ensure the longevity, durability, and quality of your next painting project. Let’s dive into the essential steps for preparing surfaces to deliver that perfect finish you can be proud of for years to come.
Essential surface prep for lasting paint jobs:
Essential surface preparation for a lasting paint job involves cleaning the surface thoroughly, repairing any damage, priming the surface, and protecting surroundings and fixtures. Proper preparation ensures the paint adheres well, resulting in a durable and attractive finish.

Discover the secrets to achieving long-lasting, professional-quality paint finishes. We’ve got the essential surface preparation techniques, tips, and tricks you need to ensure your next paint job outlasts and outshines the competition. Read on to learn more!
Contents
- 1 Crucial Surface Preparation for Durable Paintwork
- 2 Optimal Surface Preparation Techniques for Painting
- 3 Enhance Paint Job Longevity with These Tips
- 3.1 • Preparing the Surface
- 3.2 • Choose High-Quality Paints
- 3.3 • Apply Multiple Coats
- 3.4 • Utilize a Primer
- 3.5 • Apply Paint in Ideal Conditions
- 3.6 • Use Proper Painting Techniques
- 3.7 • Protect the Painted Surface
- 3.8 • Maintain and Clean Regularly
- 3.9 • Evaluate and Consider Paint Warranties
- 3.10 • The Bottom Line
- 4 Key Preparatory Work for Successful Painting Projects
- 5 Effective Paint Surface Preparation Tools and Methods
Crucial Surface Preparation for Durable Paintwork
A lasting paint job begins with proper surface preparation. Without adequate prep work, the new paint is likely to chip, crack, or peel in a short amount of time.
• Clean the Surface Thoroughly
Before starting the prep work, ensure that the surface is spotless. Dust, dirt, and grease can impair paint adhesion and cause uneven coverage.
- Wash the surface: Use a mild detergent and water solution to remove dirt and grease. For stubborn stains, a degreaser may be necessary. Rinse the surface thoroughly and allow it to dry completely.
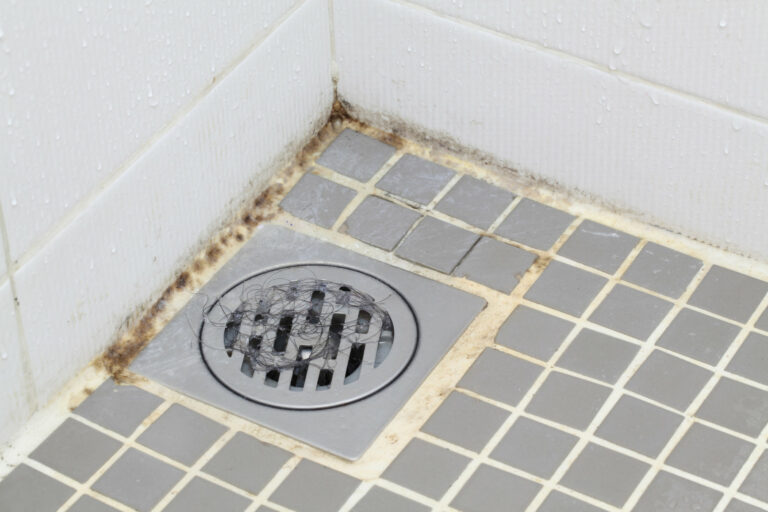
- Remove mildew and mold: For surfaces with mold or mildew growth, use a bleach solution to kill the fungi. Follow up by scrubbing the area with a stiff brush and rinsing with water.
- I recommend following the Centers for Disease Control and Prevention (CDC) guidelines on mold cleanup for the best results.
- Surface dusting: Before painting, use a tack cloth or a soft brush to remove any dust or cobwebs from the surface.
• Repair Surface Damage
Inspect the surface for any imperfections, such as holes, cracks, and loose or peeling paint. Repairing these flaws will result in a smooth finish.
- Patch holes and cracks: Use filler or spackle to fill any small gaps or holes in the surface. Apply the filling compound with a putty knife, ensuring it is smooth and level with the surrounding area. Allow the filler to dry completely before sanding.
- Remove loose and peeling paint: Use a scraper or paint remover to eliminate any chipping or peeling areas. Be sure to remove the paint cleanly and carefully to avoid causing further damage to the surface.
- Sand the surface: Sanding the entire area ensures a smooth and even finish while promoting better paint adhesion. Start with coarse-grit sandpaper to remove rough spots or existing paint, then progress to finer grits for a smooth finish.
- I recommend using a sanding block or an electric sander for large surfaces to minimize fatigue and promote even pressure.
• Prime the Surface
A primer is essential for long-lasting paint jobs, as it creates a uniform surface for the paint to adhere to, ensuring a consistent finish.
- Choose the right primer: Select a primer that is appropriate for the surface you are painting. Options include oil-based latex or shellac primers. Consult the paint manufacturers’ recommendations for the best match.
- I recommend a stain-blocking primer for surfaces with water stains, ink, or other difficult-to-cover marks to prevent them from bleeding through the paint.
- Apply the primer: Use a brush or roller to apply the primer evenly across the entire surface. Allow the primer to dry fully, as indicated by the manufacturer’s instructions.
- Sand the primed surface: Lightly sand the dried primer using fine-grit sandpaper to achieve a smooth and even finish. Wipe away the sanding dust before painting.
• Protect Surroundings and Fixtures
Before applying the paint, take necessary precautions to protect the surrounding area and any fixtures attached to the surface.
- Mask edges and trims: Use painter’s tape to mask off any adjoining surfaces that you do not want to paint, such as trims, baseboards, and neighboring walls.
- Cover the floor: Place drop cloths, plastic sheeting, or old newspapers on the floor to protect it from paint spills and splatters.
- Remove or cover fixtures: If possible, remove any fixtures, such as switch plates or light fixtures, from the surface. If removal is not feasible, mask them with painter’s tape or cover them with plastic bags.
• Start Painting
After completing the necessary prep work, you are ready to apply the paint. Remember, a successful and lasting paint job depends on diligent surface preparation. By following these essential steps, your paint project will have an enduring and attractive finish.
Optimal Surface Preparation Techniques for Painting
A successful paint job starts with proper surface preparation. From my experience as a professional painter, I can tell you that good surface preparation is the secret sauce to achieving a durable and visually pleasing paint job.
• Cleaning the Surface
Before you paint, it’s crucial to clean the surface thoroughly. Paint adheres best to a clean, dust-free surface.
Start by removing all loose dirt, dust, and debris from the surface using a soft-bristle brush, a vacuum cleaner, or a towel. If the surface is greasy or oily, use a mild detergent or degreaser to remove the grime, ensuring there’s no residue left behind.
For exteriors, you can use a pressure washer, but proceed with caution to prevent damaging the surface.
• Repairing Surface Damage
After cleaning, check the surface for any damage, such as cracks, holes, or peeling paint. Repair these imperfections to achieve a smooth and even surface.
– Fixing Cracks and Holes
Fill any cracks or holes using the appropriate filler or putty. For smaller cracks and holes, a lightweight spackle or premixed filler works best. For larger damages, use patching compounds such as joint compounds or epoxy fillers.
Once applied, smooth the material with a putty knife and let it dry according to the manufacturer’s instructions. Finally, sand the dried filler with medium-grit sandpaper to achieve a smooth and even surface.
– Removing Peeling Paint
Loose, cracked, or peeling paint should be removed before applying a new coat. Use a paint scraper, wire brush, or an electric sander with coarse-grit sandpaper to remove the old paint.
Be sure to wear proper safety gear, such as gloves, goggles, and a dust mask, especially when dealing with lead-based paint, which can be hazardous when disturbed. For more information on lead paint safety, visit The United States Environmental Protection Agency website.
• Sanding the Surface
Sanding is an essential step in surface preparation as it helps create a smooth, even surface, allowing the paint to stick better. Begin with coarse-grit sandpaper (60-80 grit) and progress to fine-grit sandpaper (180-220 grit) for a smooth finish.
– Manual Sanding
For small surfaces, manual sanding with a sanding block or sandpaper wrapped around a wooden block is sufficient. When sanding, always move in the direction of the grain for wood surfaces or in a circular motion for other surfaces.
– Power Sanding
For larger surfaces or rough textures, using a power sander can save time and effort. Make sure to choose the correct type of power sander based on the surface you’re working on (i.e., orbital sander for flat surfaces, detail sander for intricate surfaces).
• Deglossing the Surface
If the surface to be painted is glossy, it’s essential to degloss or dull the finish. This promotes better adhesion between the paint and the surface.
You can degloss by either sanding the surface with fine-grit sandpaper, using a liquid deglosser, or applying a bonding primer specifically designed for glossy surfaces.
• Priming the Surface
Applying a primer is arguably the most critical step in surface preparation. A primer seals porous surfaces, covers stains, and provides a uniform base for the paint, ensuring better adhesion and durability.
– Choosing the Right Primer
Select a primer that is specifically designed for the type of surface you’re working on (e.g., wood, metal, masonry). Primers are also available in oil-based, latex, or shellac-based formulations; choose the one most compatible with the type of paint you plan to use.
– Applying the Primer
Before applying the primer, be sure to stir it well and strain it through a paint filter to remove lumps or impurities. Apply a thin, even coat of primer using a brush or roller, following the manufacturer’s recommendations for drying time before applying the paint.
• Final Thoughts
Proper surface preparation is the key to a successful paint job. Remember to clean, repair, sand, degloss, and prime the surface before painting. With these steps in mind, you can achieve a professional-looking and long-lasting paint job.
Don’t skip any steps, as each one contributes to the overall quality and durability of the finished project. Good luck, and happy painting!
Step | Description |
|---|---|
Clean the surface | Remove dirt, dust, grease, and any other debris from the surface to ensure proper adhesion of the paint. |
Repair any damage | Fix any holes, cracks, or other imperfections in the surface. Make sure the surface is smooth and even. |
Sand the surface | Lightly sand the surface to create a smooth and slightly rough surface for the paint to adhere to. |
Prime the surface | Apply a high-quality primer to provide a uniform base for the paint, ensuring better adhesion and a longer-lasting finish. |
Tape off areas | Use painter’s tape to protect any areas you do not want to paint, such as trim, windows, and hardware. |
Enhance Paint Job Longevity with These Tips
A fresh paint job can give your space a new look, but it’s important to ensure that it lasts for a longer time.
• Preparing the Surface
Before starting any paint job, proper surface preparation is crucial in ensuring its longevity. Start by cleaning the surface to remove dust, dirt, and grease. For exterior surfaces, consider using a pressure washer for an effective cleaning process.
After cleaning, ensure the surface is dry before proceeding to the painting process.
• Choose High-Quality Paints
Invest in high-quality paints, as they can make your paint job last longer. Low-quality paints often wear out quickly, requiring more frequent touch-ups and repainting.
Many experts recommend using 100% acrylic paint for most surfaces, due to its durability and resistance to wear, as well as its color retention properties. It’s also essential to choose a paint specifically designed for the type of surface you’re painting.
• Apply Multiple Coats
Applying multiple coats of paint helps in building a protective layer on the surface, ensuring better longevity. Generally, it is advised to apply at least two coats of paint, especially for surfaces exposed to harsh weather conditions or direct sunlight.
• Utilize a Primer
Using a primer before applying paint is a vital step that helps the paint adhere better to the surface, guarantees even color coverage, and enhances its durability. Primers are available in various types, so it’s important to choose one that’s suitable for your specific surface.
The Environmental Protection Agency (EPA) provides information on selecting the right primer and paint for specific surfaces, which you can find here.
• Apply Paint in Ideal Conditions
Proper timing and climate conditions are essential when applying paint. Avoid painting in extreme temperatures or during high humidity. Also, when painting outdoors, avoid direct sunlight and choose a day with a moderate temperature so the paint can dry evenly.
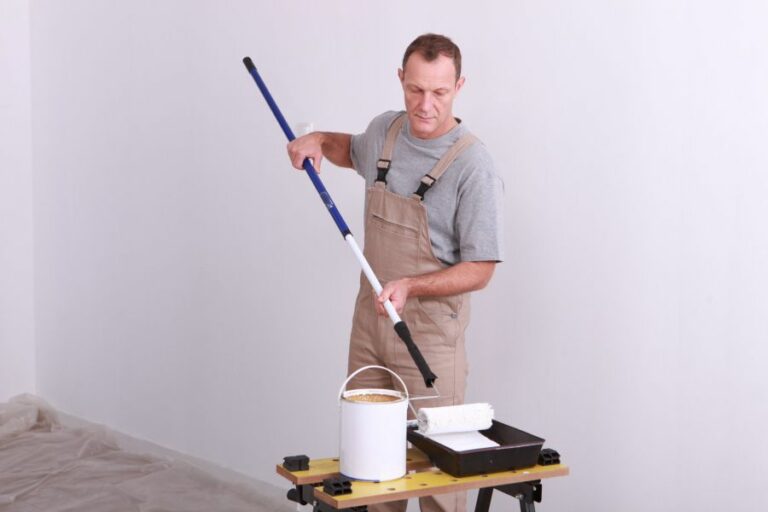
• Use Proper Painting Techniques
Using appropriate techniques not only gives your paint job a professional finish but it also helps enhance its durability. While painting, maintain a reasonable speed to avoid leaving uneven paint layers or brush marks.
Use a brush for cutting in around the edges and a roller for more extensive areas. Also, remember to maintain a wet edge to avoid lap marks, which can make the paint job look uneven and affect its durability.
• Protect the Painted Surface
Another crucial aspect of making a paint job last longer is protecting the surface. For exterior surfaces, add a clear sealer to safeguard against harsh weather conditions, such as sun exposure, rain, and wind.
For interior surfaces, use an acrylic sealer or coating to add an extra layer of protection against dust, stains, and dirt, which can all affect the longevity of the paint job.
• Maintain and Clean Regularly
Regular maintenance and cleaning of your painted surfaces prolong their lifespan. For exterior surfaces, pressure wash them yearly to remove dirt and grime. For interior surfaces, regular dusting and wiping with a damp cloth can remove dirt and stains.
Additionally, inspect your painted surfaces for any early signs of wear or damage, such as chipping or peeling, and touch up the affected areas immediately to prevent the issue from escalating further.
• Evaluate and Consider Paint Warranties
When purchasing paint, inquire about the manufacturer’s warranty, which indicates the expected lifespan of the paint under normal conditions. This information can help you make an informed decision when choosing the paint and manage your expectations regarding its durability.
• The Bottom Line
By adhering to the above tips and techniques, you can make your paint job last longer while maintaining its professional appearance. Proper preparation, thoughtful paint selection, and suitable application techniques all contribute to a long-lasting, durable paint job.
Keeping your painted surfaces well-maintained and clean and addressing any issues as soon as they arise will only add to the longevity of your paint job, ensuring it continues to look fresh and attractive for years to come.
Key Preparatory Work for Successful Painting Projects
Proper surface preparation is crucial for achieving professional-quality results when painting. A clean, smooth, and uniformly prepared surface is the foundation for achieving even and consistent paint coverage.
• Cleaning the Area
The first step in preparing for painting is to clean the area thoroughly. This involves:
- Removing dirt, dust, and debris.
- Washing the surface with a mild detergent and water.
- Rinsing the surface with clean water.
- Allowing the surface to dry completely.
For stubborn stains, a specialized cleaner or degreaser may be required. It is essential to choose a product that is safe for the material being cleaned.
• Repairing Surface Damage
Once the surface is cleaned, inspect it for any chips, cracks, or other imperfections that must be addressed before painting.
– Filling Holes and Gaps
Small holes, gaps, and cracks can be filled with caulk or suitable filler material. After applying the filler, use a putty knife or other appropriate tool to smooth the surface and remove excess material. Allow the filler to dry fully before proceeding.
– Repairing Damaged Drywall
For larger holes and damaged areas in drywall, a more comprehensive repair may be required. This involves:
- Cutting a piece of replacement drywall to fit the damaged area.
- Securing the new piece to the wall studs.
- Applying joint compound to the seams and smoothing it out.
- Allowing the joint compound to dry and sanding it smooth.
– Smoothing Rough Surfaces
Rough or uneven surfaces should be sanded smooth before painting. Use a sanding block, sandpaper, or an electric sander to create an even surface.
• Removing Loose Paint
Loose or flaking paint must be removed before applying new paint to the surface. This can be accomplished with:
- A paint scraper.
- Sanding with medium-grit sandpaper.
- A wire brush (for metal surfaces).
Take care not to damage the underlying surface when removing loose paint.
• Masking and Protective Measures
To protect areas not being painted, it is necessary to implement masking and other protective measures.
– Taping
Apply painter’s tape to the edges of windows, doors, and other adjacent surfaces to ensure clean, sharp lines.
– Drop Cloths
Cover the floors and furniture with drop cloths to protect them from paint spatters and spills.
– Ventilation
Ensure proper ventilation in the area being painted by opening windows and doors or using fans.
• Priming the Surface
A primer coat is essential for most surfaces, as it creates a uniform base and improves paint adhesion. Choose a primer that is suitable for the surface material and the type of paint being used.
- Apply the primer evenly, following the manufacturer’s instructions.
- Allow the primer to dry according to the recommended time.
- Sand the surface lightly to remove any imperfections or rough spots.
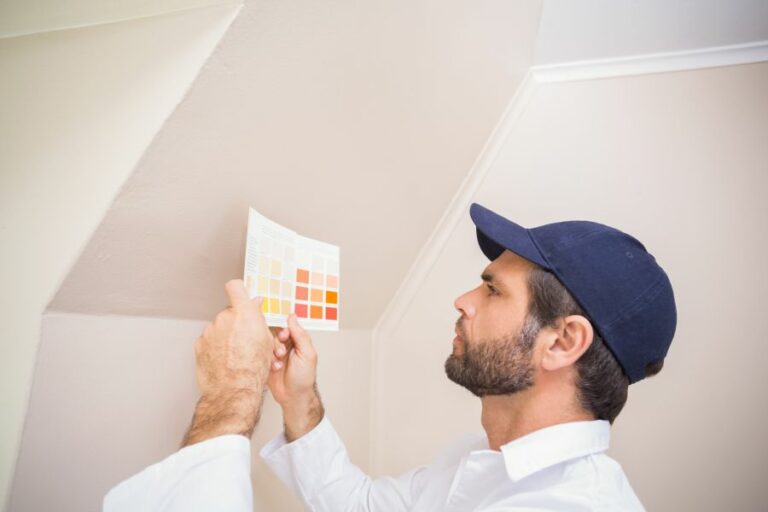
• Choosing the Right Paint and Tools
Picking the appropriate paint and tools will help ensure a successful painting project. Factors to consider include:
- Surface material (e.g., wood, metal, drywall).
- The texture of the surface (e.g., smooth or textured).
- Desired finish (e.g., glossy, satin, or matte).
When selecting paintbrushes and rollers, pay attention to the type of paint (e.g., oil-based, latex) and the surface being painted. High-quality brushes and rollers can help achieve a smoother finish and minimize brush strokes.
In conclusion, careful preparation is essential for achieving professional-quality results in any painting project. Taking the time to clean, repair, and prime the surface will help ensure a smooth and durable finish.
Additionally, selecting the right paint and tools for the job will contribute to a successful outcome. With proper planning and attention to detail, anyone can achieve professional-looking results in their painting endeavors.
Effective Paint Surface Preparation Tools and Methods
When it comes to painting any surface, proper preparation is key to achieving optimal results. Achieving a smooth, beautiful, and durable finish depends heavily on the time and effort invested in prepping the paint surface.
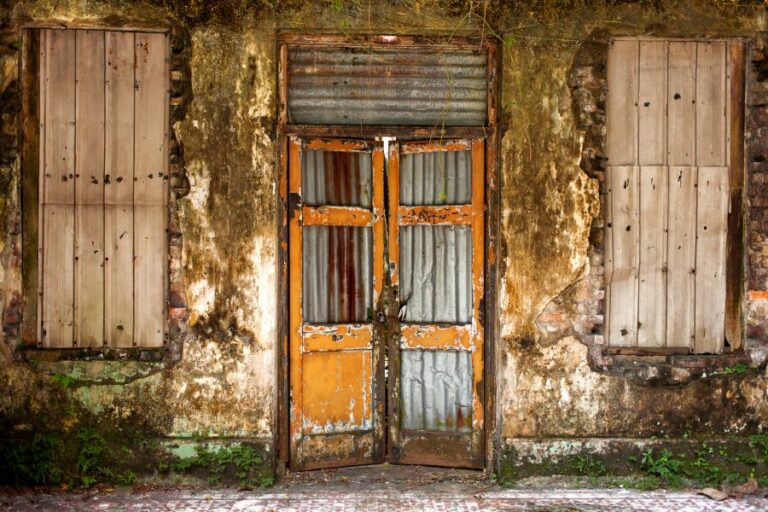
• Assessing the Surface Condition
Before starting any painting project, it is crucial to thoroughly assess the condition of the surface to be painted. This involves identifying any damage, dirt, or flaws that can potentially affect the final result. Common issues that could compromise paint adhesion and durability include:
- Cracks and holes
- Peeling or flaking paint
- Mold, mildew or water damage
- Grease, dirt or grime
Once you have identified these issues, it’s time to select the appropriate tools and materials required to address them properly.
• Cleaning the Surface
A clean surface is crucial for proper paint adhesion. Dirt, grease, and other contaminants can impede the paint from bonding with the surface, leading to eventual peeling and a less durable finish. To clean the surface, consider these steps:
- Remove loose dirt: Use a broom or brush to sweep away any loose dirt or debris from the surface.
- Wash with a detergent: For surfaces with dirt or grime, prepare a solution of water and mild dishwashing detergent. Apply the solution to the surface using a sponge, scrub brush, or soft cloth. Rinse thoroughly with clean water.
- Treat mildew: If you spot any mildew on the surface, use a bleach solution (1 part bleach to 3 parts water) to kill it. Apply the solution using a sponge or brush, and rinse it off after 10-15 minutes. (You can find more information about treating mildew from EPA.gov.)
Remember always to wear appropriate protective gear, such as gloves and safety goggles, when using cleaning chemicals.
• Repairing Surface Damage
After cleaning the surface, it’s time to address any cracks, holes, and other imperfections. The materials and techniques required will depend on the type and extent of damage present. Some common repair solutions include:
- Filling small holes and cracks: Use a pre-mixed spackling compound or lightweight filler to fill in small holes and cracks. Apply the compound with a putty knife, smoothing it out to match the surrounding surface. Allow the filler to dry and sand the area smooth.
- Repairing larger surface damage: For larger holes or dents, use a patching compound or two-part epoxy filler. Follow the manufacturer’s instructions for mixing and application, and sand the area smoothly once it has been set.
- Replacing damaged sections: In some cases, it may be necessary to replace damaged sections of the surface. This may involve cutting away and replacing damaged drywall or wood panels before continuing with the painting process.
• Sanding and Smoothness
Sanding is an essential step for achieving a smooth and even surface. Sanding removes imperfections and prepares the surface for a new layer of paint. Here are some tips to effectively sand surfaces:
- Choose the right abrasives: Use sandpaper with the appropriate grit for the surface and damage level. Coarser sandpaper (80 to 100 grit) is ideal for removing severe imperfections, while finer sandpaper (180 to 220 grit) is suitable for final smoothing and paint preparation.
- Use a sanding block: A sanding block helps ensure even pressure and a flat surface when sanding. For curved or irregular surfaces, a flexible sanding sponge may be more suitable.
- Sand with the grain: When sanding wood surfaces, be sure to sand along the grain of the wood to prevent scratches and maintain a smooth finish.
- Clean up after sanding: After sanding, use a tack cloth or vacuum with a soft brush attachment to remove any remaining dust from the surface.
• Primer: The Foundation for a Beautiful Finish
Applying a high-quality primer is essential for painting projects. Primer serves as a foundation for the paint, ensuring proper adhesion and a long-lasting finish. Here are some important factors when choosing and applying primer:
- Select the appropriate primer: Primers are available for specific surfaces, such as drywall, wood, or metal. Some are also designed for stain-blocking or to resist mildew. Read the primer label to ensure it is suitable for your project and surface.
- Apply the primer: Use a brush, roller, or paint sprayer to apply the primer evenly across the surface. Be sure to follow the manufacturer’s instructions for drying times before applying the topcoat.
• Final Thoughts
Proper surface preparation is the key to achieving professional-looking and long-lasting paint results. Be sure to assess the surface condition, clean and repair as necessary, sand for smoothness, and apply a high-quality primer before painting.
Taking the time and effort to prepare the paint surface properly will ensure your efforts are rewarded with a beautiful and durable finish that you can be proud of.
Item | Description |
|---|---|
Cleaning solution | A dedicated cleaning solution or soap and water can be used to remove dirt, grease, and other contaminants from the surface. |
Sandpaper | Various grits of sandpaper are used to scuff and smooth the surface, providing a solid foundation for the paint to adhere to. |
Tack cloth | A tack cloth is used to remove any dust or debris left behind after sanding, ensuring a clean surface for paint application. |
Primer | A primer can be applied to help the paint adhere and achieve a uniform finish, depending on the type of surface being painted. |
Painter’s tape | Used to protect areas that will not be painted, such as trim and molding, ensuring clean lines, and preventing accidental paint transfer. |
Drop cloths | Placed on the floor or over furniture to catch any paint spills, splatter, or drips, protecting surfaces from damage or mess. |