Protect Surfaces From Moisture Before Prep. What Pros Say
Ensuring surfaces are protected from moisture before any preparation is crucial for achieving optimal project results. Having the right knowledge and procedures can save you plenty of time and frustration. Luckily, we have the tips and techniques to shield surfaces from unwanted moisture, setting you up for a successful project outcome.
Protect surfaces from moisture before prep:>
Protecting surfaces from moisture before preparation is crucial to prevent paint peeling, structural damage, and mold growth. Identify and fix water leaks, install proper ventilation, apply moisture barriers, use moisture-resistant materials, and maintain a consistent temperature. Regular inspections and maintenance ensure surface integrity and longevity.

Say goodbye to water damage during surface preparation! We have all the tips and tricks you need to shield various surfaces from moisture effectively. Keep reading and learn how to protect your surfaces the right way – your future self will thank you!
Contents
- 1 Guard Surfaces Against Dampness Before Preparation
- 2 The Importance of Surface Prep for Waterproof Coatings
- 3 Cleaning Techniques for Surfaces Prior to Adhesive Use
- 4 Steps to Prepare a Surface for Effective Waterproofing
- 5 Influence of Humidity on Prepping and Applying Coatings
Guard Surfaces Against Dampness Before Preparation
• Importance of Protecting Surfaces from Moisture
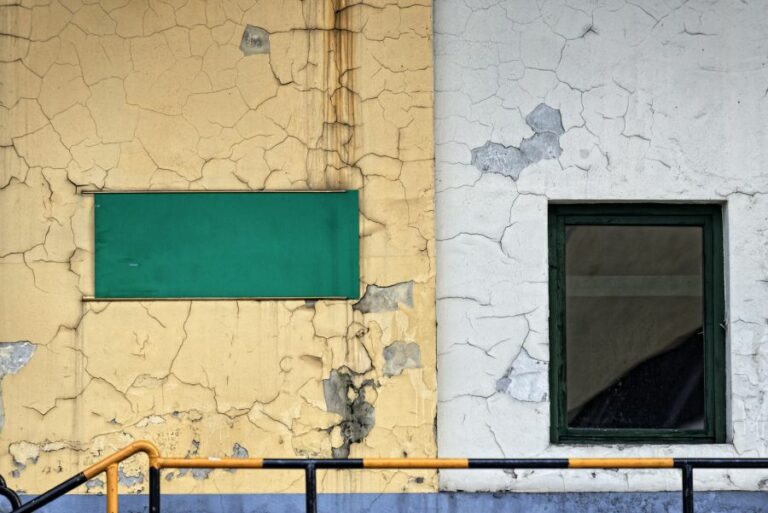
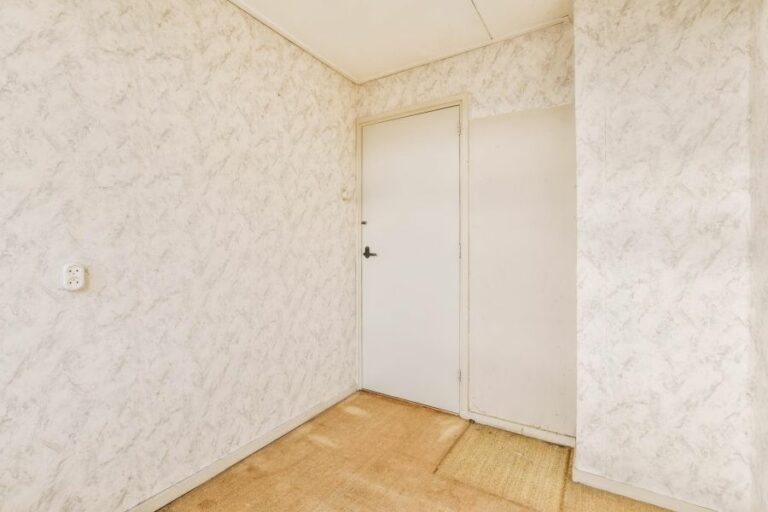
The first and most crucial step in any surface preparation is safeguarding the surfaces from moisture. Moisture is the main culprit behind various problems, such as paint peeling, structural damage, and mold growth.
Thus, it is essential to ensure that the surfaces are moisture-free before beginning any preparation process.
• Identifying Problematic Areas
– Investigate for Water Leaks
The primary cause of moisture is water leaks. Check for any signs of water leaks from plumbing fixtures, roofs, walls, or any adjoining spaces. Fixing the leaks beforehand minimizes the risk of moisture-related issues during the preparation process.
– Detect High Humidity Areas
High humidity in specific areas, such as bathrooms and kitchens, can lead to excess moisture on surfaces. Inspect these spaces for signs of high humidity, like condensation or constant dampness. Installing proper ventilation systems helps in mitigating this issue.
– Examine for Mold Growth
Mold grows in high-moisture areas and can cause severe damage, discoloration, and unpleasant odors. If you spot any mold growth, it is necessary to remove it and treat the area before proceeding.
• Steps to Protect Surfaces from Moisture
– Surface Cleaning
Thoroughly clean the surfaces you intend to treat. It is essential to remove any dirt, debris, or grease present, as these can act as moisture reservoirs.
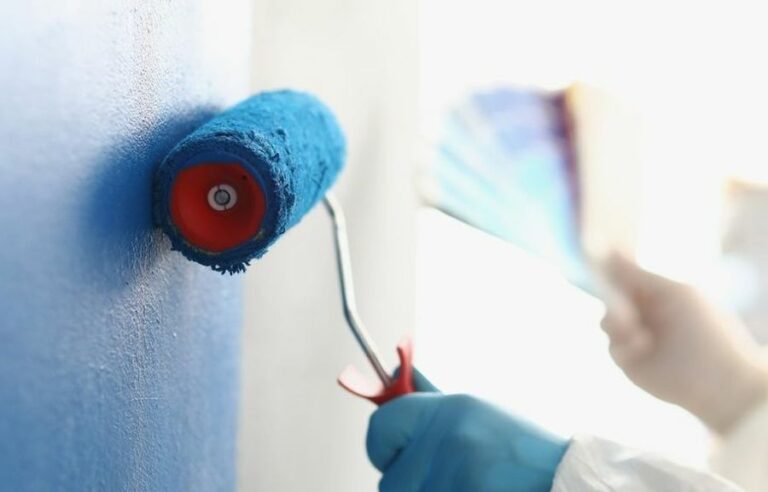
– Apply Moisture Barriers
Moisture barriers play a vital role in preventing any potential moisture intrusion into surfaces. There are various options available, such as waterproofing paints or specialized sealants, depending on the materials and purpose.
Waterproofing Paints
Waterproofing paints are suitable for porous surfaces, such as concrete or brick, and help prevent moisture penetration. It is important to choose a paint specifically labeled for waterproofing, as typical paints might not offer the necessary protection.
Sealants
Sealants like polyurethane or silicone are excellent for surfaces that require a flexible and durable moisture barrier. These products create a watertight seal and are suitable for areas with high moisture exposure, such as exterior walls or joint gaps.
– Install Proper Ventilation
In spaces with persistent high humidity, it is essential to have proper ventilation systems in place. One recommendation would be to install exhaust fans, especially in bathrooms and kitchens, to reduce the humidity level and prevent condensation.
– Use Moisture-Resistant Materials
When feasible, opt for moisture-resistant materials for surfaces prone to high moisture. For example, you can consider moisture-resistant drywall or cement boards.
– Maintain a Consistent Temperature
Maintaining a consistent temperature helps prevent condensation on surfaces. Installing insulation or using programmable thermostats can assist in maintaining the desired temperature in your space.
• Monitoring Surfaces and Maintenance
– Regular Inspections
Regularly inspect the surfaces to ensure their integrity and make sure moisture levels are under control. Look for any signs of damage, mold growth, or water leaks, and address them promptly.
– Maintenance of Moisture Barriers
Over time, moisture barriers can deteriorate or get damaged. Regular maintenance, such as repainting or resealing, ensures continued protection against moisture.
– Ensure Proper Ventilation
Ensure that the installed ventilation systems are functioning correctly and clean them periodically to maintain their efficiency.
– Handling Moisture-Related Issues
If you do encounter moisture issues after the preparation process, it is essential to address them immediately to prevent further damage. Depending on the extent of the issue, this may involve repairing water leaks, removing mold, or reapplying moisture barriers.
In conclusion, protecting surfaces from moisture before the preparation process is crucial in safeguarding them against potential damage and ensuring a successful project outcome.
Regular inspections, maintenance, and proper mitigation techniques go a long way in preserving the integrity and longevity of your surfaces. For more information on moisture management, you can visit the EPA website for tips and resources.
The Importance of Surface Prep for Waterproof Coatings
• The Foundation of a Strong Waterproofing System
Surface preparation plays a crucial role in determining the overall performance of any waterproofing system. Without proper surface preparation, the waterproof coating may not adhere correctly, resulting in inadequate protection and an increased likelihood of moisture infiltration.
• Key Factors for Adequate Surface Preparation
– Cleanliness
Before applying a waterproof coating, it is crucial to ensure the surface is clean and free of debris, dust, or contaminants. These particles can prevent the coating from adhering correctly to the surface, resulting in reduced bond strength.
Recommendation
Use a good-quality detergent to clean the surface thoroughly before proceeding with the application of the waterproof coating. Rinse the area with clean water to ensure all traces of the detergent are removed. Allow the surface to dry completely before applying the waterproof coating.
– Uniformity
An uneven surface can result in voids and pinholes in the waterproof coating, allowing moisture to creep in. It is vital to inspect the surface carefully for cracks, holes, or uneven textures and address any inconsistencies before applying the waterproof coating.
Recommendation
Use a high-quality waterproof mortar or filler to level the surface and fill any visible cracks or holes. Allow the filler material to cure as per the manufacturer’s instructions before applying the waterproof coating.
– Porosity
A highly porous surface can affect the proper absorption of waterproof coatings, resulting in reduced waterproofing efficiency. Therefore, it is crucial to assess the porosity of the substrate and take appropriate measures to combat any excessive porosity.
Recommendation
Apply a suitable primer or sealer designed to be compatible with your chosen waterproof coating. This will help in reducing the surface’s porosity and ensure a better bond between the coating and the substrate. Refer to the coating manufacturer’s guidelines for recommended primers or sealers.
• Methods of Surface Preparation
There are various methods available to ensure a well-prepared surface before applying a waterproof coating. Some of the common methods include:
– Mechanical Methods
Mechanical methods include sandblasting, grinding, and shot-blasting. These techniques physically remove contaminants from the surface and create a rougher texture to promote better adhesion for the waterproof coating.
– Chemical Methods
Chemical methods involve using chemical agents to remove contaminants from the surface. This could include acid etching, which removes surface contaminants and provides a rougher surface for better coating adhesion.
– Manual Methods
Manual methods include scrubbing, wire brushing, and sanding. These tools remove dirt, debris, and loose particles from the surface while also creating a more abrasive surface for waterproof coating adhesion.
• Best Practices for Surface Preparation
- Always consult the waterproof coating manufacturer’s guidelines for surface preparation requirements specific to the chosen product.
- Wear appropriate personal protective equipment (PPE) during the surface preparation process. This may include safety goggles, gloves, masks, and protective clothing.
- Remove any potential sources of moisture, such as fixing leaks or installing proper drainage systems, before applying the waterproof coating.
- Ensure that the surface is dry and free from any residual moisture. A moisture meter can be used to accurately measure the moisture content of the substrate.
- Avoid using excessive force during the surface preparation process, as this may cause damage to the substrate.
- Thoroughly inspect the surface after preparation to ensure there are no remaining contaminants, cracks, or uneven patches.
• Conclusion
Proper surface preparation is a critical step that should not be overlooked when applying waterproof coatings. By adhering to the best practices outlined in this article, you can significantly improve the performance and longevity of your waterproofing system.
Remember that successful waterproofing projects rely on a strong foundation so ensure that you invest sufficient time and effort in the surface preparation stage for optimal outcomes.
Cleaning Techniques for Surfaces Prior to Adhesive Use
Proper surface preparation is crucial when it comes to making sure adhesives bond securely to the material.
• Types of Surfaces and Recommended Cleaners
– Metal Surfaces
Metals are often coated with a thin layer of oil or grease to protect them from corrosion. These organic contaminants must be removed before applying adhesive:
- Alcohol-based cleaners: Isopropyl alcohol (IPA) is an effective cleaner for removing oil and grease from metal surfaces. It is inexpensive, evaporates quickly, and leaves no residue behind.
- Acetone: It is a powerful solvent that works well on sturdy metals like steel or aluminum. However, acetone must be used sparingly as it can cause damage to certain coatings or plastics.
- Degreasers: Commercial degreasers or solvents designed to remove grease and oil from metal surfaces are available. Follow the manufacturer’s instructions for proper usage.
Recommendation: Isopropyl Alcohol
– Plastic Surfaces
Plastics are susceptible to static electricity that attracts dust, and some have mold-release agents or surface treatments that can affect the bond:
- Soap and water: A mixture of mild soap and water can work for cleaning plastic surfaces. Be sure to rinse the surface thoroughly and dry it to remove any residue.
- Alcohol-based cleaners: As mentioned earlier, IPA can also be used on plastic surfaces. However, it is important to test on a small, inconspicuous area first, as some plastics may be sensitive to alcohol.
Recommendation: Soap and water
– Wood Surfaces
Dust, dirt, and oils can affect the bond between adhesives and wood surfaces. Here are some methods for cleaning wood before applying adhesive:
- Vacuum: A vacuum cleaner with a brush attachment can help remove dust from wood surfaces.
- Damp cloth: Using a clean, damp cloth can help remove dirt and grease from the surface. Allow the wood to air-dry completely before applying adhesive.
- Wood cleaners: Commercial wood cleaners are available to remove dirt, oils, and wax. Follow the manufacturer’s instructions for proper usage.
Recommendation: Vacuum and damp cloth
• Cleaning Techniques and Tips
– Proper Wiping Method
When using a solvent or cleaner, follow these wiping techniques to avoid leaving residue or contaminants behind:
- Wet a lint-free cloth with the cleaning solution.
- Wipe the surface in one direction, overlapping each pass to ensure complete coverage.
- Use a clean side of the cloth for each pass.
- Allow the surface to air-dry or use a separate clean, dry cloth to remove excess solvent.
– Sanding or Abrading the Surface
For certain applications or materials, it may be necessary to sand or abrade the surface to improve the adhesive bond:
- Use sandpaper or an abrasive pad to create a uniform, rough surface.
- Remove the sanding dust with a vacuum or a clean cloth dampened with cleaner.
- Remember to wear safety glasses and a dust mask when sanding.
Recommendation: 3M Scotch-Brite abrasive pads
• Testing the Bond
Before committing to a particular cleaning method or adhesive, it is important to test the strength of the bond on a small, inconspicuous area or a sample of the material:
- Prepare the surface according to the chosen cleaning method.
- Apply a small amount of adhesive and allow it to cure fully.
- Test the bond by pulling or applying force at the bonded area.
- Adjust the cleaning method or adhesive accordingly if the bond is not satisfactory.
• Final Thoughts
To ensure the success and longevity of an adhesive bond, it is imperative to clean surfaces properly. By following the recommended cleaning methods shared in this article, based on the material being bonded, you will provide a clean, optimal surface for adhesion, resulting in a strong, long-lasting bond.
What do you clean surfaces with before adhesive?
Surface Type | Cleaning Agent |
|---|---|
Metal | Isopropyl Alcohol |
Wood | Water and mild soap |
Plastic | Acetone or rubbing alcohol |
Glass | Glass cleaner or isopropyl alcohol |
Concrete | Water and mild soap or TSP (trisodium phosphate) solution |
Ceramic | Rubbing alcohol or mild soap and water |
Steps to Prepare a Surface for Effective Waterproofing
Before embarking on any waterproofing project, proper surface preparation is crucial.
• Evaluating the Surface
– Identifying Surface Material
The first step in surface preparation is determining the type of material you are working with. Common materials include:
- Concrete
- Masonry (brick, stone, grout)
- Wood
- Metal
- Plastics
Understanding the surface material will guide your selection of waterproofing products and surface preparation methods. The U.S. General Services Administration offers resources on various types of materials and how to protect them from water infiltration.
– Assessing the Condition
Once you have identified the material, you need to assess the condition of the surface. Look for:
- Cracks and gaps
- Uneven surfaces
- Loose or damaged material (such as flaking paint, deteriorated concrete, or rotting wood)
- Mold or mildew
These surface imperfections may require additional treatment or repair before you can proceed with waterproofing.
• Cleaning the Surface
– Removing Existing Coatings and Contaminants
For proper adhesion of waterproofing materials, the surface must be free of contaminants and existing finishes. For example:
- Strip away old paint, sealants, and coatings using a paint remover or abrasive methods (such as sandblasting, grinding, or wire brushing).
- Remove loose or damaged material, such as chipping concrete, crumbling bricks, or flaking paint.
- Clean away dirt, dust, and mildew.
– Washing the Surface
Washing the surface is crucial to remove any lingering contaminants that may interfere with the waterproofing product’s adhesion. It is essential to:
- Power wash the surface at a low to moderate pressure to avoid surface damage.
- Avoid using harsh cleaning chemicals (like bleach) that could damage the surface material or harm the environment.
- Allow the surface to dry completely before applying waterproofing products, as moisture can negatively impact adhesion or cause the product to cure incorrectly.
• Repairing Surface Damage
– Patching Cracks and Gaps
Fill cracks, gaps, and joints with a suitable patching material. For example:
- For concrete and masonry surfaces, use a cement-based patching compound or hydraulic cement.
- For wood surfaces, use wood filler or epoxy resin.
- For metal surfaces, use a rust-inhibiting, metal-compatible filler.
Allow the patching material to cure according to the manufacturer’s instructions before proceeding with waterproofing.
– Smoothing the Surface
An uneven surface can limit the effectiveness of waterproofing materials. It is necessary to:
- Sand or grind concrete or masonry surfaces to create a smooth, even surface.
- Use a leveling compound on floors to address dips, valleys, and irregularities.
Once the surface has been leveled and smoothed, remove any dust or debris before applying the waterproofing product.
• Selecting the Appropriate Waterproofing Product
With a clean, repaired, and smooth surface, it is essential to choose the right waterproofing product. Factors to consider include:
- The surface material (as discussed earlier)
- The location of the surface (interior or exterior)
- The type and severity of water exposure
- Environmental factors (such as freeze-thaw cycles or UV exposure)
- Local building codes and regulations
Many waterproofing products have specific surface preparation and application instructions; always follow these closely to ensure the best results.
• Applying a Primer (If Necessary)
Some surfaces and waterproofing products require the use of a primer. Primers enhance adhesion, reduce porosity, and provide a surface more receptive to the waterproofing material. If a primer is required:
- Choose a primer compatible with both the existing surface material and the selected waterproofing product.
- Apply the primer as per the manufacturer’s instructions.
- Allow the primer to dry completely before applying the waterproofing material.
With a properly prepared surface, you can now proceed to apply your chosen waterproofing product. Remember that thorough surface preparation is a vital aspect of a successful waterproofing project, and it shouldn’t be rushed or overlooked.
Step | Description |
|---|---|
1 | Clean the surface: Remove dirt, debris, and loose particles from the surface using a broom, brush, or vacuum cleaner. |
2 | Inspect the surface: Look for cracks, holes, or any other damages that need to be repaired before waterproofing. Mark any problematic areas for repair. |
3 | Repair damages: Use patching materials or sealants to close any gaps, cracks, or holes found during the inspection. |
4 | Smooth the surface: Sand or grind the surface, if necessary, to remove any rough spots, old paint, or irregularities that may prevent proper adhesion of the waterproofing material. |
5 | Prime the surface: Apply a primer if required by the waterproofing product, following the manufacturer’s instructions. Allow the primer to dry completely before applying the waterproofing material. |
6 | Mask off any areas that should not be waterproofed: Use painter’s tape, plastic sheeting, or other covering materials to protect adjacent surfaces, fixtures, or objects that should not be coated with the waterproofing material. |
Influence of Humidity on Prepping and Applying Coatings
Humidity plays a crucial role in the success of any surface preparation and coating application project. It can significantly impact the performance, adhesion, and longevity of coatings, leading to potential defects and quality concerns.
• Understanding Humidity and Its Effect on Coatings
Humidity is the measure of water vapor present in the air. It’s usually expressed as a percentage, known as relative humidity (RH). When RH levels are too high, excess moisture in the air can cause various issues with coating application and drying times.
On the other hand, when RH is too low, coatings may dry too quickly, leading to improper film formation and other defects.
– High Humidity Issues
High humidity can negatively impact surface preparation and coating application in several ways:
- Adhesion problems: High humidity can cause moisture to become trapped between the surface and the coating, weakening the bond between the two and leading to adhesion failures.
- Extended drying times: When the RH is high, coatings may take longer to dry, which can lead to issues like sagging, running, or uneven film build.
- Blushing or hazing: High humidity can cause blushing, a white haze that forms on the surface of the coating due to moisture reacting with the coating’s solvents.
- Contamination: Excess moisture in the air can cause condensation on the surface being coated, leading to water spotting, contamination, or corrosion under the coating.
– Low Humidity Issues
Low humidity levels can also cause problems in surface preparation and coating application:
- Dry spray or overspray: When humidity is too low, solvents within the coating may evaporate too quickly, causing a rough, dry, or dusty texture on the coating’s surface.
- Poor film formation: Low humidity can prevent coatings from flowing and leveling properly, resulting in an uneven appearance or improper film thickness.
- Static electricity: Dry air can increase the potential for static electricity, which can attract dust and other contaminants to the surface, impacting the coating’s performance and appearance.
• Best Practices for Managing Humidity in Surface Preparation and Coating Application
To ensure a successful surface preparation and coating application, proper humidity management is key. Below are some recommendations for managing humidity during a project:
– Monitor and Control Humidity Levels
Monitor and maintain the humidity levels in your workspace. This can be achieved using devices such as hygrometers, digital RH meters, or psychrometers.
The ideal humidity range for most coating applications is between 40%-60% RH, though it’s crucial to consult the coating manufacturer’s recommendations for specific application conditions.
When humidity levels are outside the recommended range for a coating, consider using dehumidifiers or humidifiers to adjust the environment accordingly.
– Maintain Proper Surface and Material Temperatures
Ensure that both the surface being coated and the coating materials are within the recommended temperature range. This can help prevent condensation and promote proper drying times.
During surface preparation, use heaters or fans to maintain the surface temperature above the dew point. The dew point is the temperature at which moisture in the air condenses on surfaces.
By maintaining a surface temperature above the dew point, you can minimize the risk of moisture-related issues during coating application.
– Proper Ventilation and Air Movement
Proper ventilation and air movement are essential for managing humidity levels and ensuring even drying of coatings. Air circulation can help reduce moisture-related issues by promoting evaporation and minimizing the risk of condensation.
However, it’s essential to strike a balance, as excessive air movement can contribute to dry spray or other defects.
– Choose the Right Coating System
Select a coating system that is designed to perform well in the specific conditions of your project. Some coatings contain additives or chemistries formulated to mitigate the effects of high or low humidity.
Consult with your coating manufacturer or supplier to determine the best products for your project’s unique requirements.
– Follow Manufacturer Recommendations
Lastly, always follow the manufacturer’s recommendations for surface preparation, application, and curing conditions. Manufacturers test their coatings and provide guidelines for achieving the best performance, and adhering to these guidelines can greatly reduce the risk of humidity-related issues.
In conclusion, proper management of humidity levels is essential to ensure the success of any surface preparation and coating application project.
By understanding the effects of humidity on coatings and following best practice guidelines, you can help prevent potential defects and ensure the longevity and performance of your coating system.