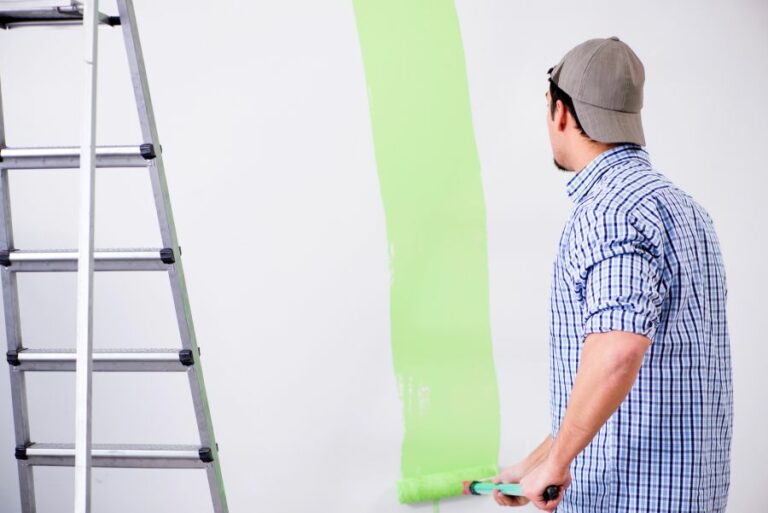
Effective Surface Preparation For Paint. What Pros Say
Preparing a surface effectively for paint can significantly impact the final result, and we have the expertise to guide you through the process seamlessly. With our thorough understanding of the key factors involved, we will ensure that the surface is immaculately ready to receive paint, guaranteeing a flawless and long-lasting finish.
Effective surface preparation for paint:
Effective surface preparation for painting involves assessing the surface, cleaning it of dust, dirt, grease, and mildew, repairing damaged surfaces by filling cracks or holes and removing peeling paint, sanding for a smooth finish, and priming for proper paint adhesion. This ensures a high-quality, long-lasting paint job.

Discover the secrets to impeccable paint jobs by mastering surface preparation techniques. Uncover the vital steps, tools, and tips to ensure a smooth, long-lasting finish. Read on as we reveal how to transform any space with a flawless coat of paint!
Contents
- 1 Efficient Methods for Surface Preparation Before Painting
- 2 Optimal Techniques to Ready Surfaces for Painting
- 3 Exploring Different Surface Preparation Methods for Paint
- 4 Standards for Preparing Surfaces to be Painted
Efficient Methods for Surface Preparation Before Painting
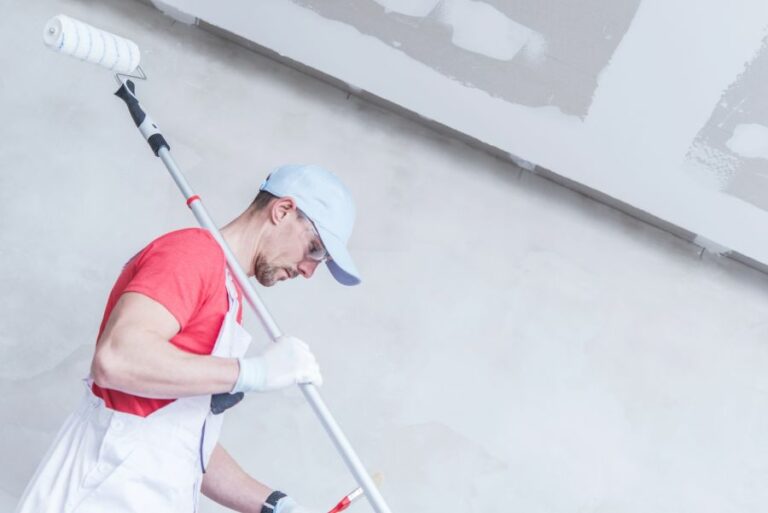
A well-executed paint job can significantly improve the appearance and value of a property. However, the success of a painting project highly depends on the thoroughness and effectiveness of the surface preparation.
• Importance of Surface Preparation
Proper surface preparation is essential to achieve a high-quality, long-lasting paint finish. Failing to properly prepare the surface can lead to paint peeling, cracking, or blistering, resulting in costly repairs and repainting.
• Assessing the Surface
Before commencing the surface preparation process, it is important to carefully assess the surface to determine the appropriate methods and tools required.
Some factors to consider include the type of material (e.g., wood, metal, concrete), the presence of any existing paint or coatings, and the presence of contaminants (e.g., dirt, grease, mildew).
• Cleaning the Surface
– Dust and Dirt Removal
The first step in surface preparation is cleaning the surface to remove any dust, dirt, or debris that may interfere with the adhesion of the paint. A stiff-bristle brush or broom can be used to remove loose dirt and debris.
For more thorough cleaning, a pressure washer or a garden hose with a high-pressure nozzle can help dislodge stubborn dirt and grime.
– Grease and Oil Removal
Surfaces such as kitchen walls, garage floors, and handrails can accumulate grease and oil, which can prevent proper adhesion of paint. Use a mild detergent or a specialized degreaser to remove any traces of grease or oil from the surface.
Rinse the surface thoroughly with water and allow it to dry completely before proceeding with any further surface preparation steps.
– Mildew Treatment
Mildew can thrive on surfaces that are exposed to moisture, such as bathroom walls or exterior surfaces. If mildew is present, it is crucial to treat it before painting, as it can cause the new paint to peel or blister.
Use a mildewcide solution, following the manufacturer’s instructions, to clean and kill any mildew present. Rinse the surface thoroughly and allow it to dry completely.
• Repairing Damaged Surfaces
– Filling Cracks and Holes
Cracks, holes, and other surface imperfections can negatively impact the final appearance of a painted surface. Use a suitable filler, such as wood filler or spackling compound, to fill in any cracks or holes. A
llow the filler to dry according to the manufacturer’s recommendations, then sand the area smoothly to ensure an even, uniform surface.
– Repairing Peeling or Flaking Paint
For surfaces with existing paint that is peeling or flaking, use a paint scraper or a wire brush to remove any loose paint. If larger areas of paint are affected, a chemical paint stripper may be necessary to remove the old paint.
After removing the paint, sand the surface smoothly to promote good adhesion of the new paint coat.
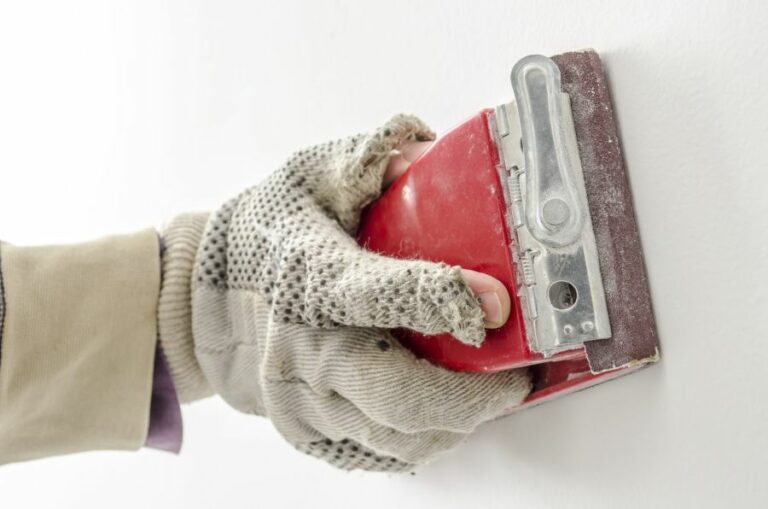
– Sanding
Sanding is an essential step in surface preparation, as it not only helps to smooth out any imperfections but also promotes better adhesion of the paint. Depending on the surface, use sandpaper with an appropriate grit (80 to 220 grit is typically sufficient for most surfaces).
Sand the surface in a consistent, circular motion, ensuring that all areas are covered. After sanding, remove any residual dust with a damp cloth or a tack cloth.
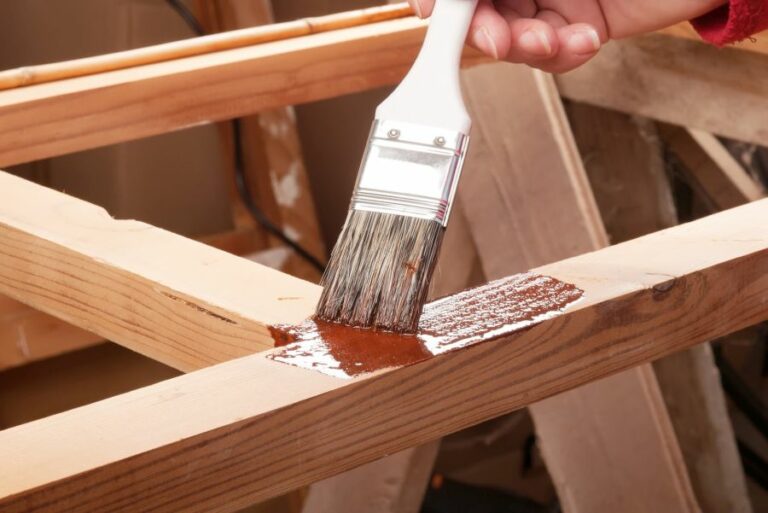
• Priming
Priming is an important step in the surface preparation process, as it helps to create a uniform, sealed surface that allows the paint to adhere properly. Use a primer that is specifically designed for the surface material (e.g., wood, metal, concrete) and follow the manufacturer’s instructions for application.
Allow the primer to dry completely before applying any paint.
• Final Thoughts
In conclusion, proper surface preparation is crucial for a successful, long-lasting paint job. By following the steps and techniques described in this article, you will be well on your way to creating a beautifully painted surface that will stand the test of time.
Optimal Techniques to Ready Surfaces for Painting
– Introduction to Surface Preparation
Before diving into the process of preparing a surface for paint, it’s crucial to understand why it’s an essential step. In order for paint to adhere properly and last for a long time, it has to form a strong bond with the surface.
Proper preparation ensures that the surface is clean, uniform, and ready to accept paint, leading to a more professional and long-lasting result.
– 1. Appropriate Cleaning
Before any surface preparation can begin, the surface must be properly cleaned. Cleaning the surface not only removes dirt, grease, contamination, and loose particles that can disrupt the paint’s adhesion but also reveals any defects that need to be addressed before proceeding.
The process of cleaning differs depending on the surface material.
a. Cleaning Wood Surfaces
For wooden surfaces, using a soft cloth or sponge combined with a mild detergent and water should be enough to remove common surface contaminants. Rinse the surface with clean water and allow it to dry completely.
b. Cleaning Metal Surfaces
When working with metal surfaces, use a solvent, such as acetone, to remove any grease or oils. For rusted or heavily soiled metal surfaces, a wire brush or sandpaper might be necessary for thorough cleaning.
c. Cleaning Concrete Surfaces
To clean concrete surfaces, begin by sweeping away loose debris. Then, use a power washer or a strong solution of water and detergent to remove any remaining dirt and contaminants.
– 2. Surface Inspection and Repair
Once the surface is clean, it’s time to inspect it for any damage or defects that could impact the paint application. Repairing any cracks, holes, or dents ensures that the paint will adhere evenly to a smooth, uniform surface.
a. Wood Surfaces
For wood surfaces, fill any cracks or holes with a wood filler, following the product instructions. After the filler is dry, sand the repaired area so that it is even with the surrounding surface.
b. Metal Surfaces
For metal surfaces, sand away any rust or corrosion. If there are large dents or holes, a professional repair or replacement might be necessary.
c. Concrete Surfaces
For concrete surfaces, use a concrete patch or filler to repair any cracks or holes. Allow the repair material to dry, and then sand the surface to ensure it is smooth.
– 3. Sanding for a Smooth Finish
Sanding the surface is a crucial step in ensuring proper paint adhesion. Sanding removes any remaining surface contaminants, roughens the surface to help the paint bond, and creates a smooth, uniform finish.
a. Sanding Wood Surfaces
For wood surfaces, use medium-grit sandpaper (approximately 120-grit) to sand the entire surface. Be sure to sand with the grain of the wood and pay special attention to any repaired areas. Vacuum or use a tack cloth to remove all dust before proceeding.
b. Sanding Metal Surfaces
For metal surfaces, use fine-grit sandpaper or a sanding sponge to remove any remaining surface contaminants and create a smooth surface. Wipe the surface clean with a cloth or paper towel dampened with a solvent like acetone.
c. Sanding Concrete Surfaces
For concrete surfaces, use a concrete grinder or power sander to achieve a smooth, uniform finish. Be sure to follow all safety guidelines when using power tools, and wear protective gear, such as goggles and a mask.
– 4. Priming for Optimal Paint Adhesion
Applying a suitable primer is the final step in preparing a surface for paint. Primers are specifically formulated to help paint adhere to the surface and should be tailored to the material being painted.
a. Priming Wood Surfaces
For wood surfaces, use an oil-based or latex primer, depending on the paint you plan to use. Apply the primer with a brush or roller, following the manufacturer’s recommended drying time.
b. Priming Metal Surfaces
For metal surfaces, choose a primer specifically designed for metal, such as a rust-inhibiting primer. Apply the primer with a brush or roller, ensuring full coverage.
c. Priming Concrete Surfaces
For concrete surfaces, use a concrete primer or sealer, following the manufacturer’s recommendations for application and drying time.
– Final Thoughts
Proper surface preparation is crucial for achieving professional, long-lasting paint results. By following these steps, cleaning, inspecting and repairing, sanding, and priming the surface will be well-prepared for a successful paint job.
Remember that using the appropriate tools, products, and techniques tailored to the specific surface material will ensure the best outcome.
Step | Description |
|---|---|
1. Clean the surface | Remove dirt, dust, grease, and any other contaminants from the surface by using mild detergent and water. Rinse and allow it to dry thoroughly. |
2. Scrape off loose paint | Use a scraper or putty knife to remove any loose or peeling paint from the surface. |
3. Sand the surface | Sand the surface to remove any remaining loose paint and to create a smooth, even surface for the new paint. Start with coarser sandpaper and progress to finer sandpaper. |
4. Repair any damage | Fill any holes, cracks, or other damage with an appropriate filler. Allow the filler to dry and sand it smooth. |
5. Prime the surface | Apply a high-quality primer to the surface, particularly if there are any stains or if bare wood, metal, or other porous material is being painted. This can help ensure proper paint adhesion and a smooth finish. |
6. Tape off any areas not to be painted | Use painter’s tape to protect any trim, hardware, or other areas you do not want to be painted. This will ensure clean lines and prevent paint from getting where it shouldn’t. |
Exploring Different Surface Preparation Methods for Paint
Surface preparation is an essential step in many industries, such as construction, painting, and manufacturing.
It involves the cleaning and preparation of a surface to ensure optimum performance and durability of the applied coating or material. To meet these goals, several different methods of surface preparation are available.
• Mechanical Surface Preparation Methods
– Abrasive Blasting
Abrasive blasting, also known as sandblasting or grit blasting, is a popular surface preparation method. It involves the use of compressed air or water to propel an abrasive material against the surface to remove contaminants and roughen the surface.
There are several types of abrasive blasting, including dry abrasive blasting, wet abrasive blasting, and vacuum blasting. Among these, dry abrasive blasting is the most widely used for large-scale projects.
I recommend using this method for removing rust, scale, old paint, and other contaminants from a variety of surfaces, including metal, concrete, and brick.
– Grinding and Polishing
Grinding and polishing are mechanical surface preparation methods that involve the use of abrasive tools to smooth or shape a surface. Grinding is typically used to remove high spots or to correct surface irregularities, while polishing involves the refinement of the surface to create a smooth finish.
These methods are best suited for preparing small or confined areas and can also be used in combination with other surface preparation techniques.
– Shot Peening
Shot peening is another mechanical surface preparation method that involves spraying a surface with small, round metallic, glass, or ceramic particles, known as a shot. The impact of the shot compresses the surface, forming a fine, textured finish.
This process is primarily used to improve the fatigue resistance of metal components and to remove burrs or sharp edges. I recommend shot peening for applications in the automotive or aerospace industries, where it is crucial to have a consistent surface finish.
• Chemical Surface Preparation Methods
– Acid Etching
Acid etching is a chemical surface preparation process that involves applying an acid solution to a surface, such as concrete or metal, to roughen its texture and improve its ability to accept a new coating. This method is commonly used to prepare concrete floors for epoxy coatings or other types of sealants.
However, acid etching can be hazardous, and proper safety measures must be followed while handling and disposing of the chemicals. It is also essential to thoroughly neutralize and rinse the surface after the etching process to prevent any adverse reactions with subsequent coatings.
– Solvent Cleaning
Solvent cleaning is a common surface preparation method used to remove dirt, oil, grease, and other contaminants from a surface. This process involves wiping or washing the surface with a solvent, followed by drying to remove any residue.
Solvent cleaning is critical when working with surfaces that are sensitive to abrasive methods, such as thin metal sheets or delicate equipment components.
– Alkaline Cleaning
Alkaline cleaning is another chemical surface preparation method that utilizes alkaline cleaners to remove contaminants from a surface. This process is particularly effective at removing organic materials, such as oils, grease, and soot, from metal surfaces.
After cleaning, thorough rinsing and drying are essential to achieve the best results.
• Thermal Surface Preparation Methods
– Flame Cleaning
Flame cleaning is a thermal surface preparation method that uses a high-temperature flame to remove contaminants, such as rust, scale, or old paint, from a surface. This method is especially effective for cleaning large metal structures, such as bridges, and can be performed quickly and cost-effectively.
However, caution must be exercised when using flame cleaning, as it can potentially damage the surface or create new defects if not performed correctly.
Additionally, some coatings or materials may release harmful fumes or gases when exposed to high temperatures, requiring appropriate personal protective equipment (PPE) and proper ventilation.
– Laser Cleaning
Laser cleaning is an advanced, non-contact surface preparation method that utilizes a laser beam to remove contaminants and prepare a surface.
This process is highly accurate, and it does not damage the underlying material, making it suitable for sensitive and intricate applications, such as aerospace and electronics industries.
However, laser cleaning is generally more expensive than other surface preparation methods and requires specialized equipment and trained personnel.
• Conclusion
Proper surface preparation is a vital step in ensuring the longevity and performance of coatings or materials applied to various surfaces. By understanding the different types of surface preparation methods available, you can choose the most appropriate technique for your specific project.
It is essential to consider factors such as material type, project size, and environmental concerns when selecting a suitable surface preparation method.
Type | Description |
|---|---|
Manual Cleaning | Hand tools, wire brushes, sanding, and scraping are used to remove loose paint, rust, and other contaminants from the surface. |
Power Tool Cleaning | Electric or pneumatic tools like grinders, sanders, and needle guns are used for more effective paint and rust removal. |
Abrasive Blasting | High-pressure compressed air and abrasive materials are used to remove coatings, and contaminants and to provide a rough surface for new coating adhesion. |
Water Blasting | High-pressure water is used to remove loose paint, dirt, and other debris and can be combined with abrasive materials for more aggressive cleaning. |
Chemical Cleaning | Acid-based or alkaline-based chemicals are applied to remove paint, rust, and other contaminants without damaging the underlying surface. |
Thermal Cleaning | Heat (e.g., torches, heat guns) is used to soften and remove coatings, especially when other methods are not suitable or efficient. |
Standards for Preparing Surfaces to be Painted
• The Importance of Proper Surface Preparation
When it comes to achieving a high-quality, durable, and professional-looking paint job, proper surface preparation is the key to success. Without the appropriate prep work, the paint can fail to bond correctly, leading to premature peeling or flaking.
Following a well-established painting surface preparation standard ensures that the final result is both aesthetically appealing and long-lasting.
• Inspection and Surface Assessment
Before beginning the preparation process, it’s crucial to thoroughly inspect and assess the surface in question. This helps to identify any existing issues, such as loose or peeling paint, cracks, moisture damage, and mildew or mold growth.
Assessing the surface’s condition allows you to determine the necessary steps for proper preparation.
– Identifying Surface Imperfections
A visual inspection may not always be enough to reveal underlying problems. In some cases, it’s necessary to perform tests, such as adhesion tests, to determine whether the existing paint is still properly bonded to the surface.
• Cleaning and Degreasing
Any dirt, dust, or grease on the surface can hinder paint adhesion, so thorough cleaning is essential. Depending on the surface material and the type of contaminants present, different cleaning methods might be required.
– Manual Cleaning
For smaller projects or lightly soiled surfaces, manual cleaning with a sponge or cloth and a household cleaning solution may suffice. When dealing with mildew, using a solution of bleach and water can help to effectively kill and remove mold spores.
– Power Washing
For larger projects or heavily soiled surfaces, power washing may be the most effective cleaning method. Using a pressure washer, water is sprayed directly onto the surface to remove dirt, debris, and loose paint.
If necessary, a biodegradable cleaning solution can also be used in conjunction with the power washer for more effective cleaning.
• Surface Repairs and Filling
Once the surface is clean and dry, any necessary repairs must be made. This includes filling holes, fixing cracks, and addressing any issues with the substrate material.
– Patching and Filling
Using a suitable patching compound or filler, fill any holes or cracks in the surface, ensuring that the filled areas are level with the surrounding surface. Once dry, sand the repaired areas smooth to create a seamless finish.
– Repairing Substrate Damage
Substrate damage, such as rot or decay, must be addressed before moving on to the painting process. This may involve replacing damaged sections of wood or masonry, treating the affected area with a stabilizing solution or primer, or applying other protective treatments as needed.
• Sanding and Smoothing
Sanding is a critical step in ensuring a smooth and level surface for painting. By removing any rough spots, high points, or uneven areas, sanding creates a uniform surface that allows for proper paint adhesion.
– Choosing the Right Sandpaper
Using the correct grit sandpaper is essential, as overly coarse or fine sandpaper may cause damage or fail to achieve the desired smoothness.
For most general purposes, sanding with medium-grit sandpaper (120-150 grit) is appropriate, while finer grits (180-220 grit) can be used for a smooth finish and rougher grits (80-100 grit) for removing more substantial surface imperfections.
– Sanding Techniques
When sanding, use consistent and even pressure to avoid creating grooves or uneven areas that may compromise the paint job. Always sand in the direction of the grain on wood surfaces, and use a suitable sanding block or tool for even pressure distribution.
• Priming
Priming is an essential step in the painting surface preparation process, as it provides a stable base for paint adhesion and helps to improve durability, coverage, and appearance. Depending on the type of paint and surface being used, different primers might be required.
– Choosing the Right Primer
Select a primer that is compatible with the paint type and surface material. For example, use a latex-based primer for latex paint and an oil-based primer for oil paint. Additionally, specific primers are available for specific surfaces, such as wood, metal, or masonry.
– Application Tips
When applying primer, use a high-quality brush, roller, or sprayer for even coverage, and follow the manufacturer’s instructions for application methods and drying times. It’s crucial to allow the primer to fully dry before moving on to the painting step.
• Final Steps
Once the surface has been properly prepped, it’s essential to remove any dust or debris that might have accumulated during the sanding and repair process. Use a tack cloth or vacuum to remove any lingering particles.
With the surface thoroughly cleaned, repaired, and primed, you’re now ready to move on to applying the paint, confident that you’ve followed the painting surface preparation standard to ensure a high-quality and long-lasting paint job.