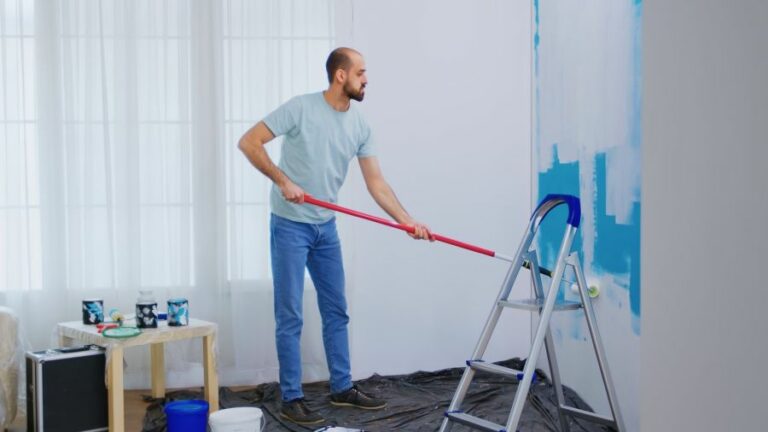
Surface Preparation Impact On Paint Lifespan. What Pros Say
Are you tired of repainting surfaces frequently due to poor paint adhesion or chipping? The secret to a long-lasting paint job lies in the surface preparation, which can dramatically impact the paint’s lifespan. We are here to help you maximize the longevity of your paint job by highlighting crucial factors and steps in surface preparation.
Surface preparation impact on paint lifespan:
Proper surface preparation significantly impacts paint lifespan by enhancing adhesion and resistance to peeling, chipping, and discoloration. Addressing surface defects and contaminants, using high-quality primers, and appropriate cleaning methods result in longer-lasting, visually pleasing paint jobs that save time and money on maintenance and repaints.

Did you know how well you prepare a surface can greatly affect the lifespan of a paint job? Read on to discover some key factors and techniques for successful surface preparation, ultimately ensuring long-lasting and aesthetically pleasing paintwork. Don’t miss out on these vital tips!
Contents
- 1 Influence of Surface Preparation on Paint Durability
- 1.1 • The Importance of Proper Surface Preparation
- 1.2 • Identifying Surface Defects and Contaminants
- 1.3 • Cleaning the Surface
- 1.4 • Removing Loose and Peeling Paint
- 1.5 • Addressing Chalkiness, Rust, and Corrosion
- 1.6 • Dealing with Mold and Mildew
- 1.7 • Surface Repair and Smoothing
- 1.8 • Priming the Surface
- 1.9 • The Impact of Adequate Surface Preparation on Paint Lifespan
- 2 Significance of Surface Preparation Prior to Painting
- 3 Consequences of Skipping Surface Preparation Before Painting
- 4 Key Factors Contributing to Long-lasting Paint
- 5 Surface Issues Resulting in Paint Deterioration
Influence of Surface Preparation on Paint Durability
• The Importance of Proper Surface Preparation
Painting is a widely used technique to protect and enhance the aesthetics of various surfaces. The durability of the paint job largely depends on the quality of the surface preparation prior to painting. In fact, improper surface preparation can reduce the lifespan of paint significantly.
• Identifying Surface Defects and Contaminants
Before proceeding with any surface preparation, it is essential to identify any defects or contaminants on the surface. Some common issues that may affect the paint lifespan include:
- Dust and dirt
- Grease and oil
- Chalkiness
- Rust and corrosion
- Mold and mildew
- Peeling and flaking paint
- Unstable substrates
By carefully examining the surface, one can determine the necessary steps needed for effective surface preparation.
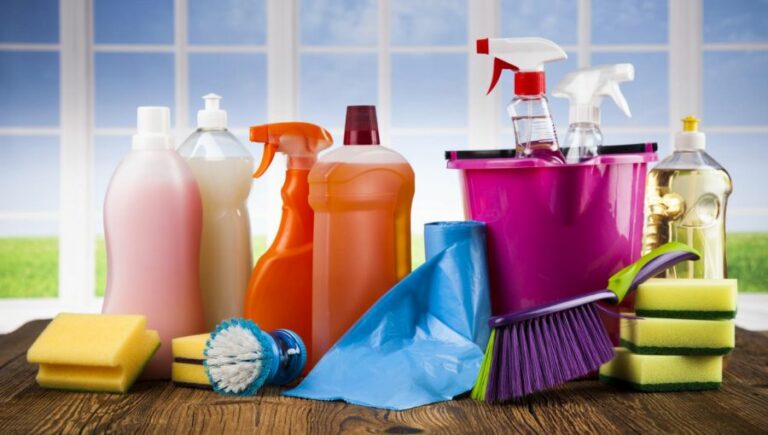
• Cleaning the Surface
The first step in surface preparation is to thoroughly clean the surface. This will remove dust, dirt, grease, and other contaminants that can interfere with paint adhesion. Depending on the type and severity of the contaminants, different cleaning methods may be employed, such as:
- Washing with water and detergent
- Using a degreaser for oil and grease removal
- Pressure washing for large exterior surfaces
- Solvent wiping for localized contaminant removal
The U.S. Environmental Protection Agency provides guidelines on proper cleaning techniques and materials for ensuring a safe and effective process.
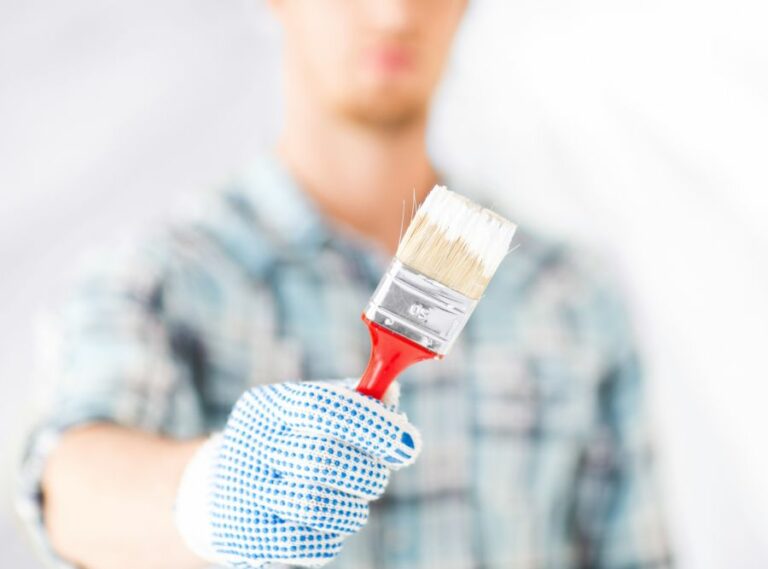
• Removing Loose and Peeling Paint
One of the primary causes of paint failure is the presence of loose or peeling paint on the surface. To address this issue, loose paint must be removed prior to applying a new coat. This can be done using various methods, including:
- Scraping the surface with a paint scraper
- Using a wire brush for smaller areas
- Employing a heat gun to loosen paint
- Sanding the surface to achieve a smooth finish
Make sure to wear proper personal protective equipment (PPE) during these processes, as they may generate dust and fumes.
• Addressing Chalkiness, Rust, and Corrosion
Chalky surfaces, as well as those affected by rust and corrosion, must be properly treated before painting to ensure long-lasting results. Some recommended treatments include:
- Applying a surface conditioner to neutralize chalkiness
- Using rust removal solutions or mechanical cleaning methods for rusted surfaces
- Applying a corrosion-resistant primer on metal surfaces
• Dealing with Mold and Mildew
Mold and mildew can cause paint to peel or discolor prematurely. It is critical to remove these contaminants and apply a mold-resistant primer to the surface. Some methods for treating mold and mildew include:
- Cleaning the surface with a bleach solution
- Utilizing a fungicidal wash
- Applying a mold-resistant primer
• Surface Repair and Smoothing
Once the surface is clean and free of contaminants, it is essential to repair any damage, such as cracks, holes, and dents. This can be done using various filling materials, such as putty, caulk, or epoxy fillers.
After the repairs are complete, sanding the surface will help to create a smooth and uniform finish for optimal paint application.
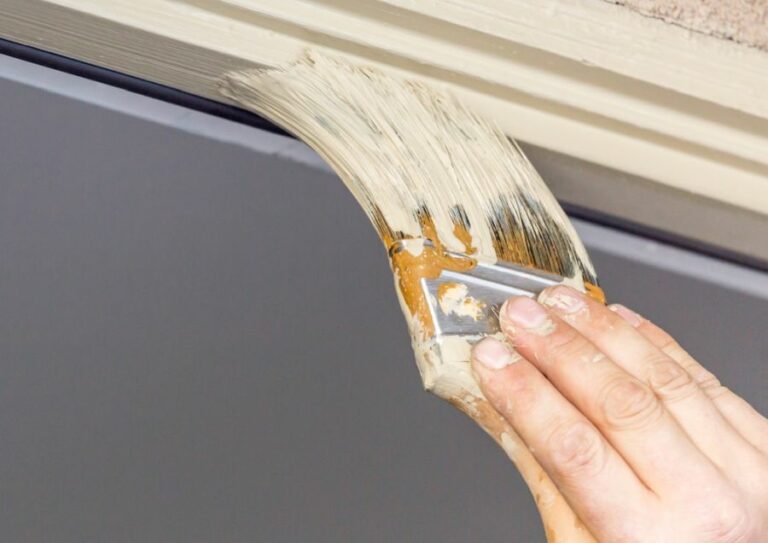
• Priming the Surface
Applying a high-quality primer is a crucial step in surface preparation. Primers serve several functions, such as promoting better adhesion between the surface and the topcoat, providing a uniform base for the paint, and sealing porous surfaces.
Using a primer that is specifically designed for the substrate and environmental conditions will greatly enhance the lifespan of the paint job.
• The Impact of Adequate Surface Preparation on Paint Lifespan
Proper surface preparation significantly increases the lifespan of a paint job. By diligently addressing issues such as dust, dirt, grease, loose paint, chalkiness, rust, corrosion, mold, and mildew, the paint will adhere better to the surface and resist premature peeling, chipping, and discoloration.
Additionally, the use of high-quality primers will further extend the durability and longevity of the paint.
In conclusion, investing time and effort in surface preparation is vital to ensuring a long-lasting and visually pleasing paint job.
By identifying and treating surface defects and contaminants, as well as using appropriate primers, one can greatly impact the lifespan of the paint, ultimately saving time and money on future maintenance and repaints.
Significance of Surface Preparation Prior to Painting
Whether you are a professional painter or a do-it-yourself enthusiast, preparing the surface before painting is a crucial step in the painting process.
Proper surface preparation can significantly improve the longevity, durability, and appearance of the finished paint job.
• Enhancing Paint Adhesion
One of the main reasons to prepare a surface before painting is to ensure proper adhesion of the paint to the surface. If a surface is not properly cleaned and prepared, the paint may not adhere well, leading to peeling or flaking paint over time. This can compromise the durability and quality of the paint job.
According to the Painting and Decorating Contractors of America, adequate surface preparation helps create a clean and stable surface that allows the paint to bond more effectively. This increases the longevity of the paint job and ensures a smoother, more uniform finish.
• Preventing Moisture Problems
Moisture can be detrimental to paint adhesion and durability. Preparing a surface before painting includes identifying and addressing moisture issues on the surface. This may involve repairing leaks, fixing cracks or gaps, and ensuring proper ventilation in the area.
Surface preparation helps prevent moisture from seeping into the paint, which can lead to blistering, bubbling, or peeling. A well-prepared surface can also make it easier for any moisture present to evaporate, reducing the likelihood of future moisture problems.
• Addressing Surface Defects
Preparing the surface before painting ensures the identification and repair of any defects on the surface, such as cracks, holes, and gouges. These defects can affect the appearance and quality of the paint job if left unaddressed.
By filling and repairing these imperfections, you can achieve a more professional-looking and long-lasting paint job.
• Improving Paint Coverage and Efficiency
Proper surface preparation can actually result in more efficient use of paint. When the surface is clean and free from defects, the paint can achieve better coverage, meaning fewer coats may be required to achieve the desired result.
This is not only cost-effective but also time-saving, as fewer coats mean less time spent on the painting process.
• Surface Preparation Steps
There are several steps involved in preparing a surface before painting. Here are some key steps recommended by professionals:
- Cleaning the surface: Remove any dirt, dust, grease, or grime from the surface using suitable cleaning solutions or solvents. This ensures a clean and stable surface for paint adhesion.
- Sanding the surface: Sanding helps create a rough surface that promotes paint adhesion. Depending on the surface type, use appropriate sandpaper grits to achieve the desired level of roughness.
- Repairing defects: Identify and repair any surface defects, such as cracks, holes, or gouges. Use appropriate fillers or compounds for the specific surface material.
- Priming the surface: Apply a primer to the surface to further improve paint adhesion and coverage. Primers also help seal porous surfaces, leading to more consistent paint application.
- Masking and protecting: Protect any areas that should not be painted, such as windows, doors, or trim, using masking tape and drop cloths.
• Tips for Effective Surface Preparation
Here are some useful tips for effective surface preparation before painting:
- Always follow the manufacturer’s recommendations for the specific paint and surface material, such as appropriate cleaning solutions or primers.
- Use proper safety equipment, such as gloves and goggles, when using chemicals or solvents.
- Allow sufficient drying time between steps, especially when applying primers or repairing defects.
- Take the time to thoroughly inspect the surface for any missed defects or areas that may require additional attention.
In conclusion, proper surface preparation before painting is crucial for ensuring a durable, long-lasting, and professional-looking paint job. By following the recommended steps and tips outlined above, you can achieve a high-quality finish that enhances the appearance and value of your home or property.
Consequences of Skipping Surface Preparation Before Painting
• Overview of Surface Preparation
Proper surface preparation is a crucial step in the painting process that many people tend to overlook. This step is essential in order to achieve a durable and long-lasting paint job.
Surface preparation ensures that the paint will adhere properly to the substrate and prevent common paint failures such as peeling, blistering, and chalking. If you decide to skip this step, you may find yourself facing numerous issues that could have easily been prevented.
• Common Issues That Arise Without Proper Surface Preparation
1. Poor Adhesion
When you don’t properly prepare the surface before painting, you risk poor adhesion of the paint to the substrate. This can lead to peeling or flaking paint over time.
2. Uneven Appearance
Without proper surface preparation, your paint job may appear uneven, and the substrate may be visible underneath, especially if the paint is applied too thinly. This not only looks unprofessional but also compromises the paint’s protection capabilities.
3. Moisture Problems
Failing to prepare the surface by removing contaminants or addressing any existing moisture issues can lead to blistering and bubbling in the paint. This is particularly common in exterior paint jobs, where the presence of moisture can end up trapped underneath the paint film.
4. Increased Maintenance and Repair Costs
If you do not prepare the surface before painting, you may experience various paint failures, ultimately requiring you to invest more time and money to fix the issues.
It is more cost-effective and efficient to properly prepare the surface in the first place, ensuring a long-lasting paint job without the need for extensive repairs.
• Tips for Effective Surface Preparation
1. Remove Dirt and Contaminants
Before you begin painting, it’s important to clean the surface thoroughly, removing dirt, dust, and any contaminants that may be present.
This can be done by washing the surface with a mild detergent, using a pressure washer, or simply wiping it down with a damp cloth. Make sure to allow the surface to dry completely before proceeding to the next step.
2. Address Moisture Issues
If you notice any signs of moisture on the surface, such as mold, mildew, or water damage, it’s important to address these issues before painting.
You might need to treat the affected area with a solution of bleach and water (1:3 ratio) to kill mold and mildew. For more severe moisture issues, consult a professional to determine the best course of action.
3. Scrape and Sand
Loose or peeling paint should be removed using a paint scraper or wire brush. After all old paint has been removed, sand the surface to achieve a smooth finish.
This process not only removes imperfections but also creates a better surface for the paint to adhere to. Remember to remove all dust and debris after sanding.
4. Repair Cracks and Holes
If you’re dealing with damaged surfaces that have cracks, holes, or other imperfections, it’s important to repair these areas before paint application.
You can use a filler or putty to fill the holes and cracks, followed by sanding the repaired areas to ensure a smooth surface.
5. Apply Primer
Primer is an essential component of surface preparation that helps to create an even surface for paint application, improve adhesion, and enhance the durability of your paint job.
Choose a primer that is appropriate for your project and apply it according to the manufacturer’s instructions. Allow it to dry completely before applying your paint.
• Conclusion
In summary, proper surface preparation is a critical step in the painting process that should not be ignored. By taking the time to adequately prepare the surface before painting, you can greatly improve the longevity, appearance, and overall quality of your paint job.
So before you grab a brush, ensure that you have invested enough effort into surface preparation – the results will surely speak for themselves.
Key Factors Contributing to Long-lasting Paint
Paint is an essential component in maintaining the appearance and durability of a building or structure. However, it can be quite disappointing when, despite your best efforts, the paint starts to peel or fade shortly after application.
• Quality of the Paint
One of the most significant factors affecting the longevity of paint is its quality. High-quality paints typically contain better ingredients and have a higher concentration of pigments and binders. These factors allow for better coverage and adhesion, in turn, making the paint last longer.
When choosing a paint, it’s important to focus on reputable brands that offer warranties and have a proven track record in durability.
• Surface Preparation
Proper surface preparation is crucial for ensuring the paint’s long-lasting performance. Poorly prepared surfaces can lead to problems such as peeling, bubbling, and uneven coverage. To properly prepare a surface for painting, follow these steps:
- Cleaning: Remove dirt, grease, and other contaminants from the surface to ensure proper adhesion of paint.
- Repairs: Fill any cracks, holes, or imperfections with a suitable patching material.
- Abrasion: Lightly sand the surface to promote adhesion and remove any loose or flaking paint.
- Priming: Applying a high-quality primer will provide a better surface for the paint to adhere to and promote long-lasting results.
• Application Techniques
The way paint is applied can also have a significant impact on its durability. For the best results, consider these application techniques:
- Appropriate tools: Use high-quality brushes, rollers, or spray equipment for a smooth and even application.
- Proper consistency: Do not over-thin or over-thicken the paint. Follow the manufacturer’s recommendation for thinning and mixing.
- Climate conditions: Avoid painting during extreme temperatures or humidity, as these can affect the paint’s curing process and adhesion. The recommended temperature range for painting is generally between 50F to 90F (10C to 32C).
- Coverage: Apply paint evenly and avoid excessive overlapping to prevent uneven coverage or areas of paint build-up.
- Multiple coats: Applying multiple coats of paint can help improve durability and better protect the surface from wear and tear.
• UV and Weather Protection
External factors, such as UV radiation and weather conditions, play a significant role in the paint’s lifespan. Exposure to sunlight can cause fading or chalking, while rain can lead to moisture intrusion, which can cause paint to peel or blister. To protect your paint from these factors, consider the following:
- UV-resistant paints: Choose paint formulations containing UV-blocking additives that help resist fading and chalking.
- Weather-resistant paints: Opt for paints specifically formulated to withstand harsh weather conditions, such as water-repellent or elastomeric coatings.
- Maintenance: Regular maintenance, including cleaning and inspection, can help identify potential problems early and prevent significant damage to the paint job.
• Color Selection
While it may seem insignificant, the color of your paint can also impact its longevity. Darker colors tend to absorb more heat, which can cause increased thermal stress on the paint film, while lighter colors reflect heat and are less susceptible to fading.
To maximize the paint’s longevity, consider selecting lighter or more neutral colors for exterior surfaces.
In conclusion, to make the paint last longer, it’s essential to invest in high-quality paints, properly prepare the surface, apply the paint using appropriate techniques, and consider external factors such as UV radiation and weather conditions.
By following these guidelines and tips, your paint job will not only look better in the short term but will also stand the test of time and keep your surfaces protected and beautiful for years to come.
Surface Issues Resulting in Paint Deterioration
Paint failure is a frustrating problem that many property owners face. It is not only a waste of time and resources but can also affect the appearance of a property, ultimately decreasing its value.
• Presence of Moisture
Moisture is one of the leading causes of paint failure. When water infiltrates the surface, it can cause the paint to blister, peel, or develop unsightly water stains.
To ensure proper paint adhesion and longevity, it is crucial to address any moisture issues before painting. Some recommendations to prevent moisture-related paint failure are:
- Ensure proper surface drainage and ventilation to prevent water accumulation.
- Repair any leaks or faults with gutters, downspouts, and roof flashing.
- Use a moisture meter to determine the moisture content of the surface before painting. The moisture content should ideally be below 15% for proper paint adhesion.
It is also essential to choose a paint formulated with moisture-resistant properties, especially for exterior surfaces exposed to natural elements like rain and humidity.
• Poor Surface Preparation
A clean, smooth, and properly prepared surface is paramount to paint adhesion and longevity. Insufficient surface preparation can lead to paint failure through peeling, cracking, or delamination. Some essential steps to ensure proper surface preparation include:
- Remove loose, flaking, or peeling paint by scraping, sanding, or using a paint stripper.
- Eliminate any surface contaminants such as dirt, dust, grease, and oil that can hinder proper paint adhesion. Use a mild detergent or degreaser, and rinse thoroughly with water.
- Repair any surface defects, such as cracks, holes, and dents, using a patching compound or filler. Sand the repaired areas until smooth and flush with the surrounding surface.
By performing these steps diligently, you can create an ideal surface for the paint to adhere to and reduce the chances of paint failure due to inadequate preparation.
• Improper Primer Application
The use of a primer is crucial in providing an ideal surface for paint adhesion and prolonging the life of the paint film. An inappropriate primer or incorrect application can lead to various paint failures, including peeling, blistering, and discoloration. Here are some guidelines for proper primer selection and application:
- Choose a suitable primer based on the surface material and environmental conditions. For example, consider using an oil-based primer for wood surfaces, a masonry primer for concrete or brick, and a galvanized-metal primer for metal surfaces.
- Apply the primer evenly and consistently, ensuring complete coverage without excessive buildup or uneven application.
- Allow the primer to cure based on the manufacturer’s recommendations before applying your topcoat.
Adhering to these guidelines will significantly decrease the chances of paint failure due to primer-related issues.
• Inadequate Paint Selection
Each paint formulation has unique properties and is designed for specific environmental conditions and surfaces. Thus, selecting the wrong type of paint can lead to premature paint failure. When choosing paint, consider the following:
- The surface material (e.g., wood, metal, concrete, etc.).
- Environmental conditions, such as humidity, temperature, and exposure to sunlight.
- The desired finish (e.g., glossy, matte, semi-gloss, etc.).
- Anticipated wear or necessary maintenance.
By selecting the appropriate paint for your surface and environmental conditions, you can enhance the longevity and appearance of your paint job, reducing the likelihood of paint failure.
• Applying Paint in Adverse Weather Conditions
Environmental factors, including temperature, humidity, and precipitation, greatly impact how paint dries and adheres to a surface. Painting in extreme or unfavorable conditions can lead to peeling, blistering, or painting failure. Keep these recommendations in mind:
- Do not paint when air or surface temperatures are below 50F (10C) or above 90F (32C) for most paint formulations. Check the paint manufacturer’s guidelines for specific temperature recommendations.
- Avoid painting in excessively humid conditions or when rain is imminent. High humidity can prolong drying times and negatively affect paint adhesion.
- Do not paint in direct sunlight on a hot day, as it can cause the paint to dry too quickly, potentially leading to cracking or poor adhesion.
Timing your painting project to accommodate optimal weather conditions will lead to better results and help you avoid paint failure.
• Insufficient Drying Time Between Coats
Applying additional coats of paint before the previous coat has adequately dried can lead to paint failure through poor adhesion, wrinkling, or blistering. To ensure proper drying and curing between coats:
- Follow the paint manufacturer’s recommendations for drying times between coats.
- Allow for additional drying time in humid, cool, or poorly-ventilated areas.
- Do not apply paint in excessively thick coats, as it can prolong drying times and contribute to poor adhesion.
By allowing your paint ample time to dry between coats, you can ensure a stable, long-lasting paint film.
In conclusion, proper surface preparation, primer application, paint selection, weather conditions, and drying times are all critical factors in preventing paint failure.
By addressing these surface conditions and following the guidelines outlined in this article, you can avoid common paint failure issues and enjoy a durable, quality paint job.